Wednesday, 13 March 2024

Floral Hello

..... Good afternoon! I've had a fun day today. Spent the morning at the hairdresser getting a new colour - sadly the peacock look has gone! And this afternoon, I've been working on cards and listening to a story on Audible. Here's my card:


Stamps: Gina K - Modern Roses, Lovely Notes
Inks: Gina K - Wild Dandelion, Passionate Pink, Jelly Bean Green; Versafine Clair - Nocturne
Dies: Gina K - Master Layouts 2
Accessories: White and Black Card; Copic Marker

I'm submitting this card to CAS on Friday - CASOF#278 where the theme is 'Hello'. 


This was fun to  make. I ordered this set last month and it arrived yesterday. I had to play with immediately. I used my MISTI to stamp the roses in yellow ink and then again in bright pink ink - I love the two tone look of the flowers. Next I stamped the leaves. I used a stitched edge die to cut out the panel, layered it onto a black mat and then added it to the front of an A2 note card. I finished the front with a pretty scripty greeting in black ink.


For the inside, I cut a piece of white card onto which I stamped a rose and leaves in the corner. I used a Copic marker to edge the panel with black ink and then adhered it inside the card. I've left lots of space for my message.


That's all for now - I'm off to make some more cards with this set - it's so pretty!!

signature photo Signature.png

Monday, 11 March 2024

Starry Birthday

... Good afternoon! It's another dull, dismal day here in Northop Hall, so I've spent the morning making a birthday card for my great-nephew. Here's the card:


Stamps: My Favorite Things - Stars Above, Bitty Birthday Wishes, Distressed Patterns; ME - Mixed Wishes Greetings
Inks: Gina K - Soft Stone; Versafine Clair - Nocturne
Dies: MFT Die-namics - Stars Above; Altenew - Featured Sentiments Dies
Accessories: White Card; Copic Markers

I'm submitting this card to Just Us Girls - JUGS#717 to use green and one other colour - I picked blue. I'm also playing along with AAA Cards - AAA#260 - a sketch, and to AAABirthday - AAAB#59 to use geometrics.


This is for Xander, my great-nephew, who will be 12 years old on Friday. I love making cards for guys and these geometric patterned stars are perfect for guys and tweens! The challenge at JUGS is to use green/lime green/one other colour - I picked blue for a boy. I used my MISTI to stamp the stars onto plain white white, took the card out and coloured the patterns with Copic markers. I returned the images to the MISTI and re-stamped with Versafine Clair black ink - this gives such a dark black line. I then used the matching dies to cut out the stars. I also cut out a number of plain white stars. I stamped a soft grey distressed panel down the side of an A2 white note card and adhered the stars. I adhered some stars flat and layered some stars to give depth. I finished the front with a simple birthday greeting in black ink, and edged the panel with green ink.


For the inside of the card, I cut two pieces of white card. I edged the larger panel with a green marker. On the other white panel I stamped a fun birthday greeting in black ink and stamped a couple more stars, which I coloured with Copic markers.


That's all for today - see you again soon.

signature photo Signature.png

Sunday, 10 March 2024

For my Mum

.... Hello, good morning. Today is Mothering Sunday in the United Kingdom - the date varies from year to year as it follows Lent in the Christian calendar. While I'm not at all religious - Mum is, and she has spent the morning at our local church celebrating Mothering Sunday. Here's the card I made for Mum:


Stamps: Gina K - Handmade Holidays, Ocean Silhouettes, Wonderfully Made
Inks: Gina K - Sea Glass, Ocean Mist, Turquoise Sea, Blue Lagoon, Key Lime, Lucky Clover; Versafine Clair - Nocturne; Memento - Tuxedo Black
Dies: Gina K - Master Layouts 4, Handmade Holidays
Accessories: White Card; SU Card - Bermuda Bay; Gina K Stencil - Summer Bouquet, Gina K Poly Glaze - Petit Flourish; Gina K Fancy Foil - Sparkling Silver; Copic Markers

I'm submitting this card to Color Hues - CH#82 - these are mum's favourite colours!!


I started by foiling one of my Poly Glaze sheets with sparkling silver foil - I love the petit flourish pattern - I made another foiled sheet with the left over foil. I used the Summer Bouquet stencils to create a bunch of lovely flowers on the card. I used the scalloped edge die to cut out a dark turquoise mat layer. I trimmed the stencilled panel to size and added it to the mat, and attached the whole piece to the front of an A2 white note card. I stamped a greeting in black on white card, cut it out with the matching die and added it to the middle of the card.


Inside the card, I cut a mat layer of turquoise card. On the white card, I stamped a simple greeting and added a pretty butterfly which I coloured with Copic markers. I took a close up of the front panel to show all the lovely sparkle from the silver foil.


I hope that everyone who is celebrating Mothering Sunday has a lovely day today. I'm making our favourite meal for dinner - roast lamb, mashed potato, veg, Yorkshire pudding, gravy, and mint sauce. Yum!! See you all soon.

signature photo Signature.png

Thursday, 7 March 2024

Mother's Day Postage Card

... Afternoon!! It's been a really dull day here in Northop Hall - but I've had fun in my craft room working on a card for Mothering Sunday. Here it is:


Stamps: Waffle Flower - Postage Collage Love, Postage Collage Fall, Postage Collage; Gina K - Handmade Holidays, Filled with Sunshine; The Greetery - Sentiment Suite Birthday
Inks: Gina K - Ocean Mist, Powder Blue, Peach Bellini, Sweet Mango, Tangerine Twist, Wild Dandelion; Versafine Clair - Nocturne, Morning Mist
Dies: Waffle Flower - A2 Postage Collage; Gina K - Handmade Holidays
Accessories: White Card; Waffle Flower Stencils - Postage Collage Rose Stencil, Postage Collage Colouring Stencil; Peach Card

I'm submitting this card to Cupcake Inspirations Challenge - CIC#589 - love these colours, and to Love to Craft Challenge Blog - LTCCB#79 where it's always Anything Goes.


I have a stack of these A2 postage stamp die cuts on my desk and I've been working my way through them, I love how different they look. For this card I used the co-ordinating PC Rose stencil - it has three parts (very easy to line up), I did the roses in shades of orange, the leaves in blues and added the starry highlights in yellow ink. I used the additional little stamps sets to add works and prices and franking marks. I layered the finished panel on to pale orange card. I used one of the stencils to add the decoration to the A2 note card and then added the stamped panel. I finished the front with a stamped sentiment.


Inside the card, I cut a couple of pieces of white card. I lightly added orange ink to the larger piece and then edged with an orange marker. On the smaller piece of card, I stamped a greeting and added some tiny flowers.


This card is for my aunty Sue. I lived with them for about 6 months when I was in my early 20s and Sue has always taken good care of me. That's it for today. Bye for now.

signature photo Signature.png

Wednesday, 6 March 2024

Mother's Day Card

..... Good afternoon! My second post this week - I'm on a roll. It's Mothering Sunday on 10 March and I've got a few cards to make - one for my mum, one for my mother-in-law, and one for my aunt. This is the one for my MIL:


Stamps: Gina K - Lovely Flowers, Handmade Holidays, Ocean Silhouettes, Lovely Notes
Inks: Gina K - Dusty Rose, Sea Glass, Ocean Mist, Applemint, Lucky Clover, Soft Stone; Versafine Clair - Nocturne
Dies: Gina K - Lovely Flowers, Handmade Holidays
Accessories: White & Black card; Gina K Stencils - Lovely Flowers, Brick Wall; Gina K Glimmer Mist - Sterling Silver

I'm submitting this card to several challenges. The first is Inkspirational - INK#310 where they have a lovely mood board for us. Second is The Flower Challenge - TFC#89 - to make a square card, and the last is Never-Before-Used-Schtuff - NBUS#60 - I've had all this stash for a while, but this is the first time they've been used!!


I used my MISTI to stamp the large floral image on white card. I removed the card and used the matching stencils to add colour to the image - the stencils match up very easily. Finally, I die cut the coloured image along with two further white die cuts. On a white square card measuring 5¾", I lightly stencilled a grey brick wall and added some silver shimmer spray. I stamped the greeting on white card, cut it out with the matching die along with two further die cuts. I layered the die cuts together for dimension and stability and then adhered both pieces to the front of the card.


Inside the card, I cut a mat layer of black card. On the white panel I stamped the large floral image in pale grey ink. I created the sentiment from two different stamps sets - I like mixing things up. Below is a close-up image of the front of the card - so that you can see the shimmer of the silver spray.


So, that's the first card done. Tomorrow, I'll make the card for my aunt and then one for mum on Friday. That's all for today - see you soon.

signature photo Signature.png

Tuesday, 5 March 2024

Rainbow Postage Birthday Card

.... Hello!! It's been a few days and somehow we're in March already! I'm here to share a birthday card that I've made:


Stamps: Waffle Flower - Postage Collage, Postage Collage Fall; Mama Elephant - Birthday Messages, Mixed Wishes Greetings; Lawn Fawn - Rain or Shine Before 'n' Afters; The Stamping Village - Birthday
Inks: Gina K - Red Hot, Tangerine Twist, Wild Dandelion, Lucky Clover, Ocean Mist, Blue Raspberry, Medium Lilac, Passionate Pink; Versafine Clair - Nocturne
Dies: Waffle Flower - Postage Collage Die A2
Accessories: White & Black Card; Waffle Flower Stencil - Postage Collage Colouring Stencil; Copic Markers; Glitter

I'm submitting this card to AAA Colourful - AAAC#01 where we can use the rainbow of colours - this is a new challenge and one I'm delighted to join. I'm also playing along with Seize the Birthday - STB#278 - I've skipping the colour and just joining the anything birthday goes.


The postage stamp style card is so popular and I just love it - it can be made to suit any and all themes. This is a rainbow birthday card. I used a mix of stamps and stencils and Copic markers to add colour to the candles and rainbow. I've also added glitter to the flames, the cake and the end of the rainbow. I layered the finished panel on black card and added the whole lot to the front of an A2 note card. 


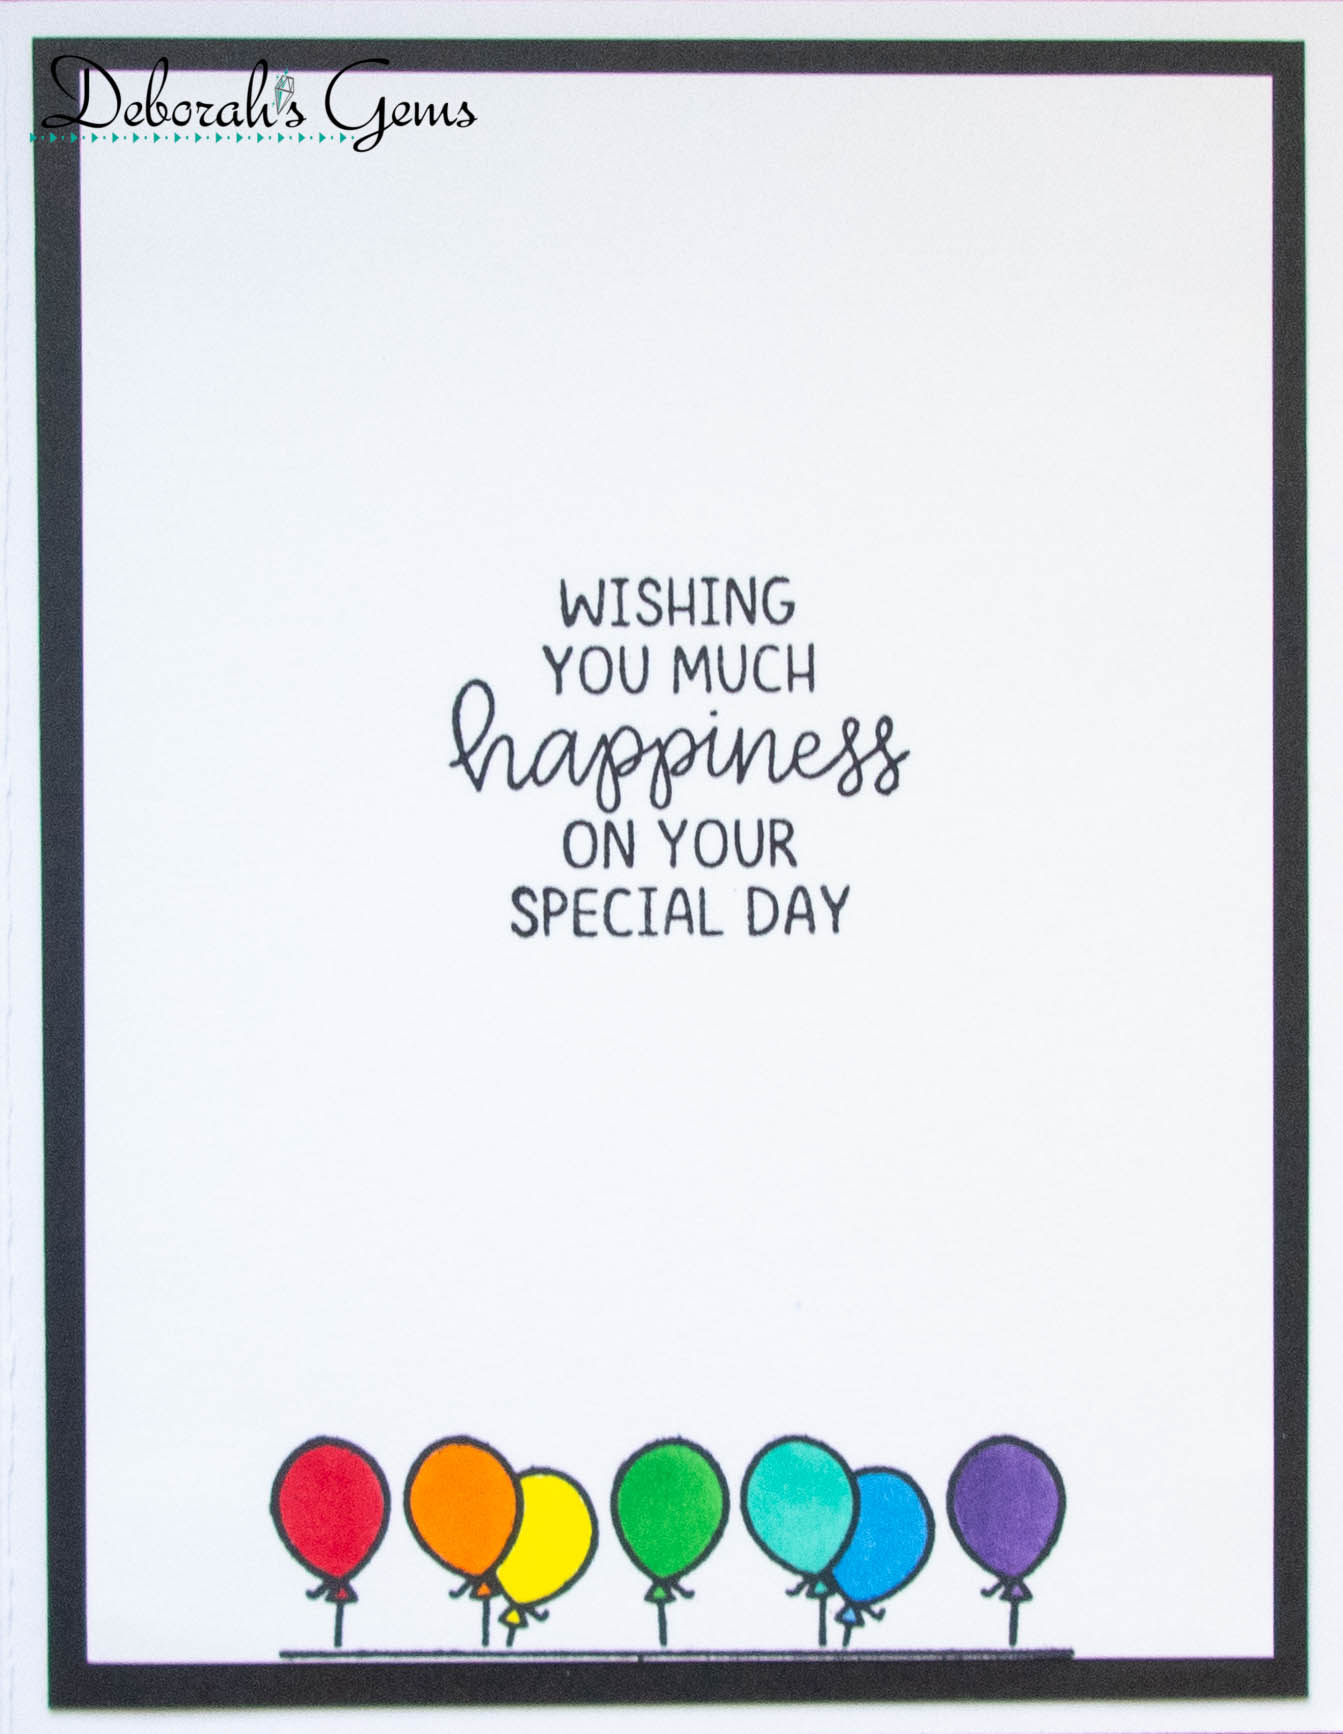
Inside the card, I cut a mat layer of black card. On the white panel, I added a fun birthday greeting along with a row of party balloons - coloured rainbow fashion.


This card is for my niece, Catherine, she has her birthday on Saturday - I'm getting it in the post today to make sure it arrives on time. That's all for today - see you again soon.

signature photo Signature.png

Thursday, 22 February 2024

Floral Birthday Postage Card

... Hello! I've got a birthday card to share with you this morning. This was inspired by Gina K's recent video, although the only Gina K products on the card are the inks!! Here's the card:


Stamps: Altenew - Enjoy Life, Just a Number; Waffle Flower - Postage Collage Fall, Postage Collage; The Greetery - Sentiment Suite Birthday
Inks: Gina K - Lemon Drop, Light Lilac, Medium Lilac, Dark Lilac, Applemint, Lucky Clover; Versafine Clair - Nocturne
Dies: Waffle Flower - A2 Postage Collage Die 
Accessories: White Card; Stencils - Waffle Flower Postage Collage Colouring Stencil, Altenew Enjoy Life; Copic Markers

I'm submitting this to Color Hues - CH#81 to use Lilac and Mint, to The Flower Challenge - TFC#88 - to add a heart, and to Never-Before-Used-Schtuff - NBUS#59 - the Postage Collage stencil and stamps have not been used before.


I have the Waffle Flowers postage collage collection and not really used it much. I was watching Gina K's release video where she made a postage stamp card with one of her flower stencils - I loved it. So I decided to use that as the inspiration and mix and match my existing stamps, dies, stencils, etc. I started by cutting the A2 postage collage die in white card. I added masking magic tape to cover the dots and stitched lines and using the first part of the collage colouring stencil, I lightly inked in pale yellow around the edges to define the 'stamps'. I then stamped the floral image onto the panel and used the matching stencils to add colour. I removed the masking magic and using a variety of stamps added words, images and prices to the 'stamps'. I created the border on the A2 note card by using Waffle Flower's Postage Collage Colouring stencil - first in green, then in lilac. I adhered the postage stamp panel to the front of the card.


For the inside, I cut a piece of white card slightly smaller than the note card. I lightly inked the edges of the panel with lilac ink. I stamped a fun greeting in the middle of the panel, and stamped the floral image again and coloured it with Copic markers.


This card is for my aunty Sue. She has her birthday on Saturday - and I'm safe to share it here now as Sue doesn't look at my blog! To be honest, not sure any of my family look at my blog. That's all for today - I'm off to the post office now. See you all soon.

signature photo Signature.png

Monday, 19 February 2024

Great-Nephew's Birthday

..... Good morning!! It's been a while - February is flying by. I'm here today to share the card that I've made for my great-nephew, he'll be 5 years old tomorrow.


Stamps: My Mind's Eye - Boy Crazy; Lawn Fawn - Happy Happy Happy; Mama Elephant - Mixed Wishes Greetings
Inks: Gina K - Red Hot, Blue Raspberry, Wild Dandelion; Versafine - Onyx Black; Versafine Clair - Nocturne
Accessories: White Card; The Greetery - Pinwheel Party Stencils; Copics; Clear Embossing Powder; Lakeland - Foil Number

I'm submitting this card to the following challenges: CAS Colours & Sketches - CASC&S#530, Time Out Challenge - TOC#257, and CAS on Friday - CASOF#277 where the theme is male/boy.


I had such fun making this card. I started by stencilling the red and blue pinwheels directly onto the A2 note card. I used my MISTI to stamp the robot onto white card. I removed the image, coloured it with Copic markers, returned it to the MISTI and stamped with Versafine ink and heat embossed with clear powder. I then carefully fussy cut out the robot and edged the image with a black marker. I added a simple birthday greeting and a large bright yellow '5' at the top of the card.


I cut a piece of white card for the inside - I lightly brushed on red ink around the edge. I stamped the robot at the bottom left and added a simple birthday verse along with some yellow elements.


I'm heading to the local post box shortly to get this card in the post - I had thought that Elijah's birthday was next Tuesday, but in fact it's tomorrow!!! I hope he likes the cute robot - it's a favourite of mine for kids cards. That's all for now - see you soon. 

signature photo Signature.png
Related Posts Plugin for WordPress, Blogger...