Thursday 31 January 2013

Triple stamping Christmas ....

.... I'm on a bit of a roll today - here is a card for this week's challenge at 52 {Christmas} Card Throwdown - 52CCT04-13.  The team would like us to make cards using the Triple Stamping technique and there's a super video here showing how it's done.  Here's my card:


Stamps: Waltzingmouse - Festive Foliage; Stampin' Up! - More Merry Messages
Inks: Stampin' Up! - Real Red; SU Marker Pens - Early Espresso, Soft Suede, Wild Wasbi, Garden Green, Always Artichoke
Accessories: SU Card - Garden Green; White card from stash


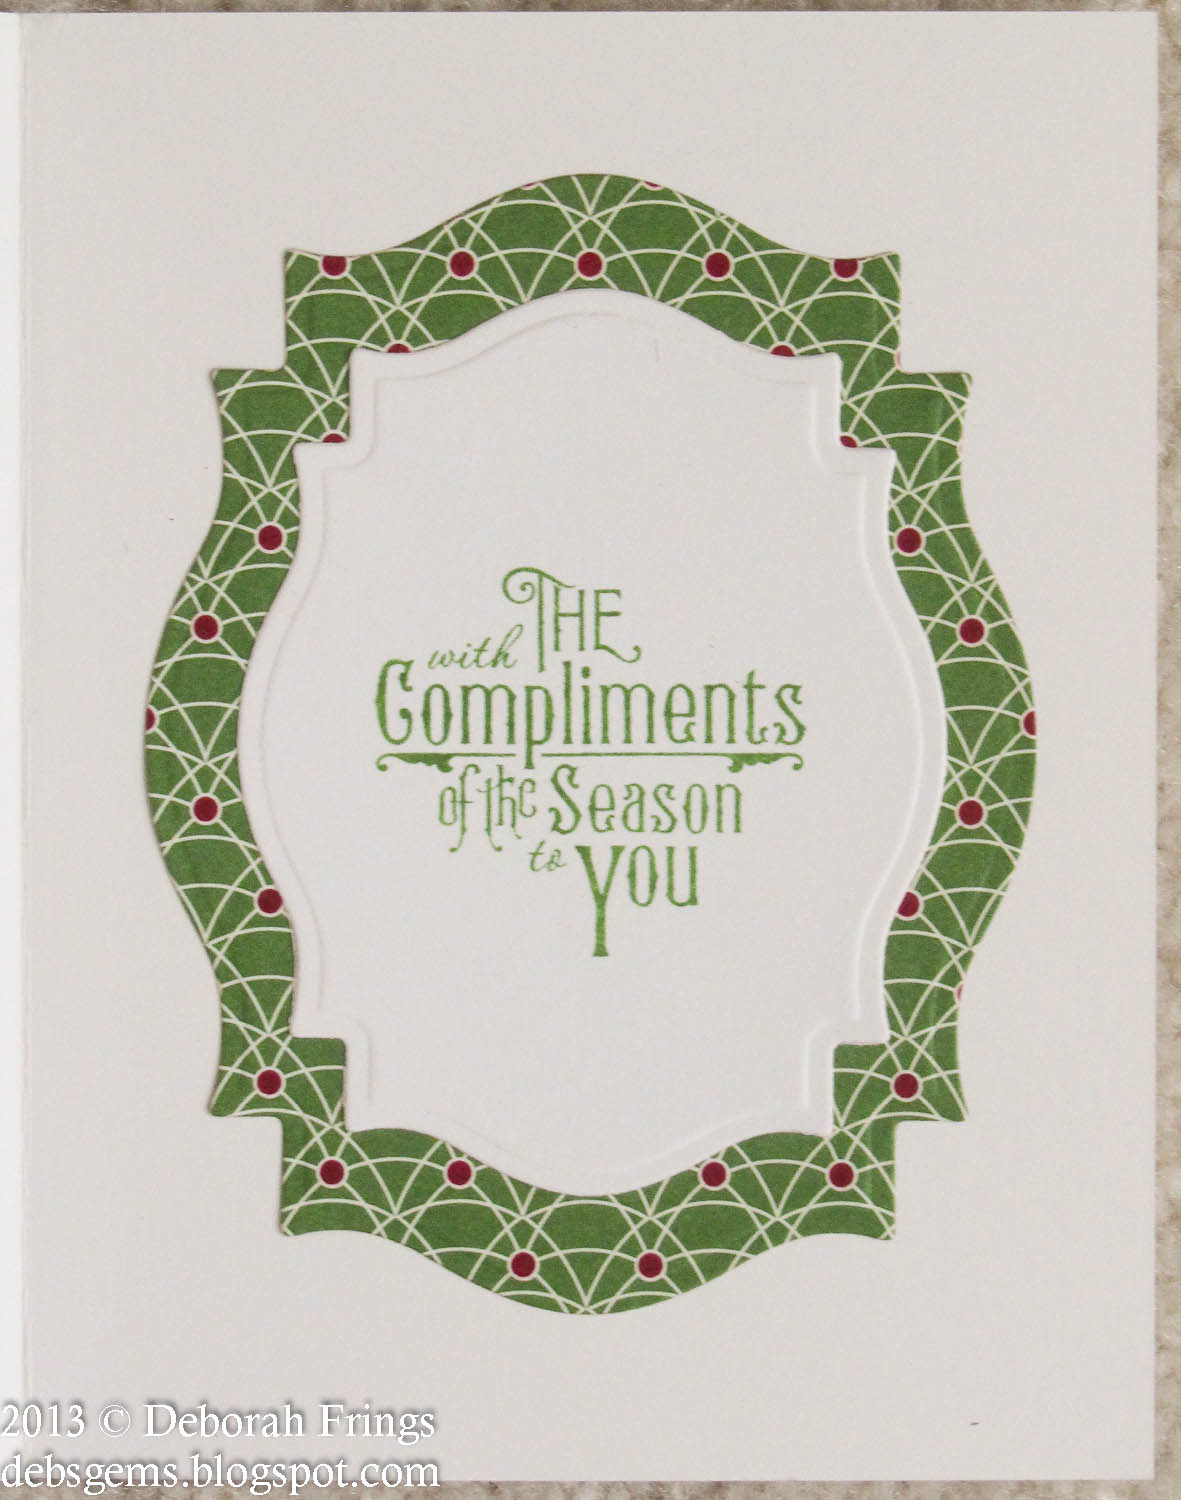
I've been meaning to try this technique for ages as I've seen some lovely cards around the blogsphere.  I just needed a good shove in the right direction :)  I decided to use the lovely Festive Foliage set as I thought it would work really well with these technique.  I cut the coloured panels at 5¼", 4¼" and 3¼" square and the white panels at 5", 4" and 3" square.  I used marker pens to colour the pine cones and branch so that I could get some shading on the image.  I really like the font used for this simple sentiment - so pretty and stands out beautifully stamped in Real Red.  For the inside I cut a green mat and white layer onto which I stamped a simple verse and another branch.

I really enjoyed making this card - and it really is an easy technique.  I think I'm going to have another go this evening - so do pop by tomorrow to see what I make.  Bye for now.

Sweet ....

.... The wind is whistling around the house this morning, so glad that I'm tucked up in the warm and dry and playing in my craft room.  I've made a card just for fun based on these challenges:


Stamps: CAS-ual Fridays - Rad, Loving Thoughts, Casual Elegance
Inks: Stampin' Up! - Crumb Cake, Pretty in Pink, Regal Rose, Old Olive
Dies: Spellbinders - Crown Circles (S4-302) #3
Accessories: SU Design Paper and Card - Old Olive ; SU Ribbon - Old Olive; SU Marker Pens: Crumb Cake, Regal Rose, Pretty in Pink, SU Brad; White card from stash


I used the sketch from The Paper Players for the layout, the colours from The Colour Throwdown (so pretty) and used marker pens to colour the leaves on the side panel and the letters on the sentiment.  I cut a panel of white card and randomly stamped a mixture of CAS-ual Friday stamps (seemed appropriate) and layered this onto some Old Olive design paper and adhered it to the card.  I added a simple ribbon and stamped the sentiment above - I like these open sentiments, perfect for colouring!!  I made the flower by stamping the large from from Loving Thoughts three times and cutting them out, I finished off by adding a brad to the centre of the flower.  Here's a close up of the coloured sentiment.

Bye for now - wherever you are - be safe!

A brick in the wall ....

.... Jonathan came home last night and asked if I could decorate a brick for him!!!  Of course, I said yes - a brick!!!  Actually, it wasn't a real brick, just a cardboard one.  The project the team is working on have identified a number milestones and as each one is completed, the team responsible gets to decorate a brick - I think they are going to build a bridge!  I thought I'd have the weekend to to, but no, Jonathan had to take it to work with him this morning.  Here's what I came up with;


Stamps: Stampin' Up! - Thoughts and Prayers
Inks: Distress Stains - Tea Dye, Wild Honey; Stazon - Forest Green; Distress Pads - Antique Linen, Pumice Stone, Black Soot
Dies: Spellbinders - Labels 25 (S5-077) #5
Accessories: Wax crayons and brown wrapping paper

I decided that I'd make the brick a wall.  I wrapped some brown paper around the box, drew on lots of bricks and simply painted the box with Distress Stains (makes is so quick and easy).    On the computer I typed up details of the stage completed using the font Castellar - which sort of looks like it's been engraved.  I cut this out using the largest of the Labels 25 dies and while in the die I added shading.  The intention was to make it look like an engraved plaque on a wall.  I randomly stamped the branch flourish all over the box using Stazon - as it works over the wax.  Here are a couple of different views of the "brick". 


I had lots of fun decorating this brick - and I hope to see a photo of the completed bridge.  That's all for now - I'm off to check Thursday challenges.

The weather here has been absolutely crazy.  Yesterday we reached a record high of 15°C and this morning (as I type) it's snowing and the temperature is -5°C (23°F)!!!  I think winter's back!  See you soon.

Tuesday 29 January 2013

You're Ace .....

.... Hi everyone!  One of the first things I do in the morning, after Jonathan and Kathryn have left, is to check the various challenges I play in.  This morning I saw that the new CASology - CAS29 challenge has the cue word "GAME", which immediately led to thoughts of scrabble (I play online games), cards, computer games and crosswords.  I'm sure that others might think of more physical games, but these are ones that I play!!  I recently got some new papers and stamps from Kaisercraft which are just perfect.  So here's my card:


Stamps: Kaisercraft - Sears & Son
Inks: Stazon - Jet Black
Dies: Die-namics - Fishtail Flags Layers STAX
Accessories: Kaisercraft Design Paper - Sears & Son; Stampin' Up! Card - Cherry Cobbler; SU Pen - Cherry Cobbler; Glossy Accents; Card from stash

 
I used the layout from this week's Less is More - LIM104 challenge -  the sketch was designed by Jen.  Chrissie and Jen have a couple of constraints and they are "It's simplicity itself, so to add a little constraint, we ask that the card stays in this orientation ie that the band remains in the horizontal plane, in the lower part of the card and that it takes up no more than 1/3rd of the height of the cardbase."

Although you can't see it in the photo above I have embossed a single line above and below the panel.  I cut the design paper to keep the Ace on the right and layered the paper onto some red card.  I stamped the cards in Stazon, colouring the ace of hearts red to match the card.  Then I cut them out - I added a touch of glossy accents on to the hearts, diamond, club and spade.  The sentiment was produced on my PC using a font called CK Chemistry and I used my fishtail dies to cut it out.  Clean, simple and perfect for a guy!

It's really dull and grey here today - we had thunderstorms and lots of rain last night, and I don't think I've had the lights off all day!!  The plus side is that it's 14°C and that really is unseasonably warm!  It's not going to last though.

That's all for now - see you soon.

Edited to add:  I was thinking that this was an original idea, but Fiona got there first!!   Fiona has posted a link to Motorhead - Ace of Spades!!

Monday 28 January 2013

Washi fun .....

... Hi, I'm back again!!  We are thawing slowing and steadily here - the tree that I showed you this morning covered with ice and snow is now just green!!  I've spent the morning playing and making my own Washi Tape.  Claire at Waltzingmouse Makes has a super tutorial on how to make your own Washi Tape and she's challenged us to use that tape on a card.  So I've put this card together with a few challenges in mind:


Stamps: Waltzingmouse - Camellia, Faux Fun, Pic Nic Patterns; CAS-ual Friday Stamps - Loving Thoughts
Inks: Distress - Milled Lavender; Memento - Tuxedo Black; Staz-on - Jet Black; Stampin' Up! - Perfect Plum, Garden Green
Accessories: Promarkers - Lilac, Aubergine, Marsh Green, Meadow Green, Pine; SU Card - Garden Green; Flower, button and card from stash


I've had such fun this morning making my own Washi Tape!!  I followed Claire's instruction and got really inky.  I used a mixture of Distress Stains and Promarkers to colour the tissue paper.  I stamped the patterns with SU inks.  I was having a really hard time with the Colour Throwdown colours (which is odd, as I love these colours) but making my own Washi seemed to clear the block.  I stamped the smallest camellia and leaves onto white card and coloured with Promarkers and cut them out.  I cut mats in Garden Green and white.  I torn the DIY Washi to fit and then attached with flower with dimensional tape.  I found this little flower and button in my stash and attached them to the card.  I have gone with a simple sentiment - Just Because !!  Here's a photo of the DIY Washi Tape that I made this morning - only used a few of them.  So nice to be able to make exactly what you want!

Before I go I must welcome some new followers - Hello to Marybeth, Kristie and Jacqdee - so glad you've joined me.  And now I really must stop playing around and get that ironing done; it sort of got forgotten :)

Scandinavian Christmas ....

.... Good morning.  I don't think I'm going out of the house today - we had lots of snow and freezing rain last night.  At 5.30am this morning we were woken by a telephone message from Northville Schools to say they are closed today - Kathryn is delighted!!  Jonathan, however, has had to go to work.  He phoned to say that the journey wasn't too bad, it's just the side roads that are really icy!   Obviously it's all the snow that is keeping me in Christmas mode - here's one I made for a couple of challenges:


Stamps: Waltzingmouse - Nordic Winter, Nordic Spring, Compliments of the Season II, Secret Set (Elf Footprints)
Inks: Stampin' Up! - Real Red, Basic Grey
Dies: Spellbinders - Moroccan Accents (S5-064); Die-namics - Fishtail Flags Layers STAX
Accessories: SU Card - Real Red; Kanban Card - Charcoal Satin Metallic; Ribbons and white card from stash


There really are only a couple of sets of stamps that I could use for the Jingle Belles challenge - it had to be Nordic Winter and a bit of Nordic Spring too!  I started off by cutting a mat of Real Red card (just the perfect shade) and a smaller white panel.  I embossed the top of the white card with snowflakes and stamped a selection of the border stamps across the bottom of the panel.  I added some grey and silver ribbon to the panel and attached it to the card.  I die cut a pretty doily from some charcoal grey satin metallic card (see the grey heart in the box) and added a sweet little bird on top (again, there's a bird in the box).  I finished off with a simple sentiment stamped in grey.  I made a couple of mats for the inside; stamped the large cross stitch star from the "Secret Set" (second impression) and a fun sentiment.  You can just about see the star in this photo!!

I stood on my door step about 20 minutes ago and took a couple of photos of the fir tree that I can see from my office window (looking at it right now!).  The tree is covered in snow and ice, but it's already dripping as the temperature is 1°C and expected to get to about 9°C by mid afternoon - all the snow will melt away :) 


You can just about see across the road - it's very foggy!  That's all for now.  See you soon.

Sunday 27 January 2013

Chalkboard - take 2 ....

... Good morning, it feels a bit strange not posting a card for CR84FN, and while I'm sad to say goodbye to the challenge, it does open up a space to play.

So I've made another chalkboard card using some scrap from my first card.  This was actually my first attempt at the technique, but I didn't leave enough space for the sentiment I wanted to use.  After finishing the other card I went back to the scrap and had a play.  I over stamped the embossed circles and then stamped around the edge - I didn't reink, just used up the ink on the stamp.  Then I decided to have a go at adding some colour.


Stamps: Waltzingmouse - Free Spirit Boy, Yonder Star
Inks: Versamark; Stampin' Up! - Whisper White
Accessories: Black card from stash; Promarker - Emerald; Staedtler - Ergosoft Pencils

I actually think this is my favourite of the two cards - I like the touch of colour and it's a bit grungier.  I drew the line around the edge free hand and then got out my colouring stash.  I used an Emerald Promarker and a couple of green pencils and just coloured!  I did make a sentiment to go on the front, but it didn't look right, so I attached it to the inside of the card and will be posting this to Ben on Monday.


I'm submitting this card to Claire's Monday Morning Make Technique challenge - WMSMMM1 and to this week's Play Date Cafe Challenge - PDCC166 where the team want us to use a splash of emerald green!  


As we still have lots of snow around here, we are planning a relatively quiet day, although we do have to clear the drive and paths!!  Jonathan is off for a photo shoot, Kathryn is still working on her Nancy Drew mystery and I'm going back into my craft room.  I've joined in with a class at My Creative Classroom - Use Every Stamp 2013.  In order to achieve the aim of using all my stuff I am doing a much needed reorganisation of stamps, dies and all the stash we have.  It's not a job that will be completed in a week or even a month, this one will last at least the year.  However, I made a really good start yesterday and finished cataloguing and organising all my dies and embossing folders - see picture below.  The next step is to finish cataloguing my new stamps and then to move on to converting all my wood mounted stamps to cling!!  That might take quite a while, but should free up so much space.


That's all for now - I'm off to do some more organising and I'll see you tomorrow with a card (or two)!!  Have a great day.

Saturday 26 January 2013

Technique challenge - chalkboard ....

.... It's stopped snowing - yea!!!  We have decided to stay tucked up in the warm - Jonathan's doing post-production on some photos, Kathryn is working her way through a Nancy Drew mystery and I've been playing with a technique challenge.  Claire from Waltzingmouse has a Monday Morning Make challenge to create a card using the chalkboard technique - she has given some super instructions here on how to do it!  Here's my card:

 
Stmaps: Waltzingmouse - Free Spirit Boy, Compact Sentiments
Inks: Versamark; Stampin' Up! - Whisper White
Accessories: Black card from stash, Staedtler Ergosoft Pencils

I've been wanting to have a go at this technique for a while, just not got around to it.  But this challenge is just the encouragement I needed.  I used my all time favourite set - Free Spirit Boy and stamped the large circles stamp in Versamark and embossed with detail white powder.  Then, following Claire's instructions, I over stamped the image using white pigment ink.  I did the same with the sentiment.  I used a ruler and white pencil to draw the border.  I added a few smaller circles to the panel and then took a paper towel and gently rubbed over the image which causes the pigment ink to smudge - just a bit!  

This was lots of fun and I'm off to check out the challenge submissions.

Friday 25 January 2013

Paper, Glitter and Christmas 2 ...

.... I'm back with my second card using design paper and glitter and a decorated inside for this week's 52 {Christmas} Card Throwdown - 52CCT03-13,  and I used the sketch from CAS(E) this Sketch! - CTS12 for the layout.


Stamps: My Favourite Things - Stitched Stockings; Waltzingmouse - Compliments of the Season
Inks: Stampin' Up! - Cherry Cobbler, Sahara Sand, Gumball Green
Dies: Die-namics - Stocking Trio; Spellbinders - Labels 18 (S4-310) # 4 & 5
Accessories: SU design paper - Be of Good Cheer; SU Glitter - Dazzling Diamonds; Martha Stewart Glitter - Coarse Crystal; SU Card - Very Vanilla


I had a few stockings left over from my earlier card and decided to make another card using them up.  I turned the sketch through 90° so that I could hang the stockings from the mantle!!  I attached two of the stockings directly to the card base, but added some dimensional tape to the third.  I used both sides of the design paper on this card.  I carried the green on with some green elements on the stockings and a simple sentiment in the corner of the card. For the inside I used Spellbinder Labels 18 dies to cut a backing panel and a panel for the sentiment.  I've also taken a close-up of the stockings to show the different glitters used - fine on the dotty stocking and chunky on the top of the texty stocking.

That's all for now - I've had a fun morning playing in my craft room and now I'd better make a start on some of the ironing.  Before I go, thanks so much for the lovely comments on my photos.  There's so much to learn, but I'm having fun.  Bye!!

Paper, glitter and Christmas ...

... Hello from a cold and snowy Northville - it's so pretty here.  It's been snowing since 8.00am and we have a light covering - about 1½", and there's that strange quiet that always comes with snow.  And it's really put me in the mood for making Christmas cards.  This one has been made with a couple of challenges in mind:

Stamps: My Favourite Things - Stitched Stockings, Seasonal Sentiments; Waltzingmouse - Join Us, Nutcracker Sweet
Inks: Stampin' Up! - Cherry Cobbler, Sahara Sand
Dies: Die-namics - Stocking Trio
Accessories: SU design paper - Be of Good Cheer; SU Card - Very Vanilla; SU Dazzling Diamonds

This was really fun to make.  I picked this lovely paper for the background and cut a panel of Very Vanilla onto which I stamped some snowflakes.  I stamped this bold sentiment in the centre of the panel.  I stamped the star and heart border onto Very Vanilla card and cut it to fit the card.  I stamped a few of the elements again in Sahara Sand, cut them out and adhered them to the panel.  I die cut one of the stockings, glittered the dots, added a coloured button and attached it to the card with dimensional tape.  It's hard to see in this photo, but I also glittered the snowflakes - they have a subtle shimmer.


For the inside I used another piece of the snowflake paper as the mat layer and decorated the panel with the star and heart border, adding a sweet sentiment.  I used Cherry Cobbler to highlight the word "Christmas" and the star in the centre of the the word "peace".   I've attached a close up of the front of the card - I think you can see the glitter better here!

Kathryn has a day of school today - not because of the snow!  No, it's just the end of the first semester and a rest day for the children and teachers.  I think it's a well earned rest day.  The terms here are very long in comparison to the UK.  We had planned to go to the movies, but I don't fancy driving in the snow - so Kathryn is catching up on some TV and listening to her music, and I'm playing in my craft room.  A perfect day for us both!!

See you soon!

Thursday 24 January 2013

Coffee and friends .....

.... I'm rather late with my post today - but I've been having a lazy day.  After I cleared the snow off the drive this morning I decided to sit in the warm with a nice hot coffee and a good book.  I finally decided I'd go have a quick play - this card has been lurking in my mind all day.  I've used four challenges in the making of it:


Stamps: Lil' Inkers - Coffee Cozies; Verve Stamps - Better with You
Inks: Stampin' Up! - Crumb Cake, Cajun Craze; Distress - Antique Linen
Dies: Lil' Inkers - Coffee Cozies
Accessories: Cuttlebug EF - Spots and Dots; SU Card - Crumb Cake; Promarkers - Burnt Orange (Dusty Durango), Apricot (Apricot Appeal), Dusky Pink (Blush Blossom); White Lustre card from stash


I used this week's Retro Sketch for the layout and stamped the coffee steam and coffee rings directly onto the white panel before embossing.  I adhered the panel directly onto the card.  Next I diecut the coffee cups and holders, then coloured the holders with Promarkers (matching the colours as closely as possible to the Colour Q challenge).  I made the sentiment panel and attached it to the card, and then adhered the coffee mugs with dimensional tape.  I stamped the inside with a fun sentiment and a couple of coffee rings!

As a coffee lover - there is only one drink that I could use for the drinks challenge!!  Just love the smell of coffee - yum!!

I'm off to a craft class this evening at Stampeddlar - the teacher is Valerie Brincheck and I'm going to be playing with Distress Inks - so I'm going to get very inky!!  Should be lots of fun.

That's all for now.  See you soon.

Related Posts Plugin for WordPress, Blogger...