Saturday 30 March 2013

Christmas Ornament ......

... Hi!  It's time for our new challenge at 52 {Christmas} Card Throwdown and Louise is hosting our fifth, and last Saturday in March.  As we have an extra Saturday in March, our challenge is a bit different.  This week we would like to see ANYTHING, but not a Card, ATC or Tag. 


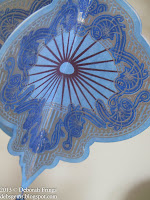
I made an ornament for my Christmas tree.


Stamps: Waltzingmouse - Ornate Ornaments, Vintage Ornaments
Inks: Versamark; Stampin' Up! - Rich Razzleberry
Dies: Spellbinders - 2010 Heirloom Ornaments (S4-283) #5
Accessories: Twinkling H2Os - Wild Blueberry, Blue Flame; Silver embossing powder, thread and beads

I stamped the ornament five times in Versamark and heat embossed all the images with silver powder and then cut them out with the matching Spellbinder die.  I used two shades of blue twinkling H2O to paint the ornament and finished each panel by stamping the lovely purple star burst.  I scored each ornament down the centre and gently folded in half.  To give some weight to the ornament I added a tassel made of beads from my stash.  I used super strong double sided tape to glue each side together. 

Here are a couple of close up views of the ornament.


That's all for now.  I do hope you have a super Easter break.  I'll be back on Tuesday.

Thursday 28 March 2013

Spring time pinks .....

.... Good morning! I'm back!  I've not been in my craft room much this week, I've been catching up on some reading; I've a series of 20 books about Anita Blake (vampire hunter) and I restarted the series just over a week ago and not put it down since then - I'm up to volume 14!  But I made sure to get into my craft room this morning to make a birthday card for a special lady.  I used the following challenges to make the card:

Stamps: Waltzingmouse - Asian Gardens, Compact Sentiments; My Favourite Things - Birthday Sentiments
Inks: Stampin' Up! - Pretty in Pink, Regal Rose, Early Espresso
Dies: Spellbinders - Petit Ovals Sm (S4-140) #2, Petit Ovals Scalloped Lg (S4-139) #2
Accessories: SU design paper - Pretty in Pink, Regal Rose; SU Card - Regal Rose; White lustre card; Gems; Sakura Blossom punches - tiny, small, medium and large


I really like these soft pinks, so fresh and spring like.  As you can see I turned the sketch on its side.  I started by stamping the trellis background in the paler pink and then stamped the branch in brown.  I stamped some sakura blossoms in both shades of pink on white and pink card and then used the punches to cut them out (so much quicker then cutting them!!).  For some variation in colour I also cut a few blossoms from the matching design papers.  I attached the flowers to the cad - some flat and some with a bit of dimension.  For the sentiment I cut a scalloped mat in the dark pink and an oval in white card.  I stamped the sentiment in brown, positioning it slightly to the left to allow room for the big punched flowers above.  Before adhering the white panel to the mat layer, I ran a brown marker around it to give a little definition to the panel.  To finish off the front of the card I added some bling - it is, after all, a birthday card!  For the inside  I stamped the whole cherry tree and added some blossom to the top corner too.  I finished the inside with a bold greeting.


This card is for Margene, the owner of my local craft shop, Stampeddler.  Not only is she celebrating her 60th birthday today - we're having cake at the shop, but she is also celebrating 30 years in business.  That's no mean achievement these days.  No only is Margene a really lovely lady, she has the most wonderful shop - I can spend ages pottering around building a wish list that she is only to happy to enable :)

That's all for now - I'm off to celebrate a birthday - see you soon.

Saturday 23 March 2013

Ribbons and bows ....

... Hi!!  It's time for our new challenge at 52 {Christmas} Card ThrowdownLouise is our host and for our embellishment challenge, she wants us to make Christmas cards with ribbons and bows!


You might have noticed that I don't use many ribbons and bows on my cards.  There are two reasons for that.  One, I'm not great at making bows and two, I find it hard to include them.  So, for me, this is a tough challenge and it was only yesterday that I woke up with inspiration.  Here's my card:


Stamps: Waltzingmouse - Compliments of the Season, Yonder Star
Inks: Stampin' Up! - Certainly Celery, Garden Green
Dies: Spellbinders - Nested Lacey Pennants (S5-029) #3
Accessories:  SU Card - Garden Green; Anita's sticky ribbons,other ribbons and bow from stash; White lustre card

I made a ribbon Christmas tree and it's turned out exactly as I imagined.  I cut the green and white panels to size, glued them together and then put on the die and cut out the tree.  Then I put the panel onto the card base and traced around the inside of the tree.  I covered the whole of the traced outline with super sticky double sided tape.  Then I peeled off the protective layer and started to add ribbon.  I started with the swirly lime ribbon and worked from there, picking ribbons with different textures, colours and widths and adding a touch of red and gold - it is after all a Christmas card!  Once I'd covered all the sticky tape I attached the die cut panel to reveal my ribbon tree.  I stamped some pale green snowflakes and added some gold/brown ribbon for the tree's pot and a big ribbon on top! For the inside I cut a couple more layer and stamped a simple greeting.  I decided not to add a sentiment on the front of the card - I think the tree says it all!

I'm really pleased how this turned out, and as I've got a lot of ribbon, I think might be a good way of using up some of it :)

Don't forget to check out the blog - the rest of the team have got fabulous cards to share with you.  Looking forward to seeing what you make with ribbon and bows!!  I have to admit that it's not been difficult to get into the mood for making Christmas Cards - winter seems to be hanging around everywhere. We've had really low temperatures and some snow all week, and I've been in touch with my UK family and friends and it appears you guys have it really bad this weekend.  Wherever you are, be safe and have a great weekend!!

Friday 22 March 2013

Waltzingmouse Friends ....

....  Good morning all!  I've been keeping a secret - something that's not always easy to do, especially when I've been wanting to tell everyone!!  There's a new feature at starting today at Waltzingmouse Stamps - to focus on WMS Friends and I am delighted and honoured to be the first!!!  Squeal !!!!!!  Okay, I'll try to calm down a little.  Here's a sneak peak of what I made - for full details - go visit Waltzingmouse Makes and check it out.


I didn't find Claire's stamps until 2010, but when I did, I became an immediate fan.  I am very luck to have all Claire's stamps - some are a bit more neglected than they should be.  A quick review of my cards show that I use WM stamps a lot!!  Can't wait for the next release!!

Thanks for popping in!

Monday 18 March 2013

A splash of coral ....

... Good morning - I hope you all had a good weekend.  My was really good - I watched the England v Wales rugby match on Saturday and was delighted that Wales won.  Mind, I would have been okay with England winning too - that's the plus of having both English and Welsh sides to the family!!  I do hope that all my Welsh friends have recovered from their hangovers ;))))

Today my card is a really quick and easy one - I've made it for the current Play Date Cafe Challenge - PDCC178.


Accessories:  Papermania - Inspirations Design Paper; Stampin' Up! - Calypso Coral Marker Pen; Promarkers - Coral, Soft Peach; Craftwork Cards - sentiment label; Gems, white and black card from stash


As you can see - there's no stamping on this card at all!  I selected a piece of the designer paper with nice big flowers so that I could colour them.  I edged the white paper with some Calypso Coral and then attached it to a black mat.  On another sheet of paper I coloured a few more flowers and then cut them out.  I attached a few flowers to the card, a label sentiment which I edged with coral, and lots of tiny gems. 

That's all for today - I really do have to catch up on some house stuff!

Sunday 17 March 2013

Be lucky .....

.... Hi - it's the 17th of the month and that can mean only one thing - it's time for the Watlzingmouse Blog Party.  As well as being the Blog Party - it's also St Patrick's Day - so I'd like to wish Claire and all my Irish friends a very Happy St Patrick's Day.  Of course, with it being St Patrick's day we get the theme for this month's challenge - LUCK!  I've been really quite literal with my card - one for Ben, here it is:


Stamps: Waltzingmouse - Free Spirit Boy, Celtic Heritage, Irish Blessings, Twas the Night Before Christmas
Inks: Memento - Tuxedo Black, Cottage Ivy, London Fog; Versamark
Accessories: Stampin' Up! Card - Lucky Limeade; SU Design Paper - Basic Black; SU Designer Silver Basic Buttons; Clear embossing powder; Black thread; White lustre card
 
I used a couple of challenge to make this card - Colour Q - cQc180 (perfect colours for St Paddy's day) and the layout from Freshly Made Sketches - FMS77.


I covered most of the card base with a panel of Lucky Limeade card (one of my favourite colours).  Rather than add a ribbon, I stamped the Celtic border in Cottage Ivy (don't have Glorious Green).  I cut a panel of SU design paper in basic black and used the polka dot side on the card.  I cut a smaller panel of white card and stamped my most favourite WM stamp - the circles from Free Spirit - I used the second stamping to give a subtle image.  I inked up the lovely four leaf shamrock in Versamark and Cottage Ivy so that I could heat emboss the image; then I cut it out.  I made the sentiment from a couple of stamps.  The word "Be" is actually the first two letters from the Believe sentiment in Twas the Night Before Christmas.  I finished off the card with a big, bold silver button.  I didn't stamp a sentiment on the inside, just the circles again.

I'll be sending this card to Ben - he is planning to take some driving lessons in the not too distant future - so I thought a good luck card might be nice!

Oh yes, not only is today St Patrick's day - I've been in the USA a year today!!!  The time has simply flown by and I'm really loving it.  The major difference between today and this time last year is the temperature.  When Kathryn and I landed at Detroit airport last year it was 20°C (68°F) and today the temperature is -3°C (26°F) and we still have snow on the ground.  Roll on spring!!!

That's all for now - I'm off to get a cup of coffee and sit down to see the rest of the cards for the Blog Party.  Bye for now.

Saturday 16 March 2013

Christmas animals .....

... Hi!  It's time for our new challenge at 52 {Christmas} Card ThrowdownLouise is hosting the challenge this month and this week she'd like us to make Christmas/Holiday cards featuring animals that are popular at Christmas. 


Now, I have a lot of Christmas animal stamps, so this is an easy challenge - wrong!  It turned out to be harder than I first thought - my first couple of cards are in the bin; didn't like them at all!  However, I found a couple of stamps that I think are just super - oh yes, I made two cards!!  Here's the first:


My card features a well-loved Christmas animal - Rudolf the Red Nosed Reindeer!  I used some polka dot paper for the backing layer and the debossed side of the white card.


Stamps:  Stampin' Up! - More Merry Messages; Animal stamps free with Simply Cards & Papercrafting; Waltzingmouse - Festive Foliage
Inks: Memento - Tuxedo Black; SU - Real Red
Accessories: Promarkers - Berry Red, Cocoa, Burnt Sienna, Tan; SU 1¾" Scallop Circle Punch ; SU Design Paper - Real Red; Cuttlebug EF - Distressed Snow; Gem from stash; White lustre card

The design paper is double sided with white polka dots on the front (as on the front of the card) and large outline circles on the reverse, which is the side I used for the mat on the inside of the card.  I added a few holly leaves and berries as well.  I'm going to come clean here - I managed to get a couple of ink marks on the white background and rather than start over, I simply covered them with the holly leaves (that's why they're black) and some berries!  I seem to remember that there are no mistakes in crafting, just happy accidents!  I think the inside looks much better with the addition of the leaves and berries.

I did make another card, but I'd completely forgotten that we weren't including birds!!  Here's my other card:


Stamps:  Stampin' Up! - More Merry Messages; Animal stamps free with Simply Cards & Papercrafting
Inks: Memento - Tuxedo Black; SU - Real Red
Accessories: Promarkers - Berry Red, Cocoa, Burnt Sienna, Tan; SU 1¾" Scallop Circle Punch ; SU Card - Real Red; Cuttlebug EF - Distressed Snow; Piccolo Pure Sparkle Gold Glitter; White lustre card

I just love robins - they really remind me of Christmas.  I stamped the image twice onto white card, cut around the circle on one and around the body of the bird on the other.  I coloured the robin with Promarkers and glued the coloured image to the circle.  I used a glue pen to colour the crown and when touch dry poured on some glitter!  I used my scallop circle to punch out a red background.  I stamped the image onto the red mount in order to see the robin's feet!  I cut a couple of panels in red and white.  I attached the red card to the card base and ran the white through my Cuttlebug.  I used my Fiskars stamp press to stamp the sentiment.  For the inside I cut a couple more red and white panels.  I stamped the singing robins along the bottom of the white card and a greeting in the centre.


Now - don't forget to visit the rest of the team and check out their inspiration cards!  We had so many lovely entries last week, and I can't wait to see your cards for this week's challenge!

That's all for now.  See you soon.

Friday 15 March 2013

Spaceman birthday ....

..... Good afternoon - hope you've all had a good day.  It's been really nice today with sunshine, but rather cool, however, it is getting quite dull now and the weathermen have promised snow tonight!!!  Anyhoo - I have a card for you and I'm submitting it to a couple of challenges:


Stamps: Waltzingmouse - Half Pint Heroes
Inks: Memento - London Fog, Lady Bug; Distress - Pumice Stone; Stampin' Up! - Daffodil Delight
Accessories: Promarkers - Warm Greys 1 - 5, Poppy, Mandarin, Primrose; Copics - E00, E21; Robot sticker; White lustre card


I had lots of fun making this card.  While sorting through my stash I found this sweet little robot sticker (sadly I've no idea what company produced him), so I decided to play along with the CASology challenge.  I stamped the spaceship directly onto the card base and coloured it with Promarkers and used Copics on the boy's face. I stamped a few stars and a moon in the sky.  I sponged in a planet on which the little robot lives and he's shouting a message to the boy in the spaceship :)

I actually made this card for my great-nephew, Xander, who was a year old yesterday and I completely forgot!!  I'm such a bad Aunt!  Anyway, this will be in the post to him tomorrow!

That's all for now - it's almost time for Jonathan to get home, so I'd better go and get dinner started.  See you tomorrow for the new 52 {Christmas} Card Throwdown challenge - it's a fun one!!  See you!

Envelope Art Take Two ....

... Morning!!!  I've got another envelope for the current Serendipity Stamps Challenge - SSCB#7 to decorate a mail-able envelope.  As I explained yesterday, I don't actually have an Serendipity stamps, but I think using the butterfly die is okay!!


Stamps: Waltzingmouse - Spring Baskets
Inks: Stampin' Up! - So Saffron, Calypso Coral, Regal Rose
Die: Serenpidity - Floral Butterfly
Accessories:  A2 White Lustre Envelope

This one is really just a variation on yesterday's envelope, but I think it works better.  I used the same technique as yesterday, but this time I decided to make the butterfly multicoloured.  I started off by sponging on yellow, then coral and finished with some darker pink at the wing tips.  I also decided that the butterfly would be better positioned in the top left corner, leaving space beneath to write the address.  I used the same sentiment above the butterfly - it was sunny yesterday afternoon, so I'm hopeful that spring will arrive eventually!

Don't forget the challenge is open until midnight US EST on 17th March - so there's still time to join in.  Oh yes, there's a prize too of $20 towards some Serendipity stamps - here's hoping!!

I'm off to have my hair cut this morning - as it's very short I have to get it done every six weeks, otherwise I end up looking really messy!!  That's all for now - hope to get back with a card later today.

Thursday 14 March 2013

Envelope Art ....

... Hello again - I'm playing along with the current Serendipity Stamps Challenge Blog - SSCB#7 which is to decorate a mail-able envelope.  I think the only reason I haven't played along with these challenges before is that I don't have any Serendipity stamps.  But I do have a Serendipity die - so while it's not a stamp, I hope the team accept this envelope for the challenge:


Stamps: Waltzingmouse - Spring Baskets
Inks: Stampin' Up! - Pool Party
Die: Serenpidity - Floral Butterfly
Accessories:  A2 White Lustre Envelope

This was really easy to make.  I ran some white card through my Xyron sticker machine to make the back self-adhesive - can you imagine trying to get glue on all the little flourishes in this shape????  Next I put some wax paper on the card and then the die.  I ran the whole bundle through my Cuttlebug several time to make sure that card and backing sheet were cleanly cut.  Then I carefully removed all the waste card.  I added some colour by sponging on Pool Party ink.  Then it was simply a case of peeling off the backing and adhering to the front of the envelope.  I left space to the side to add the address.   I decided to add a sweet sentiment too - I think I'm being hopeful!!

The challenge is open until midnight US EST on 17th March - so there's still time to join in.  Oh yes, there's a prize too of $20 towards some Serendipity stamps - here's hoping!!

Easter bunny ....

.... Hello - I seem to have lost this week!!!  Well, I suppose from time to time, real life must take the front seat :)  Anyway, I've managed to find some time to play in my craft room this morning and I've made another Easter card for this year's collection.  I used the following challenges:


Stamps: Waltzingmouse - A Good Egg, Spring Baskets
Inks: Stampin' Up! - Regal Rose, Pool Party, Early Espresso
Dies: Spellbinders - Nested Eggs (S40264) #5; WMS - Cut Files for A Good Egg
Accessories: Design Paper - Kaisercraft - Secret Admirer; White lustre card


I got my new Waltzingmouse Stamps yesterday - I'm so pleased that they now ship from the US (thanks Lynn).  I used my Cameo to cut the files that Claire has made to go with A Good Egg (they're only 99p from the shop) and used my Fiskars stamp press to stamp the images.  I'm so glad that I found this press, it really does make it so easy to position the stamps and get a great impression too.  I covered the card base with a sheet of green Kaisercraft paper (if you look closely you can see some pale blue script on the page).  Next I cut a layer of white card and die cut the egg.  I attached the frame to the card with dimensional tape and adhered the little bunny egg inside the negative space.  I added a tiny flower to the top of the frame.  For the inside I used a coordinating sheet of paper and adhered the die cut egg, on which I stamped a simple sentiment. I kept reasonably close to the colours and the MUSE sketch.

In my last post I mentioned editing some photos from the class I attended - if you're interested the link is here.  Sadly, the football match didn't go quite as I'd hoped - Chelsea started so badly but fortunately the match finished in a draw - so the game will be replayed!  Hopefully, Chelsea will play like they mean it from the start.  Oh yes, winter seems to have made a come back; it's below freezing again and we're expecting more snow!

Well, that's all for now - I really do hope to be back again tomorrow.  See you soon.

Sunday 10 March 2013

WMS Christmas .....

... Good morning!!!  We're on summer time, it's 9°C (48°F), the sun keeps trying to shine - I do believe that spring is almost here :))  However, I'm still in Christmas card mode - I intend to get most of my cards made in advance and not rush around like a mad thing in November!  This month our host is Cassandra (Paper Addiction) and she has a super challenge for us to use the colours Navy and Citrus Green on our card.  Here's my take:


Stamps: Waltzingmouse - Nutcracker Sweet, Compliments of the Season II
Inks: Stampin' Up! - Night of Navy, Lucky Limeade; Versamark
Accessories:  SU Card - Night of Navy, Lucky Limeade; SU DP - Night of Navy; White Lustre card, twine, clear EP and gems from stash


I had the idea for this card last week while making the flower birthday card at my SU meet.  This really is quick and easy to make.  I made the card from Night of Navy and cut some panels in Lucky Limeade and white.  I stamped the Christmas tree in Versamark, heat embossed with clear powder and then sponged on Lucky Limeade to reveal the tree.  I cut a small piece of the design paper and adhered it to the green card, torn a strip from the bottom of the white card and then attached the white panel.  I stamped the sentiment, added a tiny blue gem to the star and finished by wrapped some lime green twine around the panels and attached it to the card with dimensional tape.

For the inside I made a couple more layers, stamped the tree (second impression to make it a little more subtle) and Christmas greeting.

I really like these colours and will make a couple more to go with this, but I might vary the layout a bit.

Why don't you join in and get a head start on your Christmas cards - full details of the monthly challenge are:

"What is this monthly challenge all about?

It's our goal to motivate and inspire you to work on your Christmas cards year round - month by month - so that you can sit back and sip your hot cocoa when December arrives, instead of burning the midnight oil trying to get those cards completed at the last minute. We hope that you will agree that "slow and steady wins the race".

On the 10th of each month, the challenge hostess for that month will announce the Waltzingmouse Stamps Christmas Card Challenge theme right here in this forum. We have a variety hostesses, who each possess their own particular creative style and it will be great fun to see what idea the hostess will have for us to spark our own creativity.

Here are a few basic guidelines for the monthly Waltzingmouse Stamps Christmas Card Challenge:

• A new challenge will be issued on the 10th of each month in the Playroom Forum.
• Each card must contain some Waltzingmouse Stamps’ images but need not be exclusively WMS images.
• Once you have created your project, upload it to the 2013 WMSCCC gallery - and if you have a blog, we would love for you to post it there too!
• Feel free to grab the WMS Christmas Card Logo for your blog sidebar and/or your blog post if you are so inclined.
• You may make as many projects as you like for each challenge. We encourage you to make batches of cards since our end goal is to have enough hand-made Christmas cards for each person on our “list”.
• You may play along when and if you want – make it suit your schedule. For example, challenge cards for January may be uploaded anytime in January or in June or even September...whenever you have them completed. There is no monthly deadline."


You do need to join the Forum, but it's really easy - go to the Waltzingmouse blog, click on the tab marked Forum and follow the instructions.

That's all for now - I've got quite a bit to do today.  I'm about to watch the Chelsea V Man United match (fingers crossed for a Chelsea win), then I need to edit the photos I took at yesterday's class (which was lots of fun) and I still have a few more Easter cards to make.  So, enjoy the rest of your weekend and I'll see you tomorrow!

Related Posts Plugin for WordPress, Blogger...