Wednesday 28 March 2018

TMR - Technique ....

.... Morning! We've had the most spring-like weather for the past week or so - we've had blue skies and sunshine, but somehow the temperature still feels like winter!! And then yesterday the temperatures went up, but the rain came too! Anyhow, enough of that, it's time for our new challenge at The Male Room - TMR#82. We want to see you use watercolours on your masculine projects. I had lots of fun and got really inky!! Here's my card:

Happy Anniversary - photo by Deborah Frings - Deborah's Gems

Stamps: Visible Image - Fibonacci, Son Definition, Father Definition; MFT - Because You; Lawn Fawn - Happy, Happy, Happy
Inks: Versafine - Onyx Black; Gina K - Powder Blue, Jelly Bean Green, Wild Lilac
Accessories: White Lustre Card; SU Card - Basic Black; Brusho Crystals - Lime Green, Cobalt Blue, Violet, Leaf Green; Clear Embossing Powder; Shimmer Spritz - Frost; Tim Holtz Watercolour Card; Copics


I cut a panel of watercolour card to fit my card, sprinkled on some Brusho crystals and spritzed with water. I love the way these crystals bloom into colour and move with the water. I dried the panel carefully and then stamped this wonderful Fibonacci image in Versafine and heat embossed it with clear powder. I added a touch of sparkle to the whole panel by spritzing on frost shimmer spritz. I attached the panel to a black mat layer and then added it to the front of the card. I stamped a selection of words from several different sets, embossed them with clear powder and cut them down to get the words I wanted. I attached the words to the front of the panel. On the inside I cut a mat layer of black card and on the white panel stamped the Fibonacci image again, using several shades to echo the watercolour panel. I finished by stamping a greeting. This card is for my wonderful husband on our anniversary next month - it'll be 17 years!!!

Happy Anniversary inside - photo by Deborah Frings - Deborah's GemsHappy Anniversary sq - photo by Deborah Frings - Deborah's Gems

I took another photo of the front of the card to show all the wonderful sparkle:

Happy Anniversary detail - photo by Deborah Frings - Deborah's Gems

I'm submitting this card to Love to Craft Challenge Blog - LTCCB#20 where it's Anything Goes.

Before I go, I'd like to say goodbye and best wishes for the future to Cathy who, sadly, is leaving the DT. And, at the same time, I'd like to welcome Lynn (aka Linby) to the team - so glad to have you join us. Don't forget to visit The Male Room and see lots more inspiration projects from the rest of the Design Team. You've got plenty of time to join in the fun - deadline for submission is midnight (BST) Tuesday 10th April, that's 7.00pm EDT in the States.

That's all from me for now - see you soon.

signature

Saturday 24 March 2018

Uniko - Blog Hop and Revisit ...

... Hello! Thanks so much for stopping by. It's time for our Uniko Blog Hop & Revisit. On months when there is no new release, we revisit a previously released stamp set. This month Bev has picked Fun Flowers and the newly released Fun Flowers Stencil. I had fun with both the stamp set and the stencil and ended up making two cards. Here's the first:

Make a Wish - photo by Deborah Frings - Deborah's Gems

Stamps: Uniko - Birthday Sentiments, Fun Flowers
Inks: Gina K - Lovely Lavender, Wild Lilac; Versafine - Onyx Black; Versamark
Dies: Spellbinders - Classic Scallop Border (E8-001)
Accessories: White Lustre Card; SU Card - Elegant Eggplant; Vellum; Clear Embossing Powder; Cosmic Shimmer EP: Mallow Flame Aurora, Pink Violet Blaze, Tropic Violet Lustre, Tropic Bilberry Blaze


I started by taping the stencil to white card and tapping a Versmark pad all over the panel. I removed the stencil and added several different embossing powders and heat set the powders. You can't see it in the photo, but the embossed images have a lovely lustre to them. I cut a strip of shimmer vellum on which I stamped and embossed the sentiment. I used some Spellbinder dies to cut the scallop border. I attached the sentiment strip and then layered the panel on dark purple card and adhered it to the card base. On the inside, I cut a mat layer of dark purple card and added a simple birthday greeting and some more fun flowers in lilac. I'm submitting this card to The Flower Challenge - TFC#18 where it's Anything Goes.

Make a Wish inside - photo by Deborah Frings - Deborah's GemsMake a Wish sq - photo by Deborah Frings - Deborah's Gems

My second card is smaller, being a 4-bar card:

Happy Birthday - photo by Deborah Frings - Deborah's Gems

Stamps: Uniko - Fun Flowers, Simply Said
Inks: Gina K - Blue Lagoon, Jelly Bean Green; Versafine - Onyx Black; Distress - Spun Sugar, Festive Berries
Accessories: White Lustre Card; Copic Markers; Dylusions Paint Pen; Uniko Stencil - Fun Flowers; Nuvo - Aqua Shimmer Brush; Gem

I put the stencil on the card and lightly brushed on some pale pink and red inks, concentrating the colour towards the bottom right. I stamped a flower and some leaves, cut them out with my Scan'N'Cut and added colour with Copic markers and a red Dylusion paint pen. I covered them all with a light layer of clear shimmer. I added the flower and leaves with dimensional dots. I finished the card by added a sentiment and a little gem to the centre of the flower. I was going to submit this to Less is More as they want us to use stencils, but I forgot that they also want it to be one layer!!! Oops! I've not done the inside of this card as yet.

Don't forget to visit the Uniko Blog and the rest of the Design Team, comment along the way for your chance to win a £15 eGift Certificate.


You have until midnight (BST) Saturday 7th April to comment. That's all for now - see you again soon.

signature

Saturday 17 March 2018

Good Luck ....

.... Good afternoon from a beautifully sunny, but very cold, Northville. I've had a fun morning playing in my craft room. It's St Patrick's Day today and in honour of the day, I've used a very old stamp set called Celtic Heritage to make a Good Luck card:

Good Luck - photo by Deborah Frings - Deborah's Gems

Stamps: Waltzingmouse Stamps - Celtic Heritage; Uniko - Simply Said
Inks: Gina K - Jelly Bean Green, Christmas Pine
Accessories: White Lustre Card; SU Card - Garden Green; WRMemory Keepers DP - Travel Light; SU Punches


This is a 4 bar size card - so a bit smaller than my usual. I started by stamping a lucky four leaf clover (with a hint of Celtic design) on a white circle and layered it on a scalloped dark green circle. I cut a panel of dark green card onto which I adhered some pretty patterned paper from my stash. I attached the panel to the card and added the clover panel on top. I finished the front by stamping a simple 'good luck' sentiment using words from two different stamp sets. On the inside, I cut a mat layer of the patterned paper and on the white panel added some more Celtic design elements, but left it blank for my own message. I'm submitting this card to CAS-ual Fridays Challenge - CFC#195 where they want to see greens, and also to MFT Wednesday Sketch Challenge - MFTWSC#376.

Good Luck inside - photo by Deborah Frings - Deborah's GemsGood Luck sq - photo by Deborah Frings - Deborah's Gems

A few weeks ago I sold a load of my old stamps at the annual yard sale at Scrappy Chic. It was both very sad and lots of fun going through my stash. I parted with many old wood mounted stamps that I've had for years and made room for new stuff. In the process, I rediscovered some of my old favourites - this being one! The stamp set came from Waltzingmouse Stamps (sadly now closed) that was owned by Claire Brennan. While Claire doesn't have her own company anymore, you can still get Claire's stamps from Gina K. It was so nice to rediscover some old favourites and you're probably going to see more old sets soon.

As a result of recycling so much of my stash, I have to update my catalogue system and I'm going to take the opportunity to set up an electronic catalogue too. I'm going to use the Evernote system - I've been watching an excellent video about the system by Kat Driggers - as I'll be able to see all my stash on my PC, phone and tablet! It's going to take a while, but I think it'll be worth it.

That's all for now - enjoy your weekend!

signature

Friday 16 March 2018

Uniko Challenge - Colours ....

.... Hello! Can you believe that we're halfway through March already? No, neither can I! Only a few more days until it's officially spring and then it'll be Easter before you know it. That sort of leads into today post - I'm sharing my card for the new Uniko Challenge - USC#46 where we want you to use some or all of the colours in the graphic photo and we have the option of making an Easter card. Here's my card:

Happy Easter - photo by Deborah Frings - Deborah's Gems

Stamps: Uniko - Some Bunny, Happy Succulents, Birthday Sentiments
Inks: Distress - Twisted Citron, Mowed Lawn, Salty Ocean; Versafine - Onyx Black
Accessories: White Lustre Card; Stampin' Up! DP - Daffodil Delight; Uniko Stencil - Scattered Polka Dots; Copic Markers; Spectrum Noir - Sparkle Brush; Clear Embossing Powder


As you can see, I used all the colours and made an Easter card too. I stencilled the polka dot background on the card using distress inks. I stamped the bunny on white card and coloured it with Copic markers. I put it back in the MISTI and restamped in Versafine and heat embossed with clear powder - I really like that you get a super crisp line using this method. I carefully cut out the bunny and adhered him flat to the card. I added lots of sparkle to his feet, chest, inner ear and bow tie. I finished the front by stamping a bold and simple greeting. On the inside, I cut a mat layer of yellow design paper and on the white panel added more polka dots and finished with a bold greeting. I'm submitting this card to Creative with Stamps - CWS#24 where they want us to use a bunny, and also to City Crafter Challenge Blog - CCCB#403 - they want bunnies too!

Happy Easter inside - photo by Deborah Frings - Deborah's GemsHappy Easter  sq - photo by Deborah Frings - Deborah's Gems

Don't forget to visit the main Uniko blog to see more inspiration from the Design Team (well, some of us!!) and also from our Guest Designer Michele. You'll see more from the rest of the DT when we do our reminder post in a couple of weeks.

Do you feel inspired? Well have fun, you've got plenty of time to join in, the deadline for submission is midnight (BST) on Friday 20th April, that's 7.00pm EDT in the States. And we have prizes too:

PRIZES

  • Main winner chosen by the Design Team - £25 eGift Certificate
  • Random twist winner - £4 in stock clear stamp set of winner's choosing
  • Randon Uniko stamps winner - £4 in stock clear stamp set of winner's choosing
  • Top 3 chosen by the Design Team - 150 Loyalty Reward Points
That's all for now - see you again soon.


signature

Wednesday 14 March 2018

TMR - Theme ....

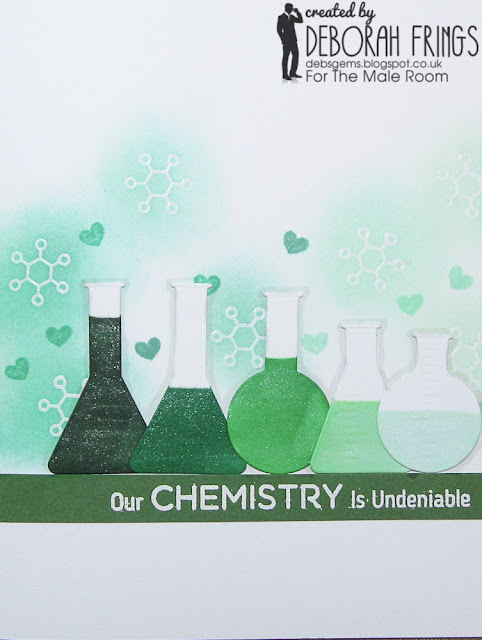
... Hello! I can't quite believe that it's been two weeks since I posted anything!! Time is going by so fast. Anyway, it's time for our new challenge at The Male Room - TMR#81. We have a fun theme, we want to see Space/Science inspired masculine projects. I actually ended up making two cards, here's the first with a science theme:

Our Chemistry - photo by Deborah Frings - Deborah's Gems

Stamps: My Favourite Things - LLD Undeniable Chemistry
Inks: Distress - Cracked Pistachio, Evergreen Bough, Lucky Clover; Versamark
Dies: Die-namics - Chemistry Set
Accessories: White Lustre Card; SU Card - Garden Green; Copic Markers; Spectrum Noir - Clear Sparkle Brush; White and Clear Embossing Powder


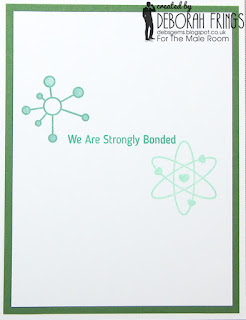
I'm submitting this card to AAA Cards - AAA#110 where they have an Ombre theme, to The Card Concept - CC#88 where they want shades of green, and to CAS(E) this Sketch! - CTS#262. I die cut several different flasks from white card and coloured them with shades of green - moving from the most concentrated to the least. I stamped some 'molecules' in Versamark on to the card base, heat embossed them with clear powder and then inked over with soft shades of green. I also stamped some little hearts in the same shades of green. I stamped a sentiment on green card in Versamark and heat embossed with white powder. I added lots of sparkle to the 'chemicals' in the flasks and adhered them to the card. On the inside, I cut a mat layer of dark green card and added a fun sentiment on the white panel with more 'chemical' symbols!!

Our Chemistry inside - photo by Deborah Frings - Deborah's GemsOur Chemistry sq - photo by Deborah Frings - Deborah's Gems

I was on a bit of a roll, so I made a second card, this time with a space theme:

Shoot for the Moon - photo by Deborah Frings - Deborah's Gems

Stamps: Altenew - To The Moon, Happy Dreams; Uniko - Reach for the Stars
Inks: Versamark; Delicata - Silvery Shimmer; Gina K - Moonlit Fog, Dark Sage
Dies: Die-namics - Circles Set 2 #5
Accessories: White Lustre Card; Stampin' Up! Card - Basic Black; Shimmer Spritz - Frost; White Embossing Powder


I made the card base from Stampin' Up! black card. I used the multi-step moon image from To The Moon to create the focal image, stamping in silver, pale grey and dark grey, and cut it out with a circle die. I spritzed the card with frost shimmer spray to give the impression of a galaxy of stars. I stamped the sentiment in Versamark and heat embossed with white powder. I finished the front by added a few larger stars in silver. On the inside, I cut a panel of white card on which I stamped another moon and added a greeting. I'm submitting this card to Less Is More - LIM#366 where they want a monochromatic card.

Shoot for the Moon inside- photo by Deborah Frings - Deborah's GemsShoot for the Moon sq - photo by Deborah Frings - Deborah's Gems

That's all from me for today. But do visit The Male Room blog to see lots more inspiration from the rest of the Design Team and also from our Guest Designer Lynda from Lynda's Crafty Hall. You've got lots of time to play along with this challenge, submission deadline is midnight BST on Tuesday 27th March, that's 7.00pm EDT in the States. Have fun!!

signature
Related Posts Plugin for WordPress, Blogger...