Saturday 30 May 2015

52CCT - Pick a Previous .....

.... Colour!!!  Hi, good morning!  We have a fifth Saturday this month, which means that we have a Pick a Previous Colour challenge for you this week at 52 {Christmas} Card Throwdown.  You can check our Colour Archive to see previous colour challenges; simply pick one, make a card and tell us which challenge you've used.  I went right back to the very first colour challenge we had in January 2012 to use black, white and a splash of red.  Here's my card:

Merry Christmas - photo by Deborah Frings - Deborah's Gems

Stamps: Stampin' Up! - Sassy Salutations, Many Merry Stars, Bright & Beautiful
Inks: Memento - Tuxedo Black; SU - Real Red
Accessories: White Lustre Card; SU Card - Real Red; Glamour Dust - Crystal


This card is about as clean and simple as it gets.  It's a one layer card featuring lots of stars, so I'm submitting it to the current challenge at One Layer Christmas Card Challenge - OLXCC#10.  I stamped stars directly on the card in black and then used my stamp-a-ma-jig to position the sentiment which I stamped in red.  To make the card more festive I used a glue pen and some ultra fine glitter - sadly not visible above.  On the inside I cut a mat layer of red card and stamped another star and a Christmas greeting on the white panel.

Merry Christmas inside - photo by Deborah Frings - Deborah's GemsMerry Christmas sq - photo by Deborah Frings - Deborah's Gems

I took a few ultra close-up photos of the card in order to show the sparkle - it really is beautiful when the sun hits the card!!  I've found that by taking a photo slightly out of focus, you can just about see the shimmer and shine.

Merry Christmas 1 - photo by Deborah Frings - Deborah's GemsMerry Christmas 2 - photo by Deborah Frings - Deborah's Gems

So visit our blog to see which colour challenges the rest of the team have picked.  You've got plenty of time to join in the fun - deadline for submission is midnight (UK) Friday 5th Jun, that's 7.00pm EDT for those of us in the States.  Have fun!!

signature

Thursday 28 May 2015

Sweet thanks ....

.... Hello again!  I did do some house stuff - honest!!!  But I decided to take a short break as this idea has been buzzing round my head since I got up, and I just had to make the card:

Merci Beaucoup - photo by Deborah Frings - Deborah's Gems

Stamps: Avery Elle - Bonjour
Inks: Stampin' Up! - Strawberry Slush, Tangerine Tango, Daffodil Delight, Coastal Cabana; Versafine - Onyx Black
Dies: Avery Elle - Bonjour
Accessories: White Lustre Card; Kaisercraft DP - Oh So Lovely, Blue Bay


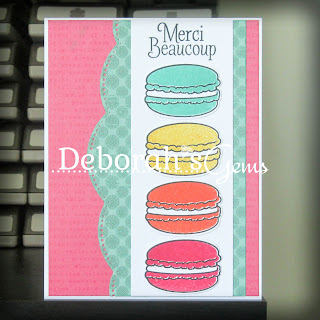
Two of my favourite challenges have extended the deadlines on their recent challenges - which is good for me as I can play along!!  I've used the sketch from Retro Sketches - RS#165 and the yummy colours are from Colour Q - cQc#292.  I stamped the outline image of the macaroon four times in black and then over stamped each one with the solid image to create four different colour macaroons.  I cut them out with the matching die.  I found some design paper in my stash that is close to Strawberry Slush and I cut a piece slightly smaller than the base to cover the card.  Then I found this lovely green paper - I used a border die to cut the fancy edge and adhered it to the card.  I cut a strip of white card, attached it to the card and adhered the macaroons.  I finished with a sweet sentient.  On the inside I cut a mat layer of the green design paper and stamped a small macaroon on the white panel.

Merci Beaucoup inside - photo by Deborah Frings - Deborah's GemsMerci Beaucoup sq - photo by Deborah Frings - Deborah's Gems

You know when you have an idea in your head, and sometimes it doesn't quite work out, well this is NOT one of those times.  This is exactly what I had in my head!!

And now I suppose I'd better get back to the ironing - it won't magically do itself!  See you tomorrow!

signature

Some photos today ....

... Good morning!  No card to share with you this morning, just a few photos.  Kathryn and I went to Washington DC with the school over the weekend of 16th - 18th May.  It was a super trip and, according to the pedometer on my phone, we walked about 28 miles over the three days.  My ankles are still recovering!!  We visited so many places that it was hard to remember them all - three days is not enough time to do the place justice!  Here are a few photos from the trip.

Washington DC 1 - photo by Deborah Frings - Deborah's Gems

Walking towards the Washington Monument first thing Saturday morning, 16th May.

Washington DC 2 - photo by Deborah Frings - Deborah's Gems

The kids found an air vent and had fun!!

Washington DC 3 - photo by Deborah Frings - Deborah's Gems

Group shot - taken at the Newseum - highly recommend this place.

Washington DC 4 - photo by Deborah Frings - Deborah's Gems

Well, you can't go to DC and not take a photo of the White House!!!  It's smaller than you expect!


Washington DC 5 - photo by Deborah Frings - Deborah's Gems

Our last visit on Saturday was the Air Force Memorial - it's absolutely huge and I could only manage to photograph the top!

Washington DC 6 - photo by Deborah Frings - Deborah's Gems

Sunday - we spent several hours at Arlington National Cemetery.  

Washington DC 7 - photo by Deborah Frings - Deborah's Gems

United States Marines Memorial, also called Iwo Jima Memorial - amazing sculpture.

Washington DC 8 - photo by Deborah Frings - Deborah's Gems

Vietnam War Memorial with the Washington Monument in the background.

Washington DC 9 - photo by Deborah Frings - Deborah's Gems

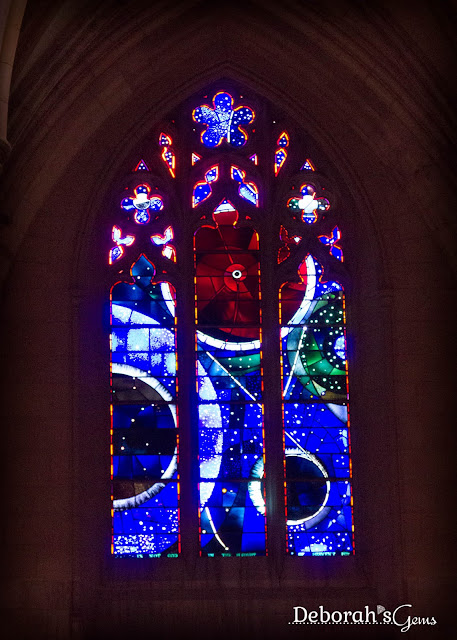
The Space Window at Washington National Cathedral - it's absolutely stunning!

Washington DC 10 - photo by Deborah Frings - Deborah's Gems

Our last visit on Monday afternoon was Washington Zoo - we didn't have long there, but it was fun in the small mammal house!

I took lots more photos that then ones I've shared here.  If you would like to see them all click on the links below:


I'm going to finish with a few photos from a shoot last weekend.  I've been wanting to work with these ladies, two amazing dancers, since last year, but for various reasons it's taken until now to manage it!  This is Cindy:

Dance Shoot Cindy 1 - photo by Deborah Frings - Deborah's Gems

Dance Shoot Cindy 2 - photo by Deborah Frings - Deborah's Gems

Dance Shoot Cindy 3 - photo by Deborah Frings - Deborah's Gems

You can see more from this first set (yes, lots more to come) by clicking on this link.

That's all for now.  Today I really do have to catch up with some housework!!!  See you soon.

signature

Wednesday 27 May 2015

TMR - Stash

....  Morning!!  I can hardly believe it's almost the end of May, this year is simply flying by.  However, it does mean that it's time for our new challenge at The Male Room.  This time we have a stash challenge.  I don't know about you, but I have loads of Washi Tape in my craft room, but I don't seem to use it very often.  So our challenge this month is to make a masculine project using Washi Tape.  Here's my card:

Enjoy - photo by Deborah Frings - Deborah's Gems

Stamps: PTI - Phrase Play #4
Inks: Stampin' Up! - Tangerine Tango
Dies: PTI - Phrase Play #4
Accessories: White Lustre Card; SU Card - Basic Black; Washi Tape


Enjoy inside - photo by Deborah Frings - Deborah's GemsI actually had lots of fun playing with the Washi tape.  I covered a scrap of white card with diagonal strips of two different tapes.  I used a die cut and cut one in black, one in white and one from the Washi panel.  I covered the corner of the card with some more of the Washi tape.  I used the in-laid die technique to put the Washi covered letters back in the die panel and then adhered the lot to the card.  I stamped the sentiment in orange on the white piece and then adhered that back in the panel.  Clean and crisp.  On the inside I cut a mat layer of black card and on the white panel adhered a strip of the coloured Washi tape, leaving lots of space for my message.

Chris has joined us again as our Guest Designer - she has a super card for you.

Sadly, we are saying goodbye to Vicki as a member of the Design Team.  Vicki and I started on the team at the same time, so I'm sad to see her go.  She and her husband are off to do lots of travelling, so hopefully, we'll see Vicki back playing along with us from time to time. 

Do drop by our blog and check out the fabulous inspiration cards from Chris, Vicki and the rest of the team.  You've got until Tuesday 9th June to play along with us.  Have fun!!

signature

ASM - Anything Goes ....

.... Good evening.  It's time for our ever popular ANYTHING GOES challenge at Addicted to Stamps and More!  I've been busy working on some art journal pages - I've got lots of backgrounds prepared, so I decided to create some pages!  I posted my first finished page yesterday, and today I've a fun and funky dance themed page:

Dance Club Witch - photo by Deborah Frings - Deborah's Gems

Stamps: Rick St Dennis Digi - Dance Club Witch; Dylusions - Say What You Mean, Doodle Parts, Shrooms; Cas-ual Friday Stamps - Love Notes, Big Treble; Stamper's Anonymous - Brett Weldele Racer Girl
Inks: Archival - Jet Black, Plum; Distress - Shabby Shutters; Versafine - Deep Lagoon, Spanish Moss; Memento - Tuxedo Black; Dylusions Inks - shades of pink
Accessories; White Lustre Card; Copic Markers; Wink of Stella - Clear; White Gel Pen; Stencils - Various

I started by printing the wonderful Dance Club Witch - a very fun and funky young lady - on white card, coloured with Copic markers and cut out with a scalpel.  The background was prepared in class using three shades of pink Dylusions inks and a variety of stencils.  I randomly stamped some stars and music themed images to add more depth.  I stamped the shrooms on white card, coloured them with Copics and adhered them to the page.  I found a fun sentiment that seemed to be perfect for the page, stamped it on white card and coloured over with shades of green.  After adhering all the elements I drew round them with a black marker.  I finished the page by adding some clear Wink of Stella to the witch's outfit, the mushrooms and the clefs.   Here's a close up showing the sparkle on the mushrooms and witch.

Dance Witch detail 1 - photo by Deborah Frings - Deborah's GemsDance Witch detail 2 - photo by Deborah Frings - Deborah's Gems

 Don't forget to visit the blog to see what the rest of the team have made today.  Have fun!

Edited:  Oops!  I completely forgot to tell you that Addicted to Stamps and More! is having a DT Call - full details here!

signature

Monday 25 May 2015

Mixed media ...

....  Good afternoon.  I hope that everyone has had a good holiday weekend.  We've had a super time.  I picked up my new car on Saturday - it took a while, but was worth it.  On Sunday we all went to a photo shoot with two ballet dancers - it was such fun and I'll get the photos up soon.  And today, while Kathryn has been out with a friend, Jonathan and I went to the cinema this morning to see Mad Max and this afternoon I got to play in my craft room.

At the beginning of March I went to a craft class with the wonderful Dyan Reaveley and learnt lots of techniques using her Dylusions sprays.  I left the class with an art journal that I started and several loose sheets that had backgrounds ready for further work.  This afternoon I finished my first art journal page - was such fun:

Naughty list - photo by Deborah Frings - Deborah's Gems

Stamps: Rick St Dennis Digi - I Love My Prezzies; Dylusions - Christmas Words; Waltzingmouse - Festive Foliage
Inks: Archival - Jet Black
Accessories: White Lustre Card; Dylusions Sprays; Copic Markers; Wink of Stella - Clear; Crafter's Companion Spray 'n' Sparkle - Iridescent; Stencils - various

I was browsing through Rick St Dennis's Zibbet shop this morning and found some super new digital images and I was fully intending to colour them in this afternoon, but I stumbled across this lovely lady already in my stash of RSD digis!  How could I have missed her? 

The background was created using three shades of Dylusions spray and several different stencils.  I decorated the edge of the page with some solid black holly leaves as well as a number of outline leaves which I coloured with Copic marker.  I printed the image on white card and coloured her with Copic markers.  I wanted her to really stand out against the background, so I picked a soft pink for her dress, which I distressed with a light grey marker.  And then I had fun colouring the parcels at her feet - bold and bright and very scary too!  Here's a close up of the main image:

Naughty List details - photo by Deborah Frings - Deborah's Gems

Dyan has created wonderful sentiment stamps - and I found all three on her Christmas words set - I think they are absolutely perfect for this naughty girl!!!  I stamped the sentiments on white card, coloured them with Copics and then cut them out and adhered them to the page.  I finished the page by lightly distressing the edges and adding some iridescent spray - which sadly doesn't show up on the photo.

If you're wondering about the images I picked to play with they are Dance Club Witch - a fun and funky young witch (and I'll be back with something featuring her tomorrow) and Zombie Holiday Showgirl - another somewhat quirky image, but I think she's fab!  I'll have a finished piece featuring the showgirl soon.

signature

Sunday 24 May 2015

SNG - Sending hugs ....

.....  Good morning!  It's my turn to showcase one of Rick St Dennis's fabulous images today on Sparkle and Glitter.  I think you all know that I really like Rick's wonderful Hat Ladies, so here's another in the series:

Sending Hugs - photo by Deborah Frings - Deborah's Gems

Stamps: Rick St Dennis Digi - May Lily of the Valley; Winnie & Walter - The Big, The Bold & Friends, Sparkle
Inks: Stampin' Up! - Real Red; Versafine - Onyx Black
Dies: Spellbinders - Labels 25 (S5-077) #4
Accessories: White Lustre Card; SU Card - Bermuda Bay; SU DP - Real Red; Copic Markers; Wink of Stella - Clear


The challenge at Just Us Girls - JUGS#294 is a photo inspiration and I've taken the colours of red, aqua and white from the photo.  I coloured the image with Copic markers, added some Wink of Stella sparkle to her eyeshadow and the little flowers.  I know that the flowers in this image are lily of the valley, but I decided to make them redbells!!  I used an elegant die to cut out the image.  I cut a mat layer of dark aqua card, layered on some red design paper and adhered the image flat and towards the top of the card.  I finished the front with a bold and simple sentiment.  On the inside I cut another mat layer of aqua card and added a simple greeting on the white panel.

Sending Hugs inside - photo by Deborah Frings - Deborah's GemsSending Hugs sq - photo by Deborah Frings - Deborah's Gems

I do like Rick's lovely ladies - you can this image and many, many more at Rick's Zibbet shop.  That's all for now, see you soon.

signature

Saturday 23 May 2015

52CCT - Stash ....

....  Good morning all!  It's been a bit quiet here - still recovering from a fabulous trip to Washington DC and my brain just hasn't got back into the groove!!!  Anyhow, it's time for our Stash challenge at 52 {Christmas} Card Throwdown and Patricia would like us to use ribbon on our cards.  I have a huge selection of ribbon and really don't use it often enough!  Here's my card:

Christmas Tag - photo by Deborah Frings - Deborah's Gems

Stamps: Waltzingmouse - Yonder Star Background, Opera Tags Christmas, Alpine Christmas
Inks: Stampin' Up! - Cucumber Crush, Mint Macaron, Real Red
Dies: Spellbinders/WMS - Opera Tags
Accessories: White Lustre Card; SU Card - Cucumber Crush, Real Red; SU Ribbon - Real Red; Black/White Bakers Twine


I made a tag for my Christmas card.  I used a couple of the new in-colours from Stampin' Up! and paired them with bright red - a very festive combination.  I cut a mat layer of bright green card, and stamped a background pattern in mint green on the white card.  I stamped the tag in green, cut it out with the matching die and added a sentiment in red.  I layered the tag on red card, cut around to leave a thin red border and added a bold red ribbon.  I used dimensional tape to attach the tag to the card.  On the inside of the card I cut a mat layer of red card, stamped a Christmas greeting in green and finished with some mint green snowflakes.

Christmas Tag inside - photo by Deborah Frings - Deborah's Gems

For more inspiration using ribbon on your cards, check out the blog to see what the rest of the team have made.  Have fun!!

signature
Related Posts Plugin for WordPress, Blogger...