Saturday 28 January 2017

Warm Winter Wishes ....

.... Good morning! Winter's back! We had some snow yesterday - not a lot, but it was quite cold and it gave me an idea for a Christmas card:


Stamps: Stampers Anonymous Tim Holtz - Fresh Brew; Uniko - Simply Said Christmas, Stunning Snowflakes
Inks: Stampin' Up! - Early Espresso; Distress - Tumbled Glass
Dies: Sizzix - Coffee Cup
Accessories: Cream Lustre Card; SU Card - Early Espresso; SU Punch; Copics; Spectrum Noir Sparkle - Clear


I got the idea for the card from this week's Merry Monday Challenge - MM#232 where they have a fun inspiration photo. I made the base from dark brown card. I cut a panel of cream card slightly smaller and embossed it with coffee cups, rounded the corners and lightly inked the edges. I adhered it flat to the card. Next I stamped the cup coffee on a cream tag. I did two more copies - one on white card where I coloured the cup band and added a logo, and one on cream which I die cut out. I randomly stamped some snowflakes on the tag, and then adhered the cup and band. I finished the tag by edging it with a brown marker and adding a ribbon. I finished off with a fun greeting. On the inside I cut another panel of cream card, stamped a Christmas greeting and added a few more snowflakes.

Warm Winter Wishes inside  - photo by Deborah Frings - Deborah's GemsWarm Winter Wishes sq - photo by Deborah Frings - Deborah's Gems

We're half-way through our colour challenge at Christmas Card Throwdown - CCT#02 to use AQUA, BROWN AND CREAM. I decided that these colours worked perfectly for this card. You've still got plenty of time to join in with us - deadline for submission is midnight (GMT) Friday 3rd February, that's 7.00pm EDT.

I'm also submitting the card to Simon Says Wednesday Challenge - SSWC2501 where the theme is ANYTHING GOES.

That's all for now - I'm planning to spend the day in my craft room. Not sure whether it's going to be cards, art journal or, perhaps, some tidying up! Jonathan is off to a photo shoot and Kat is planning to chill - it was tough last week with her finals. Have a good weekend, see you soon!

signature

Friday 27 January 2017

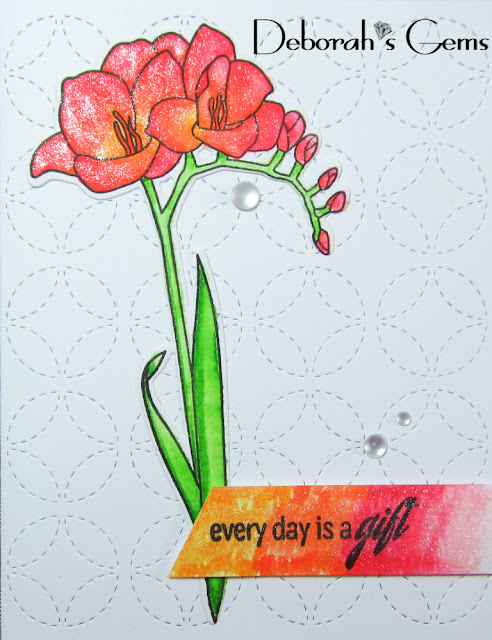
Every day - a gift ....

... Morning! I've just got back from taking Kat to school. It's colder than recently and there were tiny snowflakes falling as I drove home - it is very pretty, but I hope it doesn't last long! I'm here with a clean, simple and very bright card:

A Gift - photo by Deborah Frings - Deborah's Gems

Stamps: Altenew - Fresh Fressia
Inks: Versafine - Onyx Black; Memento - Tuxedo Black
Dies: Altenew - Freesia; Lil Inkers - Circles and Diamonds Stitched Cover Up
Accessories: White Lustre Card; Tim Holtz Water Colour Card; Stampin' Up! Card - Tangerine Tango; Zig Clean Colour Brushes; Spectrum Noir Sparkle - Clear; Gems; Copics


Stampeddler, my local craft shop, has recently started stocking Altenew - I'm pleased, but it does mean that I've got some more new stamps for my stash! One of my all time favourite flowers is the freesia - I love the pretty flowers and the wonderful scent, so I had to get the stamp set. I've used it here on this card.

I used a cover plate to die to cut the all over pattern on the card base. I stamped the flower on water colour card and used my Zig brushes to colour it, cut it out with the matching die and added sparkle to the petals with a clear brush. I adhered it flat to the card base. I made the sentiment panel from a scrap of water colour card. I stamped the sentiment, scribbled three colours over it and used my sparkle pen to spread them out. I adhered it with dimensional tape. I finished the front by simply adding a few frosty gems. On the inside I cut a mat layer of orange card and on the white panel stamped another flower and a greeting. I used Copics to colour the flower.

A Gift inside - photo by Deborah Frings - Deborah's GemsA Gift sq - photo by Deborah Frings - Deborah's Gems

I'm submitting this card to Paper Players - PP#328 where they want a flower on our CAS project. Also to The Card Concept - CC#65 where I was inspired by the bold colours and the pattern on the cushion. Finally, I'm also playing along with Addicted to Stamps and More! - ATSM#226, where it's ANYTHING GOES.

I don't normally make any type of new year resolutions, but this year I am determined to work more on my art journal - so you'll be seeing much more of that. However, it does mean that I'll have less time to spend on cards! I had fun making this one.

That's all for today. It's end of semester for Kat and she's had final exams all week. Today are her last two exams - she's been working really hard and has done well so far. As a treat and to help her relax, we are spending some girl time together this afternoon. We're having a massage, foot rub and some aromatherapy - should be bliss!!! See you soon.

signature

Tuesday 24 January 2017

Art Journal Index ....

.... Hi! I've had another fun day working on my Joggles Art Journal Adventure. Yesterday I shared the cover for the 2017 journal and today I've made an index for the journal.

Index - photo by Deborah Frings - Deborah's Gems

Supplies:
Archival Ink - Jet Black
Dylusions Paints - Lemon Zest, Fresh Lime, Dirty Martini, Black Marble
Dylusions Stamps - Further Around the Edge
Stampin' Up! - Layered Letters Alphabet
Joggles Stencil - Starlight
Dylusions Stencils - Holes (lg), Stars (sm)
Pitt Pens
Signo - White Pen
Rooster image from Internet

The January challenge at the Facebook Dylusions Challenge is to use Lemon and Lime - Dots and Dashes - so I decided to use that as the main inspiration for the spread. I used baby wipes to apply the paint to the page - I just love how quickly this paint dries. Next I added some depth by lightly stencilling on some patterns. I used the Joggles starlight stencil to carry the design from the cover, and added some Dylusions bubbles and smaller stars. I added a dot-dash border around the edge of the spread. Then I stamped the word INDEX in black archival ink, added some white dots for fun and then drew the lines on the page. I added a few dot and dash extras too. I finished the page by adding a smaller rooster to match the one on the cover page.  Here are a couple of close-up photos of the index pages:


I'm going to submit this spread to Love to Craft Challenge - LTCC#6 where the theme is Anything Goes. That's all for now! It's time to make a start on dinner!

signature

Monday 23 January 2017

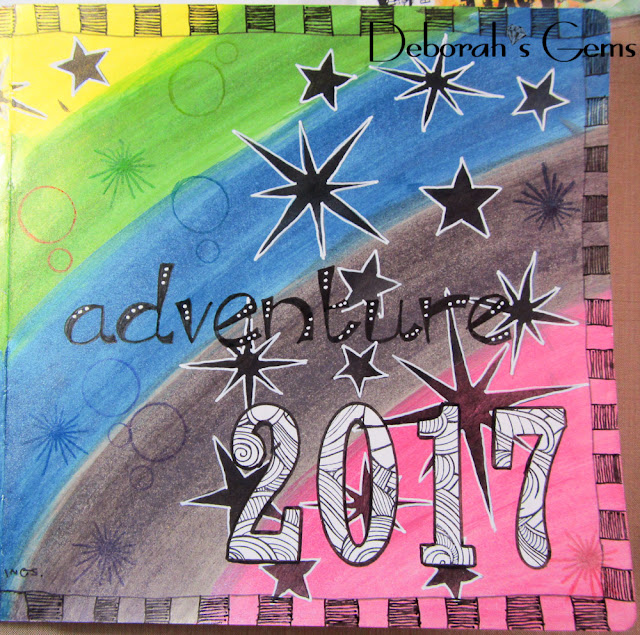
Art Journal 2017 .....

..... Good afternoon! Last year I joined the Joggles Art Journal group on Facebook. It is a closed group, but if you're interested you can ask to join the fun. I didn't end up doing anything with the prompts last year, but saw some wonderful work from other artists.

Barb and Bonnie both created lovely covers for their journals and have inspired me to have a go. As always, I'm not exactly up to date, but here's my cover for the 2017 Joggles Art Journal Adventure. I decided to use one of my square Dylusions journals for the project.

AJ Cover - photo by Deborah Frings - Deborah's Gems

Supplies:
Archival Inks - various
Art Alchemy Paints - various
Dylusions Paint - Black Marble
My Favourite Things - Wavy Colouring Book
Visible Image - Rays of Light
Dylusions - Word Love
Stampin' Up/Sizzix - Large Letters & Numbers Dies
Joggles - Stencil Starlight
Copics
Pitt Pens - various
Signo - White Pen
Rooster image from Internet

The rooster comes from the fact that it's the Chinese Year of the Rooster and both Bonnie and Barb have used one one their covers. I didn't have any pictures or stamps, but found this fun rainbow rooster on the internet. I printed him on white card, added extra colour with Copics and then cut him out. His rainbow tail gave me the inspiration to create a rainbow background.

I used Art Alchemy paints which have a metallic sheen to create the rainbow, applying the colours with wet wipes. I stencilled a large sun to the left side of the page and added some stars to the rest of the layout. I used my large colouring book background from MFT, stamped it in black on to white card and then die cut the word ART and the year 2017. I kept them black and white to stand out from the rainbow background. I used a Dylusions stamp for the word JOURNAL and then wrote JOGGLES and ADVENTURE by hand. I added some random circles and starbursts using archival inks. I used a strong adhesive to attach the letters and numbers and then outlined them with Pitt pen. I finished the page by attaching the rooster, outlining him with a black aquarell pencil and added some words about rooster characteristics. Finally, I drew a border with a black Pitt pen.

Here are some close-ups photos of each page and the rooster characteristics:

AJ Cover 1 - photo by Deborah Frings - Deborah's Gems

AJ Cover 2 - photo by Deborah Frings - Deborah's Gems

AJ Cover 3-  photo by Deborah Frings - Deborah's Gems

I had lots of fun creating this page and am really looking forward to working on pages for the next few prompts:

  • Texture
  • Mug shot
  • Feature a door(s)
That's all for now. I've had a fun morning finishing up this spread, but I really have to get down to some house work now! Ugh!!! See you soon.


signature

Sunday 22 January 2017

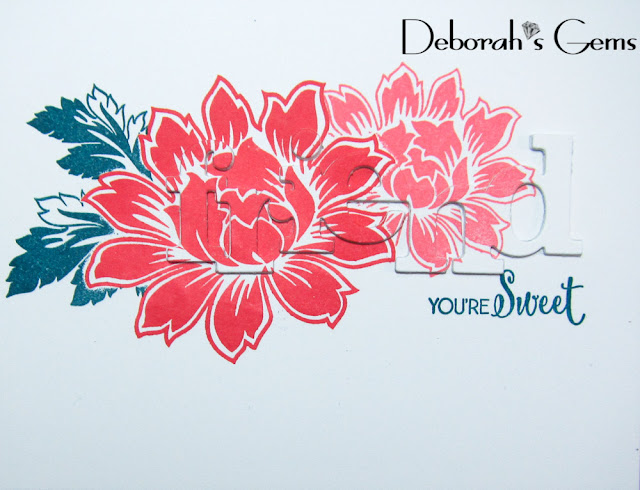
Uniko - Friend You're Sweet .....

.... Good morning! I'm running late with my DT card for our new challenge at Uniko - Anything Goes with the option of Love, so I'm combining my card with my Uniko DT Inspiration post. Here's a quick peak of the card:


I'm submitting this card to acouple of challenges. I've used the colours from this week's CAS Colours & Sketches - CASC&S#206 and over at CASology - CAS#232 the cue word is CUT. I have used several die cuts here to create the hidden word. I had such fun with this technique.

Friend You're Sweet - photo by Deborah Frings - Deborah's Gems

Stamps: Uniko - Beautiful Blooms 1, Pure Floral Cosmos
Inks: Stampin' Up! - Island Indigo, Flirty Flamingo, Watermelon Wonder
Dies: Winnie & Walter - Friend Cutaway
Accessories: White Lustre Card; SU Card - Flirty Flamingo


Details of how I made this card can be found over at Uniko today along with step-by-step photos of the process. Here's a look at the inside of the card:

Friend You're Sweet inside - photo by Deborah Frings - Deborah's GemsFriend You're Sweet sq - photo by Deborah Frings - Deborah's Gems

No more card-making for me today! Instead Jonathan and I are off to our other passion - photography. Have a fun day!


Edited to add: that I'm also playing along with Darnell's wonderful - NBUS#9 Challenge. This is where Darnell gets us to use stuff from our stash that has never been used before - well, this was the first outing for the die! And, as luck would have it, I also used the hidden word technique on this card which is one of the options that Darnell suggest we try!

signature

Saturday 21 January 2017

CCT - Colours ....

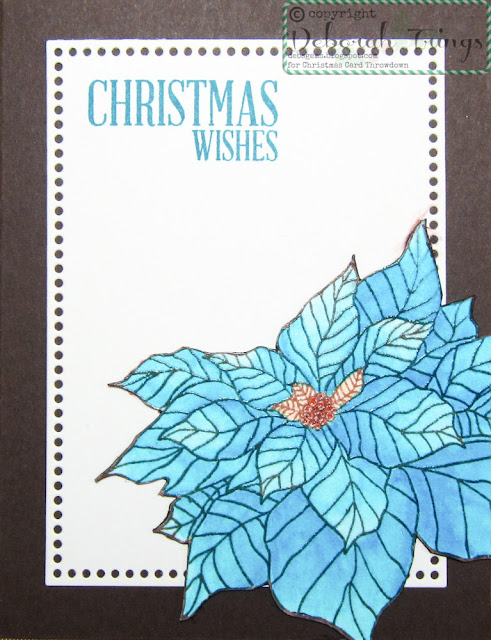
.... Morning! Huge apologies to my team mates, I'm running late with my DT card for our new challenge at Christmas Card Throwdown - CCT#02. We have some wonderfully warm colours for you to use on your cards for the next couple of weeks - CREAM, AQUA AND BROWN - and only these colours. My mojo took a holiday last week, but I dreamt this card last night - here it is:

Christmas Wishes - photo by Deborah Frings - Deborah's Gems

Stamps: Uniko - Pure Florals Poinsettia, Simply Said Christmas, Most Wonderful
Inks: Versafine - Antique Sepia; Stampin' Up! - Tempting Turquoise
Dies: Lil Inkers - Dotted Rectangles #3
Accessories; Cream Lustre Card; SU Card - Early Espresso; Tim Holtz Water Colour Card; Zig Clean Color Brushes; Spectrum Noir Sparkle - Clear; Clear Embossing Powder


I love this gorgeous poinsettia image. Using my MISTI I stamped it in brown Versafine ink on water colour card, coloured it with Zig water colour brushes and a clear spectrum noir brush - such a shame you can't see all the sparkle - it's so pretty. Once completely dry, I put the image back in the MISTI and stamped it again, added clear embossing powder and heat set it. I like doing this as it gives really clean, crisp lines. I then fussy cut the flower. I created the base from dark brown card and die cut a panel of cream card using the dotted die. I added a simple Christmas greeting at the top of the panel. On the inside I cut another panel of cream card on which I stamped the outline poinsettia again, adding just a touch of colour to the centre. I finished with a Christmas message.

Christmas Wishes inside - photo by Deborah Frings - Deborah's GemsChristmas Wishes sq - photo by Deborah Frings - Deborah's Gems

I'm submitting this card to the new challenge at Addicted to CAS - ATCAS#103 where the cue word is WISH - well, I've got wishes, but that should be okay. So glad my mojo is back!

Don't forget to visit Christmas Card Throwdown to see more inspiration cards from the rest of the Design Team - they have made such lovely cards. You've got plenty of time to join the fun - deadline for submission is midnight (GMT) Friday 3rd February - that's 7.00pm EDT.

signature

Thursday 19 January 2017

TMR - Stash ....

... Afternoon everyone! I don't quite know what's happened this month, my mojo seems to have taken a bit of a hike. I'm not sure whether it's back or not, but at last I do have my design cards for our new challenge at The Male Room - TMR#52. For the next couple of weeks we want you to use some of the Washi tape stash you have (I've got lots and lots). Here's my first card:

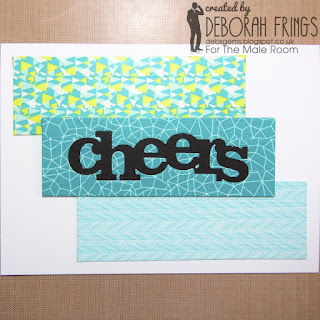
Cheers - photo by Deborah Frings - Deborah's Gems

Stamps: Visible Image - Rock Out; My Favourite Things - Kind Thanks
Inks: Distress - Twisted Citron; Stampin' Up! - Island Indigo
Dies: Winnie & Walter - Cheers Cutaway
Accessories: White Lustre Card; SU Card - Island Indigo, Basic Black; Washi Tape


I found three co-ordinating Washi tapes from my stash and used them to cover some scrap white card and create my own design card. I used a die to cut the word "cheers" from one panel, adhered some black card behind and glued back the bits that normally we throw away. So the sentiment is the negative cut. On the inside I cut a mat layer of teal card and on the white panel added some graffiti style stars and a greeting. I used the sketch from Match the Sketch - MTS#160 for the layout of this card.

Cheers inside - photo by Deborah Frings - Deborah's GemsCheers sq - photo by Deborah Frings - Deborah's Gems

As I used the negative of the die cut on my first card, I decided to make another card using the actual die cut.

Cheers 2 - photo by Deborah Frings - Deborah's Gems

Stamps:Visible Image - Rockout, Teenage Kicks
Inks: Distress - Twisted Citron
Dies: Winnie & Walter - Cheers Cutaway
Accessories: White Lustre Card; SU Card - Island Indigo, Basic Black; Washi Tape; Doodlebugs Sprinkles - Black


I used the sketch from the new Freshly Made Sketches - FMS#271 for the layout, but flipped it. I stamped a brick wall background, added a border of black card and adhered the die cut word. I finished the front with a few black enamel dots. On the inside I cut a mat layer of teal card and on the white panel added a fun image - perfect for a teenage boy. I'm submitting this card to AAA Cards - AAA#81 where they want to see cards to say Hello, Hi or whatever word you use to say Hi - so cheers!

Cheers 2 inside - photo by Deborah Frings - Deborah's GemsCheers 2 sq - photo by Deborah Frings - Deborah's Gems

These cards hardly made a dent in my Washi tape stash. I really must use it more often. Do visit The Male Room blog to see more inspiration projects from the rest of the team. You've plenty of time to join in with us - deadline is midnight (GMT) Tuesday 31st January - that's 7.00pm EDT for those of us this side of the pond! Have fun!

signature
Related Posts Plugin for WordPress, Blogger...