Sunday 28 February 2021

O Christmas Tree ....

.... Hello again! I've ended February with an almost full week of cards - go me!! Today I'm sharing a Christmas card. It's never to early to start on your stash for this year - it makes thing so much less frantic in November!! This card is a bit out of my comfort zone.


Stamps: Visible Image - O Christmas Tree, Sentimental Christmas
Inks: Distress - Black Soot, Chipped Sapphire, Shaded Lilac, Tumbled Glass, Shabby Shutters, Twisted Citron; Versafine - Onyx Black; Memento - Lulu Lavender
Accessories: White Card; Clear Embossing Powder; Imagine Crafts - Frost Sheer Shimmer Spritz; Tim Holtz Stencil - Stars THS115; Viva - Iridescent Glitter Paste

I'm submitting this card to Just Us Girls - JUGS#573 - that inspiration photo is just gorgeous and inspired my ink blended background. I'm also playing along with 52Christmas Card Throwdown - 52CCT08-21 where they want Mixed Media on your card - done!! Finally, I'm joining in with Merry Little Christmas Challenge Blog - MLCCB#31 where it's Anything Christmas Goes.


I used a top-folding A2 card for the base. I used several shades of Distress ink to blend the background. I used Tim's water drop method to add some subtle dot texture on the background and then I spritzed the whole thing with frost shimmer spray - it's absolutely beautiful in sunshine!! Once the background was dry, I stamped the Christmas tree in black Versafine ink and heat embossed with clear powder. To give better definition of the tree, I repeated this step (one of the great things about using a MISTI). I finished the front by applying a layer of iridescent glitter paste through a Tim Holtz star stencil. On the inside, I stamped a Christmas greeting in black and added a tiny lilac start.


I took a photo of the card in direct sunlight - you can really see all the shimmer and sparkle - so pleased with it.


Isn't it wonderful how much better everything feels when the sun shines? And getting decent photos is a real plus too! I'm very pleased how this turned out. I don't usually go full mixed media on a card, but this was fun. That's all for today. Hope to see you again soon.

signature photo Signature.png

Saturday 27 February 2021

Coffee Time ...

... Hello again! I've had a super afternoon, playing with stamps and ink - something I've not done for a while. I've got a couple of cards with coffee theme to share. My first card also celebrates the 9th birthday of one of my favourite stamp companies - Uniko. I've been a fan of Bev's designs since she started the company and I've also been lucky enough to be on her design team too. This card is for Bev:


Stamps: Uniko - I Love Coffee, Originally Organic
Inks: Versamark; Gina K - Stormy Sky
Dies: Honey Bee - Coffee Cup Card
Accessories: White Card; SU Card - Crumb Cake; Vellum; Copic Markers; Silver Embossing Powder

I'm submitting this card to Bev's Uniko 9th Birthday Bash - US9BD.


I used Honey Bee's large coffee mug die to cut out the card. I used some kraft card for the cup lid and stamped lots of little coffee beans over it in Versamark. On the main mug I stamped the beautiful Originally Organic flower - this is a favourite of mine. I coloured it with Copic markers paying homage to Uniko's house colours. I embossed the finished image with silver powder. I cut the cup holder in vellum as I didn't want to hide the pretty image when it is put over the mug. On the inside, I stamped a simple and heartfelt sentiment in grey.


My next card kind of sums up how I feel at the moment. This third lockdown has really gotten to me, as it has to many, and this just made me feel better:


Stamps: CAS-ual Friday Stamps - Cup of Coffee, Hot Coffee, Peace, Love & Coffee; Stampendous - Coffee Background
Inks: Gina K - Warm Cocoa; Memento - Rhubarb Stalk
Dies: CFS - Coffee Cup
Accessories: White Card

I'm submitting this card to Caffeine Fueled Paper Play - CFPP#02 (a challenge I've been meaning to play along with for ages), and to Never-Before-Used-Schtuff - NBUS#23.


I've not used any of the coffee themed stamp sets that I have from CAS-ual Friday, so it's been fun to give them an outing! I stamped the background image using soft brown ink - it has lots of wonderful coffee quotes. I stamped the coffee mug on white card and added this brilliantly snarky sentiment. Absolutely perfect for how I'm feeling! I used the matching die to cut out the mug and adhered it to the front of the card. On the inside, I simply stamped another sentiment and added a tiny coffee mug.


I really do think that's it from me today. The sun is just starting to go down behind the houses over the road. It's been a beautiful bright day and I've played inside - my idea of fun. See you tomorrow!

signature photo Signature.png

Perfect Moment ...

.... Good afternoon! Yes, I'm posting again! I've been having fun just playing along with various challenges. So, today I have a rather quirky card to share:


Stamps: Stamp Mania - Mexican Pottery Set; Visible Image - Take the Moment, The Ripple Effect
Inks: Versafine - Onyx Black; Stampin' Up! - Mint Macaron, Mossy Meadow; Verafine Claire - Nocturne
Accessories: White Card; Copic Markers; Sakura Stardust Pens; Nuvo Clear Aquashimmer Brush; Clear Embossing Powder

I'm submitting this card to Fab Friday - FABF#208 - where they have these lovely colours, and to Addicted to CAS - ATCAS#192 where the cue word is Animal. 


I love this lizard image and I think he's perfect for the animal element of my card. I used my MISTI to stamp him on white card. I removed the image and coloured it with Copic markers. I then returned the image to the MISTI and restamped in black Versafine ink and heat embossed with clear powder. This technique is one of my favourites because it gives such a lovely crisp, clean image. I then very carefully fussy cut him out. I used a top-folding A2 white card and stamped a subtle background directly onto the card. I adhered the lizard, onto which I have added some shimmer, and then added a sentiment. On the inside, I finished the message in bold black and stamped the lizard again in dark green ink.


I really like this inspirational message. For the moment, the card is going into my stash but I think I know where its eventual home will be. 

I've got a couple more cards in progress, so I'm going to make the most of a nice quiet Saturday afternoon and work on them. See you again soon.

signature photo Signature.png

Friday 26 February 2021

Happy Birthday Friend ...

.... Good afternoon. It's a gorgeous day here in Northop Hall. Mum is in the garden putting in some new plants she bought and I've been playing in my craft room. Well, it's my happy place. Today, I've made a large birthday card for a friend of mine;


Stamps: Stampendous - Agapanthus Thanks; Woodware - Countryside Stems, Huge Friend
Inks: Versafine - Onyx Black; Gina K - Turquoise Sea
Dies: Spellbinders - 5x7 Modern Stationary (S6-013) # 6 & #7
Accessories: White Card; DP from stash; Copic Markers; Clear Embossing Powder

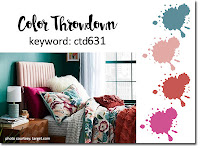
I'm submitting this card to AAA Birthday - AAAB#22 where they want to see a large sentiment, and to The Color Throwdown - CTD#631.


I love this big, bold friend word. I used the fancy die cut to cut a mat layer of turquoise design paper (no idea who made it) from my stash and a piece of white card. I positioned the word 'friend' in the centre of the white card and stamped it. I removed the card from my MISTI and coloured the letters with Copic markers. I returned the card to the MISTI, restamped in Versafine black ink and heat embossed with clear powder. I then stamped little message above in turquoise and stamped some agapantha flowers around the edge of the card. I adhered the finished panel to the front of a large 5" x 7" white card. On the inside, I cut a mat layer of the turquoise design using the shaped die and another piece of white card. I stamped some more agapantha flowers to the side of the panel and added a birthday greeting in black at the bottom right corner.


One of my favourite flowers are agapantha. I don't think you can get them in turquoise, but I do think these look very pretty. 

I'm going to see how mum's getting on with putting in the new coloured hellebores - to go with the white hellebores we already have in the garden. See you again soon. Keep safe.

signature photo Signature.png

Thursday 25 February 2021

Dancing Queen ....

... Good morning! A friend recently asked me to make a birthday card - the brief was dance, pink, purple, and sparkle. I sent him a few ideas and this is the one he picked to send:


Stamps: Visible Image - Born to Perform; Hero Arts - Cupcakes
Inks: Versafine - Onyx Black
Accessories: White Card; Copic Markers; Clear Embossing Powder; Glitter; Sakura Stardust Pens

I'm submitting this card to Addicted to Stamps and More! - ATSM#399 where the theme is Any Occasion, and to Seize the Birthday - STB#208 - it's always AG Birthday. 


I stamped the ballerina in Versafine black ink and heat embossed her with clear powder. I placed a mask over her and stamped the middle cupcake. I added a mask to that cupcake and stamped the remaining cakes. I used Copic markers to colour the frosting to match the brief - shades of pink and purple. After colouring the cupcakes I restamped them in Versafine black ink and embossed with clear powder - this gives a lovely crisp image. I added the birthday greeting (which comes from the Cupcakes stamp set). I trimmed the panel to be slightly smaller than the card base, edged it with a pink marker, and adhered it to the card. I used a dark pink Sakura Stardust pen to add some subtle shimmer to the middle cake. I drew a line of pink ink along the embossed line and used a dry paint brush to pull the shimmer out. I finished the front by adding some glitter to the cupcake frosting. On the inside, I cut another piece of white card and stamped the greeting and another cute little cake with a candle. It sparkles too!


That's all for today. See you soon.

signature photo Signature.png

Wednesday 24 February 2021

SHC - Trig 102 ...

... Hello and welcome! I'm here with my regular weekly post for Seven Hills Crafts. I'm still on something of a trigonometry kick. It's not something I liked at school, but on a card - triangles and geometric shapes are just fab! I was on something of a roll this weekend and made four cards! I'll start with a card that has hexagons!


Stamps: Altenew - Spheres and Spirals; Concord & 9th - In Bloom, Painted Rose; MFT - More Essential Sentiments
Inks: Gina K - Jelly Bean Green, Peach Bellini; Versamark; Versafine Clair - Nocturne
Accessories: White Card; Copic Markers; Silver Satin Mirri Card; Silver Embossing Powder

I'm submitting this card to Color Hues - CH#12 where the colours are peach and green, and to The Flower Challenge - TFC#53 where they want us to use our latest stamps and flowers.


I used my MISTI to stamp the large floral image from In Bloom on white card. I removed the image from the MISTI and coloured it with Copic markers. I returned the image and stamped it again with Versamark ink and heat embossed with silver powder. I then very carefully fussy cut the image out. I separated the flower into several parts. Next I free hand stamped the hexagon (from Spheres and Spirals) background in peach and green inks. It's very easy to line up the hexagons. I cut a strip of this background and layered it onto silver satin mirri card and adhered it to the front of a 6¼" x 4½" card. Next I adhered the flowers to the card - I used the two large flowers at the top and some of the smaller flowers at the bottom. I finished off the front by adding a simple birthday greeting.

On the inside I cut a piece of silver mirri card for the mat layer. On the white panel I stamped several hexagons and added a lovely scripty greeting. This card is for my Aunt and it's her birthday today - she should have got this in the post this morning!


My next card is based on the green and teal card I made last week, but I've added a bit more.


Stamps: MFT - More Essential Sentiments, Trendy Triangles; Altenew - Trigonometry
Inks: Gina K - Peach Bellini, Tangerine Twist, Sandy Beach, Soft Stone, Slate; Stampin' Up! - So Saffron; Versamark
Dies: MFT - Dienamics - Trendy Triangles
Accessories: White Card; Copic Markers; Silver Embossing Powder

I'm submitting this card to Sunday Stamps Challenge - SSC#251 where they have these lovely citrus colours.


I used the layout from last week's card and built on that for this card. I used a mixture of triangle from MFT and Altenew for the design. I added extra triangles. I stamped two of the triangles on scrap white card. I coloured the larger with Copic markers and then embossed both with silver powder. I used the MFT triangle dies to cut out the smaller diamond triangle, but I simply cut out the other triangle. I adhered the larger triangle flat to the card. I used some scrap small triangles to build up some depth for the small triangle and glued it to the card front. To finish off I stamped this lovely sentiment on a strip of white card. I layered it on several strips of white card and then glued it to the front of the card. On the inside I kept things very simple. I stamped a few triangles in the bottom corner and added another sentiment. This card has gone to my son. He gives great hugs and I'm missing them!!


I have another triangle based card to share:


Stamps: MFT - More Essential Sentiments, Trendy Triangles; Concord & 9th - Tiny Tagalongs
Inks: Gina K - Blue Raspberry, Blue Denim
Accessories: White Card; Blue Mirri Card

I'm submitting this card to AAA Cards - AAA#184 where they have a sketch challenge with the option of watercolour (which I skipped).


I cut a piece of white card 3" square and used my MISTI to make sure that I stamped the triangle images in exactly the same place. I used the large and small versions from Trendy Triangles - I really like the fact that this set has both sizes in the patterns. I layered the finished panel on blue linen effect mirri card and adhered the whole panel in the centre of a 5¼" square white card. I finished the front by stamping a simply birthday greeting in blue ink. Inside I piece of white card 5" square, edged it with a blue marker added a greeting and several more triangles. Clean, simple and fun. Perfect card for a guy.


My last card used up the left over flower from the first card:


Stamps: Concord & 9th - In Bloom, Tiny Tagalongs; MFT - More Essential Sentiments
Inks: Gina K - Tangerine Twist, Turquoise Sea, Stormy Sky; Versamark
Dies: MFT - Dienamics Trendy Triangles
Accessories: White Card; Copic Markers; Silver Embossing Powder; Nuvo - Gold Aquashimmer Brush

I'm submitting this card to CAS on Friday - CASOF#199 where they want us to use Teal/Turquoise, Orange and White - done!


The flower started off peach, so I added orange copics and crayons to make a bold orange flower. I made the leaves a deep teal. I cut a piece of white card 4" x 5¼", edged it with a turquoise marker and used the small triangle dies to cut out a line of triangles. I placed the panel on an A2 card and lightly drew through the triangles. I then used my MISTI to stamp three orange and two turquoise triangles. I used foam tape to adhere the white panel to the card base. I finished the front by adding a sentiment and the flowers. On the inside I cut another piece of white card, stamped some flowers in the corner and added a greeting.


Don't you find it strange how often different challenges end up with similar themes - here the colours are all in the warm peaches/oranges with hints of green and/or teals. They were fun. That turned out to be a long post! Thanks so much for sticking with me. See you again soon.

signature photo Signature.png
Related Posts Plugin for WordPress, Blogger...