Tuesday 31 May 2011

Jingle Belles, Part 3 ...

.... yes, I know I went mad with this week's Jingle Belles challenge.  I'm enjoying playing with paper!!  Most of my recent cards haven't featured much in the way of designer papers - I've most stamped my own backgrounds, so this is lots of fun.  And I'm starting to use my (huge) supply of designer papers :)

This time I've gone for a blue/green colour scheme - a bit more traditional in colour, but not so much in design.


The card is themed, loosely, on snowflakes.  The papers are all from a Dovecraft pack that I've had for a few years - it may last a few more :))

Stamps: Waltzingmouse - Sewing Box - Christmas
Ink: Memento - Tuxedo Black
Paper: Dovecraft - Christmas Blues
Spellbinders: Eyelet Circles (S4-304) die # 3

The close-up photo shows the bauble in greater detail and here you can just about see the soft pale green of the textured mirri card.  It's ever so pretty in real-life!!

I've enjoyed this challenge, and think that I may make a few more cards - although I don't think I'm going to get them done in time to beat the deadline!

And that's all for today.  It's been a really fun day - family, friends, crafting TV - what more could I want.  Oh yes, I'd love to have Jonathan home from India - still it's only two months to go!! 

Do drop by tomorrow - it's the launch of the June challenge for St Luke's Charity Card Challenge - we have a super theme this month - so come see my card.

Mono Christmas ....

.... here's another card for this week's Jingle Belles challenge to use three or more different patterned papers.  I kept to the same set of stamps - but this time I selected the snowman - he's so cute!


This time the papers come from Anita's (Docrafts) and I've gone for a black, white and silver look.

Stamps: Waltzingmouse - Sewing Box - Christmas
Ink: Memento - Tuxedo Black
Paper: Anita's Classic Christmas - Black
Spellbinders: Snowflake Pendant (S4-286)

You can see from the close-up photo that I have managed to use four different papers, and again I've got a Christmas sentiment on the paper pieced snowman.  The card is lovely in real-life, it's a bit dull in the photo.  However, I am very pleased how it's turned out.

I'm off to watch Create and Craft TV - Dawn Bibby has moved from QVC (after 18 years) to a new position on C&C.  I'm sure she's going to be really nervous - but I'm looking forward to seeing what (if anything) is going to be different from QVC.  I may even be tempted to renew my C&C membership!!

That's all for now - I'll be back later this evening to check out this week's challenge from Colour Q - I'm having fun with their colours!!  See you later.

We three kings ....

... is the challenge over at Jingle Belles this week.  They don't actually want Three Kings - but the girls would like us to use three (or more) different patterned papers in the card designs.  They don't mind whether the papers are from the same company or collection, but they MUST be different patterns.

I like this challenge and knew exactly which stamps I was going to use to make my cards - it was a bit harder to select the papers.  I decided on non-traditional colours for my first card.  The papers are all from the same collection and are in shades of pink.


Please excuse the quality of the photo - I still haven't got my little photo studio yet - and this was taken by desk light and edited to get the colours correct.  In this paper collection there is a lovely plain paper with Christmas greeting - if you look closely at the paper you'll see that there are faint lines of text on it.  I cut this piece to fit my poink base card.  Next I die cut a bit of scrap holographic bright pink card using my beaded square nesties.  I stamped the Christmas stocking on three different, but coordinating papers and then paper pieced them.  It was quite quick to make and I'm really pleased how it turned out.

Stamps:  Waltzingmouse - Sewing Box - Christmas
Ink:  Memento - Tuxedo Black
Paper:  DCWV - Christmas Multi Stack - Rose Tinted Christmas
Spellbinders:  Beaded Squares (S4-315) die #3


The close-up detail above shows the different papers more clearly, you can just about see the faint text on the backing sheet!  If you look closely, you can see that I cut the text paper on the stocking to show the word "Peace"!!  You can also see from this shot that I managed to use four papers on my card!!

That's all for now - but do come by again later today - I have some more Christmas cards to share with you.  In the meantime, I off to do a bit of tidying.  My friend Buffy and her daughter, Mawgan, are coming over to stay with us for a few days.  So it's going to be madness and mayhem in the house - but lots of fun!!  I'm sure that we'll have a bit of time to craft :)

Monday 30 May 2011

Green graduate dreams ....

..... I hope everyone has been having a good day.  As the weather has been so awful today, we decided to stay in and play!!  Ben's been playing on Fable 3 - collecting gold and I believe he's now King!!  Kathryn has been crafting - but she's been keeping it a secret.  And I've been playing in my craft room too - and would like to share my card for two challenges.

The first is this week's colour challenge over at The Play Date Cafe - PDCC83 and the second challenge is for CAS-ual Fridays.


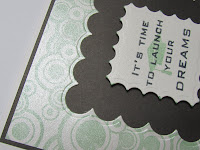
The starting point for this card was the scrap card that I had left over after making my card for Ben.  His card features a lacey square with lots of circles on it - I kept the border and used it on this card.  I layered it onto a piece of black paper.  In the centre I put the image - a graduate cap in green and inspirational sentiment, stamped in black and clear embossed.  I'm really pleased how this turned out.


Stamps:  Waltzingmouse - Free Spirit - Boy, Free Spirit - Sentiments
Inks:  Versamark; Memento - Cottage Ivy, Tuxedo Black
Spellbinders:  Lacey Squares (S4-295) die #4 (waste left over),  Inverted Scalloped Squares Lg (S4-196) die #3
Accessories:  Card from stash


The photo above shows the lovely embossed edge left on the scrap card - looks great on the black paper.

And it occurred to me after I'd posted the card below as my entry for this week's Less Is More challenge, that it would also apply for the CAS-ual Fridays challenge!!


And that's all for now - I'm off to get dinner for us all.  Here's hoping that tomorrow is a better day weather wise - I'd like to get out with the children during the holidays - but if not we might have a film fest at home!!  See you tomorrow - I do have some cards to share!

Waltzingmouse sketch & thanks ...

... the Waltzingmouse Sketch challenge is such fun this week and I decided to use it as the basis for an anniversary card that I needed to make.


The sketch has been designed by Edna Morrisedie and when I saw Edna's card - and her comment about adapting a sketch to make it your own - I really had a play!!  There's a big area on the sketch that says "stamp here" and I did try - honest!!  But I couldn't get it to work quite the way I wanted. 

So I adapted the sketch and went for a really clean and simple design.  My Mum and I are going to an anniversary party next Sunday - for a Ruby Wedding - 40 years!!!  Mum asked me to make her a card and she likes roses.  I wanted to do deep ruby red roses, but the decoupage roses are a coral red - so that determined the colour.  The decoupage set was pre-cut (I couldn't have done the detail) so I simply pressed out the layers.  I used one of my Martha Stewart punches to make the scalloped border and added a piece of illusion mirri card behind the punch - it shimmers as you move the card.  To make the sentiment I had to mix inks - I didn't have one to match (or even come close) to the roses and mirri.  I used Tangerine Tango and Regal Rose - worked a treat!  And the dotty frame was heat embossed with clear powder.  So here it is:


Stamps:  Waltzingmouse - Say It With Style, Very Vintage Labels No 18
Inks:  Stampin' Up! - Tangerine Tango, Regal Rose; Versamark
Accessoreis:  Rose Decoupage (dont' have company details), Martha Stewart Punch, Ribbon by Avec, Card and illusion mirri card from stash

I'm still busy making my card to Jim and Catherine - but it should be finished later this week!

And before I go, I have a special thank you card - to all my Design Team colleagues at CR84FN - for sending birthday wishes to me on yesterday's CR84FN30 posts.  And also to those who've left such lovely comments too!  I appreciate them all.  My birthday is on Thursday, but I'm planning to party all week :)  And I've taken the opportunity to use this week's Less Is More sketch as the basis for my Thank You card - it's a real CAS design!!


Stamp:  Stampin' Up! - Cute by the Inch (hostess set)
Spellbinders:  Labels 15 (S4-291) dies # 2 & 3
Ink:  Stampin' Up! - Real Red, Versamark
Accessories:  Card from stash; Clear embossing powder; Real Red scrap


I've gone for the classic central position - seems to work well for these layered cards.  I was so pleased to play with this set of nesties - they are very elegant. 


Now, it's time for breakfast!!!  I don't think that we're going out today - it's cold, wet and grey, feels more like November!!!   Bye for now!

Sunday 29 May 2011

CR84FN30 ....

.... another week has simply flown by, and we're here for this week's colour challenge at CR84FN


I do like the soft, gentle colours of this week's palette - light blue, light yellow and kraft.  Now when I first saw these colours I thought of beaches, sand dunes, soft seas - that kind of thing.  But, I couldn't come up with a design I liked.  So I went back to the inspiration photos - courtesy of Martha Stewart - and looked at the clothes - the pale blue shorts made me think of clothes for a baby boy. 

So my card was born!!  A sweet baby card.  I embossed some pale blue card with one of my Cuttlebug folders and matted that onto some light yellow pearl paper.  I stamped a circle of hearts in kraft ink which I embossed with clear powder so that it would be easy to colour the image with Promarkers.  I cut a mat layer in kraft card using my pinking circles.  The little teddy was stamped directly onto the circle and again on another piece of card so that I could layer the image and give a little depth.  I  added a simple sentiment using kraft ink.  It was only when I'd finished the card that I realised the teddy was just a little high up!  So to fix that I added a sweet blue nappy pin!!


Stamps:  Waltzingmouse - L'il Buddies;  Docrafts - Forever Friends Baby (FFS9061016S)
Inks:  Stampin' Up! - Crumb Cake; Versamark
Promarkers:  Powder Blue, Pastel Yellow, Satin
Spellbinders:  Standard Circles Sm (S4-116) die #5; Pinking Circles Sm (S4-172) die #5
Accessoreis:  Cuttlebug folder - Bloom Dots;  Ribbon and pin from stash


You can see the depth - very subtle, but it's there - on the teddy in this picture - love that circle of hearts!!

For more inspiration using these really pretty colours go and check out the Design Teams' blogs - we've great cards to share with you.

 
It's also time for us to say goodbye and thank you to Lin - our brilliant Guest Designer for May - I've really enjoyed seeing her cards and sharing her inspiration this month.  Please do check out her blog and leave some love.

Lin - Guest Designer for May

That's all from me for today.  I plan on having a day out with my children - I think we're going out for a special lunch.  I'll see you tomorrow - I should have a card or three to share :)  Have a good day.

Saturday 28 May 2011

Less is More 17, No 2 ...

..... the sketch challenge over at Less is More is super - the idea is to select one of the squares and confine your image and sentiment to just that area with lots of white space.


Earlier this evening, I posted a couple of cards that I'd made concentrating on the top left square.  But this sketch gives us so much scope to play and I do like to centralise stamps on square cards - so I made another card.

This time I've gone for a modified square and a more elegant design.  I've got quite a collection of Spellbinder dies and decided to use Labels 3 for this card - it's a lovely shape and I don't use them often enough.  First I stamped one of the frames from Very Vintage Labels No 3 (Waltzingmouse) and embossed with gold for some luxury.  Then, while still in the die, I added colour with my distress inks.  The lily is from my new Stampin' Up! set.  It's lightly coloured with the same distress inks and I used my Sakura Stardust pen to colour the stamens and add speckles to the lily petals.  Finally, I added a simple sentiment.


Stamps:  Waltzingmouse - Very Vintage Labels No 3, Sweethearts; Stampin' Up! - Fifth Avenue Florals
Inks:  Versamark; Distress - Dried Marigold, Spiced Marmalade
Spellbinders:  Labels 3 (S4-189) die #4
Accessories:  Card, embossing powder, Sakura pen - from stash

It's so nice to have Ben here - he's got so tall - just shy of 6 feet!!  I have to look up at him now.  I have a feeling he's not stopped growing yet.  Kathryn was delighted to see her brother and they've been playing together happily - mostly :)  I've had lots of fun with this sketch and think I may have a few more cards to share with you next week.

Now, it's getting late and I'm off to bed.  Don't forget that tomorrow is the new CR84FN colour challenge - do drop by and play along with the challenge.  Bye for now.

Less is More 17 and colour Q challenges ...

... it's been a really fun day today.  I got to the airport to pick up Ben, only to find that his plane would be over half an hour late!!  The positive was a nice cup of coffee and time to read some of my latest Stephen King book - Cell (excellent). 

It also gave me time to think about this week's Less is More challenge.  It's week 4 in the monthly rota and that is either a sketch or recipe - Lady LIM and Diva LIM gave us a sketch - with the instruction to "pick a square".  The idea being to pick one of the five squares (staying inside the area as much as possible) and leave the rest white space.  They do like to play with us!!


Now, I've got to make some Father's day cards for Ben - one for Jonathan and one for his father, Kim.  And I've got a super Stampin' Up! image that would be brilliant for this challenge - so I came home knowing just what I was going to do.  However, Vicky beat me to it!  And she did it brilliantly.  So I had to think again. 

I decided to try one of the top squares - I think these are quite hard, but I think I've done it!  It's a really, really clean and simple design - I made two versions - one black and one blue.  Which do you like best?


Stamps:  Waltzingmouse - Free Spirit - Boy, Free Spirit - Sentiments
Inks:  Memento - Tuxedo Black;  Stampin' Up! - Bashful Blue, Night of Navy

Now, my other card is quite different - although I think it's still relatively clean and simple.  It's for this week's colour challenge at colour Q - the inspiration picture is such fun and the colours are fabulous.  It gave me the opportunity to play with my new Stampin' Up! set - Fifth Avenue Florals - love these stamps.


As soon as I saw that one of the colours was Real Red I knew that I'd use the rose stamp, and I decided to use the lily and daisy too with the shades of yellow.  I stamped the images in Versamark and then heat embossed them with detail white powder.  I then, very carefully, cut out each flower.  I used my Marianne dies to cut some greenery and finally added the sentiment.


Stamps:  Stampin' Up! - Fifth Avenue Floral
Inks:  Versamark; Stampin' Up! - Early Espresso
Card:  Stampin' Up! - Real Red, Daffodil Delight, So Saffron
Marianne Dies:  Greenery - LR0150, LR0151
Accessories:  Card, white embossing powder from stash


These flowers are really easy to cut out and they stamp really well, giving lovely clear lines - great for colouring with Promarkers, watercolour paints, glitter or just leaving as they are!  So happy that Joanne was able get this set for me.

Fifth Avenue Florals ....

.... I am so very excited as I've manged to obtain one of my favourite Stampin' Up! sets - Fifth Avenue Florals.  There's a rose stamp in this set that is wonderful, but the card I'm sharing today doesn't feature the rose - I've used the lily, daisy and sentiment instead!!!  You'll have to check back to see my rose cards. 

I have to say thank you very much to Joanne for getting this set for me - I really do appreciate it!!

Now to my card - it's very clean and simple, and I realised after I'd stamped the lily that I should have used a slightly darker ink.   Never mind - it's my first time using this set and I just want to share it with you.


Stamps:  Stampin' Up! - Fifth Avenue Florals
Inks:  Stampin' Up! - Certainly Celery, Pink Pirouette, Soft Suede
Accessories:  Card and stardust pens from stash

That's all for now - the new Less is More challenge will be up soon, but I have to collect Ben from the airport this morning - so I'll be able to think about my card while I wait for him to arrive.  So do pop back later today and I'll be able to share my card with you then.  Bye for now.

Friday 27 May 2011

OLW55, back for more ....

.... I've decided that Jennifer, Styles Ink might be right, this could be "easy peasy" after all.  I've made another card featuring an animal - Jennifer wants us to use a cat, dog or both.  This time I've gone for a cat!  I'm not really a cat person, but they seem to like me!  My card was inspired by Susan's design - thank you Susan!!

My rather elegant feline is from the Inkadinkado set that I used for my earlier card - I think she's gorgeous!  Yes, I really do think that the cat is a she.  And that's why I've added a line of pink stars to ground her and the simple sentiment "princess".   Positioning stamps is particularly important in clean and simple designs, and my stamp-a-ma-jig was essential for this card.


Stamps:  Inkadinkado - Patterned Pets; Making Memories - Just Chillin' Girl
Inks:  Memento - Tuxedo Black, Rose Bud

That's all for today.  It's Scouts tonight, so I'm going to be busy getting ready for our session this evening.  It's the last session before half-term, so I'm not sure how many of the children will be attending.  I hope it's a reasonable turn out as we going to be talking about hiking, do some map reading and generally getting ready for our June hike!!  See you tomorrow for the Less is More challenge.

One Layer Wednesday ....

... is being hosted by Jennifer at Styles Ink this week.  Jennifer simply wants us to make a one layer card featuring either a cat or dog or, if you feel that way inclined, both!!  "Easy peasy" she says!!  Not sure it's that easy.  Some of the cards that have already been posted are so good - with scenes and witty sentiments.  So I had to think a bit harder and have a good look through my Stamp Catalogue (it's a god send for times like this).

I've made a sweet little card featuring a funky Scottie Dog.  It's really clean and simple, but took a little while as I had to make sure that I got the positioning correct - my stamp-a-ma-jig is one of my best ever buys!  I started off with a simple black frame into which I stamped the dog image.  I decided to add a bit of colour to the dog's coat with my Promarkers.  I also added just a bit of sparkle.  Finally a simple and fun sentiment.


Stamps:  Waltzingmouse - Frame-It; Inkadinkado - Patterned Pets
Inks:  Memento - Tuxedo Black
Promarkers:  Royal Blue, Pearl Blue
Accessories:  Card, glamour dust from stash

I've had these animal stamps for a while, so I'm pleased that I've finally managed to ink them up - thanks Jennifer.  In the set there are some cats, some dogs, a tortoise and a lizard - all rather funky, all great fun.  I may have to play again later :)

That's all for now - I'm going to be spending a while in my craft room this morning - working on Design Team cards (check back on Sunday).  And I've got to sort out Ben's room - he's coming to stay with us for a week - it'll be so nice to see him.  See you later!

Thursday 26 May 2011

Just Us Girls ....

.... it's been a while since I played along with Just Us Girls - but the challenge this week was totally irresistible!!  The want us to make a card using rainbow colours - red, orange, yellow, green, blue, violet - and I do like a bright and cheerful card.


I think the hardest thing about this challenge was what to put on my card.  I've gone for a clean and simple design which allows the rainbow colours to shout out!!  First I had a rummage in my paper stash - I knew I had some rainbow paper - and sure enough I found a sheet of hand made paper.  Bright colours with some chunky texture and some sparkle too.  I cut out a lattice shape using my Spellbinders Lotus die.  For the topper I stamped a circle of hearts in black versafine and heat embossed the image with clear powder.  I coloured the hearts with Promarkers (there are 24 hearts - so I was able to do exactly four repeats of the colours).  To go inside the coloured hearts I went for a simple, graphic flower and used red, orange and yellow.  Finally, I added a simple sentiment.  I think the card can be used for all sorts of occasions.  It's going in my stash!


Stamps:  Waltzingmouse - Big Bloom - Poinsettias, L'il Buddies
Inks:  Versafine - Onyx Black
Promarkers:  Poppy, Mandarin, Canary, Lush Green, Royal Blue, Purple
Spellbinders:  Lotus Pendant (S4-269), Standard Circles Sm (S4-116) die #5
Accessories:  Rainbow paper, card, clear embossing powder and greeting from stash

Please excuse the quality of the photo - taken in a darkish room with not much light.  I'll try for a better shot tomorrow, but I wanted to make sure that I got in on time. 

I'd like to say thank you so much to Jules for her tip regarding Blogger and commenting - it worked a treat and I spent a large part of this morning catching up on commenting on CR84FN entries - such fun!!  I have had a look at lots of other challenges, but I'm sorry I don't have time to go back and leave comments.

That's all for now.  I have a couple more cards to share with you tomorrow - so until then, bye for now.

Blogger issues - here's some help ...

... if you're having problems leaving comments - and it's been driving me totally crazy - check out Jules post here - it works and I'm off to leave some love!!

Wednesday 25 May 2011

Fed up with Blogger ...

... leaving comments is really hit and miss at the moment.  Blogger still don't seem to have sorted out the problem with logging in and staying logged in, and then being able to leave comments.  I've found that on blogs when I have to click on "post comment" and a new pop-up box opens - I can leave comments.  And obviously blogs not on Blogger are okay too.  Sadly, though - I haven't been able to leave as many comments as I'd like!  Here's hoping that tomorrow Blogger is better :)  Good night, see you tomorrow.

Less is More 16 & CAS-ual Fridays .....

.... the challenges from Less is More to use a butterfly or butterflies on your card is a perfect partner to the request to "Bring the Bling" for this week's CAS-ual Fridays challenge.  A marriage made in heaven!!


Butterflies are such a popular image and they feature frequently on the cards that I see when browsing the Internet.  And there are so many gorgeous stamps available - I have quite a few in my stash, but for this card I decided to use a stamp that I got free with this issue of Craft Stamper magazine.  I inked up the butterfly with a lovely pale pink and added a darker rose colour to the wing edges and stamped directly onto a small 3" × 3" card.  I used one of my new ultra fine Sharpie pens (super set) to add some butterfly trails and finally a simple sentiment.  But I wasn't happy with the card - it was certainly clean and simple - but didn't look finished.

So I made my small card into a topper by cutting off the front of the card and trimming down the size.  I used the red ink pad to ink the card edges - just a fine line.  Then I attached the image to a mat of pale pink textured mirri card and mounted the whole lot onto a larger square card.  Finally I added some bling to the little swirls - and now I'm happy with the way the card has turned out.


Stamps:  Chocolate Baroque - Butterfly (FOC from Craft Stamper);  Waltzingmouse - Say It With Style
Inks:  Stampin' Up! - Pretty in Pink, Rose Red
Accessories:  Card, mirri card, gems from stash

I'd like to say thank you to my fellow LIMettes for all your wonderful comments on my LIM15 cards - I've read them all and really appreciate you taking the time to leave some love!!  I have discovered that I am able to leave comments on some cards - it does appear to be a bit hit and miss at the moment.  Blogger says that the problem is not affecting everyone and that they are working on a fix - so hopefully I'll be able to leave some love.

I've got a day of playing in my craft room lined up.  See you all later.

Tuesday 24 May 2011

Blogger issues and colourQ Courtier ...

... just a quick note to let you know that I have been visiting blogs and seeing some wonderful cards. I've tried to leave a number of comments but unfortuantely, Blogger seems to be having issues again.

I'll try to get back around tomorrow and leave some love ;)

Before I go, I'm thrilled and delighted to find that I've been selected as one of the colourQ Courtiers for last week's challenge with this card - details here.  I thought these colours were just gorgeous and decided the best way to showcase the colours was to go for a nice clean and simple card.  It was also the only way I could think of putting these colours together!!!


And that really is all for this evening.  I'm off to watch a bit of TV and have a nice cup of coffee.  Until tomorrow!!  Bye for now.

Related Posts Plugin for WordPress, Blogger...