Showing posts with label Martha Stewart. Show all posts

Friday, 9 August 2013

Waltzingmouse Christmas Card Challenge and some Exciting news ....

.... It's my pleasure to be the host for this month's Waltzingmouse Christmas Card Challenge.  For my month I decided to go with a colour theme and I opted for bright colours - not traditionally associated with Christmas.  In May we visited Frankenmuth and paid a visit to Bronner's - the world's largest Christmas shop.  While there we saw lots of beautiful Christmas baubles - I happened to find three baubles in the colours I picked - RASPBERRY, TANGERINE AND LIME.


I like Jonathan's photo and decided to be literal and feature Christmas baubles on my cards - I did a set!!


Stamps: WMS - Reverse Crackle BG, Yonder Star BG, Vintage Ornaments, Ornate Ornaments, Compliments of the Season II
Inks: Archival - Black; Distress - Shabby Shutters, Picked Raspberry, Spiced Marmalade; Versafine - Onyx Black; Versamark
Dies: Spellbinders - 2010 Heirloom Ornaments (S4-283) # 4 & 5
Accessories:  Stampin' Up! Card - Pumpkin Pie, Lucky Limeade, Raspberry Ripple, Whisper White; SU Design Paper - Pumpkin Pie; Silks Acrylic Glaze - Key Lime; Martha Stewart Ornament Border Punch; Distress Stains - Shabby Shutters, Picked Raspberry, Spiced Marmalade; Clear embossing powder; Ribbon; Sakura Glaze Pen Black; Glitter

I had lots of fun making the baubles - each made by a different method.  Tangerine - I stamped the bauble outline onto pretty design paper.  Lime - I painted the background with acrylic glaze and stamped on the image.  Raspberry - I stamped Yonder Star background in Versamark, heat embossed with clear powder and then rubbed over with Picked Raspberry.  I added some detail to the tangerine and raspberry baubles with my black Sakura glaze pen.  I also added a touch of glitter to each bauble - can't really see it here!  I made the matching ribbons by dying some white organza ribbon.

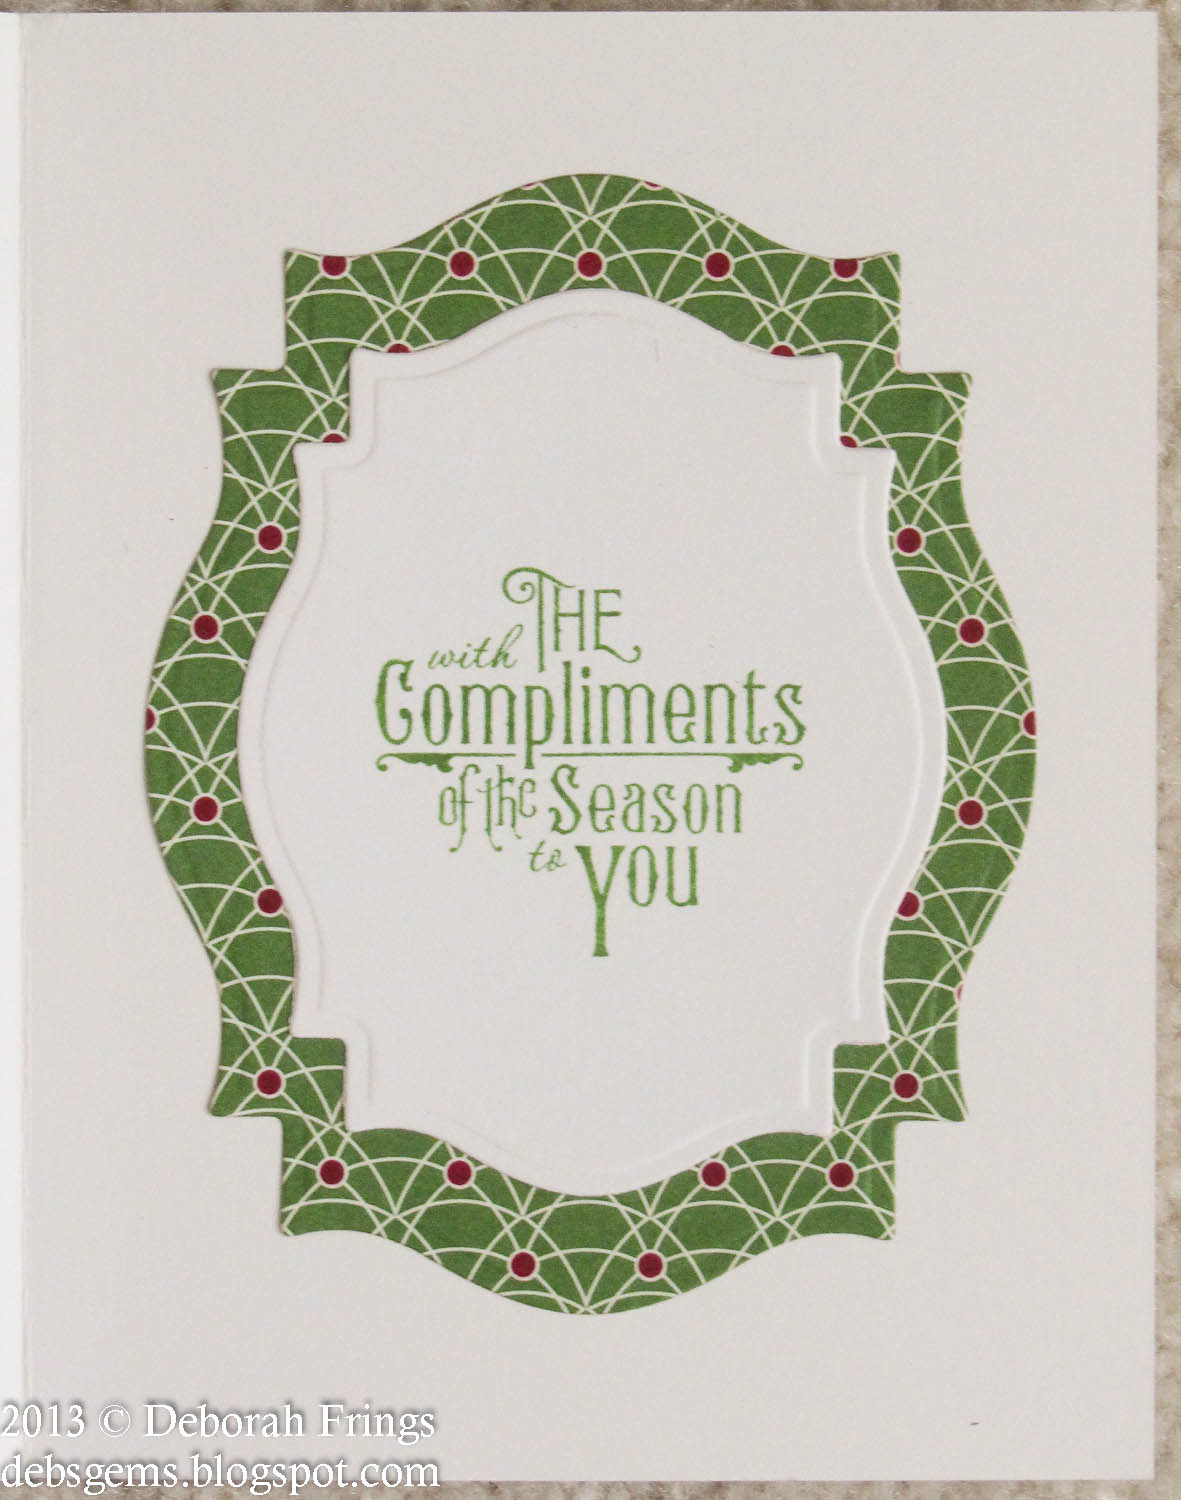
To make the background I stamped the Reverse Crackle in Versamark, heat embossed with clear powder and then sponged on all three distress inks, given a lovely subtle background.  I cut the panels to fit the card bases and punched the ornament border along the bottom.  I used Stampin' Up! card to make the coordinating card bases.  It was only when I finished, I realised that I've actually CASEd the card I made for WMSC127 - I obviously like the design!!!  For the inside of each card I stamped a sentiment and another bauble - to coordinate with the card.  Here are some larger images of each card as well as one of the inside!


I can't wait to see what you make with these non-traditional colours!  Here are some guidelines for the challenge:

• Each card must contain some Waltzingmouse Stamps’ images but need not be exclusively WMS images.
• Once you have created your project, upload it to the 2013 WMSCCC gallery - and if you have a blog, we would love for you to post it there too!  The code for this month is WMSCCC08-13.
• Feel free to grab the WMS Christmas Card Logo for your blog sidebar and/or your blog post if you are so inclined.
• You may make as many projects as you like for each challenge. We encourage you to make batches of cards since our end goal is to have enough hand-made Christmas cards for each person on our “list”.
• You may play along when and if you want – make it suit your schedule. For example, challenge cards for January may be uploaded anytime in January or in June or even September...whenever you have them completed. There is no monthly deadline.

Now, before I go, I've got some very exciting news to share with you.  Some of you may have noticed, and indeed already started to follow, a new challenge - Waltzingmouse Fanatics Challenge.  When I was on holiday in the UK in July, I had the great good fortune to meet up with my blog buddy, Tara Cardwell.  We got chatting about our love of Waltzingmouse Stamps and how much we missed the weekly sketch challenge.  So you can imagine how thrilled I was when Tara emailed me to say she was setting up a new challenge and wanted me to join her on the design team.


So, starting in September we have a new challenge for all Waltzingmouse Fans - come and join us.  Do keep an eye on the blog for more news and also check out our Facebook page.

That's all for now - I've got a very busy day today - details will follow!!  See you tomorrow.

Tuesday, 11 June 2013

Elegant birthday wishes ....

.... Morning all!  Time is marching on soooo fast and I have lists as long as my arms - just to make sure that I don't forget anything before we fly on Thursday.  But I've made sure of some "me" time and here's a card I made for a very special lady.  My mother-in-law has her birthday when I'm in the UK, so I've gone a bit mad and made a large (8" ×8") card for her.  I used a couple of challenges to make it:

Stamps: Stampendous - Jumbo Dahlia; Hero Arts - Layered Flowers; Waltzingmouse - Say It Loud; PTI - Stylish Sentiments - Birthday
Inks: Stampin' Up! - Island Indigo, Raspberry Ripple
Dies: Die-namics - Fishtail Flags Layers Stax # 3; Spellbinders - Grand Big Scalloped Circles (LF-249) #3
Accessories:  Kanban DP (Grey); Martha Stewart Punch - Arches Border; SU Card - Island Indigo, Raspberry Ripple; White Lustre Card;


I had such fun making this card.  I love the colours - so rich and elegant, perfect for my mother-in-law.  I cut a mat layer in raspberry onto which I layered this lovely grey/silver paper - isn't the flourish just wonderful?  I had to trim the grey paper to fit the card, and used the scrap on the envelope.  I stamped the dahlia onto white card and cut it out, layering onto a teal scalloped circle.  I stamped the sentiment onto white card and cut it out with my Die-namics fishtail dies.  I finished the front of the card with a punched border in white and an accent flower, layered with all the colours.

For the inside I cut another mat in raspberry and on the white panel I stamped another dahlia (using second impression for a more subtle look) as well as the flourish from the same set.  I think the sentiment is just right for Madeline's card - she's always in our thoughts, but more so on her birthday.


To complete the look, I also decorated the envelope using the left over strip of grey/silver paper - I couldn't waste it - far too nice.  I punched the arch border in the grey paper and laid it over a strip of raspberry card.  They look great together.


I got lots done yesterday - washing and ironing - making sure that Kathryn and I both have clean clothes for our trip.  I laid out the suitcases in the spare room too - and am starting to pack!  I have to be careful to make sure I don't go over the baggage weight limit!

That's all for now - I hope to have a card to share with you tomorrow.  Bye for now.

Saturday, 4 May 2013

Christmas sketch .....

... Good morning!  Well, we're well into the first week of May and the spring weather has finally shown up in Michigan, but that hasn't let me stop making Christmas cards.  I intend to have almost all my cards made by November - so there'll be no panic then!!

It's time for our challenge at 52 {Christmas} Card Throwdown, and as it's the first week we have a sketch for you.  I think it's a super sketch and there are so many possibilities with it.  I liked it so much that I ended up making three cards and could easily have made a few more (any may yet do that!).


Stamps: Stampin' Up! - Contempo Christmas, More Merry Messages
Inks: SU - Midnight Muse, Raspberry Ripple, Gumball Green
Dies: Spellbinders - Floral Ovals (S4-356) #3; Martha Stewart - Snowflake Punch; SU - Ornament Punch
Accessories:  Cuttlebug EF - Snowflakes; Silver card and paper; White Lustre card; Gems

This is such an easy card to make.  I cut the base panels to fit the card base and embossed with snowflakes.  Next I cut the horizontal strips in white and coloured card.  I punched all the snowflakes from some pretty shimmery silver paper in my stash.  The sketch has that pretty oval on it, so I decided to be totally faithful and cut three fancy ovals in the last of this pretty silver card!  Next I stamped several of the Contempo Christmas ornament (sadly discontinued) and used the coordinating punch to cut them out.  I added lots of gems to the ornaments.  For the inside I cut a mat layer in the matching colour and a white panel on which I stamped the sentiment (used the same one insdie each card).


As you can see from the picture of the inside - I made cards in Raspberry Ripple and Gumball Green - these colours work so well for the cards.


I did ring the changes a little on the green card - I used slightly different size gems on the ornament - not sure which I prefer.  I like these cards - they are all very elegant!


Don't forget to check out our 52 {Christmas} Card Throwdown blog to see the inspiration cards from the rest of the Design Team.  Looking forward to seeing your cards.  Have a good weekend!

Well that's all for now.  I'm off out today taking photos of tulips and I hope to share them with you soon.


Saturday, 27 April 2013

Christmas punch .....

....no, not the drink!!  Our challenge this week at 52 {Christmas} Card Throwdown  is an embellishment/technique challenge.  We want you to use punches in the making of your Christmas card.  I'm going to admit up front that I'm not very good at creating images with punches, so this was a challenge until I realised that I could make a Christmas tree with my punches.  My cards, yes I made three, are relatively straightforward.


Stamps: Stampin' Up! - Ornament Keepsakes; My Favourite Things - Seasonal Sentiments; Waltzingmouse - Woodgrain
Inks: SU - Daffodil Delight, Early Espresso; Memento - Tuxedo Black
Dies: Spellbinders - Nested Pennants (S5-028) #3; SU/Sizzix - Framelits Holiday Ornaments; Martha Stewart - Christmas Bauble Border Punch
Accessories: Design Papers - My Mind's Eye - Snowed In, DCWV - Rose Tinted Christmas, Dovecraft - Christmas Blues; Green card and paper from scraps bin; Lakeland - Metallic Christmas Banners; Gems; White Lustre card


I started by cutting three plain white triangles with the Nested Pennants.  Then I found a selection of green card and paper, with different textures and finishes, from my scraps bin and punched the ornament border on them all.  Then it was simply a case of adhering the green strips to the triangle base.  I used super strong tape to adhere the strips and trimmed the edges as I went along.  I made three trees varying the order of the strips.  I stamped a wood grain pattern onto plain white card and used a banner die to cut the tree trunks.  I made mats in different shades of green for each card and found Christmas tree papers from my stash onto which I adhered my trees.  I finished off each tree with a bright yellow star and a simple banner sentiment.  The inside of each card has a mat layer and a white panel onto which I stamped a bold Christmas sentiment - I've only shown the inside from the green card on the right.  See below for bigger images of each card and also a close of the actual Christmas tree - they really shimmer and shine!


I'm really looking forward to seeing your creations for this week's challenge!  Do check out the inspiration cards from the rest of the team - they are really great!

That's all for now - have a good weekend.  See you soon.

Friday, 25 January 2013

Paper, Glitter and Christmas 2 ...

.... I'm back with my second card using design paper and glitter and a decorated inside for this week's 52 {Christmas} Card Throwdown - 52CCT03-13,  and I used the sketch from CAS(E) this Sketch! - CTS12 for the layout.


Stamps: My Favourite Things - Stitched Stockings; Waltzingmouse - Compliments of the Season
Inks: Stampin' Up! - Cherry Cobbler, Sahara Sand, Gumball Green
Dies: Die-namics - Stocking Trio; Spellbinders - Labels 18 (S4-310) # 4 & 5
Accessories: SU design paper - Be of Good Cheer; SU Glitter - Dazzling Diamonds; Martha Stewart Glitter - Coarse Crystal; SU Card - Very Vanilla


I had a few stockings left over from my earlier card and decided to make another card using them up.  I turned the sketch through 90° so that I could hang the stockings from the mantle!!  I attached two of the stockings directly to the card base, but added some dimensional tape to the third.  I used both sides of the design paper on this card.  I carried the green on with some green elements on the stockings and a simple sentiment in the corner of the card. For the inside I used Spellbinder Labels 18 dies to cut a backing panel and a panel for the sentiment.  I've also taken a close-up of the stockings to show the different glitters used - fine on the dotty stocking and chunky on the top of the texty stocking.

That's all for now - I've had a fun morning playing in my craft room and now I'd better make a start on some of the ironing.  Before I go, thanks so much for the lovely comments on my photos.  There's so much to learn, but I'm having fun.  Bye!!

Wednesday, 12 December 2012

Gifts of love ....

.... Good Wednesday morning to you all - it's absolutely beautiful here today.  The sun is shining, the skies are blue and it's really cold!  I've another Christmas card to share with you today made with the following challenges in mind:


Stamps: CAS-ual Friday Stamps - Happy Kiss-mas; Stampin' Up! - More Merry Messages
Inks: Memento - Tuxedo Black; SU - Always Artichoke; Distress - Bundled Sage
Accessories: SU Design Paper - Real Red, Everyday Enchantment (Lucky Limeade); SU Card - Real Red, Lucky Limeade; White Lustre card ; Martha Stewart Glitter - Garnet, Coarse Crystal; Twine from CAS-ual Friday Stamps

I've finally got around to inking up these super stamps from CAS-ual Friday!  I stamped the middle bunch of mistletoe in Always Artichoke and the ones either side in Bundled Sage (don't have Sage Shadow).  I added the twine to the middle bunch - it's actually recycled from the packaging I got with these stamps - and a touch of glitter too.  I stamped a very simple sentiment directly onto the card base and surrounded it with lots of parcels - all containing love and best wishes for Christmas!  I stamped some parcels directly on to the card and cut the others from plain card and design paper.  I finished off with coarse crystal - suggesting snow piling up around the gifts.

That's all for now - got to put on some washing!!  Hey ho!  See you soon.

Saturday, 8 December 2012

Christmas blues .....

..... Good afternoon - it's very dull and grey in Northville today - a perfect excuse to stay indoors and play!  Jonathan has just finished a photo shoot at the house, Kathryn has done some homework and is now playing and I've made a card for the following challenges:


Stamps: Waltzingmouse - Ornate Ornaments
Inks: Stampin' Up! - Midnight Muse, Pacific Point, Tempting Turquoise, Pool Party; Versamark
Dies: Spellbinders - 2010 Heirloom Ornaments (S4-283) #5
Accessories: Martha Stewart - Ornament Punch; Cuttlebug EF - Winter Wonderland; SU Card - Midnight Muse; White Lustre Card, Silver embossing powder


I got my new WMS sets yesterday and I had to play with the wonderful ornate ornament stamps - the large stamp is stunning.  Claire showed us how easy it is to colour here.  My card is not entirely original - Teresa used the same one on her card, but our cards are totally different.  So versatile.

I stamped it in Versamark and embossed with detail silver powder, then I painted with my aquabrush.  I don't have Cool Caribbean so used Pool Party on the stripes with Pacific Point and Tempting Turquoise for the fancy scrolls.  I used Midnight Muse to stamp the sentiment on the ornament and the verse inside the card.  I made the card base from Midnight Muse card.  The white panel was cut to fit the card, the bauble edge was made using my Martha Stewart ornament punch and then it was dry embossed in my Bug!  I finished off with a double bow - white striped organza and turquoise organza both from my stash.  For the inside I simply stamped a bold sentiment.  Here's a close up of the ornament and embossed snowflakes.

I had such fun making this card.  I think you'll be seeing a variation on this card very soon.  Hope you all have a super weekend.  See you soon.

Friday, 30 November 2012

Festive glimmer and glitz ....

.... Hi!!  Another Christmas card for you this morning - made for two challenges:


Stamps: Waltzingmouse - Around Christmas Time, Compliments of the Season II
Inks: Memento - London Fog
Accessories: Martha Stewart Glitter - Lapis Lazuli, Turquoise, Feldspar, Aquamarine Crystal, Verdelite, Perdiot; Vellum, twine and card from stash

Taking of a photo of this card has been quite tough - but I think this captures the sparkle and shine.  I love the sketch and immediately thought of this pretty snowflake stamp.

I used my stamp-a-ma-jig to line up the stamps, having first established the centre of the card.  Starting at the bottom of the card, I used a glue pen to fill in the snowflake outline and once the glue reached the clear stage I added glitter.  I repeated this up the card using two shades of glitter on each of the full snowflakes.  Once the card was dry I burnished the glitter to make sure it doesn't shed and to add shine.  Here's a close up of the snowflakes.  Sadly the photos don't do the card justice - the sparkle and shine is lovely!  As I didn't want to hide the pretty snowflakes, I stamped the sentiment onto vellum.  As I didn't emboss the sentiment it has dried to give a very soft focus effect - which I rather like.  I finished off by adding this thread in coordinating colours.

Kathryn has now started her countdown to Christmas - only three full weeks of school left!!!  We plan to put up our Christmas tree this weekend.  Bye for now!

Related Posts Plugin for WordPress, Blogger...