Thursday 23 December 2021

Snowflakes galore ...

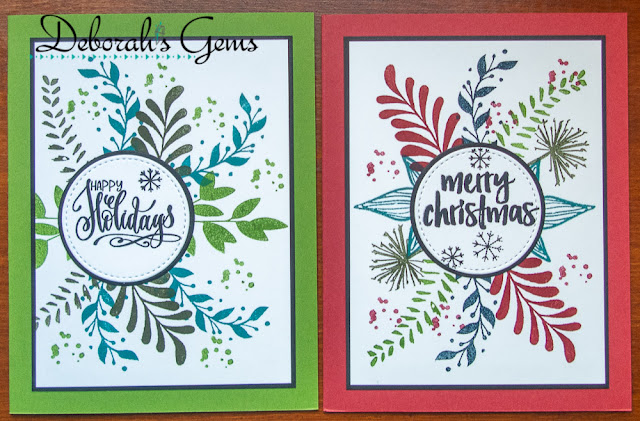
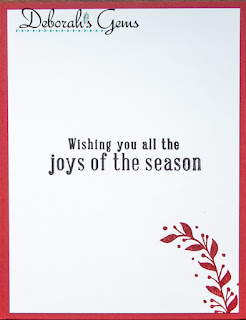
... Morning! I'll bet this is a bit of a surprise. It is for me too! Yesterday afternoon, mum asked me if I had any Christmas cards left - no!! So, I spent a couple of fun hours in my craft room playing with my new snowflake suite from The Greetery. I made three cards for mum, this is the first:


Stamps: Altenew - Warm Blessings; The Greetery - Snowflake Soiree
Inks: Gina K - Lipstick, Cherry Red, Turquoise Sea, Tranquil Teal
Accessories: White Card; The Greetery - Snowflake Soiree Stencils

I'm submitting this card to AAA Cards - AAA#205 where they want to see Christmas with the option of slimline, I skipped the slimline option. Also to CAS Colours & Sketches - CASC&S#450 - pick a previous 2021 challenge and make it festive; I picked challenge #405 - the colours are pretty close!!


It's so easy to create the snowflake border - the stencil is a six-piece set made up of Set A1 & A2, Set B2 & B2 - which together create the border, a stencil for separate snowflakes, and a mask to cover the completed border. I used two shades of red inks for Set A and blue and green inks for for Set B. I covered the completed border with the mask and then lightly inked the bottom of the card and finished by adding a simple greeting in dark blue. I left the inside of the card blank for mum to write her own message.


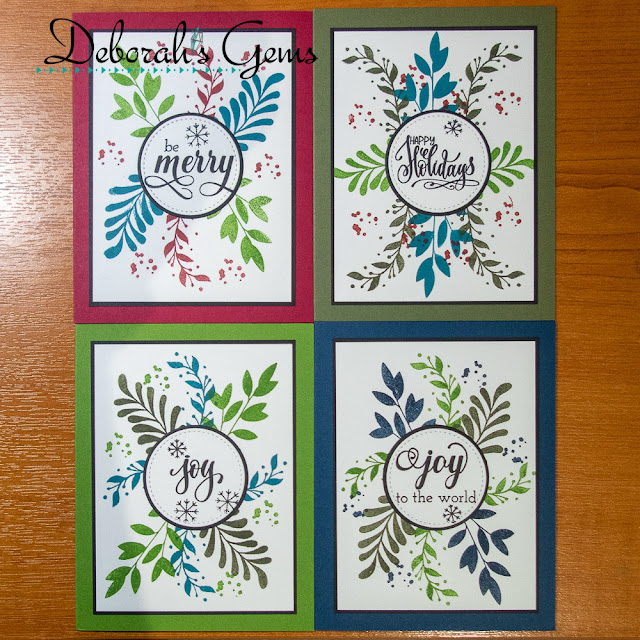
I was having fun with the stencils so I made a couple more cards - this time I went for shades of pink and purple:


Stamps: Altenew - Warm Blessings; The Greetery - Snowflake Soiree
Inks: Gina K - Dusty Rose, Passionate Pink, Lovely Lavender, Wild Lilac
Accessories: White Card; The Greetery - Snowflake Soiree Stencils

I'm submitting this card to Never-Before-Used-Schtuff - NBUS#33 - this is the first time I've used the set, but it won't be the last!!


I used exactly the same technique as outlined above, but this time in non-traditional colours. I love this one!


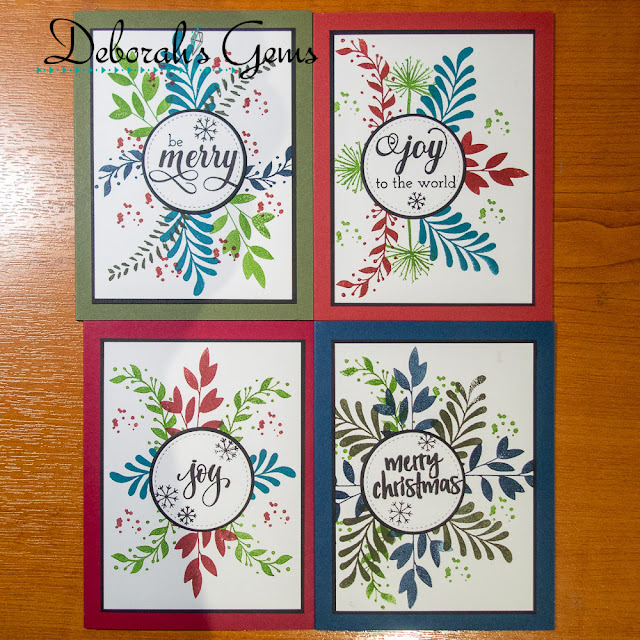
Here's my final card:


Stamps: Altenew - Warm Blessings; The Greetery - Snowflake Soiree
Inks: Gina K - Applemint, Lucky Clover, Powder Blue, Blue Denim
Accessories: White Card; The Greetery - Snowflake Soiree Stencils

I'm submitting this card to Happy Little Stampers Stencil Challenge - HLSSC#12 where it is Anything Goes. 


This time, as well as the snowflake border at the top of the card, I used the extra stencil to add some large stencilled snowflakes around the edge, as well as stamp a few from the stamp set. Once again, the inside is blank for mum to write her own message.

That's all from me today. See you again soon.

signature photo Signature.png

Wednesday 22 December 2021

SHC - Happy Birthday ...

.... Morning! This is my weekly Seven Hills Craft blog post - and the last one before Christmas!! Today I have a fun birthday card to share with you. My great niece will be 8 years old on Friday and this is the card I made for her.


Stamps: The Greetery - Birthday Blooms, Pinwheel Party
Inks: Gina K - Lipstick, Wild Dandelion, Lucky Clover, Turquoise Sea; Verafine Clair - Nocturne
Dies: Altenew - All About Wishes; The Greetery - Pinwheel Party Dies
Accessories: White & Black Card; Altenew - Shattered Cube Stencils; The Greetery - Pinwheel Party Stencils; Doodlebug - Sprinkles Black

I'm submitting this card to a couple of challenges - Happy Little Stampers Stencil Challenge - HLSSC#12 where it's Anything Goes, and Love to Craft Challenge Blog - LTCCB#65 where it's Anything Goes.


I started by creating the background panel. I used a piece of white card larger than I needed and Stencil 1 from the Shattered Cubes stencil set. I used four inks and simply turned the stencil through 90⁰ each time and this lovely pattern emerged. I cut it down to size and layered it on black card and adhered to the front of a US A6 card (4½" x 6¼"). I used All the Wishes to die cut the word 'birthday' - three black shadow layers and one white script word. I layered them together for dimension and stability. I had a few of the pinwheel die cuts left over from earlier card making sessions, and I decided to add them to the card. I used the co-ordinating stencils to add colour to each pinwheel and to match the background I'd made. I adhered them flat to the front of the card. I stamped the word 'happy' and finished the front by adding the die cut word 'birthday' along with some black enamel dots. Inside the card, I cut a mat layer of black card. On the white panel, I stamped a bold greeting in black ink. I used the pinwheel stencils to lightly ink a few pinwheels behind the greeting.


This card is on it's way to Lexi-Sue, and she should get it in plenty of time for her birthday. That's all from me today. My next Seven Hills Craft post will be in January. So I'd like to wish you all a Merry Christmas and Happy New Year. See you soon.

signature photo Signature.png

Wednesday 15 December 2021

SHC - Batch Christmas Cards ....

.... Morning! I'm here with my Seven Hills Craft blog post. I've been a bit smug about finishing all my Christmas cards for this year. Sadly, last weekend, I discovered that I was in fact short several cards. So I decided to batch make some cards. Inspiration for the designs comes from Gina K, but I've used Altenew, Concord & 9th, Colorado Craft Company, and Hero Arts products for my cards. Here are my ten cards:


Stamps: C&9 0 Harvest Wreath Turnabout, Warm Wishes Turnabout, Christmas Cottage; Altenew - Freeform Greenery, Parrot Paradise, Happy Dreams, Majestic Mistletoe, Warm Blessings; Hero Arts - Color Layering Holly; CCC - Big & Bold Majestic Moth, Big & Bold Holly & Berries
Inks: Stampin' Up! - Midnight Muse, Raspberry Ripple, Always Artichoke, Gumball Green, Riding Hood Red; Gina K - Tranquil Teal; Versafine Claire - Nocturne
Dies: Gina K - Master Layouts 3
Accessories: White & Black Card; SU Card - Midnight Muse, Raspberry Ripple, Always Artichoke, Gumball Green, Riding Hood Red

I'm submitting these cards to Holly & Ivy Christmas Challenge - H&ICC#106 and to Merry Little Christmas Challenge Blog - MLCCB#41 where it is always Anything Christmas Goes.


I started by preparing all my materials. I used old cardstock to make the note cards - all A2 side opening cards in festive colours. I cut ten white panels 3½" x 4¾" and 10 black panels 3⅝" x 4⅞". I went through my large vast stamp collection and found stamps sets with lots of smaller leaf images that would work to create a wreath. Most of the designs are centred on the white panel, with a few off to the side. I stamped the various leaves using inks to match the cardstock. Once finished, I adhered the stamped panels to the black layer panels and added them to the front of the note cards. Next I made the focal sentiments. Once again, I found smaller greetings, stamped them in black on white card. I used a stitch edged circle die to cut them out and a slightly larger die to cut a black mat layer. I adhered all the greetings flat to the front of the card. Inside, I kept things simple. I cut a white panel 4" x 5¼" and I used the same greeting for all the panels. I added a single leaf image for decoration and stamped it to match the cardstock.


I'm very pleased how these turned out. I got them made in about three hours and I think I've now got all the cards I need this year. But I had such fun, that I might make a couple of sets to give as gifts this year - to my son and to my daughter!! I spent most of Sunday writing all my cards and they are now on their way to my family and friends. That's all for today. See you soon.

signature photo Signature.png

Friday 10 December 2021

The Christmas Tree ....

... Morning!! Yes, it's me with another post - that's three in a week. Wow. Today I'm sharing a card that I made for Rachel - my daughter's flat mate. Rach asked me to make a personalised Christmas card for her grandparents - it was my absolute pleasure. Here's the card:


Stamps: C&9 - Fa La La Fringe Tree, Perfectly Penned, Yuletide Ornament, Tiny Trees Turnabout; Hero Arts - Color Layering Holly Leaf
Inks: Gina K - Jelly Bean Green, Fresh Asparagus, Christmas Pine, Lipstick, Warm Cocoa; Versafine Claire - Nocturne; Delicata - Golden Glitz
Dies: C&9 - Fa La La Fringe Tree
Accessories: White Card; SU Card - Pear Pizzazz; Kaisercraft DP - Christmas Edition; Red Satin Mirri Card; Gold Satin Mirri Card

I'm submitting this card to Happy Little Stampers Anything Goes with Dies - HLSAGD#12 and to Merry Little Christmas Challenge Blog - MLCCB#41 where it is always Anything Christmas Goes.


Rach asked me to make a more traditional Christmas card for her grandparents. So this card is mostly more traditional - I've used red and green and featured Christmas trees, but I think the backing paper gives a slightly more contemporary twist. I trimmed the design paper to fit a 6¼" x 4½" card. I stamped the personalised names with an older C&9 set - Perfectly Penned - it's super and the first time that I've actually used it!! I stamped the fringe tree on green card using several shades of green ink. I used the matching die to cut it out the stamped layers along with the green base tree. I adhered the layers and added pretty red satin baubles to the tree. I adhered the tree to the notecard, added a gold star and finished with a simple greeting. Inside the card, I cut a mat layer of green card. On the white panel I stamped a Christmas greeting. I stamped the matching mini fringe tree towards the bottom of the panel.


I sent the card to Rachel earlier this week and she was delighted with it - just hope her Nanny and Pappy like it too. That's all from me today. See you again soon.

signature photo Signature.png

Thursday 9 December 2021

Pinwheels and Robot ...

.... Morning! My great nephew - Nico-Lewis - was 5 years old on Tuesday and I had lots of fun making a special birthday card for him:


Stamps: C&9 - All the Birthdays, Birthday Stacks; My Mind's Eye - Boy Crazy; The Greetery - Pinwheel Party Stamps
Inks: Gina K - Applemint, Key Lime, Sea Glass, Turquoise Sea, Blue Lagoon; Versafine Claire - Nocturne
Accessories; White Card; The Greetery - Pinwheel Party Stencils; Lakeland - Die cut Number; Copic Markers; SU Card - Pear Pizzazz

I'm submitting this card to Never-Before-Used-Schtuff - NBUS#33. While I shared cards yesterday made with the Pinwheel suite, this was the first card I used them on!!

I used shades of blue and green to create the pinwheel garland at the top of the card. I stamped the robot directly on to the card and also onto a scrap of white card. I coloured the one on scrap with Copic markers and cut out the head and body and adhered them to the card. I stamped a bold birthday greeting and finished by adding a large silver number 5. Inside the card, I cut a mat layer of green card and on the white panel I added a birthday greeting along with some stars and circles.


I know that Nico has received this card and had a wonderful birthday with his mum and dad, and his friends. That's all for now. Off to have my hair cut now!

signature photo Signature.png

Wednesday 8 December 2021

SHC - Pinwheel Birthdays ....

... Good afternoon - I'm running a bit late with my Seven Hills craft blog post today. I've made pretty well all the Christmas cards I need for this year, but December and January are full of birthdays for family and friends. So, today I've got a couple of birthday cards to share with you. Here's the first:


Stamps: The Greetery - Pinwheel Party
Inks: Gina K - Innocent Pink, Red Hot, Applemint, Lucky Clover; Versafine Claire - Nocturne
Dies: Gina K - Master Layout 7
Accessories: White Card; The Greetery - Pinwheel Stencils; Silver Holographic Card

I'm submitting this card to Addicted to Stamps and More - ATSM#420 where it's die cuts and/or stencils, and to Sunday Stamps - SSC#271 where I've used their colours.


I started by making the mini slimline notecard from white card. The finished card measures 6½" x 6¼" - it's a super size. Next I used the Pinwheel party stencils to create the pretty garland. I used more pastel shades for set A and brighter shades for set B. I used a couple of stars from the matching stamp set and added silver stars. I used a stitch edged die to cut out the panel and layered it onto a piece of holographic silver card stock. I finished the front by adding a simple birthday greeting. Inside the card, I cut a mat layer of holographic card. On the white panel I stamped a bright red 'let's party' greeting and added one of the smaller messages too. I finished by stamping more silver stars.


Next I have an easel card to share - it's been a while since I made one, but this was fun:


Stamps: The Greetery - Pinwheel Party, Birthday Blooms; Altenew - Just a Number
Inks: Gina K - Sandy Beach, Kraft, Warm Cocoa, Dark Chocolate
Dies: The Greetery - Pinwheel Dies
Accessories: White Card; SU Card - Early Espresso; The Greetery - Pinwheel Stencils

I'm submitting this card to AAA Birthday - AAAB#32 where they want us to make an easel card, and to Cardz 4 Guyz - C4G#285 to use shades of brown.


I made a top folding A2 card (US size which measure 5½" x 4¼"). I scored the front panel half way at 2¾". I cut two pieces of white card to 5¼" x 4". On one piece I marked the centre with a pencil and used the pinwheel stencils upside down. By this, I mean place the flat edge of the stencil to the pencil line and use four shades of brown ink to create the garland. I then used the co-ordinating die to cut the fancy edge. I stamped a birthday greeting in the bottom half of the panel and added a brown line with a marker. I adhered this to the front of the card - only the bottom portion. Inside the card, I repeated the pinwheel garland at the bottom of the white panel, this time using only two shades of brown ink. I added a fun message towards the top of the panel. To complete the card I adhered a small die cut pinwheel. It's just the right size to hold the easel in place.


I'm rather late coming to The Greetery, but this pinwheel suite is just fab and I can see it making more appearances on my cards. That's all for now. I do believe the sun is trying to come out - would make a nice change from all the wind and rain. See you soon.

signature photo Signature.png

Wednesday 1 December 2021

SHC - December Calendar ....

.... Morning all! I'm here with today's post for Seven Hills Craft blog. I don't have a card to share today, but I have decorated my December calendar page with lots of pretty stars:


Stamps: Altenew - Fancy Star Builder; C&9 - Big On Christmas
Inks: Gina K - Innocent Pink, Red Hot, Applemint, Fresh Asparagus; Delicata - Silvery Shimmer; Versafine Clair - Nocturne
Accessories: A4 Wire Bound Blank Calendar; Altenew - Fancy Star Builder Stencil Set

I started by stamping the words in bold black ink in the centre(ish) of the blank panel. I then used the star builder stencil to add pale green stars and small red stars. I used the matching stamp set to add details to the green stars with a dark green ink and silver ink. I stamped the large spiky star in pink and repeated it in red. I then used a silver ink to add fine detail to the stars and also to the background. I finished by inking up one of the small dots in red and green and randomly stamping on the background. This is such a festive panel. 

I had planned on making several cards with the fancy star stamp and stencil sets. However, we went away for the weekend to a photoshoot in Dorset. In many ways this was lucky for us - we missed the worse of Storm Arwen. There was no electricity in our village for a couple of days, but it was all on by the time we got home. Our journey home, on Monday, was so pretty. There was a light dusting of snow all the way from Dorset. Most of the snow had gone from the final part of our trip home and yesterday the temperature in was into double figures!!!!

That's all from me today. This weekend I'll be writing my Christmas cards and getting them into the post. See you soon.

signature photo Signature.png
Related Posts Plugin for WordPress, Blogger...