Wednesday 26 April 2017

TMR - Theme

... Hi! I didn't manage to create anything for our last challenge at The Male Room, so for our new challenge today, I've created two projects!! For the next couple of weeks at The Male Room - TMR#59 we have a fun theme for your masculine projects, we want you to feature

MANY LEGS

I think this gives a few options. I've decided to make a couple of Halloween cards - featuring creatures with many, many legs!!!

Happy Halloween - photo by Deborah Frings - Deborah's Gems

Stamps: Rick St Dennis Digi - Octasac; Clearly Besotted - All Occasion Sentiments
Inks: Versafine - Onyx Black
Accessories: White Lustre Card; Graphic 45 DP - Rare Oddities; Enamel Dots; Copics; Spectrum Noir Sparkle - Clear


I've used one of my favourite RSD digis for this card, and the thing I like about digi images is that you can change the size and orientation. So I printed one larger than the other and flipped the one so that they face each other. I cut a strip of design paper from some scrap and used this to anchor the Halloween Octopods. I coloured them with Copic markers, cut them out with a scalpel and added some sparkle to them with a clear Spectrum Noir brush. I hooked the larger of the octopus on the strip of card and adhered it flat. I used dimensional gel to attach the other octopus and finished by adding some enamel dots and a simple greeting in black. On the inside I cut a mat layer of co-ordinating design paper and put a panel of white card on top, which is blank for my message. I'm submitting this card to Less is More - LIM#325 where they want to see a clean and simple card with a stripe

Happy Halloween inside - photo by Deborah Frings - Deborah's GemsHappy Halloween sq - photo by Deborah Frings - Deborah's Gems

My second card also features a Rick St Dennis mutant alien - he's a Space Spider!!

Happy Halloween - photo by Deborah Frings - Deborah's Gems

Stamps: Rick St Dennis Digi - Space Spider; Clearly Besotted - All Occasion Sentiments
Inks: Versafine - Onyx Black
Accessories: White Lustre Card; Graphic 45 DP - Rare Oddities; Vellum; Copics; Spectrum Noir Sparkle - Clear; Clear Embossing Powder


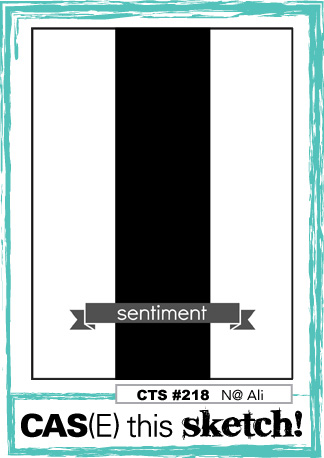
I used the sketch from this week's CAS(E) this Sketch! - CTS#218 for the layout, although I turned it to make a horizontal card. I think these mutants spiders are super, but I'm glad they're made of paper and not real!!!! I cut a large strip of design paper for the centre of the card and I based the colour of the spiders on the bottles (which you can just about see) on the strip. I stamped the sentiment on some cloudy vellum and heat embossed it with clear powder. On the inside I cut a mat layer from the co-ordinating design paper and added a white panel, currently blank.

Happy Halloween inside - photo by Deborah Frings - Deborah's GemsHappy Halloween sq - photo by Deborah Frings - Deborah's Gems

That's all from me today. Do visit The Male Room to see more inspiration projects from the rest of the Design Team. You've got plenty of time to play along with us - deadline for submission is midnight (BST) Tuesday 9th May, that's 7.00pm EDT. Have fun!!

signature

Tuesday 18 April 2017

Spring Flowers ....

... Good afternoon! It's a lovely day here in Northville with bright sunshine and reasonably warm. Spring has most definitely arrived - the leaves on the trees are opening, the magnolia is in bloom and the daffodils are so pretty. Sadly, I don't have any of my favourite spring flower in the garden - I just adore tulips! So I've made a very clean and simple birthday card featuring some tulips:

Birthday Wishes - photo by Deborah Frings - Deborah's Gems

Stamps: Altenew - Tulips
Inks: Stampin' Up! - Peekaboo Peach, Calypso Coral, Pink Pirouette, Regal Rose, Daffodil Delight, Crushed Curry, Certainly Celery, Cucumber Crush; Versafine - Onyx Black
Dies: Altenew - Tulips
Accessories: White Lustre Card


I'm submitting this card to several challenges that all have a spring or related theme:

I created the tulips by stamping the layered images on some scraps of white card. I used my MISTI to make sure that I got the images lined up and then die cut each image with the matching die. I also used the MISTI to position and stamp the sentiment. I added the word belated as this is going to be late! I adhered the central yellow tulip first and kept it flat to the card. I also adhered the leaves on the peach and pink tulips flat, but used dimensional gel to attached the flowers, so they have a little depth. I finished off the front of the card by simply drawing a simple black border around the card. The inside is blank.

Birthday Wishes sq - photo by Deborah Frings - Deborah's Gems


Our family trip to Disney has completely thrown my usual routine! However, it was really fun to get into my craft room and play today. I've got some tidying to do and then lots of work for DT projects - you'll have to come back to see them! That's all for now. See you soon.

signature

Saturday 15 April 2017

CCT - Technique ....

... Hi! It's been a while since I've posted anything - been on holiday to Disney - but more of that later. Today I'm sharing a rather clean and simple card for our new challenge at Christmas Card Throwdown - CCT08. For the next couple of weeks we want you to use the SHAKER technique on your Christmas cards. Here's my take on the technique:

Star of Wonder - photo by Deborah Frings - Deborah's Gems

Stamps: Stampin' Up! - Star of Light
Inks: SU - Pool Party, Island Indigo
Dies: Cheery Lynn Star Die K108
Accessories: White Lustre Card; SU DP - Winter Frost; Cheery Lynn Shaker Card Kit; Sequins; Spectum Noir Sparkle Brush - Clear


I recently purchased a Cheery Lynn Shaker Card Kit that includes all you need to make a star shaker card - dies, metal shaker bits, acetate and foam - and decided to use it on today's card. I have based the layout on the sketch from CAS Colours & Sketches - CASC&S#218, but I have turned it to make a landscape style card.

I started by picking my design papers. I used the star die from the kit to cut the base layer and the acetate, and the frame die to cut the top frame and the foam. The sketch shows a band behind the rectangle and rather than use ribbon or paper, I decided to create a band of small stars behind the shaker element. I stamped the stars using a pale aqua ink and added a few lighter areas of stars on the front of the card. I adhered the base of star flat to the card front and then stamped the sentiment. The foam in the kit comes with adhesive on both sides, so I simply removed the backing paper and attached the foam layer to the base star. Next I added a mixture of sequins and some of the tiny metal embellishments that come with the kit. I didn't put a lot of sequins in the shaker as I still wanted to be able to see the design paper. I removed the backing paper from the top of the foam, attached the acetate and then finished the element by adding the design paper frame. I stamped an simple star on some white card, cut it out and adhered that on top of the star shaker. I added some sparkle to this star with my clear Spectrum Noir brush. On the inside I cut a mat layer of design paper and on the white panel added another band of aqua stars and a Christmas greeting.

Star of Wonder inside - photo by Deborah Frings - Deborah's GemsStar of Wonder sq - photo by Deborah Frings - Deborah's Gems

After cutting out the star frame from the design paper I was left with a large star, so I decided to decorate an envelope to match the card. I also added a tiny little star in dark aqua. You can see the card and envelope below, along with a close up of the shaker element on my card:

Star of Wonder detail - photo by Deborah Frings - Deborah's GemsStar of Wonder env - photo by Deborah Frings - Deborah's Gems

Now, do visit our blog to see more inspiration projects from the rest of the Design Team. You've got plenty of time to play along with this challenge. Deadline for submission is midnight (BST) Friday 5th May (7.00pm EDT) - you've got an extra week for this challenge! Do have a go!

I mentioned earlier that we were at Disney for Kat's spring break. It's not a place I've longed to go to, but Kat and her friend, Alyx, were both very, very keen to go. So, we took them for a week. It turned out to be great fun for us all. Kat and Alyx are both old enough to go off on their own, so Jonathan and I were able to go round and just have fun. We even went on a few rides!! We walked miles and miles. It was a really fun break. The only downside was that our flight home was cancelled by Delta (weather related) and Jonathan ended up driving back to Michigan from Florida. He's my hero!  Here are a few photos from our holiday:


I think the girls are at just the right age to really enjoy Disney. Old enough to go off on their own, keeping in touch by text, and young enough to want to see the Disney princesses and characters!! Love them both!

That's all for now - hope you all have a good weekend!

signature

Saturday 1 April 2017

CCT - Theme ....

.... Morning all! Blimey, it's April already! As it's the first Saturday of the month, it's time for our new challenge at Christmas Card Throwdown - CCT07. We have a fun theme for you to use on your Christmas cards for the next couple of weeks:

MUSICAL NOTATION

Here's my card - a fairly clean and simple card:

Merry Christmas - photo by Deborah Frings - Deborah's Gems

Stamps: CAS-ual Friday Stamps - Big Treble, Love Notes, Christmas Carols, Uniko - Simply Said Christmas
Inks: Versafine - Onyx Black; Distress - Festive Berries
Accessories: White Lustre Card; Stampin' Up! DP - Real Red; Cuttlebug EF - Distressed Snow; Zig Clear Colour Brush; Spectrum Noir Sparkle - Clear; Gems; Vellum; SU Punch


This is a fairly small card measuring 3½" x 5", but it's the perfect size to showcase this lovely treble clef stamp. I stamped the image direct onto the card base and then embossed the snowflakes. I coloured the treble clef with a bright red Zig brush and went over it with a clear sparkle brush. I also added a touch of sparkle to some of the snowflakes. I didn't want to hide the treble clef, so I stamped the sentiment on vellum, heat embossed it with clear powder and punched it out. I finished the front with a few tiny red pearls. On the inside I cut a mat layer of red design paper. On the white panel I stamped a border of musical notes and added a simple Christmas greeting along with a tiny musical note accent. I've used the sketch from this weeks CAS(E) this Sketch challenge - CTS#215.

Merry Christmas inside - photo by Deborah Frings - Deborah's GemsMerry Christmas sq - photo by Deborah Frings - Deborah's Gems

I really like this theme, so I decided to make another card. This one if much larger, 4½" x 6¼". I have a large, okay HUGE, stash of design papers, and I think this theme lends itself to using up some of that stash. Here's my card:

Hark Angels - photo by Deborah Frings - Deborah's Gems

Stamps: CASual Friday Stamps - Love Notes, Christmas Carols
Inks: Versafine - Vintage Sepia; Delicata - Golden Glitz
Dies: Uniko - Snowflakes
Accessories: White Lustre Card; Kaisercraft DP - Holy Night; Gold Textured Card; Spectrum Noir Sparkle - Clear


This card came together really quickly. I found a sheet of design paper showing the Christmas carol, Hark the Herald Angels Sing (one of my favourites), and cut it to fit the front of the card. I layered it on some gold textured card. I wanted to keep it reasonably simple, but felt that it needed something. So I cut a gold snowflake from the gold card and attached that to the front.  I did add a touch of sparkle to the star above the Nativity image. On the inside I cut a mat panel from some more co-ordinating design paper. On the white panel I stamped a simple Christmas greeting and added some gold musical notes. I'm submitting this one to the April Love to Craft Challenge Blog - LTCCB#09, where Anything Goes.

Hark Angels sq - photo by Deborah Frings - Deborah's GemsHark Angels inside - photo by Deborah Frings - Deborah's Gems

Do visit our blog to see more inspiration cards from the rest of the Design Team. You've got plenty of time to play along with our MUSICAL NOTATION theme at Christmas Card Throwdown. Deadline for submission is midnight (BST) on Friday 14th April, that's 7.00pm EDT in the States. Have fun!!

Kat has finished school for her spring break and she really needs it, she's been working so hard! I think that most of the schools are off now for a week, and in the UK it's two weeks. We're having a week away - it's going to be a busy week. We're off to Disney, Orlando! Should be lots of fun. Whatever you're doing for the break, have a great time!

signature
Related Posts Plugin for WordPress, Blogger...