Showing posts with label Color Hues. Show all posts

Friday, 22 May 2026

Birthday Card for a Sewing Fan

.... Good afternoon! It's absolutely beautiful here in North Wales. The sky is blue, and the sun is shining, and, more importantly, it's lovely and warm too. And I've spent the morning making a birthday card for my friend:


Stamps: Waffle Flower - Sweet Birthday Sentiments, Postage Collage, Postage Collage Sew Fun
Inks: Versafine Clair - Nocturne; Gina K - Soft Stone, Stormy Sky, Light Orchid, Medium Orchid, Dark Orchid
Stencils: Waffle Flower - Postage Collage Sew Fun, Postage Collage Blocks Stencil, Postage Collage Coloring Stencil
Dies: Waffle Flower - Postage Collage Die, Sweet Birthday Sentiments
Accessories: White Card; SU Card - Smoky Slate; White Posca Pen

I had so much fun making this card. Heather, my friend, is a whiz with the sewing machine. She makes lots of her own clothes, so this is perfect for her. I die cut the postage stamp panel from white card, used the co-ordinating Sew Fun stencils and inks to create the little stamps, and finished by adding postage marks in black ink. I used the PC Coloring Stencil to make the airmail border on an A2 white note card. I layered the stamp panel on grey card and added the whole piece to the A2 card. I finished the front with a simple birthday greeting. On the inside, I cut a mat layer of grey card, and on the white panel stamped a birthday greeting and a couple of sewing images.


I'm submitting this card to AAA Birthday Challenge - AAAB#85 where it's their 7th birthday and the theme is Anything Birthday Goes. I'm also playing along with Color Hues - CH#133 where the colours are lime green and violet.


This card is going in the post this afternoon and should reach Heather in plenty of time. That's all for now. See you soon.

signature photo Signature.png

Tuesday, 5 May 2026

Belated Birthday Card

... Hi! I'm running late with this card. It's my brother-in-law's birthday today, and I got so caught up with the bank holiday weekend, that I forgot to make a card for him. However, it's never too late to wish someone a happy birthday. Here's the card:


Stamps: Uniko - Bauhaus Blocks, Simply Said Birthday, Everyday Sentiments, Birthday Sentiments, Background Blocks Mid Century Modern
Inks: Versafine Clair - Nocturne; Gina K - Blue Denim, Blue Sky, In the Navy
Accessories: White Card; Copic Markers; Lawn Fawn - Clear Embossing Powder

This came together very quickly. I used my MISTI to stamp the Bauhaus Blocks images, removed them and coloured with Copic Markers. I returned them to the MISTI and restamped with Versafine Clair Nocturne ink and heat embossed with clear powder. I then cut them into individual square panels. I added them to the front of an A2 white note card and finished with a suitable greeting. On the inside, I cut a white panel slightly smaller than A2 size. I stamped a fun background in light blue ink, and added a greeting in shades of dark blue. I edged the panel with a yellow marker and adhered it to the note card.


I'm submitting this card to the following challenges:

Addicted to CAS - ATCAS#307 where it make a birthday card
Color Hues - CH#132 - to use yellow and blue
Cardz 4 Guyz - C4G#385 - make a clean and simple card


I really like the Bauhaus blocks images - they work perfectly for masculine cards, and also for feminine cards too. It just depends what colours you pick! That's it for now. See you again soon.

signature photo Signature.png

Sunday, 22 February 2026

Set of Five Christmas Cards

.... Good afternoon, it's another lovely day and I've been indoors! I've made a set of five Christmas cards for my stash - they are all inspired by the current challenge at 52 Christmas Card Throwdown to use letters and/or numbers - 52CCT2026-07


Stamps: Woodware - Christmas Date; Hero Arts - Christmas Messages, Stylized Christmas Trees
Inks: Versafine Clair - Nocturne; Gina K - Jelly Bean Green
Dies: Gina K - Master Layouts 2
Accessories: White Card; Copic Markers; Grabie Jumbo Glitter Gel Pens; Kaisercraft DP - Home for Christmas

This card is also being submitted The Neglected Stuff Challenge - NSC#0226 - it's been a very long time since I used any of my design paper pads!!

The same process was used for all the cards. I used my MISTI to stamp the image on white card, removed them from the MISTI and coloured each image with Copic markers. I returned the coloured images to the MISTI and restamped with Versafine Clair Nocture ink - it is a really dark black. I carefully cut out all the images and then added some shimmer to each image with Grabie Jumbo Glitter Gel pens. I had put the images aside overnight to make sure gel ink dried completely. I used a die to cut out the front panel from design paper - to match the colours on the focal image - and adhered to an A2 notecard. I used dimensional tape to add the focal image. On the inside of each card, there is a mat layer of design paper, and on the white panel a simple greeting with a couple of stars to match the main colour.


The next card in the set is being entered into AAA Colourful - AAAC#25 -  these are such lovely colours.


Stamps: Woodware - Christmas Date; Hero Arts - Christmas Messages, Stylized Christmas Trees
Inks: Versafine Clair - Nocturne; Gina K - Blue Sky
Dies: Gina K - Master Layouts 2
Accessories: White Card; Copic Markers; Grabie Jumbo Glitter Gel Pens; Kaisercraft DP - Violet Crush

Next is a card inspired by the image at Time Out Challenge - TOC#307 - I like the soft colours and the dotty pattern:


Stamps: Woodware - Christmas Date; Hero Arts - Christmas Messages, Stylized Christmas Trees
Inks: Versafine Clair - Nocturne; Gina K - Lovely Lavender
Dies: Gina K - Master Layouts 2
Accessories: White Card; Copic Markers; Grabie Jumbo Glitter Gel Pens; Kaisercraft DP - Silver Bells

For the next card I used the colours at The Color Hues Challenge - CH#127 - peach and teal are such a pretty combination and make for an unusual Christmas card:


Stamps: Woodware - Christmas Date; Hero Arts - Christmas Messages, Stylized Christmas Trees
Inks: Versafine Clair - Nocturne; Gina K - Sweet Mango
Dies: Gina K - Master Layouts 2
Accessories: White Card; Copic Markers; Grabie Jumbo Glitter Gel Pens; Kaisercraft DP - Storyteller

And the final card in this set of five, is inspired by ABC Christmas Challenge - ABCXMAS#02 where I've picked C for the colour crimson:


Stamps: Woodware - Christmas Date; Hero Arts - Christmas Messages, Stylized Christmas Trees
Inks: Versafine Clair - Nocturne; Gina K - Red Hot
Dies: Gina K - Master Layouts 2
Accessories: White Card; Copic Markers; Grabie Jumbo Glitter Gel Pens; Kaisercraft DP - Home for Christmas

Sorry there are so many photos in this post! I had fun with them and I'm building my Christmas stash nicely. See you soon.

signature photo Signature.png

Monday, 19 January 2026

Snowman

... Hello! I hope everyone has had a good weekend.  I was busy this weekend, more of that below, and I made a card too - another for my Christmas stash:


Stamps: Funstamps - Scribble Snowman; Winnie & Walter (W&W) - Winter Wonderland, Sentimental Wishes
Inks: Gina K - Blue Sky, In the Navy; Versafine Clair - Nocturne
Accessories: White Card; Gina K Card - In the Navy; Gina K Stencil - Glacier Lace; Copics; Glitter

This was fun to make and I'm entering the following challenges:

CAS on Friday - CASOF#325 - where they want a Snowman
Time Out Challenges - TOC#304 - they want to see glitter
Colour Hues -CH#125 - blue and white

I started by stencilling an icy background directly on the A2 note card. I stamped the snowman on white card and used Copic markers to add colour. I stamped a few extra snowmen, then fussy cut the focal image along with the spares and layered them up for dimension. I stamped the greeting directly onto the card and adhered the snowman above. I finished the front by adding some glitter to the snowman's hat. On the inside, I cut a mat layer of dark blue card. On the white panel I stamped a Christmas greeting in dark blue ink and added some soft stencilling at the corners of the panel. I took a close-up photo of the hat to show the glitter.


So, I said above that we were busy this weekend. Jonathan had a photoshoot at the house with Bobbi; she's a bundle of fun! I watched some craft videos, caught up with the European Ice Skating Championships, which came from Sheffield, and read a bit. We also went to the cinema to see 28 Years Later The Bone Temple - it was silly and lots of fun and very bloody too!


It's been a fun weekend. That's it for now. Thanks again for stopping by to see my cards and for all the lovely comments, they are much appreciated.

signature photo Signature.png

Sunday, 11 January 2026

Birthday Boy

... Hello! It's been quite a while since my last post. I really thought I'd got it together, but it turned out not to be the case. However, I'm determined to get back to making cards - I've got hardly any left in my stash! So, today I'm sharing a card that I made for our son, Ben. Ben is 30 years old on Tuesday - I'm safe sharing it now, as he doesn't look at my blog!! Here's the card:


Stamps: MFT - Bitty Birthday Wishes, Sassy Pants Birthday Greetings
Inks: Gina K - Red Velvet, Stormy Sky; Versafine Clair - Nocturne
Dies: SU - Large Number Framelits
Accessories: Waffle Flower Stencil - Layered Triangles; Graphite Grey Mirri Card; Gina K Card - Red Velvet; White Card

I'm submitting this card to Color Hues - CH#124, great colours for a guy, AAA Birthday - AAAB#81, Winter birthday theme, and Inkspirational - INK#358, where they want shine.

This stencil is great for a masculine card. I did the first layer in red and the second in grey. I trimmed the panel to be slightly smaller than an A2 (US size card) card. I stamped a simple birthday greeting in grey, and finished the front with a bold, shiny number 30. I die cut two numbers from mirri card (so hard to photograph), along with several in white card which I layered up to give the number some depth. On the inside, I used what was left of the ink on the stencil to make a second generation image. On top of that I stamped a fun birthday greeting.


I've posted the card to Ben and, hopefully, he should get it by Tuesday. It's hard to believe he's 30 years old.


Before I go, I'd just like to wish everyone a Happy New Year - I'm sure this will be the latest one in the year. See you soon.

signature photo Signature.png

Wednesday, 4 August 2021

SHC - Shimmer and Shine ....

.... Morning! I can't quite believe that it's already August - the year is flying by. However, it's Wednesday and that means it's time for my weekly Seven Hills Craft Blog post. Not a Christmas card in sight today, instead I've made a set of three cards all using products from Concord & 9th. Here's the first:


Stamps: Concord & 9th - Stripes & Sayings, Everyday Greetings
Inks: Gina K - Wild Dandelion, Passionate Pink; Versafine Clair - Nocturne
Dies: C&9 - Confetti Card Die, Butterfly Perfect Pairing
Accessories: White Card; SU Card - Melon Mambo; C&9 - Tintables Card Fronts; Silver Holographic Card; Sheer Shimmer Spray - Sparkle

I'm submitting this card to Color Hues - CH#23 where the colours are yellow and pink, and to Inkspirational - INK#244 where they want to see Dots/Spots.


I started by blending yellow and pink inks over the dotty tintable card front. I love the way the pattern is revealed as the colour is blended! I spritzed the panel with a shimmer spray and once it was dry I used a fancy edge die to cut the panel to fit on the front of an A2 (US size card) notecard. I stamped a simple greeting in bold black in the bottom corner of the card. I finished the front by adding a flutter of butterflies. I die cut a silver layer and two white layers. I adhered them together to give strength and stability to the die cut, and then I glued them to the card. Inside, I cut a mat layer of bright pink card. On the white panel I stamped a birthday greeting in bright pink and added a tiny sun stamp in yellow. I also added a silver holographic butterfly - some of the waste from the die cut!!


Next, I used word tintable card front:


Stamps: Concord & 9th - Everyday Greetings
Inks: Gina K - Lemon Drop, Key Lime, Lucky Clover
Dies: C&9 - Confetti Card Die
Accessories: White Card; SU Card - Granny Apple Green; C&9 - Tintables Card Fronts; Sheer Shimmer Spray - Frost

I'm submitting this to the current Never-Before-Used-Sctuff - NBUS#29 - first time I've used the Confetti die, despite having it for a while!!

I used acid lemon, lime green and grass green for this tintable cover sheet. In real-life the words are clearly visible, but not so much in the photo. I think perhaps, I'll use darker colours next time. As before, I used the Confetti die to cut out the panel, after first adding shimmer with a frost spray. I adhered the panel directly to an A2 notecard. Inside, I cut a mat layer of bright green card. On the white panel, I simply adding a bold greeting in green. Lots of space left for my own message.


My final card is a simple hello card:


Stamps: Concord & 9th - Shine On
Inks: Gina K - Powder Blue, Blue Denim, In the Navy, Slate
Dies: C&9 - Confetti Card Die; Everyday Sayings
Accessories: White & Black Card; C&9 - Tintables Card Fronts; Sheer Shimmer Spray - Frost; Copic Marker

I'm submitting this card to Cardz 4 Guyz - C4G#276 where they want us to use Shades of Blue - done!!

This time I used blue and grey inks to blend over the chevron tintable card front. I spritzed on some frosty shimmer and, once dry, I used the Confetti die to cut the panel to size. I adhered it to the front of an A2 card. I used a large 'hello' die to cut a black shadow and three white hellos. I layered the white words together, glued them to the black shadow and then adhered the lot to the front of the card. Inside, I cut a piece of white card slightly smaller than the note card. I edged it with a dark grey Copic marker and stamped a message and some stars. There's plenty of space for my message. I think this one will go to our son, Ben.


That's all from me today. I'm taking Mum and Kat into Chester later this morning for a bit of retail therapy. And then, in the afternoon, I'll be watching the Olympics - just love all the sports. See you soon.

signature photo Signature.png

Wednesday, 26 May 2021

SHC - Starry Birthday ....

Morning! I'm here with my weekly Seven Hills Craft blog post. This week I've made a birthday card for an old friend of mine. It's actually her birthday tomorrow, but I'm safe to share it here as she won't see the blog.


Stamps: Stamping Bella - Oddball Frida; Avery Elle - Inside Birthday Greetings; Concord & 9th - Start Turnabout
Inks: Gina K - Sea Glass, Ocean Mist, Lovely Lavender; Versafine - Onyx Black; Versamark; Versafine Claire - Nocturne
Accessories: White Card; Copic Markers; Clear Embossing Powder; Nuvo - Clear Aqua Shimmer Brush; Sakura - Stardust Pen

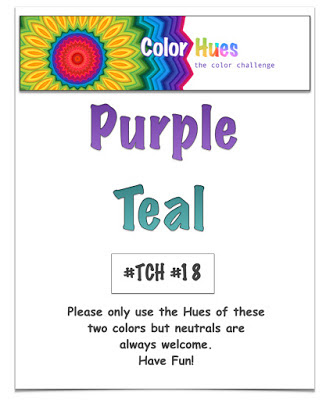
I'm submitting this card to Color Hues - CH#17 where they want to see Teal and Purple, and also to AAA Birthday - AAAB#25 where the theme is Happy Birthday. The AAAB challenge is 2 years old!


I started by stamping the star background onto my notecard. I used my MISTI and the C&9 jig positioner and stamped the stars in Versamark ink on all four turns. I heat embossed the stars with clear powder. Next I used teal and purple inks to blend a soft, subtle background and reveal the shiny stars. On some scrap white card I stamp the Oddball Frida image in grey ink, removed it from the MISTI and coloured with Copic markers. I returned the image and stamped with Versafine black ink and heat embossed with clear powder. I then fussy cut the image and adhered it to the front of the card with dimensional pads. I added some sparkle to the flowers and hem of her dress with a clear aqua shimmer brush. To finish the front, I stamped a bold birthday greeting in black ink and embossed it with clear powder. On the inside, I cut a piece of white card to 5¼" x 4". I used the small section from the Star turnabout stamp to stamp some lilac stars. I edged the piece of card with soft teal ink and finished by stamping a greeting.


I am pleased to say that you can actually see the shimmer on the flowers in these photos! I'm pleased how they photos turned out as it was so grey and wet on Sunday when I took them!!

Anyway, that's all from me today. I hope you all keep safe. See you soon.

signature photo Signature.png
Related Posts Plugin for WordPress, Blogger...