Showing posts with label C&9 - Star Turnabout. Show all posts

Wednesday, 26 May 2021

SHC - Starry Birthday ....

Morning! I'm here with my weekly Seven Hills Craft blog post. This week I've made a birthday card for an old friend of mine. It's actually her birthday tomorrow, but I'm safe to share it here as she won't see the blog.


Stamps: Stamping Bella - Oddball Frida; Avery Elle - Inside Birthday Greetings; Concord & 9th - Start Turnabout
Inks: Gina K - Sea Glass, Ocean Mist, Lovely Lavender; Versafine - Onyx Black; Versamark; Versafine Claire - Nocturne
Accessories: White Card; Copic Markers; Clear Embossing Powder; Nuvo - Clear Aqua Shimmer Brush; Sakura - Stardust Pen

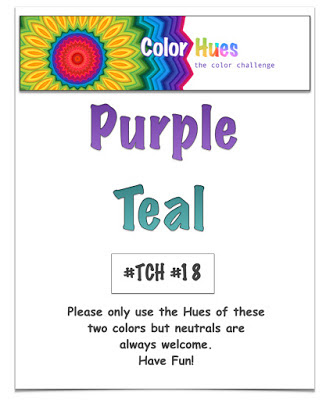
I'm submitting this card to Color Hues - CH#17 where they want to see Teal and Purple, and also to AAA Birthday - AAAB#25 where the theme is Happy Birthday. The AAAB challenge is 2 years old!

I started by stamping the star background onto my notecard. I used my MISTI and the C&9 jig positioner and stamped the stars in Versamark ink on all four turns. I heat embossed the stars with clear powder. Next I used teal and purple inks to blend a soft, subtle background and reveal the shiny stars. On some scrap white card I stamp the Oddball Frida image in grey ink, removed it from the MISTI and coloured with Copic markers. I returned the image and stamped with Versafine black ink and heat embossed with clear powder. I then fussy cut the image and adhered it to the front of the card with dimensional pads. I added some sparkle to the flowers and hem of her dress with a clear aqua shimmer brush. To finish the front, I stamped a bold birthday greeting in black ink and embossed it with clear powder. On the inside, I cut a piece of white card to 5¼" x 4". I used the small section from the Star turnabout stamp to stamp some lilac stars. I edged the piece of card with soft teal ink and finished by stamping a greeting.


I am pleased to say that you can actually see the shimmer on the flowers in these photos! I'm pleased how they photos turned out as it was so grey and wet on Sunday when I took them!!

Anyway, that's all from me today. I hope you all keep safe. See you soon.

signature photo Signature.png

Wednesday, 11 November 2020

SHC - Ornament Banner Christmas ...

... Hello! Time is marching on - it's almost the middle of November and that means there are only six weeks until Christmas. So, my Seven Hills Crafts post features Christmas cards. All feature ornament banners - I made banners in pinks, blues, gold, rainbow, and red & green. Here's the first card using the pink ornament banner:


Stamps: My Favorite Things - Ornament Builder Banner; Concord & 9th - Star Turnabout, Very Merry Sentiments, Christmas Cottage
Inks: Gina K - Innocent Pink, Passionate Pink, Red Hot, Cherry Red, Jet Black Amalgam; Delicata - Silvery Shimmer
Dies: Die-namics - Ornament Builder Banner
Accessories: White & Black Card

I used the Star Turnabout alternating pink and silver inks to create the background. I cut the pink ornament banner into two, adhered them to the card front and finished by stamping the sentiment in the middle. On the inside, I stamped and added some decoration in pink to match the front of the card.


My next card uses the blue banner:


Stamps: My Favorite Things - Ornament Builder Banner; Concord & 9th - Star Turnabout, Joy, Christmas Cottage
Inks: Gina K - Powder Blue, Blue Denim, Jet Black Amalgam; Delicata - Silvery Shimmer
Dies: Die-namics - Ornament Builder Banner
Accessories: White & Black Card

I used the same star stamp for the background, but this time only stamped it twice, once in blue and once in silver.

Next is the rainbow ornament banner card:


Stamps: My Favorite Things - Ornament Builder Banner; Concord & 9th - Star Turnabout, Christmas Cottage, Warm Wishes
Inks: Versafine Clair - Tulip Red, Summertime, Cheerful, Verdant, Paradise, Charming Pink, Purple Delight; Gina K- Jet Black Amalgam; Delicata - Golden Glitz
Dies: Die-namics - Ornament Builder Banner
Accessories: White & Black Card

For this card I only stamped the stars once in shimmery gold ink as I wanted the rainbow ornaments to stand out. I stamped a greeting on the front and inside, I used the same words as the previous two cards, but this time the decoration is stamped in gold to match the stars.


The next card features the gold ornament banner:


Stamps: My Favorite Things - Ornament Builder Banner; Concord & 9th - Polka Dot Turnabout, Very Merry Sentiments
Inks: Delicata - Golden Glitz; Versafine - Onyx Black
Dies: Die-namics - Ornament Builder Banner
Accessories: White, Cream, & Black Card; Clear Embossing Powder

I changed the background to polka dots for this card and stamped the turnabout image twice in gold. I adhered the ornament banner across one corner of the card and stamped a bold greeting in black in the opposite corner which I embossed with clear powder. On the inside, I stamped the verse from Very Merry Sentiments.


My last card uses the red & green ornament banner and this time I opted for a portrait look:


Stamps: My Favorite Things - Ornament Builder Banner; Concord & 9th - Polka Dot Turnabout, Very Merry Sentiments
Inks: Kaleidacolor - Fruit Cake; Versafine - Onyx Black
Dies: Die-namics - Ornament Builder Banner
Accessories: White & Black Card; Clear Embossing Powder

I really like this Kaleidacolor ink pad, I think it's perfect for Christmas cards. I stamped the polk dot background twice. I cut the banner into two pieces, adhered them across the corners of the card and added the centre ornament with a dimensional pad. I finished by stamped the sentiment directly on the card and heat embossing with clear powder. The inside has the same verse as the cream card - but the photo was blurred!! 

These cards are flat and will be easy to mail. That's all from me today. Hope you're all keeping safe and well. Bye for now.

signature photo Signature.png
Related Posts Plugin for WordPress, Blogger...