Showing posts with label HLS - Fun Birthday Sentiments. Show all posts

Monday, 8 March 2021

Happy Birthday ....

.... Good afternoon. I've made a birthday card today:


Stamps: Unity Stamps - Tess Girl; Happy Little Stampers - Fun Birthday Sentiments
Inks: Versafine - Onyx Black
Accessories: White Card; Kaisercraft DP - Bombay Sunset; Clear Embossing Powder; Copic Markers

I'm submitting it to AAABirthday - AAA#23 where they want us to use patterned paper, and also to Never-Before-Used-Schtuff - NBUS#24. I have a huge stash of patterned paper and don't often use it, so thanks to the AAAB team for making me get some out! My NBUS is this lovely image from Unity Stamps and the verse inside.


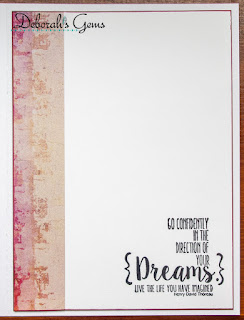
I found this lovely paper in my stash cut it to fit the front of the card, edged it with a dark pink marker and glued it to the card. I stamped the girl on white card, coloured her with Copic markers, reinked with black Versafine and heat embossed with clear powder. I then fussy cut her out, edged her with a black marker and glued her to the front of the card. I finished by adding a simply birthday greeting. On the inside, I cut a piece of white card onto which I glued a strip of the same design paper to one side. I stamped the sentiment in the bottom corner of the card. It is such an encouraging sentiment - perfect for a young woman setting out on her journey in life.


Today is International Women's Day and the theme they have is Choose to Challenge. I think the sentiment goes well with the theme. I'm also submitting this to Women.Beyoutifully.you where there theme is empowerment. I think she's very confident in herself and the sentiment works perfectly.


And that's all from me today. See you soon.

signature photo Signature.png

Sunday, 28 February 2016

CIC - Theme ....

... Good morning!  It's time for our new challenge at Cupcake Inspirations - CIC#349 where we have a theme - PRINCESS.  I wasn't able to play along last week (busy at Back to Back Retreat in Florida), so I'm pleased to be here this week.  Our sponsor is this week is AlciaBel and the winner of the challenge will get three digi images.  The team were lucky to be able to pick an image to play with and I chose Umbrella's Lady.  Here's my card:

Happy Birthday - photo by Deborah Frings - Deborah's Gems

Stamps: AliciaBel Dig - Umbrella's Lady; Happy Little Stampers - Fun Birthday Sentiments; Dovecraft - Princess
Inks: Versafine - Vintage Sepia; Stampin' Up! - Early Espresso
Dies: Die-namics - Wonky Stitched Ovals Stax #3
Accessories: White Lustre Card; My Mind's Eye DP - Summer Papers; Copic Markers; SU Card - Early Espresso; Wink of Stella - Clear


I really like this little lady - she's quite fun - check out the tiny skulls on her skirt and her hat!  I used the colours in the graphic as inspiration for colouring the image.  In my stash I found crown stamp which is perfect for the theme.  I used the layout from this week's Freshly Made Sketches - FMS#225.  The crowns fit nicely down one side of the card and I used pretty patterned paper for the large panel.  I printed the image on white card, coloured her with Copic markers and used a scalpel to cut her out.  I die cut an oval panel from white card, adhered the image and added some little gems.  I finished the front of the card with a simple birthday greeting.  On the inside I cut a mat layer of design paper, which I edge with a brown marker and adhered to the card.  On the white panel I stamped the crown again and added the crown.  I added sparkle to the main image (skulls, umbrella, lips and hat) with a clear Wink of Stella brush and also to the hearts in the crowns.  Sadly you can't see it in the photo!

Happy Birthday inside - photo by Deborah Frings - Deborah's GemsHappy Birthday sq - photo by Deborah Frings - Deborah's Gems

For more inspiration with our Princess theme, do visit our blog to see more cards from the rest of the team.  That's all for now!

signature

Wednesday, 3 February 2016

TMR - Theme ....

.... Good evening!  I'm very, very late with my post for the new challenge at The Male Room - TMR#28 and I must apologise to my team mates!  For the next couple of weeks we want to see your masculine styled projects with an ORIENTAL theme.  I've made a very simple birthday card:

Happy Birthday - photo by Deborah Frings - Deborah's Gems

Stamps: Happy Little Stampers - Bold Birthday Sentiments, Fun Birthday Sentiments; Kanban - Oriental (I think)
Inks: Versafine - Onyx Black; Stampin' Up! - Real Red
Dies: Die-namics - Wonky Stitched Rectangle Stax #4
Accessories: SU Card - Real Red; White Lustre Card; SU/Sizzix - Double Sided Adhesive; Black Peeloffs; Gilding Flakes - Gold/Silver


I made the base from red card, as red is considered a lucky colour in China.  The cue word over at Addicted to CAS - ATCAS#80  is RED, so I'm submitting this card to the challenge.  I stamped the oriental character image in bold black - I've no clue what the characters mean.  I die cut a panel of double sided adhesive attaching one side to to white card and on the other I place a black oriental peeloff.  I added gilding flakes in gold (with a touch of silver) to the adhesive panel.  I love the effect that this gives.  I finished the front with a simple birthday sentiment.  I attached the gilded panel to the card with dimensional tape.  On the inside I cut a panel of white card and on it I stamped the same oriental characters in red and added a fun greeting.

Happy Birthday inside - photo by Deborah Frings - Deborah's GemsHappy Birthday sq - photo by Deborah Frings - Deborah's Gems

I really like the cards that the rest of the team have made - from cute and fun to elegant - all with the oriental theme!  I've not been on my blog much lately - details will follow soon!  That's all for now, see you soon.

signature

Wednesday, 20 January 2016

TMR - Theme ....

...  Morning!  We had so many fabulous projects submitted to our last challenge at The Male Room - it was great to see the thumbnail display.  Here's hoping that the new challenge at The Male Room - TMR#27 which has a theme of BABIES & LITTLE BOYS, will generate just as much enthusiasm.  I made a birthday card - I always need to have a few cards for little boys!

Happy Birthday - photo by Deborah Frings - Deborah's Gems

Stamps: Happy Little Stampers - Mix Mash, Fun Birthday Sentiments, Bold Birthday Sentiments; Stampers Anonymous Tim Holtz - Robot
Inks: Stampin' Up! - Marina Mist, Tangelo Twist, Pumpkin Pie; Memento - Tuxedo Black
Dies: Spellbinders - Reverse Wonky Rectangles (S4-307) #4
Accessories: White Lustre Card; SU Card - Marina Mist, Pumpkin Pie; Papermania DP - For Him; SU Punch - Chevron; Copic Markers; Wink of Stella - Clear


Going through my stash of design papers I came across a very old set from Papermania which included this piece with the fun robots.  I used my Tim Holtz blueprint robot stamp for the image, cut it out with a die and coloured it with Copics and added sparkle with a clear Wink of Stella brush.  I left space at the bottom of the die cut to add the sentiment.  I grounded the image with a chevron and star.  I echoed the chevron patter by punching a border of orange card and matting it on blue.  On the inside I cut a mat layer of blue card.  On the white panel I created a birthday message from several sets and finished off by adding another cute robot.  I'm submitting this card to the current challenge over at Cardz 4 Guyz - C4G#103 where they want to see the colour blue on your card, and mine is mostly blue.

Happy Birthday inside - photo by Deborah Frings - Deborah's GemsHappy Birthday sq - photo by Deborah Frings - Deborah's Gems

The sun was shining yesterday (when I made this card) so I was able to take a photo of the robot showing all that lovely shimmer.  The snow on the ground was sparkling too - so very pretty!

Happy Birthday detail - photo by Deborah Frings - Deborah's Gems

Do visit our blog to see what the rest of the team have made to inspire you.  Remember, you can make any type of papercraft project for the challenge - scrapbook layout, ATC, 3D, Project Life - it's entirely up to you, but it must have a masculine feel.  You've plenty of time to play along - submission deadline is midnight (GMT) Tuesday 2nd February (7.00pm EDT).  That's all for now! See you soon.

signature

Wednesday, 6 January 2016

TMR - Theme ....

.... Hello!  I'm running late with my DT card for the new challenge at The Male Room - TMR#26.  I don't quite now how, but I lost track of the day and thought that today was Tuesday!!!!  Heyho, better late than never.  For the next couple of weeks our challenge at The Male Room is ANYTHING GOES, but it must have a masculine style.  Here's my card:

Happy Birthday - photo by Deborah Frings - Deborah's Gems

Stamps: Waffle Flower - Calendar; Happy Little Stampers - Fun Birthday Sentiments; Clearly Besotted - A Little Sentimental
Inks: Stampin' Up! - Crumb Cake, Soft Suede; Tip Top Taupe
Accessories: White Lustre Card; SU Card - Crumb Cake; Kaisercraft DP - Attitude!; Snap Stickers - Carpe Diem; Project Life - Corner Punch; Copic Markers


I used a couple of challenges to make this card:

I made the base from kraft card and cut a panel of white card slightly smaller to go on the front.  I used papers from Attitude! - a very masculine pack of papers - cutting stripes to go at the top of the card.  I rounded the corners with my Project Life corner punch.  I stamped the calendar frame on the lighter design paper and realised that I needed to make the smaller stripe darker, so I added some colour with a neutral Copic marker.  I stamped the month of January on white card and used the little circle stamp go highlight the important date.  I stamped a birthday greeting above the horizontal stripes and finished with some transparent stickers that emphasis the day.  On the inside I cut a panel of white card, added stripes of the design paper at top and bottom, and finished with a birthday greeting.  


This card is already in the post to the UK - I do hope that Ben likes it.  He'll be 20 on 13th January - but it only seems like yesterday that he was my sweet little blond haired boy!  Do drop by The Male Room to see more inspiration for the team.  Bye for now.

signature

Sunday, 3 January 2016

CIC - New Sweetie .....

..... Hello!  I've been keeping a secret, something that I find really difficult, but I can tell you all about it today.  I'm now a Sweetie at Cupcake Inspirations.  I was invited to join the team last year and naturally I said yes, but it's been so hard to keep it a secret.  I'm thrilled to be joining such a talented team.


Now that we have all recovered from the long holiday break, it's time for our new challenge at Cupcake Inspirations - CIC#341.  Each week we provide a cupcake to inspire you to create a card or other craft project following our theme or colours.  This week our theme is Elegance.  I made an elegant birthday card for someone special:

Happy Birthday - photo by Deborah Frings - Deborah's Gems

Stamps: Sparkle 'n' Sprinkle - Ballet Shoes; Happy Little Stampers - Fun Birthday Sentiments; Stampin' Up! - Making Spirits Bright; Uniko - Classic Numbers
Inks: Versafine - Onyx Black; Memento - Tuxedo Black; SU - Blushing Bride, Calypso Coral
Dies: Lil Inkers - Stitched Rectangles #5
Accessories: White Lustre Card; SU Card - Basic Grey; SU DP - Whisper White Bridal (discontinued); Green Card; Copic Markers; Wink of Stella - Clear; Clear Embossing Powder

Picture - Champagne Cupcakes

Our sponsor this week is Sparkle 'n' Sprinkle and the lucky winner of this week's challenge will receive a $15 gift certificate towards some of their fabulous digital images.


For my card I used these lovely ballet shoes - so pretty, so elegant.  I printed the shoes on white card, coloured them with Copic markers, carefully cut the shoes out and added lots of sparkle with a clear Wink of Stella brush.  I tried to make the shoes a soft creamy colour - like the frosting on the cake.  I cut a couple of mat layers in dark grey and dark green (also from the graphic) and on top I adhered a piece of white patterned paper.  I stamped the sentiment in Versafine and heat embossed with clear powder.  I attached the ballet shoes in the corner and added a shadow with my Copics.  I love the elegance of the paper and the lovely shoes.  On the inside I cut a mat layer of dark green card and on the white panel added a birthday greeting along with a couple of champagne glasses toasting the birthday girl!!

Happy Birthday inside - photo by Deborah Frings - Deborah's Gems

Do check out our blog to see more elegant inspiration projects from the rest of the team.  Have fun!

signature
Related Posts Plugin for WordPress, Blogger...