Showing posts with label US - Classic Numbers. Show all posts

Sunday, 10 September 2023

80th Birthday Celebration

.... Hello, good morning!!! It's been almost two months since I posted on my blog - we've had a busy summer and, while I've not made many cards, I have been busy in my craft room doing a bit of reorganisation and working in my dyalogs. However, today, I'm sharing a couple of birthday cards that I made for my uncle Ian, who celebrated his 80th birthday last weekend. Here's the first card I made:


Stamps: Simon Hurley - Candles; Cas-ual Friday Stamps - Shenanigans
Inks: Gina K - Wild Dandelion, Sweet Mango, Applemint, Key Lime, Jelly Bean Green, Grass Green, Christmas Pine; Versafine - Onyx Black; Versafine Clair - Nocturne, Green Oasis
Dies: Stampin' Up! - Large Numbers
Accessories: White & Black Card; Glossy Black Card; Sakura Stardust Pens; Clear Embossing Powder; Simon Hurley - Layering Candles; Copic Markers

I'm submitting this card to Happy Little Stampers Stencil Challenge - HLSSC#09 where is Anything Goes.

I used my MISTI to stamp the candles in Versafine black ink and heat embossed with clear powder. I added colour by ink blending through the matching layering stencils. I checked with my uncle to find out his favourite colour - green!! Yea, mine too!! I started at the top of the panel with light, bright greens and shaded down to darker greens at the bottom of the stencil. I used the next stencil to colour the flames. Next, I added sparkle to the candles and flames with Sakura Stardust pens in co-ordinating colour giving a subtle shimmer. I trimmed the panel to size, layered it onto a black mat layer and added the panel to the front of a 5¾" square white card. I cut the numbers from black glossy card and white card; I layered them together for dimension and stability and adhered them to the card. I finished the front with a bold sentiment stamped on white card. I used dimensional tape to add this to the card. Inside, I cut a mat layer of black card. On the white panel, I added a fun birthday greeting, stamped the candles at the bottom and coloured them with Copic markers. This is the card Jonathan and I gave to Ian.


Next up is the card that I made for my mum to give to Ian, her baby brother:


Stamps: Visible Image - Brother Definition; C&9 - Beautiful Words; Winnie & Walter - The Big, The Bold, and The Happy; Stampin' Up! - Made with Love; Uniko - Classic Numbers
Inks: Gina K - Powder Blue; Versafine Clair - Nocturne; Versafine - Onyx Black
Dies: SU - Word Bubbles; Gina K - Today & Shadow
Accessories: White Card; SU Card - Blueberry Bushel; Copic Markers; Clear Embossing Powder; Cuttlebug Embossing Folder - Happy Birthday


There's a story behind the design of this card. Ian's, mum's brother, always teases her by calling her "his older sister". So, when I asked what she'd like on Ian's card - mum smiled and said "the words 'baby brother'". I went one step further by adding a cute blue babygro with the number 80 on the front 😁. I made the note card from dark blue cardstock. I used a very old, but perfect for the theme, embossing folder from Cuttlebug, I lightly inked the edge and glued it to the front of the note card. I stamped the babygro and number on white card, embossed with clear powder, coloured it with Copic markers and then fussy cut it out and glued it to the card. I die cut the word bubble from white card and made the sentiment by mixing words from several stamp sets. I finished the front by adding the die cut word 'today'. Inside, I cut a piece of white card onto which I stamp the brother definition - absolutely perfect. I kept the 'baby brother' theme going by adding a cute duck and teddy, along with a row of alphabet letters in pale blue ink.


I am happy to report that Ian thought that both cards were just brilliant. Mind, he wasn't too keen on the thought of 80 candles on his cake!!! This is the birthday cake that my aunt had made for him:


It was a good birthday party with all the family there to celebrate - including some very distant cousins that I hadn't seen in years!! 

That's all for now. I'm going to publish this post and then go down for a cool glass of water. The weather this week has been nuts!! July and August were not the best summer, and then the first week of September is blazing hot!! See you soon.

signature photo Signature.png

Tuesday, 31 October 2017

Ghosts and Skeletons ....

.... Hi! I'm here this morning with a sneak peek of a project that you can see over at Uniko. Just for a change, I've made a scrapbook page:


You can see the whole process over at Uniko - with photos of various steps along the way. I'm going to submit this layout to Love to Craft Challenge Blog - LTCCB#15 where the theme is Anything Goes.

Happy Halloween - photo by Deborah Frings - Deborah's Gems

Stamps: Uniko - Classic Alphabet, Classic Number, Background Builders Seeing Stars, Background Builders Chevrons, Uniko Style, Festive Sentiments
Inks: Versamark; Distress Oxides - Spiced Marmalade, Wilted Violet, Black Soot; Gina K - Wild Lilac; Stampin' Up! - Pumpkin Pie
Dies: Memory Box - Cross Stitched Frames #3, Corner Cobweb, Dangling Spider, Dancing Skeleton, Cross Stitched Borders #5 & #6
Accessories: Kraft Card 12" x 12"; Purple Glitter Paper; Black Glitter Card; Black Card; Graphic 45 Halloween DP; Copics; Wink of Stella - Clear

Over on the Uniko blog, I mentioned that this is going to be our fifth Halloween celebration in the States. Kat has always loved Halloween, so being here and able to take part in Northville's Halloween celebration is a joy for her. Tonight she and her best friend, Alyx, are off downtown. Hopefully, I'll get a picture or two of them dressed up! A couple of years ago my son came over to visit and he got to enjoy it too! I've got a few more photos of all those skeletons and the wonderful Halloween decorations in Northville.


Above are just some of the skeletons from the 2015 display. Sadly, I've not managed to get around this year and take photos of the new skeletons - and they had some wonderful ones!!


The photos above are from our trip to Three Cedars Farm to enjoy the autumn bounty. Lots of apple cider, doughnuts, and, of course, pumpkins! It's really a fun day out for all the family.

Thanks so much for stopping by - see you all again soon.

signature

Sunday, 3 January 2016

CIC - New Sweetie .....

..... Hello!  I've been keeping a secret, something that I find really difficult, but I can tell you all about it today.  I'm now a Sweetie at Cupcake Inspirations.  I was invited to join the team last year and naturally I said yes, but it's been so hard to keep it a secret.  I'm thrilled to be joining such a talented team.


Now that we have all recovered from the long holiday break, it's time for our new challenge at Cupcake Inspirations - CIC#341.  Each week we provide a cupcake to inspire you to create a card or other craft project following our theme or colours.  This week our theme is Elegance.  I made an elegant birthday card for someone special:

Happy Birthday - photo by Deborah Frings - Deborah's Gems

Stamps: Sparkle 'n' Sprinkle - Ballet Shoes; Happy Little Stampers - Fun Birthday Sentiments; Stampin' Up! - Making Spirits Bright; Uniko - Classic Numbers
Inks: Versafine - Onyx Black; Memento - Tuxedo Black; SU - Blushing Bride, Calypso Coral
Dies: Lil Inkers - Stitched Rectangles #5
Accessories: White Lustre Card; SU Card - Basic Grey; SU DP - Whisper White Bridal (discontinued); Green Card; Copic Markers; Wink of Stella - Clear; Clear Embossing Powder

Picture - Champagne Cupcakes

Our sponsor this week is Sparkle 'n' Sprinkle and the lucky winner of this week's challenge will receive a $15 gift certificate towards some of their fabulous digital images.


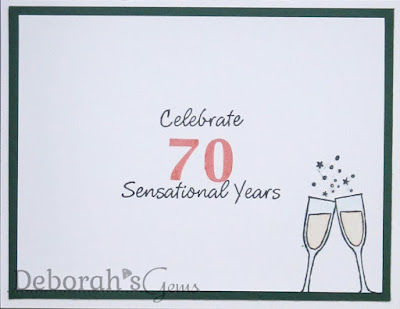
For my card I used these lovely ballet shoes - so pretty, so elegant.  I printed the shoes on white card, coloured them with Copic markers, carefully cut the shoes out and added lots of sparkle with a clear Wink of Stella brush.  I tried to make the shoes a soft creamy colour - like the frosting on the cake.  I cut a couple of mat layers in dark grey and dark green (also from the graphic) and on top I adhered a piece of white patterned paper.  I stamped the sentiment in Versafine and heat embossed with clear powder.  I attached the ballet shoes in the corner and added a shadow with my Copics.  I love the elegance of the paper and the lovely shoes.  On the inside I cut a mat layer of dark green card and on the white panel added a birthday greeting along with a couple of champagne glasses toasting the birthday girl!!

Happy Birthday inside - photo by Deborah Frings - Deborah's Gems

Do check out our blog to see more elegant inspiration projects from the rest of the team.  Have fun!

signature

Friday, 27 November 2015

UC - Christmas .....

.... Morning!  Have you joined in with our Uniko Challenge yet?  This month our theme is CHRISTMAS with an optional twist of CAS.  There's no white space on my card, so I don't think it counts as CAS, but it is quite simple to make:

25 Dec - photo by Deborah Frings - Deborah's Gems

Stamps: Uniko - Classic Numbers, Wonderful Washi Christmas, Stunning Snowflakes
Inks: Versamark; Stampin' Up! - Lost Lagoon
Dies: Uniko - Snowflakes
Accessories: White Lustre Card; SU DP - Winter Frost; Glitter Paper; Rhinestones; Copic Markers; Silver Tinsel Embossing Powder


I've used the sketch from Freshly Made Sketches - FMS#214 for the layout, the colours are inspired by the new FUSION challenge - FUSION#44 and I've used snowflakes based on the words at TIME OUT Challenge - TOC#44 - "Snowflakes are winter's butterflies".

I cut some design paper and covered the card.  I stamped the washi image in Versamark, heat embossed with Silver Tinsel and coloured the reverse with a Copic marker, then cut it out and adhered it to the card.  I die cut a snowflake from glitter paper and adhered that to the card.  I punched a circle of the DP and stamped the number 25 - for Christmas Day and adhered it to the centre of the snowflake.  I finished the front with some gems - crystal and frosted.  On the inside I cut a mat layer of the DP and on the white panel added a sentiment and more snowflakes.

25 Dec inside - photo by Deborah Frings - Deborah's Gems25 Dec sq - photo by Deborah Frings - Deborah's Gems

Our guests for this month's challenges are Shona and Magic Flying Boots - do check out their gorgeous cards.  Don't forget to visit the rest of the team too - they have all made such beautiful cards.

If you need more encouragement to play along - then we have prizes too.  The DT pick an overall winner who will get a £20 gift voucher for the shop.  The DT also pick a Top 3, who will each receive 50 Loyalty Points to their customer account.  If you've used Uniko products on your card, then you'll be entered in the random draw and the winner gets 150 Loyalty Points added to their account.  Finally, if you've twisted with us this month (CAS), then you'll be entered into another random draw, the winner of this draw will get 100 Loyalty Points added to their customer account.  You've plenty of time to join in, deadline for submission is 8.00pm GMT on Friday 4th December (that's 3.00pm EDT for those of us this side of the pond).  

signature

Friday, 6 March 2015

SNG - Happy Birthday .....

... Morning!   I've got a fun birthday card for you today - suitable for a little boy or even a big boy, who is still young at heart!!

Happy Birthday - photo by Deborah Frings - Deborah's Gems

Stamps: Rick St Dennis Digi - Buddy and his Pet Plant; Uniko Studio - Simply Said Birthday, Classic Numbers
Inks: Versafine - Onyx Black; Stampin' Up! - Lucky Limeade
Dies: Lil Inkers - Stitched Stars
Accessories: White Lustre Card; Papermania DP - For Him; Copic Markers; Wink of Stella - Clear; SU Marker - Basic Black


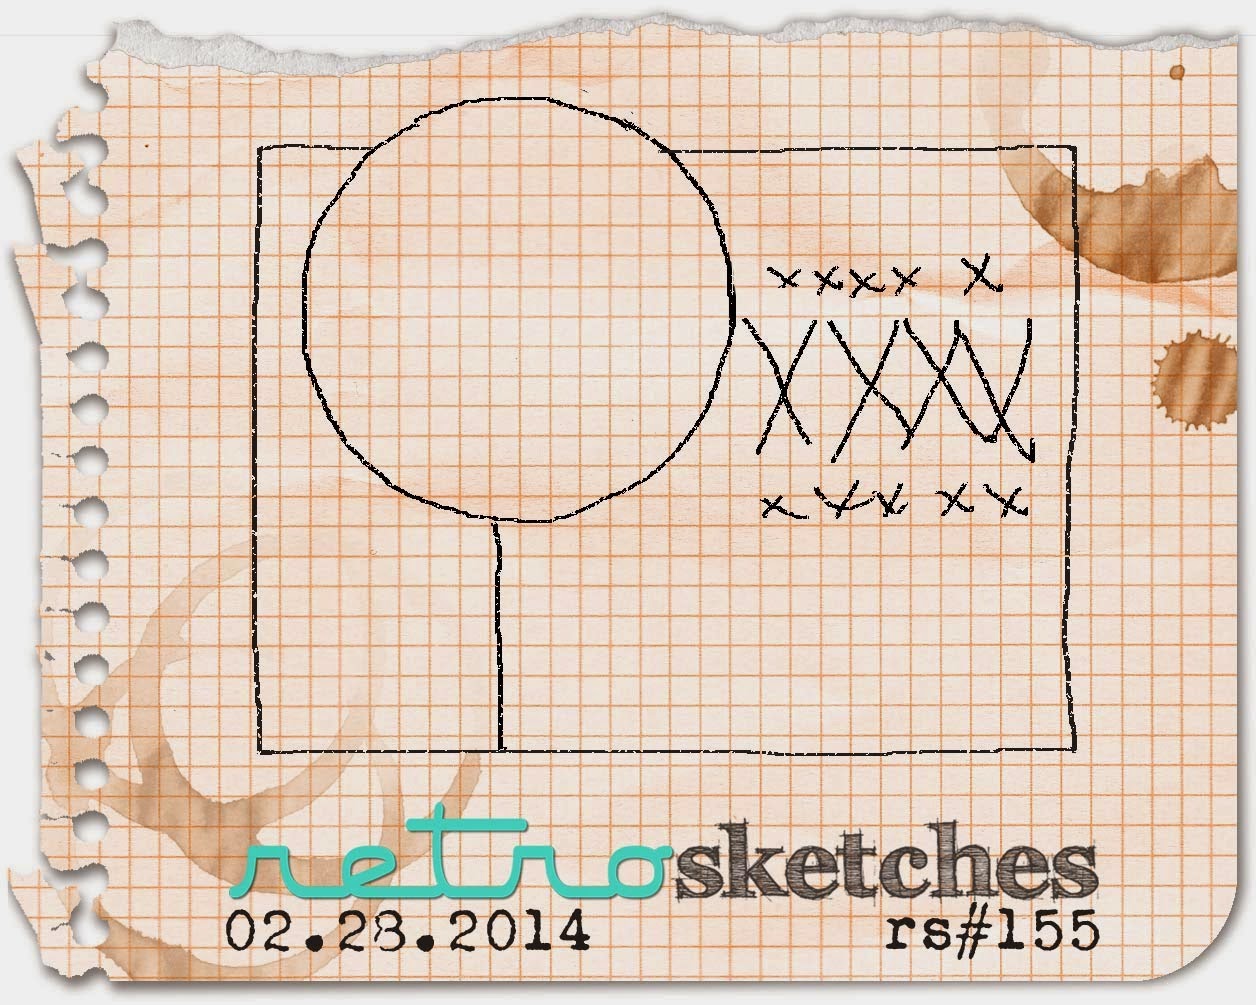
Don't you think Buddy and his Pet Plant are adorable?  You can find him and many more super fun digital images over at Rick's Zibbet and Esty shops.  I used the layout from this week's Retro Sketches challenge - RS#155, and the colours are from the current My Favourite Things Colour Challenge - MFTCC#16.  I used a couple of sheets of design paper to cover the card base.  I printed Buddy on some white card, coloured him with Copic markers, cut him out and edged the image with black marker.  I die cut the star from white card, coloured it with Copic markers and added lots of sparkle with my Wink of Stella brush.  I added a touch of sparkle to the pet plant too!  I finished the front with a simple birthday sentiment.  On the inside I cut a mat from the design paper and added a simple greeting on the white panel.

Happy Birthday Sq - photo by Deborah Frings - Deborah's GemsHappy Birthday inside - photo by Deborah Frings - Deborah's Gems

I hope the DT over at MFT are okay with my colours - when I printed off the challenge graphic I thought the colours were blue and green, it's only now that I realise the colour is lavender!!  Never mind - I'm pleased how this turned out.

We've got sunshine again, but along with the sun comes cold, cold temperatures!  But spring is on the way - the clocks go forward this weekend and the weatherman is promising much warmer temps next week - yea!!!  I was out yesterday and I spotted some grass - albeit slightly brown, but it'll green up soon - I hope.  That's all for now.  See you soon.

signature

Tuesday, 10 February 2015

Uniko Studio - Simply Said Birthday ....

...  Good morning - so pleased to see you.  Today we are introducing the fourth and final new mini-set from Uniko Studio - Simply Said Birthday, which is full of lots of birthday greetings in a selection of fab fonts!  Here's my card:

Happy Birthday - photo by Deborah Frings - Deborah's Gems

Stamps: Uniko Studio - Simply Said Birthday, Balloon Bash, Classic Numbers
Inks: Stampin' Up! - Pretty in Pink, Early Espresso, Smoky Slate; Memento - Peanut Butter
Accessories: White Lustre Card; SU Card - Early Espress; Cuttlebug EF - Chevrons; Wooden Arrow; Vellum


I used a couple of challenges in creating this card.  I used the colours (but not the theme) from The Card Concept - CC#28 and when I saw the MUSE challenge - MUSE#104 I knew I had to play along.  I cut a mat layer of brown card slightly smaller than the base card and adhered it to the card.  I embossed white card with this fab dotty chevron pattern (similar to the MUSE card) and then lightly ran over the pattern with grey, pale pink and sand coloured inks to define the dots.  I stamped the birthday sentiment in brown on vellum, wrapped it around the card and adhered it to the base.  I finished the front with a little wooden arrow which I over stamped with stars!  On the inside I cut a mat layer of brown, and on the white panel stamped a birthday greeting and more stars.

Happy Birthday inside - photo by Deborah Frings - Deborah's GemsHappy Birthday sq - photo by Deborah Frings - Deborah's Gems

I like the contrast of the scripty font on this birthday greeting and the geometric chevron pattern.  On the inside of the card are a couple more fonts!

Click on the links below for more inspiration with our new mini-set - Balloon Bash:

Bev - Uniko Studio
Amber
Deborah (that's me)
Erika
Gillian
N@ Ali
Nicki
Sandie
Sarah

Here's the release schedule:

Saturday to Tuesday - we're introducing each set day by day.  The DT will have examples of how to use the stamps - lots of inspiration guaranteed.

Wednesday 11th February - you will get to see all the products and be able to purchase them HERE on the website.  As tradition holds, there will be a Design Team Blog Hop with a chance for a lucky person to win the ENTIRE release!!!

Now, you won't want to miss out on any of the fun on our intro days as we will be drawing totally random winners for mystery prizes.  We are not giving any hints as to the prizes or their value, you'll just have to join in on the fun!

Places to join in on the fun and possibly win a prize are by commenting along the way on the Uniko Studio Blog, DT, liking the Uniko Studio Facebook page, following on Twitter and Pinterest!

I do hope you've enjoyed seeing my cards introducing the new Uniko Studio mini-sets.  Do come back tomorrow - I'll be sharing more inspiration cards using these sets and, more importantly, you can get them from Bev's shop at 9.00am.  See you soon.

signature
Related Posts Plugin for WordPress, Blogger...