Saturday, 22 March 2014

WMSFC - Colours ....

.... Hello again!  I'm back with my card for our new colour challenge at Waltzingmouse Fanatics.  I love the shades of teal and gold, Tara has called it mustard, but I think gold is prettier!  You must use at least three of the colours on your project; I used two shades of teal and two shades of gold.  You must also use at least one Waltzingmouse image, digi or sentiment. 

Mother's Day - photo by Deborah Frings - Deborah's Gems

Stamps: Waltzingmouse - Two Step Sprig; Winnie & Walter - The Big, The Bold & The Happy, The Write Stuff: Leave it to Mom; CAS-ual Friday Stamps - Wallflower
Inks: Stampin' Up! - Soft Sky, Pool Party; Memento - Potter's Clay, Cantaloupe
Accessories: White Lustre Card; SU Card - Soft Sky


I used the sketch from Clean & Simple Stamping - FTL#285, although I've turned the sketch through 90° to make a landscape style card.   I made the base from Soft Sky and cut a panel of white card to go on top.  I stamped the leaves directly onto the panel and the flowers onto white card.  The flowers are really easy to make, simply stamp the base colour (pale gold) and the detail in a darker colour (dark gold) add the centre and then I fussy cut the flowers.  I attached the smaller flowers directly to the card and used dimensional gel for the larger flowers.  I finished the front with a bold sentiment - I love the font used in the word happy.  For the inside I cut another panel of white card, stamped some flowers down the sides and added a sentiment in the middle.

Mother's Day inside - photo by Deborah Frings - Deborah's Gems

Don't forget to check out Tara's card.  I hope you find these pretty colours inspiring - you have plenty of time to join in with the challenge, deadline is Thursday 3rd April, 5.00pm BST (that's Noon EDT).

I hope you all have a fun weekend planned.  Mine is full of crafty stuff.  Today I'm off to Stampeddler for a class to make a scrapbook page - I'll share photos soon.  And on Sunday, it's another photo shoot.  That's all for now, take care.

signature

52CCT - Stash challenge ...

....  Morning!!!  It's time for our new challenge at 52 {Christmas} Card Throwdown.  The theme this week is dimensional paper flowers - you can use ready made flowers, punches, or dies, and I've stamped my flower and decoupaged the image.

Sparkly Stuff - photo by Deborah Frings - Deborah's Gems

Stamps: Waltzingmouse - Text It; CAS-ual Friday Stamps - Christmas Carols; Reverse Confetti - Tinsel 'n' Trim
Inks: Versamark; Stampin' Up! - Smoky Slate, Lucky Limeade, Strawberry Slush
Accessories: White Lustre Card; SU Card - Lucky Limeade, Melon Mambo; Vellum; White Embossing Powder; Copics

I've gone for some very bright, non-traditional colour for my card using the colours from this week's Merry Monday - MM#100.  I used the layout from last week's Waltzingmouse Fanatics challenge - WMSFC#13.  I started by stamping some text onto the bottom of the card in soft grey and then made the panel with white and lime card.  I stamped the sentiment in lime at the top of the card.  Next I stamped the large, funky poinsettia three times in Versamark on to bright pink card and vellum, heat embossing them all with white powder.  I cut out the whole of the bright pink poinsettia and attached it to the card.  I coloured the reverse of the vellum flowers with lime on one and pink on the other and then carefully cut out the layers, to reveal the bright pink at the bottom, some green leaves and the top pink layer.  I finished the centre with some gems.  You can't really see the dimension of the flower above, so here are a couple more views showing that I have got a dimensional paper flower!

Sparkly Stuff close up - photo by Deborah Frings - Deborah's GemsSparkly Stuff top view - photo by Deborah Frings - Deborah's Gems

You can see that the petals have a gentle curve and on the side view you can see all three layers.  I have kept it reasonably flat so that it is okay for the post.  On the inside I cut a mat layer of lime card, stamped the poinsettia in pink and added a sentiment.

Sparkly Stuff inside - photo by Deborah Frings - Deborah's Gems

For more inspiration with dimensional flowers check out the cards from the rest of the Design Team, and from our Guest Designer, Scraplady.  That's all for now!

signature

Friday, 21 March 2014

Birthday card ....

.... Good afternoon!  I do hope you're all having a good day - I've had fun playing in my craft room making cards for various design team challenges and this very clean, simple and, I think, elegant, birthday card.

Happy Birthday - photo by Deborah Frings - Deborah's Gems

Stamps: Waltzingmouse - Funky Feathers, Big Day - Today
Inks: Stampin' Up! - Bermuda Bay, Perfect Plum; Memento - Danube Blue
Dies: WMS Dies - Funky Feathers
Accessories: White Lustre Card; Masking paper; Baker's Twine


I used the colours from Colour Throwdown - CTD#284; they are just gorgeous and so rich.  The theme for birthday cards is from Card Concept - CC#6 and the technique of stencilling from this week's Less is More - LIM#163 challenge.  I die cut a couple of feathers from masking paper, attached them to the card and simply sponged colour off the stencil onto the card.  Then I inked up this pretty feather in three colours, cut it out with the matching die, added some twine and adhered it to the card with dimensional tape.  I finished with a clean, simple birthday sentiment, which is straight despite the photo!!  I've left the inside blank.

I've been taking part in the Clean & Simple Card Making.  The emphasis is on one-layer cards with lots of techniques.  This is not quite one layer, but it is very clean and simple.  I'm really pleased how it turned out.

On Wednesday I mentioned warmer temperatures and melting snow.  Today has been gorgeous, not quite as warm as Wednesday, but much brighter and the snow is still melting.

Front Yard - photo by Deborah Frings - Deborah's Gems

Front Yard 2 - photo by Deborah Frings - Deborah's Gems

I can see grass (albeit a bit brown still) and my plants are finally appearing from under the snow!  That's all for now.  Do drop by tomorrow for our new challenges at 52 {Christmas} Card Throwdown and Waltzingmouse Fanatics!  See you soon.

signature

Wednesday, 19 March 2014

You make me happy ....

.... when skies are grey!  And they are certainly grey here today!  However, the upside is that while it's grey and wet, it is very much warmer than it has been, a good reason to be happy.  This card has been made with a couple of challenges in mind:

Happy - photo by Deborah Frings - Deborah's Gems

Stamps: PTI - Scattered Showers; Stampin' Up! - See Ya Later
Inks: Memento - Cottage Ivy, Pear Tart, New Sprout
Dies: Spellbinders - Squares Lg (S4-126) #7, Squares Sm (S4-128) #7
Accessories: White Lustre Card; Green Mirri Card


My inspiration of the words "Dancing in the Rain", the theme at the new challenge Time Out Challenges, immediately reminded me of the movie Singin' in the Rain, one of our all time favourites and it always makes me happy.  So when I saw the stamp in See Ya Later, I had to combine the two.  I used the sketch and repeated stamping from Fusion.

I stamped the umbrella around the edge in two shades of green and added the handle in another green.  I die cut a mat of dark green mirri card and on the white panel stamped the sentiment and added another brolly.  On the inside I cut a mat of mirri card and on the white card I randomly stamped some raindrops and another sentiment.  I put the sentiment off to one side to allow plenty of room for me to write a message.

Happy inside - photo by Deborah Frings - Deborah's Gems

I mentioned the rain we are having and the warmer temperatures  - it's great, the snow is finally melting away and this is the view from my craft room window:

Craft room view - photo by Deborah Frings - Deborah's Gems

The grass is looking a little sad, but with some sunshine it'll soon green up!  We had 77 days continuous days with more than an inch of snow here in Northville.  I've never experienced a winter like this before!!!  That's all for now.  I'd better get on with some housework stuff!! 


signature

TMR - Vintage ....

... Morning!  It looks like spring might be trying to make an appearance in Northville, it got up to 7°C (45°F) yesterday afternoon, and it should be even warmer today, although a bit wet!!  Still it is time for our new challenge at The Male Room.  We had so many lovely submissions for our blue, green and brown theme.  Our theme this time is VINTAGE, and here's my take:

Happy Birthday - photo by Deborah Frings - Deborah's Gems

Stamps: Stampin' Up! - Perfectly Penned; Dare to be Artzy - Hot Air Balloons E13102
Inks: SU - More Mustard, Sahara Sand; Versafine - Onyx Black; Distress - Antique Linen
Accessories: White Lustre Card; SU Card - Basic Black, More Mustard; SU DP - More Mustard; Couture Creations EF - Ascension; Lakeland Greetings Banners


I find that vintage style is a bit out of my comfort zone, but I'm quite pleased with this card.  I used the colours from Dynamic Duos - DD#94, as well as the Dessert option of dry embossing.  I made the base from black card, cut a mat layer of More Mustard design paper and a panel of white card.  I embossed the white card with these fabulous balloons and brayed over the image with Sahara Sand and More Mustard.  I then added more ink by sponging on Antique Linen and More Mustard.  I rounded the corners of both layers and adhered them to the front of the card.  I finished the front with this bold birthday sentiment.  Not a bit of stamping on the front of the card.  On the inside I made a mat layer of More Mustard and on the white panel stamped (using second generation images) several small balloons and finished with a birthday greeting.

Happy Birthday inside - photo by Deborah Frings - Deborah's Gems

For more inspirational masculine cards with a vintage feel, check out the cards from the rest of the Design Team.  Looking forward to seeing what you make!  Bye for now.

signature

Tuesday, 18 March 2014

ASM - Make Your Mark .....

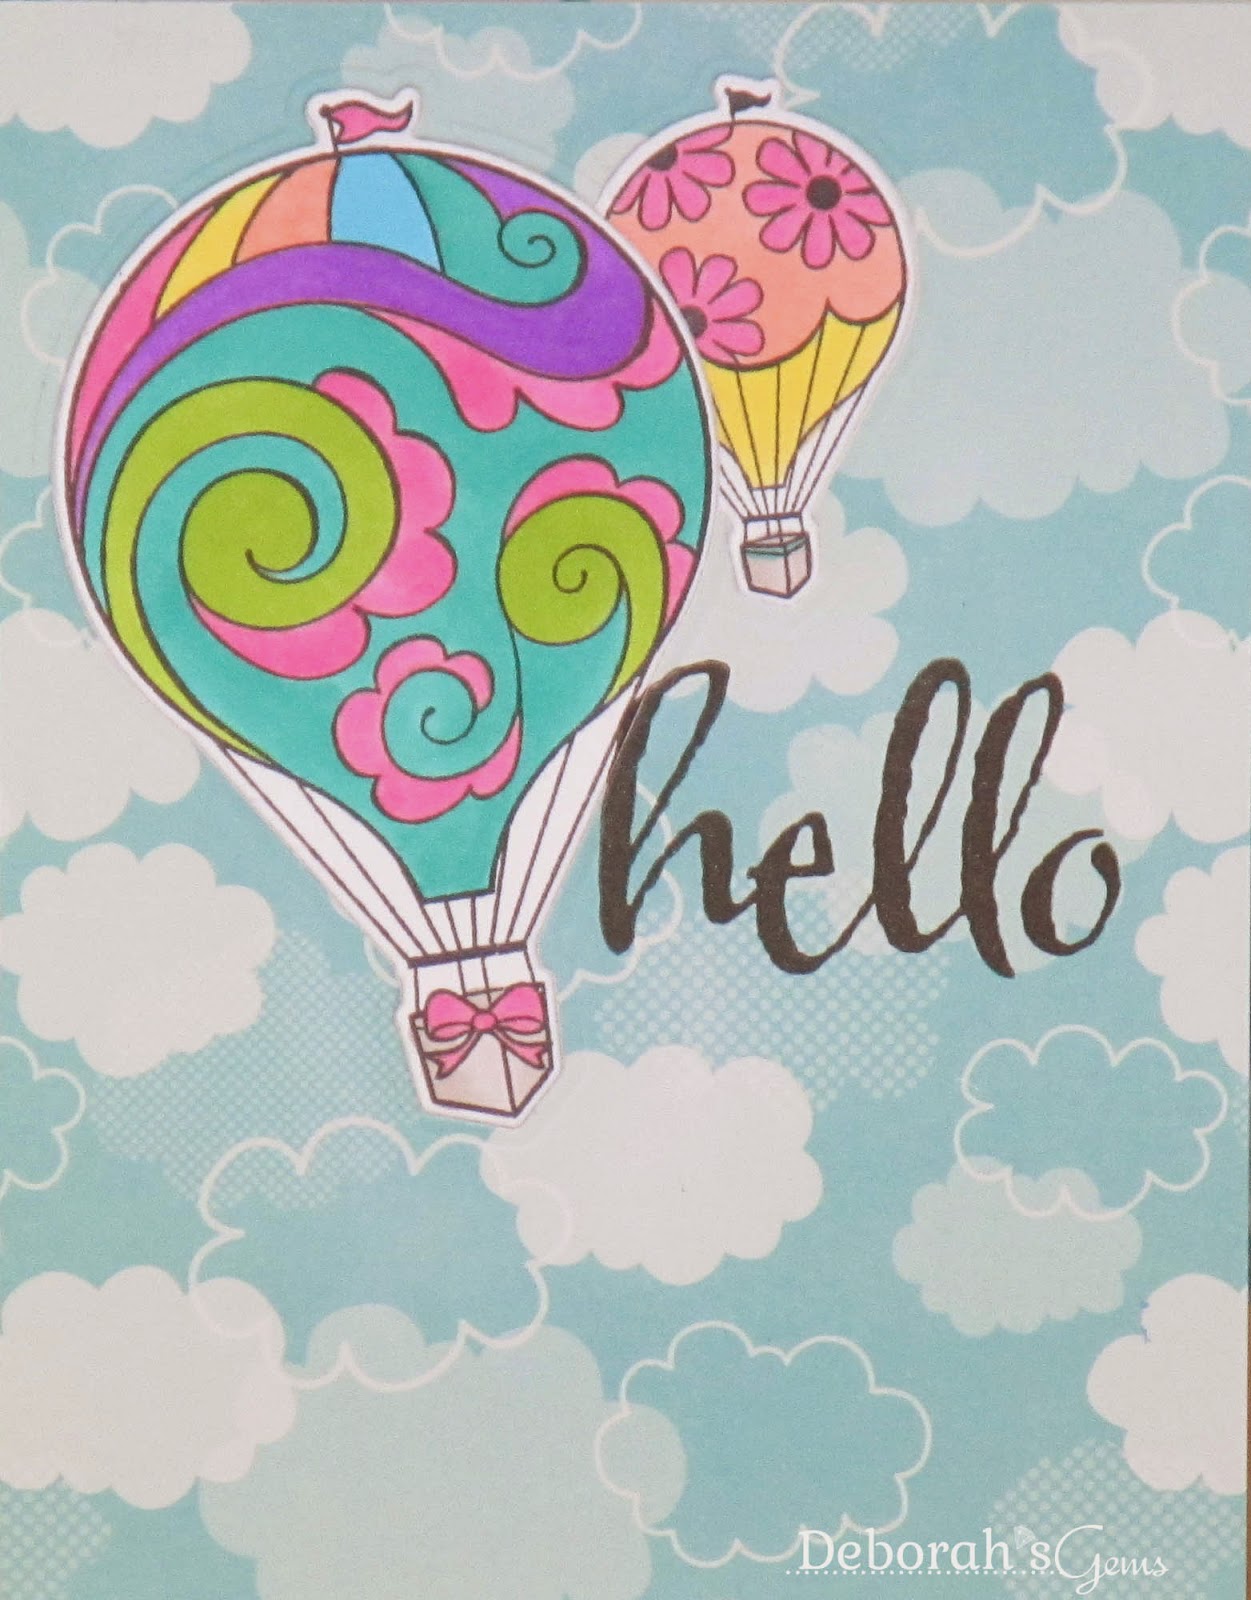
.... Evening All!!!  You certainly enjoyed our Anything Goes challenge last week - so many gorgeous cards!  This week at Addicted to Stamps and More! we have our "Make Your Mark" challenge - this one always popular too!  You must use markers on your card.  Here's my take:

Hello - photo by Deborah Frings - Deborah's Gems

Stamps: Dare to be Artzy - Lift Your Spirits; Winnie & Walter - The Big, The Bold & The Happy
Inks: Memento - Tuxedo Black; Versafine - Onyx Black
Dies: Dare to be Artzy - Balloons
Accessories: White Lustre Card; DP - Let's Fly Away (FOC with Quick Cards Made Easy); Copics; Stampin' Up! Card - Pool Party

Many of you will be familiar with Anita from France (My Papercraft World).   Apparently Anita had her birthday on 18th Feburary, but kept the date quiet.  And, although it's a bit late, we are surprising her with a birthday blog hop today!  The idea for the Blog Party was from Bev (Happy Dance), and it's being hosted by the ever popular Darnell (djkardkreations). This is the card I made for Anita.

I'm taking the Online Card Class, Clean & Simple One Layer Cards.  I always make time to watch the videos and follow the instructions, but I don't always make a card.  On the first day Debby Hughes demonstrated a really fun technique "Faux Layered Die Cuts" and that's what I did with this card.


I stamped the balloons on to white card and coloured them with Copics using the inspiration photo from Inkspirational Challenge - INK#52; love the coloured sheep - check out my photo below.  The layout is based (loosely) on the sketch at CAS(E) this Sketch! - CTS#68.  I cut the balloons out with the matching dies.  I covered the front of the card with this perfect paper.  I worked out where to position the balloons and then cut the smaller balloon out and inlaid the coloured image.  Then I put on the die for the large balloon cut it out and then inlaid the coloured balloon.  To make sure the images stayed in place I taped over them on the back and then covered the lot with a piece of white card.  What's great is that this card is just one layer, no bumps to cause problems with the post, but it looks layered.  Love this technique.  I finished the front with this wonderful bold greeting.  On the inside I cut a mat layer in pale aqua and on the white layer I stamped a greeting, die cut the small balloon and inlaid the waste from the front!

Hello inside - photo by Deborah Frings - Deborah's Gems

For more inspiration with our Make Your Mark challenge, check out the cards from the rest of the Design Team.  This week our Guest Designer is Anni(Annikarten) a member of our Wall of Fame.  Anni's cards are always gorgeous - do check out her card for our challenge.  Our sponsor this week is STAMPlorations and the winner will receive a prize from them.

My card features stamps from two new companies that I've just found.  The sentiment is from Winnie& Walter's The Big, The Bold and The Happy, and I've seen this set on Anita's blog.  The balloons are from a company called Dare to be Artzy that I found at my local craft store - Stampeddler - a treasure trove of goodies.  Check them out!  Oh yes, those coloured sheep I mentioned, here's a photo of them from the Latitude Festival held in 2010.  Since moving to the States we've not been able to attend the festival - this year's Latitude looks fab!

Coloured Sheep Latitude - photo by Deborah Frings - Deborah's Gems

That's all for now.  See you soon.

signature

Craft room done ...

....  I had to completely reorganise my craft room after I'd put together the new desk yesterday.  It took a lot less time than I expected and I can see the carpet again!  Here's the new look room.

Craft Room 1 - photo by Deborah Frings - Deborah's Gems

I found a table upstairs that wasn't being used, so I nicked it!  All the boxes that used to be on the floor are now on a desk and much easier to reach.  Also, there's a shelf, so I've managed to get gems, embossing powders, and a few other bits much closer.

Craft Room 2 - photo by Deborah Frings - Deborah's Gems

Here's a view of the desk with all the bits back on top.  Much more space to work in.

Craft Room 3 - photo by Deborah Frings - Deborah's Gems

I've put all my Stampin' Up! and Uniko Studio stamps in the bookcase (it used to hold various papers, card stock, embossing folders and glitters).  So nice to be able to see all the names clearly.  They used to be stored in the cubbie unit - three deep!!!

Craft Room 4 - photo by Deborah Frings - Deborah's Gems

Finally, the cubbie unit (previous home of SU/US stamps) - all my painting, glitters, buttons, gems, and sewing stash.  And it's so nice to have a clear floor!!  That's all for now.  My Addicted to Stamps and More! post will be going live shortly - do drop by to check it out! See Ya!

signature

Monday, 17 March 2014

New Desk ....

....  Well that was much easier than expected!!  Cleared my old desk, hoovered underneath and got rid of all the dust balls!  Then assembled my new desk - instructions really clear, all pieces present and correct and only took two hours to put together.


I ordered the desk - SEI Braxton Espresso - from Amazon on Saturday night and it was delivered this morning at 10.30am.  Brilliant service from all concerned.  It's not solid wood, but for $123 you can't complain.  My old desk was only 42" wide, this one is 47" wide - so I gained a bit of space.  Sadly, I've lost the drawers where I used to keep lots of bits and pieces, but I think I can get a couple of boxes to go on the shelves to store all that stuff.  Really pleased with this desk. 

It's also given me the boost to get my room tidied!!  That's all off to finish.  See you later.

signature

Friends owl-ways ....

....  Morning all!  Hope you've had a good weekend.  Ours was great fun, but more of that later.  Here's a fun card that I made yesterday afternoon for a couple of challenges:
Friends Owl-ways - photo by Deborah Frings - Deborah's Gems

Stamps: Dare to be Artzy - Feather Friends; Waltzingmouse - Woodgrain
Inks: Stampin' Up! - Early Espresso, Wild Wasabi
Dies: Dare to be Artzy - Owl Dies D2
Accessories: White Lustre Card; Kaisercraft DP - Limelight; Vellum


Checking out the definitions on The Card Concept, this card is clean and layered.   For some reason this is only the second time I've managed to play along, but I really like the colours this time, so I'm close to deadline, but I've made it.  I used the sketch from CAS - Colours & Sketches.  I covered the card with some lime paper from my new Kaisercraft pad - love the embossed texture on this piece.  I cut a white panel on which I stamped the sentiment in green.  For the vertical panel I stamped a wood grain image onto vellum - so my cute owl is sitting on a tree!!!  On the inside I cut a mat layer from another piece of design paper and added another owl.

Owl-ways inside - photo by Deborah Frings - Deborah's Gems

That's it for today.  The UPS guy has just delivered my new craft desk, so I've got to clear out my old desk, hoover and then assemble my new desk!  My old desk is really old - it's an antique desk that Jonathan had as a boy; he used it for doing homework.  When we moved here Jonathan told me to use it, I wasn't keen, but he was keen not to get a new one.  Sadly, the top drawer broke and needs to be repaired.  When I told Jonathan, his comment was "You use the drawers!!", well, yes, I keep all types of stuff in the drawers.  So now I have a new desk and the antique, will be upstairs as decoration!!!  Bye!

signature

Saturday, 15 March 2014

52CCT - Theme ....

...  Hello everyone!  According to the calender it's only a week until spring starts, but looking out my window to the snow on the ground, it is still very much winter!  It's time for our new challenge at 52 {Christmas} Card Throwdown and this week Patricia has picked the theme "STARS".   Here's the card I made:

It's Christmas - photo by Deborah Frings - Deborah's Gems

Stamps: Waltzingmouse - Frame-It, Festive Foliage; CAS-ual Friday Stamps - Christmas Carols
Inks: Stampin' Up! - Chocolate Chip
Dies: WMS - Pine Cones; Die-namics - Scattered Stars
Accessories: White Lustre Card; Gold Card; SU DP - Garden Green; SU Markers - Chocolate Chip, Always Artichoke, Garden Green, Old Olive


I've used the colours from this week's Merry Monday - MM#99 challenge: brown, green, gold with either white or cream.  I have to admit this is not what I initially came up with.  I had a much more vintage card with brown base and I didn't like it, so I started again.  This time I have a clean, layered card and I'm happy.  I cut a panel of white card slightly smaller than the base and die cut the stars.  I stamped the sentiment, layered gold card behind and adhered it to the card base with dimensional tape.  I coloured the pine cones and branches with markers, stamped the image and cut it out with the matching die, adhering it with very thin dimensional pads.  On the inside I cut a mat layer of green design paper and on the white panel stamped the pine cones again (second generation image) and a simple sentiment.

It's Christmas inside - photo by Deborah Frings - Deborah's Gems

I know that we're now well into March and many of you can't see why we are making Christmas cards as we come up to spring.  Well, if you've joined in since we started this year and made only one card, you have 13 cards in your stash.  The idea is that you get ahead so that you have more time for the parties and being with family.  Come on - we are looking forward to seeing your cards based on a Star theme.  As always, our Design Team have wonderful inspiration cards to share with you as does our Guest Designer, Scraplady. 

That's all for now.  We have a photography filled day planned today.  Kathryn is really enjoying her new (and expensive) hobby, and we have a Family Pass at most of the shoots.  I know I'm biased, but Kathryn has some lovely shots from last week - here's one:

Andrea Dreams - photo by Kathryn Frings - Deborah's Gems

If you want to see more of Kathryn's work, here's the link.  Bye for now!

signature
Related Posts Plugin for WordPress, Blogger...