 |
| Card Size: 4¼" × 5½" |
 |
| Card Size: 4½" × 6¼" |
Inks: Distress - Forest Moss, Pine Needles, Shabby Shutters, Peeled Paint, Evergreen Bough, Mowed Lawn; Stampin' Up! - Garden Green, Wild Wasabi, Coastal Cabana, Pistachio Pudding; Versafine - Onyx Black
Dies: Spellbinders - A2 Matting Basics A (S5-131) #5, A2 Matting Basics B (S5-132) #5, Wonky Rectangles (S4-306) #6
Accessories: White Lustre Card; Clear Embossing Powder; Black Card; Sakura Micron Pen; Kanban Sentiment Strip; My Favourite Things - MPD Graduated Diamonds Stencil; Signo White Gel Pen
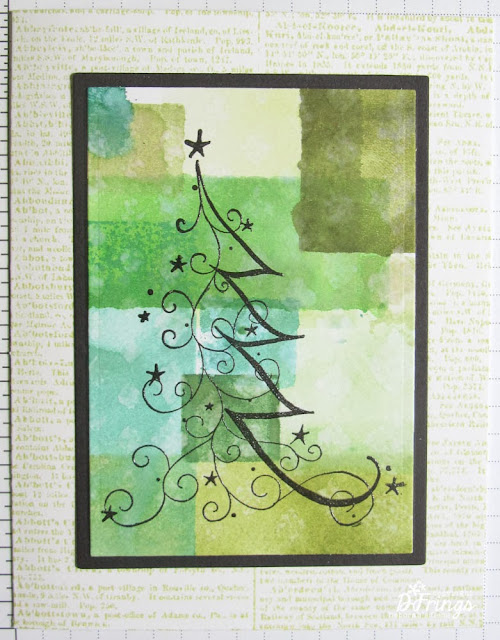
I had lots of fun with this technique and ended up getting quite inky! But that was half the fun. I used several different sized acrylic blocks - long and thin, tiny squares, and a couple of different sized rectangles. I inked the backs, spritzed and stamped. I overlapped some of the stamped images dried them with a heat gun and then added more. The top card has a somewhat smoother finish to the stamped blocks because I added more water to the acrylic blocks; the bottom card has a slightly blotchy look because of less water. On the top card, if you look closely, you might just see a subtle patten of graduated diamonds. I achieved this effect by spritzing water through a stencil and allowing it to react with the stamped blocks. I didn't add any texture to the background on the bottom card. I stamped the Christmas tree on each background and heat embossed with clear powder.
On the first card I used the Matting Basics to cut a rectangular image which I matted onto black card. I stamped the Dictionary background on the card base and then adhered the Christmas tree. It has the look of a painted canvas.
On the larger card I decided to have a bit of fun with placement of the image. For this card I die cut the tree using the Wonky Rectangles and, after stamping the dictionary background, adhered the image directly to the card. I put the die over the top of the image and lightly drew round the die. Then, using a Micron pen I created a "Zentangle" type frame. I finished the front of this card with a greeting that I found in my scrap stash - just happened to be the right colour!
For the inside of each card I cut a mat layer in black and on the white panel stamped the Christmas tree and added a sentiment.
 |
| Inside of top card |
 |
| Inside of bottom card |


4 comments:
Ooohh, just caught a glimpse of this. My artsy fartsy heart loves this look.
TOTALLY fabulous, Deb!!! LOVE the different greens you used! HUGS and hope you have a great rest of the week! :) Mynn xx
I love that you used different sizes and shapes of the blocks to make this really unique and trendy card (both of them). Great job Deborah!
Oh my goodness, I am so late with my comments, it's next week already! You blew me away with these ones, Deborah! They are fantastic with a capital F! love the colours, the image, the extra bits to the technique. Glad you had fun!
Louise xx
Post a Comment