Showing posts with label Waltzingmouse Pajama Party. Show all posts

Monday, 15 December 2014

WMS Pajama Party ....

... Good evening!  It's time for the December Waltzingmouse Pajama Party.  Claire sends out the invitation in plenty of time for us to get ready and play along this evening.  There are four challenges:
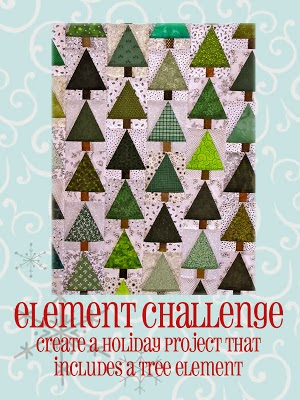
  1. Put up the Tree - make a 3D Christmas tree
  2. Deck the Halls - make a Christmas ornament
  3. Old pajamas - make something with an older Waltzingmouse set of stamps - the design team are using Country Labels 4
  4. Bedtime story sketch
It's getting really busy here with preparations for Christmas and various design team commitments, that I wasn't sure I'd get to play along.  However, I'm sharing a 3D Christmas tree here with you today.  I can't claim the idea is mine - I saw these trees at my local craft shop, Stampeddlar Plus - but I knew I could manage to make one of them.

3D Christmas Tree - photo by Deborah Frings - Deborah's Gems

Stamps: WMS - Faux Fun Circles, Dainty Doilies Large; Stampin' Up! - Be the Star
Inks: SU - Garden Green, Bermuda Bay, Regal Rose, Real Red; Brilliance - Galaxy Gold
Dies: Spellbinders - Circles Lg (S4-114) #4 and #5, Big Scalloped Circles Lg (S4-249) #2, #3 and #7
Accessories: White Lustre Card; Striped straw; Eggcup


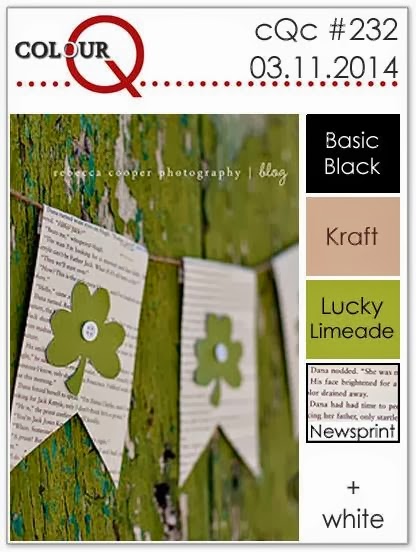
I used the colours from this week's Colour Throwdown - CTD#322 - I think they're just right for a Christmas tree.  I don't use these stamps enough, it was fun getting out these old sets and making the layers for the tree.  I used the two largest circles from Dainty Doilies to make the bottom four layers and the top layers are a mixture of both sets.  This is so easy to make.  I used an eggcup for the base of the tree and there's a convenient hole in the bottom through which I pushed a wooden skewer.  To keep the tree steady I used blu tac around the dowel. Then I cut the straw into ½" pieces and started by putting one of the pieces over the dowel.  I used my Cropadile to punch the holes in the centre of the circles.  Then it was simply straw, circle and repeat.  At the top I added a golden star which I adhered to the dowel with hot glue.  Here are some more photos of my 3D tree.

3D Christmas Tree 2 - photo by Deborah Frings - Deborah's Gems

3D Christmas Tree 3 - photo by Deborah Frings - Deborah's Gems

3D Christmas Tree 4 - photo by Deborah Frings - Deborah's Gems

3D Christmas Tree 5 - photo by Deborah Frings - Deborah's Gems

I have to apologise for the photos - it was really dark this afternoon (Saturday) and these are the best I could do.

At the time of typing this post (Saturday) I haven't managed to make anything for the other challenges, and as we are all rather under the weather I'm not sure I'll get chance.  That's all for now. 

signature

Monday, 15 September 2014

WMS PJP - last card ....

....  Good afternoon!  I'm back with another card for the Waltzingmouse Pajama Party!  Yes, I know I said that yesterday's card was the last one, but I got chance to play in my craft room this morning and have just one more for you:

Believe - photo by Deborah Frings - Deborah's Gems

Stamps: Waltzingmouse - Vintage Ornaments, Twas the Night Before Christmas, Tis the Season
Inks: Versamark; Stampin' Up! - Strawberry Slush; Versafine - Onyx Black
Dies: Spellbinders - 2010 Heirloom Ornaments (S4-283) #4, Ovals Sm (S4-112) #3
Accessories:  White Lustre Card; SU Card - Strawberry Slush, Basic Black; White Embossing Powder; Ribbon; SU Marker Pens - Real Red, Black; Signo White Gel Pen


I combined a couple of Claire's challenges - No 1 Doodle Do and No 3 Old Pajamas - this actually means doodling on a stamped image and using an older set of Waltzingmouse Christmas stamps.  I decided to use the solid image from Vintage Ornaments.  I stamped it in Strawberry Slush and cut it out with the co-ordinating Spellbinder die.  Then I added some doodles to the panels using marker pens.  I die cut a panel of white cut, stamped the oval ray pattern using the 3rd generation image and then stamped the sentiment and attached it to the ornament with dimensional tape.  I made the background panel by stamping the oval ray patten in Versamark and heat embossed with white powder.  I layered the background onto pink card and adhered it to the card base.  I finished the front with a simple ribbon.  On the inside I cut a panel of black card for the mat and on the white panel stamped a bold, simple sentiment in Strawberry Slush.

Believe - photo by Deborah Frings - Deborah's Gems

Now - that really is my last card for the PJ Party!  I'm going to make a cup of coffee and sit down to check out all the submissions.   But before I go, I told you that we'd were away for the weekend in Holland, Michigan.  Below are some (of the many) photos that I took on Saturday when we were in Grand Haven and Muskegon.

Grand Haven & Muskegon 1 - photo by Deborah Frings - Deborah's Gems

Kathryn - she was messing around on this rock and I managed to get a photo of her.  Kathryn used to love having her photo taken, but over the last year she's become less keen!!!  So I was pleased to get this one.  Taken in Grand Haven.

Grand Haven & Muskegon 2 - photo by Deborah Frings - Deborah's Gems

The lighthouse in Grand Haven.  Love the bold red colour.  It was a lovely afternoon.  Jonathan and I both walked to the red house at the end of the pier.

Grand Haven & Muskegon 3 - photo by Deborah Frings - Deborah's Gems

It was a bit windy at the end of the pier, so I decided to try and catch the waves crashing against the walk.  And I did!!!!  Fortunately I didn't get wet.

Grand Haven & Muskegon 4 - photo by Deborah Frings - Deborah's Gems

On our drive to Muskegon we came across a Veteran's Memorial Park in the middle of the road!  It was so beautiful that we decided to stop and look around.  I found this cross as we walked around.  It was really peaceful.

Grand Haven & Muskegon 5 - photo by Deborah Frings - Deborah's Gems

Finally a photo taken at the Farmers' Market in Grand Haven.  It was a fabulous market full of fresh produce and flowers.  Love chillies and tomatoes - I bought some to make salsa!! That's it - see you soon.

signature

WMS PJ Party - take three ....

... okay, I realise that you might have seen enough, but I've one more cute Halloween card, for the Waltzingmouse PJ Party,  to share with you today. 

Witch Way - photo by Deborah Frings - Deborah's Gems

Stamps: WMS - Boo and Friends, Peek a Boo Sentiments
Inks: Memento - Tuxedo Black; Archival - Jet Black; Distress - Stormy Sky, Weathered Wood
Dies: WMS - Witch Die
Accessories: White Lustre Card; SU/Sizzix EF - Cloudy Day; Copic Markers


I think this little spook witch is absolutely adorable!  Stamped onto white card, cut with the matching die and coloured with Copic markers.  I made a cloudy sky for the background by embossing white card, shading to suggest a night sky and attached it to the card base.  I stamped the sentiment on scrap card and fussy cut it out.  Both the image and sentiment were adhered using dimensional tape.  The inside is blank for my own message.

That really is all for today.  It's been a fun weekend.

signature

WMS PJ Party ....

.... Good evening!  I'm back with another card for the Waltzingmouse PJ Party.  This one is for No 2 - Cute Halloween.

Fangtastic - photo by Deborah Frings - Deborah's Gems

Stamps: WMS - Boo and Friends, Peek a Boo Sentiments
Inks: Memento - Tuxedo Black; Archival - Jet Black; Distress - Evergreen Bough
Dies: WMS - Vamp Die
Accessories: White Lustre Card; Stampin' Up! Card - Real Red; Copic Markers; Cuttlebug EF - Skeleton Skull; Gem


I adore these cute little spooks that Claire released last month - they are fun, sweet and so easy to colour.  I stamped the little vampire onto white card, cut him out with the matching die and then used Copic markers to colour him.  I added a tiny red gem.  I embossed some white card with this design, shaded the edges to highlight the skulls and adhered it to a panel of red card.  I stamped the pun sentiment in the centre.  On re-reading Claire's explanation, I realise that she might have been expecting actual sweets and candies!!!  Oh well, never mind, this is still rather sweet :))

That's all for now!

signature

Sunday, 14 September 2014

Swell birthday ....

....  Good evening!  I hope you're all enjoying your weekend.  We're on a weekend break on the west coast of Michigan in a town called Holland!  Jonathan came over for a photo shoot by Lake Michigan but sadly the chill weather meant that it was cancelled.  But that's okay as there's plenty to do over here.  We'll still be taking photos!!!  Before heading over here I was busy in my craft room making some cards for the Waltzingmouse Pajama Party!!!!!  Yea!  It's been a while since Claire hosted a PJ Party, so it's nice to sit back with a cuppa and check out what everyone has made.

Edited:  Oops!  I've posted a day early - hey ho!  I'll still be linking up when the PJ Party starts tomorrow!!!!

There are four categories:
  1.  Doodle Do - make a project that include some hand doodling.
  2. Too cute to Spook - make a Halloween project that includes cuteness! To quote Claire "sweet treats and dinky delectables".
  3. Old Pajamas - use an older Waltzingmouse Christmas set on your project.
  4. Bedtime Story Sketch challenge - a sketch from Claire for us to play with.
I actually made a few cards.  The first one that I'm sharing is for No 4 the Bedtime Story Sketch challenge.  I made a birthday card - I took inspiration from Lynn's beautiful card which she posted in our Waltzingmouse Fanatics Challenge on the theme Birthday/Anniversary (there's still time to join in).

Swell Birthday - photo by Deborah Frings - Deborah's Gems

Stamps: WMS - Art Deco Backgrounds, Putting on the Ritz; Rick St Dennis Digi - Shady Ladies "Tosca"
Inks: Versamark; Distress - Evergreen Bough, Tumbled Glass, Broken China, Iced Spruce; Stampin' Up! - Tempting Turquoise, Coastal Cabana
Dies: Spellbinders - Floral Ovals (S4-356) #3, Fancy Framed Tags Two (S5-128)
Accessories: SU Card: Bermuda Bay, Smoky Slate; White Lustre Card; Copic Markers; Wink of Stella Brush - Clear & Silver; Martha Stewart punch; Clear Embossing Powder

I've had this stunning digi image, Tosca Shady Lady, for a while (I coloured her during the summer break) and I couldn't work out how to show her off to best advantage.  The image was coloured with Copic markers and I added sparkle with Wink of Stella brushes on the gems and knife.  When I saw Lynn's card with the fab Art Deco background I realised that it was the perfect background for this elegant lady.

I stamped the background with Versamark, heat embossed with clear powder, and then added colour to match the image - I used a mixture of Evergreen Bough, Tumbled Glass, Broken China and Iced Spruce.  I adhered the background to a card base made from Bermuda Bay card.  I punched the horizontal border from grey card (I didn't want to hide too much of the background) and die cut an ornate oval frame for the image.  I used dimensional tape to attach the oval and image.  I stamped the birthday sentiment on white card, cut it out with one of the layer dies from the Fancy Tags set and adhered it with dimensional tape.  I added a couple of Art Deco decorations either side of the sentiment.  On the inside I cut a panel of white card, added some decoration in the corners and stamped a birthday greeting.

Swell Birthday inside - photo by Deborah Frings - Deborah's Gems

The image is called Shady Lady "Tosca" and she hold a dagger in her hand, which might not be what you'd expect on a birthday card - but she really is very beautiful and so elegant!!  I had to use her.  I'm submitting this card to the RSD Progressive Challenge Sept - Anything Goes.


I'll be back later with a couple more cards.  See you soon.

signature

Tuesday, 11 March 2014

Waltzingmouse Pajama Party ....

... this is going to be a quick post with a card for the Waltzingmouse Pajama Party Use Dies challenge:

For Mum - photo by Deborah Frings - Deborah's Gems

Stamps: Waltzingmouse - Funky Flowers; Stampin' Up! - Delightful Dozen
Inks: SU - Elegant Eggplant, Perfect Plum, Crushed Curry
Dies: Spellbinders - Lacey Circle (S4-293) #4; WMS - Funky Flowers; Die-namics - Fishtail Flags Stax #3
Accessories: White Lustre Card; SU DP - Perfect Plum; SU Card - Elegant Eggplant; Twinkling H2Os - English Lavender, French Lilac, Egyptian Gold; Gem; Vellum


I've used the colours for CAS - Colours & Sketches - CASC&S#64 and the layout from Seize the Sketch - STS#15. After I'd made the photo frame I had some die cut flowers left over, so I decided to make a Mother's Day card.  Mother's Day is on 30th March in the UK, so I need to get a couple of cards made.    I also realised that my previous submission for CAS - Colours & Sketches didn't fit the rules - they only have cards, not 3D projects!!  I really should read the rules more carefully.  I've not done the inside yet, but I'll add that tomorrow.

That's all for this evening.  I'm off to get a coffee and finish of checking out all the submissions for the Waltzingmouse Pajama Party!  See you soon.

signature

ASM - Anything Goes ....

.... Evening all!  Hope your week is going well.  Mine's busy, but fun!  It's time for our new challenge at Addicted to Stamps and More!  This week is the ever popular ANYTHING GOES challenge.  Here's what I made:

There was a Girl - photo by Deborah Frings - Deborah's Gems

Stamps: Waltzingmouse - Funky Flowers, Half Pint Heroines, Fancy Flourishes
Inks: Stampin' Up! - Elegant Eggplant, Perfect Plum, Crushed Curry
Dies: WMS - Funky Flowers
Accessories: Kaisercraft - Mini Window Shadow Frame; White Lustre Card; Twinkling H2Os - English Lavender, French Lilac, Egyptian Gold; Gems


Last week I made a Shadow Frame with picture of Ben, this week I decided to make one with photos of Kathryn.  I used the colours from CAS - Colours and Sketches - CASC&S#64.  I painted the frame with Twinkling H2Os in English Lavender.  I created the backing paper by stamping flowers randomly all over the paper.  I stamped the sentiments onto white paper, cut them out and distressed the edges and attached them with dimensional tape.  For the die cut flowers I painted the stamps with Twinkling H2Os, stamped and stamped again.  Once dry I cut them out with the matching Waltzingmouse dies.  I attached some flowers directly to the base of the frame, attached some with dimensional tape and finished by adding a couple directly to the outside frame.  To complete the picture I added gems to the centres of some of the flowers.  I'm also submitting this picture to the Waltzingmouse Pajama Party where Challenge 1 is to use WMS Dies.

There was a Boy - photo by Deborah Frings - Deborah's Gems

Our Guest Designer, Darnell, and the rest of the Design Team have lots more inspiration for you - do drop by and check them out.  This week our sponsor is STAMPlorations.  Looking forward to seeing your creations.

signature

Vintage St Paddy ....

...  It's time for the March Waltzingmouse Pajama Party!!!  Yea!  A couple of weeks ago Claire gave us three challenges that we could get ready for today.  They are:
  1. To die for - where Claire wants us to use the Waltzingmouse dies on our project - check back later today for that one!
  2. St Patrick's Day Charm - to make a vintage project with a nod to St Patrick.
  3. What would Mother do? - here Claire wants us to make something in the style that your mother might have made.  She also provided a picture of an egg her Mother had made for her as inspiration.  I'm afraid I didn't get around to this one!
If you want to see what I made for challenge No 1, drop by later when my Addicted to Stamps and More! post goes live.  I have made a card for St Patrick's Day Charm.  It might not be as vintage as some, but I'm pleased with it.

St Paddy's Charm - photo by Deborah Frings - Deborah's Gems

Stamps: Waltzingmouse - Digi Image - St Patrick's Day (Freebie)
Dies: Spellbinders - Labels 5 (S4-229) # 5; Lil Inkers - Stitched Squares #6
Accessories: White Lustre Card, Papermania DP - Bookprint; Promarkers


I used the love St Patrick's Day digi image that Claire released a few years ago.  I simply coloured it in with Promarkers and cut it out with the matching Spellbinder die.  I cut a layer of newsprint paper with my stitched square die and adhered it to the card base.  This was really quick and easy to make.  I've kept it quite flat so that it can go in the post easily.  I used the colours from this week's Colour Q - cQc#232 challenge - they are just perfect.

Now, I'm off to get a cup of coffee and then I'm going to check out what everyone has made for Claire's challenges.  See you soon.

signature

Thursday, 28 November 2013

A thank you .....

...  Good afternoon everyone!  We are enjoying the first day of our Thanksgiving long weekend.  We woke to light snow falling and a very cold morning.  I got most of the preparations for today's dinner sorted out last night, which mean that after watching the Thanksgiving Day parade from Detroit (on TV - not going out in that cold) I was able to spend a little while in my craft room.  Appropriately, I made a thank you card:

Thank you - Photo by Deborah Frings - Deborah's Gems

Stamps: Waltzingmouse - Fine Feathers, Funky Flowers, Crackle Background Lg
Inks: Stampin' Up! - Tangerine Tango, Tempting Turquoise, Early Espresso, Lucky Limeade
Dies: Lil Inkers - Stitched Rectangles, Stitched Circles
Accessories: White Lustre Card; Burlap Ribbon; SU Marker - Early Espresso

I used the sketch from the Waltzingmouse Pajama Party Bedtime Story - WMSPJPBS4, I have to admit that I was beginning to think I wouldn't make it in time.  For the colours I've used this week's selection from Colour Q - cQc217, although I've had to substitute Lucky Limeade for Kiwi Kiss.


I cut a panel of white card using the stitched dies from Lil Inkers and while still in the die stamped the crackle background in green.  I used the second impression for a more subtle finish.  I edged the card with Early Espresso to define the panel.  I attached some burlap ribbon to the panel and then adhered the whole lot to the card base.  I die cut a large circle and stamped the sentiment in brown.  I made these flowers using Funky Flowers, stamping the large and medium images onto white card and cutting them out. To finish the flowers I added the centres in turquoise.  For the inside I have a mat layer of orange and a white panel which is blank for my message.

As I type I can smell the turkey roasting in the oven - it's still got a couple of hours to go, we are not sitting down to dinner until about 3.00pm.  It's entirely possible that I've cooked too much!!  That's all for now - off to have a glass of wine and read before finishing dinner!

Saturday, 23 November 2013

Waltzingmouse PJ Party .....

... Morning!  I'm back with my third card for the Waltzingmouse Pajama Party - this time it's for the second category - to pick a card, any card, so long as it's Christmas:

Merry Christmas - Photo by Deborah Frings - Deborah's Gems

Stamps: Waltzingmouse - Funky Feathers, Alpine Christmas
Inks: Stampin' Up! - Old Olive, Cherry Cobbler, Crumb Cake
Accessories: SU Card - Cherry Cobbler, Crumb Cake; White Lustre Card; Vellum

I'm afraid that I haven't made a 3D or interactive card, but I have made a Christmas card using non-Christmas images!  I created the Christmas tree from one of the stylized feathers from Funky Feathers - I woke up early yesterday morning with idea in my head and it only took about 20 minutes to make the card.  I stamped the Christmas message onto vellum (very on trend) and wrapped it round the white panel.  Then I mounted the whole lot onto a mat of Cherry Cobbler.  The inside has a a white panel on which I stamped the little village from Alpine Christmas and one of the verses from the set - they are all so nice.

Merry Christmas inside - Photo by Deborah Frings - Deborah's Gems.

I used a couple of challenges to make this card - the colours from this week's CAS - Colours & Sketches - CASC&S#52.  I'm also joining in with the final challenge of 2013 over at Festive Friday Challenge - FFC#22; the DT would like us to make a card using our favourite challenge from the year.  Now I didn't get to play along often - don't know why - I love making Christmas cards.  So I picked the challenge to feature a Christmas tree - those I adore!


Now, you might have noticed that I made this card with non-Christmas images - well that's what we'd like you to do over at Waltzingmouse Fanatics - WMSFC#6 - make a card and share it with us - you've got until Thursday 28th November to join in.

And that really is all for now.  I've got a busy morning lined up getting ready for our Dr Who party.  We've invited friends over to share in the fun of the 50th Anniversary show.  The Day of the Doctor will be broadcast on BBC America at 2.50pm with no advert breaks!  Really looking forward to it.  See you soon.

Related Posts Plugin for WordPress, Blogger...