Saturday, 9 September 2017

Uniko - September Release, DT Blog Hop and Giveaway ....

.... Good morning! Today's the day! The new stamps from Uniko are available to buy today over at the Uniko shop. I've got a few cards to share with you this morning. I'm going to start with a clean, simple and bright card:

Reach for the Stars - photo by Deborah Frings - Deborah's Gems

Stamps: Uniko - Background Blocks Stars, Reach for the Stars
Inks: Gina K - Black Onyx , Red Velvet; Versamark
Dies: Lil Inkers - Stitched Stars #1, #2 and #3
Accessories: White Lustre Card; Copics; Silver Tinsel Embossing Powder; Wink of Stella - Clear; Vellum


I got the inspiration for this card from the graphic on the Colour Throwdown Challenge - CTD#459 - the stripes on the vase reminded me of the striped stars on the Background Blocks Stars stamps. The layout is based on the sketch from Freshly Made Sketches - FMS#304. As I coloured the stars with my markers, I'm submitting this one to CAS on Friday - CASOF#116. I stamped the image using my MISTI, then coloured it with Copic markers. Once coloured I stamped the image again in Versamark and heat embossed with silver tinsel embossing powder - I do think stars need to sparkle!! I layered the image on some black card and adhered it to a 4 bar card - it's a bit smaller than an A2 card, but it fits the background block size perfectly. I die cut three stars from white card and coloured two of them to match the stars on the panel and then I added sparkle with a clear Wink of Stella brush. I layered the stars with dimensional pads. I stamped the word "stars" on white card, cut it out and then layered it onto some vellum. On the inside I cut a mat layer of black card and on the white panel added some stars down the side. There's plenty of space for a message.

Reach for the Stars inside - photo by Deborah Frings - Deborah's GemsReach for the Stars sq - photo by Deborah Frings - Deborah's Gems

My next card features lots and lots and lots of little stars:

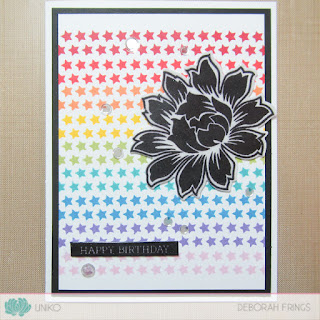
Happy Birthday - photo by Deborah Frings - Deborah's Gems

Stamps: Uniko - Background Builders Seeing Stars; Beautiful Blooms I; Simply Said Blocks; Happy Succulents
Inks: Gina K - Onyx Black, Cherry Red, Red Hot, Sweet Mango, Wild Dandelion, Jelly Bean Green, Blue Lagoon, Blue Raspberry, Wild Lilac, Lovely Lavender; Versamark
Dies: Uniko - Beautiful Blooms
Accessories: White Lustre Card; Stampin' Up! - Basic Black; Clear Embossing Powder; Simon Says - Moonshine Confetti


The current challenge at TIME OUT Challenge - TOC#91 is to CASE our very own Beverley Brown - and I had to play along with that challenge. Bev's card has a lovely rainbow of solid colours with the pretty lily outline flower, so I played on that. On my card I've stamped a somewhat larger rainbow of stars and my flower is solid black, as is my greeting. I stamped the flower on white card, cut it out with the matching die and then "enamelled" it using Versamark mark and clear embossing powder. It has a lovely shine. I layered the rainbow panel on black card and finished the front with some clear sequins. On the inside I cut a mat layer of black card and kept the white panel fairly simple with a fun greeting and lots of rainbow stars!


Happy Birthday inside - photo by Deborah Frings - Deborah's GemsHappy Birthday sq - photo by Deborah Frings - Deborah's Gems

My last card today has dots and flowers:

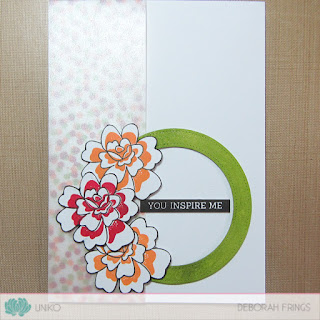
Inspire Me - photo by Deborah Frings - Deborah's Gems

Stamps: Uniko - Background Blocks Polka Dots, Simply Said Blocks, Beautiful Blooms II, Reach for the Stars
Inks: Gina K - Black Onyx, Jelly Bean Green, Sweet Mango, Cherry Red
Dies: Die-namics - Pierced Circle Frames #2
Accessories: White Lustre Card; SU Card - Basic Black; Vellum; Wink of Stella - Clear


I've used the sketch from FUSION - FUSION#81 for the layout of this card, and the colours are from CAS Colours & Sketches - CASC&S#239. I created the dotty panel by stamping the polka dots in all three colours, trimming the panel to size and then covered it with some shimmery vellum to soften the colours. I used the ink direct to paper to colour some card green and then die cut the circle frame. I stamped the flowers and added a touch of colour to the insides. I finished the front with a simple sentiment. On the inside I cut a mat layer of black card and added a greeting and some stars to the white panel.

Inspire Me inside - photo by Deborah Frings - Deborah's GemsInspire Me sq - photo by Deborah Frings - Deborah's Gems

It's traditional when we have a new release to have a Design Team Blog Hop - so follow along and leave some comments for your chance to win! You have until midnight BST Saturday 16th September to leave your comments. The winner will be announced on Sunday 17th September. Here's the Blog Hop list:

Deborah (that's me)

Before I go - here's a look at each of the sets being released today:


Background Blocks Scattered Polka Dots


Background Builders Seeing Stars


Reach for the Stars


Background Blocks Stars


Simply Said Blocks

It's been a long post - thanks for staying with me to the end! I hope you've enjoyed my projects. I think this is one of my favourite releases - I just adore all those stars! There really is endless possibilities with these stamps.

That's all for now - see you soon.

signature

Friday, 8 September 2017

Uniko - Stars and More Stars ....

.... Morning! It's the last day of our introductions for Uniko's September release. Today we have another addition to the Background Blocks series - BACKGROUND BLOCKS STARS, and another in the set in the Background Builders series - BACKGROUND BUILDERS SEEING STARS. You might have noticed a distinct, and very on trend, theme with this release. I absolutely love this release.

Awesome - photo by Deborah Frings - Deborah's Gems

Stamps: Uniko - Background Builders Seeing Stars, All Occasion Sentiments #2
Inks: Stampin' Up! - Lemon Lime Twist, Brocade Blue; Gina K - Onyx Black; Memento - London Fog
Accessories: White Lustre Card; Copics; Wink of Stella - Clear; Glossy Accents


I've combined a couple of challenges in this card. I've used the colours of royal blue and lime green from the current Less is More - LIM#344 and the layout is based on the sketch over at CAS(E) this Sketch! - CTS#237, sadly the challenge has closed, so I can't play along!

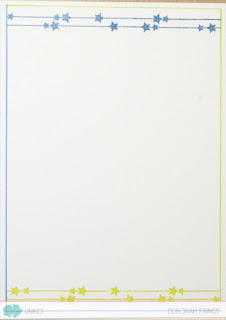
I stamped the stars on white card and coloured the striped one with Copic markers, adding a touch of sparkle to the stripes. I carefully cut them all out. I knew that I wanted to pair these stars with the word "AWESOME" from All Occasion Sentiments #2 - it has a star in the middle! I cut a panel of white card slightly smaller than the base and stamped the word in black towards the top. I added some sparkle to the inside of the star. The longest part of this card was planning the layout of the stars! Once I had them laid out, I took a photo on my phone and used that to help me position them properly. I attached the green stars flat to the card, then used one layer of dimension tape on the blue circle one and the grey (by the dotty green). The last two stars were attached with two layers of dimensional tape. Then I added the smaller stars. I edged the white panel with blue and green and used dimensional tape to attach it to the base. Finally, I added some glossy accents to the black star. On the inside I stamped some star borders on the top and bottom of the panel and finished by edging with blue and green copics.

Awesome inside - photo by Deborah Frings - Deborah's Gems

My next card showcases Background Block Stars - and I'm so pleased I had the actual stamps as I was able to emboss the image:

Happy Birthday - photo by Deborah Frings - Deborah's Gems

Stamps: Uniko - Background Block Stars, Simply Said Blocks, Reach for the Stars
Inks: Versamark; Gina K - Onyx Black; SU - Pumpkin Pie, Tempting Turquoise
Dies: Lil Inkers - Stitched Rectangles #2
Accessories: White Lustre Card; Copics; Wink of Stella - Clear; Silver Tinsel Embossing Powder


I stamped the block image in pale grey on white card and coloured it with Copics then, as I used my MISTI, I put the card back in and restamped it with Versamark and then heat embossed with silver tinsel powder for a subtle powder. I made the mat panels by die cutting two panels of white card and then colouring them with Copics so they match the stars. I added lots of sparkle to the open stars with a clear Wink of Stella brush. I finished the front by stamping Happy Birthday with the new Simply Said Blocks - I really like the contrast of the clean, fresh image and the bold sentiments. On the inside I cut a panel of white card, edged it with Copic markers and added some more stars and a greeting. I've used the colours from this week's Cupcake Inspirations Challenge - CIC#421.


Happy Birthday sq - photo by Deborah Frings - Deborah's GemsHappy Birthday inside - photo by Deborah Frings - Deborah's Gems

Don't forget to visit the main Uniko blog to see lots more inspiration from the rest of the Design Team.

RELEASE DAY: Tomorrow - Saturday 9th September at 9.00am BST. There will be a DT Blog Hop and a Giveaway. Do leave comments as you go along - we all like them.

That's all for now - see you tomorrow!

signature

Thursday, 7 September 2017

Uniko - Reach for the Stars ....

.... Hi! I'm back to introduce Reach for the Stars - the third new set from Uniko's September release. I have a confession to make - I think this is my favourite. So many lovely words and wonderful stars. Here's my card:

Good Friends - photo by Deborah Frings - Deborah's Gems

Stamps: Uniko - Reach for the Stars
Inks: Distress - Shaded Lilac, Wiled Violet, Blueprint Sketch, Cracked Pistachio, Lucky Clover; Versamark; Gina K - Onyx Black
Accessories: White Lustre Card; Stampin' Up! - Basic Black; Embossing Powder - White, Clear and Silver Tinsel


I was lucky enough to get the actual stamps sets just before we left for our trip to Virgina last week, so I was able to make this card with the stamps!! Yea! I was able to use one of my favourite techniques on the card - resist embossing. I'm playing along with this week's MUSE - MUSE#232 challenge, Anita's card is just gorgeous. I masked off the card leaving a diagonal panel on which I stamped the stars in Versamark ink and heat embossed them with clear powder. Then the fun bit was adding colour to reveal the stars. I pretty much used the same colours, although mine are just a bit brighter. I stamped the words on black card with Versamark and used white and silver tinsel to heat emboss them. I used dimensional tape to adhere them to the card. On the inside I cut a mat layer of black card. On the white panel I stamped diagonal rows of stars using the distress inks. I finished by stamping a simple, but very heartfelt, sentiment.

Good Friends inside - photo by Deborah Frings - Deborah's GemsGood Friends sq - photo by Deborah Frings - Deborah's Gems

Don't forget to visit the Uniko blog to see more inspiration cards from the rest of the Design Team. The release schedule is:

Introductions: 6th - 8th August.

RELEASE DAY: Saturday 9th August, 9.00am BST. Our traditional DT Blog Hop and Giveway, and your chance to get these lovely stamps from the Uniko shop.

Bye for now - see you again soon.

signature

Wednesday, 6 September 2017

Uniko - Polka Dots and Word Blocks ....

... Good morning! You've seen the sneak peeks, and now it's time to introduce the new stamps from Uniko. Today we are introducing two new sets. The first is an addition to the Background Blocks series and it features POLKA DOTS - just love them!! The second set is an addition to the Simply Said series - this time the words are in blocks. I've combined them both on this card:

Inspire Me - photo by Deborah Frings - Deborah's Gems

Stamps: Uniko - Background Blocks Polka Dots, Pure Florals Gerbera, Simply Said Blocks, All Occasion Sentiments #3
Inks: Gina K - Onyx Black; Delicata - Silvery Shimmer
Accessories: White Lustre Card; Stampin' Up! - Basic Black; Copics; Wink of Stella - Clear; Silver Shimmer Washi Tape


When I made this card, I hadn't received the actual stamps - Bev kindly sent me the digital images and I was able to print them off to size. I used the sketch from Sunday Stamps Challenge - SSC#160 for the layout. I cut the polka dot panel to size and layered it on some black card and attached it to the card base. I forgot to add some silver string, so used a strip of silver shimmer washi and and thin strip of the polka dot panel to make my own. I stamped the gerbera image on white card and used Copics to create a rainbow coloured flower, cut it out and added some sparkle all over with a clear Wink of Stella brush. I attached the flower with some dimensional tape on the side that over hangs the dotty panel. I finished the front with a simple sentiment - I think there are some super words in this set. On the inside I cut a mat layer of black card. On the white panel I stamped the polka dots in silver shimmer ink and added a bold word in the centre, I finished the panel by adding a couple of rainbow gerbera daisies. I wish you could get daisies like this for real!!!

Inspire Me inside - photo by Deborah Frings - Deborah's GemsInspire Me sq - photo by Deborah Frings - Deborah's Gems

You've seen the peeks, and you've used seen how I've used the stamps. Do visit the Uniko blog to see how the rest of the team have used these sets - they're fabulous!!! Before I go, here's a quick reminder of the release schedule:

Introductions: 6th - 8th August - your chance to see how these stamps are in action

RELEASE DAY: Saturday 9th August, 9.00am BST. You get to see the whole release and see how the Design Team have used them on their projects. As is traditional, there will be a DT Blog Hop - do leave comments as you go along as there's a GIVEAWAY too! You can get the stamps at the Uniko Shop.

That's all from me today - do come back tomorrow to see more introduction cards! Bye for now.

signature

Tuesday, 5 September 2017

Uniko - Sneak Peeks 4 & 5 ....

.... Hi! I'm back today with the last of our sneak peeks from Uniko's September Release. Today I have a couple to show you:


You might notice that there's a bit of a theme going on with this release - and it's one of my favourite themes too!! So one of these stamps is an addition to the Background Blocks series and the other joins the Background Builders series. I love the way Bev creates stamps that form series and that all work together so well. Here's a reminder of the release schedule:

Sneak Peeks: 3rd - 5th September

Introductions: 6th - 8th September - check out the stamps in action on a variety of projects from the team.

RELEASE DAY: Saturday 9th September, 9.00am BST. A Design Team Blog Hop and Giveaway and your chance to see the release in full. Also, you can buy the stamps from the Uniko shop.

Today is a busy day as we get back to our usual schedule. Kat is back at school - she's a Junior at High School this year - time is flying by, and Jonathan is back to work. Me, I'm hoping to get back into my usual routine quickly. More importantly, I hope to get back to crafting a bit more and sharing my work with you all. That's it for now.

Do drop by tomorrow to see the first of my introduction cards. Bye!!

signature

Monday, 4 September 2017

Uniko - Sneak Peek 3 ....

... Hello! Today is a holiday in the US and this is a scheduled post as we'll be on our way back from a trip to Virginia. Today, I've only got one sneak peek from Uniko's September release, but I think you're going to like it!


I think you might be able to guess the theme from this image - such fun! Don't you love the look of that font too? That's all from me for now, and here's a reminder of the release schedule:

Sneak Peeks: 3rd - 5th September - a hint of things to come!

Introductions: 6th - 8th September - a first look of the stamps in use.

RELEASE DAY: Saturday 9th September, 9.00am BST. Your chance to see the whole release and to buy the stamps from Uniko's shop. And, there's going to be our traditional Design Team Blog Hop and Giveaway!

Bye for now - see you again tomorrow for the last of our sneak peeks.

signature

Sunday, 3 September 2017

Uniko - Sneak Peeks 1 & 2 .....

.... Good morning! I'm here this morning with a couple of sneak peeks from Uniko's September release. Bev has created more wonderful stamps and I'm sure you're all going to love them. So, here's a quick peek:


One is a new addition to the fabulous Background Blocks series and the other continues the Simply Said series. You will be able to see them both in use in the introduction post on Wednesday 6th September. Here's the release schedule:

Sneak Peeks: 3rd - 5th September - a quick look to tease!

Introductions: 6th - 8th September - a first look at each of the new sets in action!

RELEASE DAY: Saturday 9th September, 9.00am BST.  There will be more inspiration projects from the Design Team introducing these super sets. You will be able to purchase the stamps from the Uniko Shop at 9.00am BST. And, of course, there will be the traditional Design Team Blog Hop and Giveaway!

Do stop by again tomorrow to see a couple more sneak peeks! See you soon.

signature

Wednesday, 30 August 2017

TMR - Colours .....

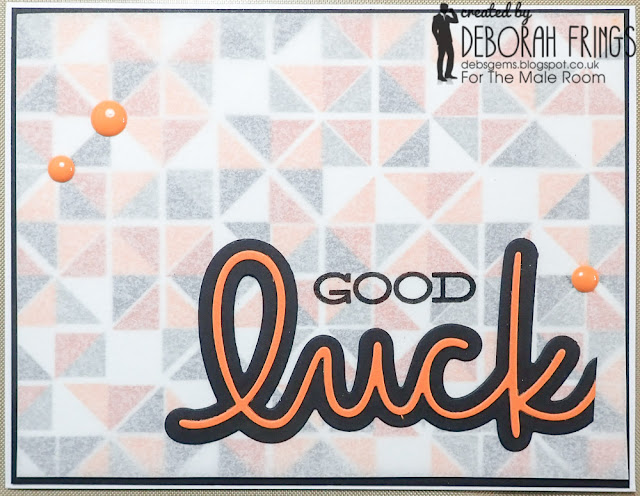
.... Hello! Sorry I've been missing for a while - life getting in the way of my crafting :) However, I'm here with you today - a bit earlier than the rest of the team - with my card for our new challenge over at The Male Room - TMR#68. For the next couple of weeks we want you to use SCHOOL COLOURS on your masculine projects. You can pick any school - elementary, nursery, high school, college or university. Here's my take on the challenge:

Good Luck - photo by Deborah Frings - Deborah's Gems

Stamps: Concord & 9th - Turnabout Triangles; MFT - DC Coupon Book Love; Dare 2B Artzy - Graduation, Northville Mustangs
Inks: Stampin' Up! - Smoky Slate, Pumpkin Pie, Peekaboo Peach; Gina K - Black Onyx
Dies: Concord & 9th - Lucky
Accessories: White Lustre Card; SU Card - Basic Black, Pumpkin Pie; Smoky Vellum; Enamel Dots


Kat goes back to high school next week, so I've made a good luck card for her using the school's colours of ORANGE and BLACK. I added in a softer orange and pale grey too. I know this card is for Kat, but it would work for a guy too. I'm submitting this card to Cupcake Inspiration Challenge - CIC#420 where the theme is Back to School.

I've used some new stamps from Concord & 9th - I can't think how I missed this company, but I really like their products! If you want to see how to use this stamp check out this post and video by Jennifer MacGuire. I die cut the word "lucky" from black and orange card and cut off the y, so it would work for my sentiment. I adhered the thin orange word onto the black mat layer and then attached them both to a piece of smoky vellum. Then I stamped the word good above it. I attached the vellum to the card by putting glossy accents on the back of the word and behind the enamel dots. I cut a piece of black card slightly smaller than the base and layered on the stamped panel. On the inside I cut a mat layer of black card and on the white card added a greeting and the school logo.

Good Luck inside - photo by Deborah Frings - Deborah's GemsGood Luck sq - photo by Deborah Frings - Deborah's Gems

Do visit The Male Room blog to see more inspiration projects from the rest of the team. You've got plenty of time to join in the fun - deadline for submission is midnight BST (7.00pm EDT) on Tuesday 12th September.

I've got another post for you in about half an hour - a sneak peek - do come back and check it out.

signature

Wednesday, 16 August 2017

TMR - Theme ....

.... oops! I'm running a bit late with my DT card for our new challenge over at The Male Room - TMR#67. For the next couple of weeks we want to see your masculine projects with a DRINKS theme. Here's my very simple take:

Cheers - photo by Deborah Frings - Deborah's Gems

Dies: Winnie & Walter Cutaways - Cheers
Accessories: White Lustre Card; Out There Scrapbooking DP - Beer Tabs; Red Mirri Card


This really is about as easy as it gets. I cut a piece of red mirri card slightly smaller than the card base and then cut the design paper a bit smaller still. I adhered them both to the card. I really like the bold, graphic beer tab image and wanted to have that as the focus. For the sentiment I die cut the word "cheers" four times in white card, adhered them together and added a red mirri card layer on top. I like that you can see the white border with the red word. Clean, simple and very quick. I've left the inside blank. I'm submitting this card to Love to Craft Challenge - LTCCB#13 where the theme is Anything Goes.

Do visit The Male Room blog to see more inspiration projects from the rest of the team. That's all for now!

signature

Wednesday, 2 August 2017

TMR - Theme ...

... Hi! It's been a while! My mojo seems to have taken a bit of a hike again. However, I do have something for our new challenge over at The Male Room - TMR#66. For our new challenge we have a fun theme for your masculine projects - we want you to incorporate maps or co-ordinates. Here's my take:


Supplies:
Canvas 5" x 7"
Detroit Area map
Um Wow Studio Chipboard embellishments: Michigan State, Tiny House, Hearts
Distress Oxide Inks - Worn Lipstick, Broken China, Cracked Pistachio
Distress Paints - Barn Door, Black Soot; White
Stencil
White Gesso
Gel Medium


I didn't mange to make anything for our mixed media challenge, but this would work for that one too! This is not an original idea to me - I attended a class at Scrappy Chic (one of my local craft stores) run by Michele Kosciolek to create a "Michigan is Home" canvas.

We started by coating the Michigan chipboard embellishment with white gesso and allowing it to dry. This helps to prevent the chipboard absorbing too much ink in the next step. After that we started on the 5" x 7" canvas and a map of Michigan State. I picked out the area that shows Detroit, the largest city, along with my town of Northville and the surrounding areas. As I had such a wide bit of map, I decided to make my canvas landscape, most of the class went for portrait orientation. We used gel medium to attach the map.

I added texture to the canvas with green distress oxide ink through a chevron stencil. I also added some spatter with watered down broken china ink. I used Worn Lipstick and Broken China distress oxides to add colour to the Michigan chipboard. I started with pink, added some water droplets to get the oxidised effect and dried it carefully before adding some blue and water. I really like the oxidised effect this gives. I used Distress paint daubers to colour the word, the house and the little hearts. Once everything was completely dry I adhered the chipboard to the canvas.

Here's a close up of the Michigan embellishment and also the heart by my local town:


I'm submitting this canvas to the new challenge at Love to Craft Challenge Blog - LTCCB#13 where it's Anything Goes.

I had lots of fun making this canvas and it has a home in my craft room. I'm going to make another canvas, a bit bigger, for my Mum for Christmas. It'll be broadly the same, but I'm going to use different colours and have a different word. I'll share a picture once it's done.

Now do visit The Male Room blog to see more inspiration projects from the rest of the team. You've got plenty of time to join in with the challenge. Deadline for submission is midnight (BST) Tuesday 15th August, that's 7.00pm EDT in the States. Have fun!!

signature
Related Posts Plugin for WordPress, Blogger...