Showing posts with label Memory Box. Show all posts

Monday, 27 January 2014

All you need is love ....

....  and now that you're all humming along with the song, here's the card I made:

All You Need is Love - photo by Deborah Frings - Deborah's Gems

Dies: Memory Box - Musicality Collage
Accessories: White Lustre Card; Black Card; Kanban - Apple Beat

Last week I was browsing at Stampeddlar - they stock a HUGE selection of Memory Box and other dies - and I came across this wonderful music die.  I don't have many music stamps/images/dies, so I thought it would go nicely in my stash.  The current theme at The Male Room - TMR#2:14 is to make a masculine card with a music theme.  Yea!!! 

This is about as clean and simple as it gets!  I cut the music collage out of black card and then carefully attached it to the card base (took a while) and finished with a simple sentiment from some Kanban stash that I've had for ages.  I think one is for my wonderful husband, Jonathan.  I've left the inside blank!

It's silly cold here - I was out this morning clearing the snow (so, so glad that we got the snow blower) - and the rest of the day I'm staying in!  That's all for now.

signature

Sunday, 26 January 2014

One for the stash ...

.....  Morning all!  Just a quick post showing a card that I made with the left over bits from my Waltzingmouse Fanatics post.

With Sympathy - photo by Deborah Frings - Deborah's Gems

Stamps: Waltzingmouse - Big Day - Today
Inks: Versafine - Onyx Black
Dies: Memory Box - Chloe Stem
Accessories: White Lustre Card; SU - Basic Black; WMS Digital Paper - Celtic Lunettes

I had a sheet of grey digital paper left after I'd made my WMSFC cards.  I adhered the paper to some scrap white card and then die cut the flower.  I attached the grey layer to a mat of black card, cut another flower in black and then in-laid the black flower.  I finished the front with an elegant, but simple sentiment.  On the inside I cut a mat layer in black and adhered the grey flower to the white panel.  I left the inside blank.  This one is for my stash.

With Sympathy inside - photo by Deborah Frings - Deborah's Gems

That's all for now folks!  See you later!
signature

Saturday, 25 January 2014

WMSFC - Sketch .....

.... Hello again!  It's time for our new challenge at Waltzingmouse Fanatics.  This time we have a sketch for you to play with - I liked it so much that I actually made three cards!!!!  Here they are:

Thanks a Bunch - photo by Deborah Frings - Deborah's Gems

Take Care - photo by Deborah Frings - Deborah's Gems

Thank You - photo by Deborah Frings - Deborah's Gems

Stamps: Waltzingmouse - Folk Art Medallion, Frame It, Say It Loud; Uniko Studio - All Occasion Sentiments #3
Inks: Versamark; Versafine - Onyx Black; Memento - Grey Flannel
Dies: Memory Box - Forget Me Knot Stem, Prim Poppy, Chloe Stem; Die-namics - Fishtail Flags Stax # 3 & 4
Accessories: WMS Digital Papers - Celtic Lunettes; White Lustre Card; Stampin' Up! Card - Basic Black; White Embossing Powder


I think this sketch is lots of fun and I decided to focus on WMS digital papers.  I printed several sheets of the Celtic Lunettes pattern in grey, blue and pink, sized just a bit bigger than the card base.  I also printed off several copies of the sketch to use as a template.  I trimmed all the papers to size and then used temporary adhesive to stick the sketch pattern over the top of the design paper and cut the panels.  Using this method to cut the panels means that the lunette patterns line up.  Ask me how I know this?  Well the first card was a mess with misaligned patterns all over the place!!!  I used  dies to cut out the flowers and banners.  I inked up the sentiments in Versamark and heat embossed with white powder.  I turned the last card to make it horizontal - that's because I needed to cover up the point which was a bit messy on this card!  Here are photos of the inside of each card.

Thanks a bunch inside - photo by Deborah Frings - Deborah's Gems

Take Care - photo by Deborah Frings - Deborah's Gems

Thank you inside - photo by Deborah Frings - Deborah's Gems

For more inspiration with this sketch - check out Tara's card.  I'm really looking forward to seeing what you create with this sketch.  As always, you can make a card, scrapbook page, or 3D project, but whatever you make must include at least one Waltzingmouse image or sentiment.  You've got plenty of time to play along, the deadline for submission is Thursday 6th February 5.00pm GMT (that's Noon EDT for those of us in the States).   That's all for now, see you soon.

signature

Friday, 24 January 2014

Colour blocks .....

....  Morning everyone!  The arctic blast is back in full force, so much so that Kathryn has a snow day.  No actual snow, but wind chills down to -19°C (-2°F) and that's with a very light breeze.  We're expecting gusts up to 30 mph, so the wind chills are going down!!!  So my card this morning is looking towards spring and warmer weather:

So Glad - photo by Deborah Frings - Deborah's Gems

Stamps: Stampin' Up! - Bloomin' Marvellous
Inks: Versafine - Onyx Black; SU - Daffodil Delight, Garden Green
Dies: Memory Box - Toulouse Background
Accessories: White Lustre Card; SU DP - Daffodil Delight, Garden Green; SU Card - Marina Mist


I used the sketch from this week's CAS Colour & Sketch - CASC&S#58 turning through 90°, and the theme of colour blocks from CAS-ual Fridays - CFC#126.  I picked the background colours to suggest ground, sky and sun and placed the die cut over the top.  It's a new die and it cuts like a dream!  I added a simple sentiment in the corner.  On the inside I cut a mat layer in blue and stamped a couple of flowers at the corners, but left a big space for me to write a message.

So Glad inside - photo by Deborah Frings - Deborah's Gems

I don't think Kathryn or I will be venturing outside today - so I have the perfect excuse to play in my craft room - all day!!  That's all for now, see you soon.

signature

Friday, 22 November 2013

Newsflash ....

.... Good afternoon - it's really dull here today.  But the upside is time spent crafting - I've got a cute card today:

You Are Amazing - Photo by Deborah Frings - Deborah's Gems

Stamps: My Favourite Things - Read All About It
Inks: Memento - Tuxedo Black
Dies: Spellbinders - Circles Sm (S4-116) #5, Big Scalloped Circles Sm (S4-250) #5; Memory Box - Piestra Tile
Accessories: White Lustre Card; Stampin' Up! Card - Tangerine Tango, Island Indigo; SU DP - Tangerine Tango, Island Indigo; Copics

I'm playing along with a couple of challenges that I've missed recently - My Favourite Things Wednesday Sketch Club - MFTWSC151 and Just Add Ink - JAI#192.  I really like the fun colours and they work perfectly with this cute stamp.  I flipped the sketch upside down.  I die cut the white panel and mounted it onto orange card and then layered again onto Island Indigo.  I stamped the image onto white card and cut it out with a circle die.  I coloured some of the image with copics and paper pieced the rest.  I finished the front with this sentiment.  I'm not sure where this card is going yet and so I've not decorated the inside.


That's all for the moment.  I've had a busy morning doing some shopping.  This afternoon Kathryn and I are off to the dentist for a check up - I don't mind it, but Kathryn hates it!  So as a special treat we are all off to the movies this evening to see The Hunger Games - Catching Fire.  See you later!

Tuesday, 1 October 2013

Some exciting news, and Just a note ....

... Good afternoon.  I've been keeping a secret and bursting to tell you all - and today I can!!!  I got an email from Kylie recently, inviting me to join the Design Team at Addicted to Stamps and More!  After checking the mail a few times, I immediately replied YES, please!!!  I'm absolutely thrilled and delighted to join such a talented group of ladies. 

And my first challenge as part of the ASM Design Team is to create a card using the inspiration photo in the challenge graphic.  Here's my take:


Stamps: Uniko Studio - All Occasion Sentiments #1
Inks: Stampin' Up! - Early Espresso, Cherry Cobbler, Daffodil Delight
Dies: Memory Box - Piestra Tile; Die-namics - Sunflower
Accessories:  SU Card - Early Espresso, Coral Calypso, Crumb Cake; SU DP - Daffodil Delight; White Lustre Card; SU Marker - Coral Calypso


The inspiration photo offers lots of choices and I decided to focus on the sunflowers and these gorgeous colours.  For the layout I used this week's challenge at CAS(E) this Sketch! - CTS47; it's been a while since I played along with them! 

I cut a panel of white card and used the Piestra die to cut out the pretty pattern on both sides of the card.  I cut some strips of card to go beneath the die cuts and attached them to the panel.  I opted for a bold, simple sentiment, made the pretty sunflower by die cutting some scraps from my box and adhered it to the left of the sentiment.  For the inside I kept it very simple - a mat of brown and a white panel with sponged flower and lots of space for the note!


As luck would have it, there are a few challenges about at the moment with the theme Autumn/Fall, and I'm submitting this card to the current Addicted to CAS challenge - ATCAS#23 too.

Don't forget to check out the inspiration cards from the rest of the Design Team - the cards are awesome!  Looking forward to seeing what you create based on the photo!  See you soon.

Tuesday, 11 June 2013

You bring me sunshine .....

.... Hi again!  I'm back a bit quicker than expected - got all the washing and ironing finished quicker than expected - so free time to play!!!  And that's good because as soon as I saw the challenge at CASology - CAS48, cue word YELLOW, I knew what I'd be making.  The card also works for the current Addicted to CAS Challenge - ATCAS14, cue word CIRCLES - here there are many!!! Here's my card:


Stamps: Waltzingmouse - My Island; My Favourite Things - First Class Friend; Verve - Learning to Sail
Inks: Stampin' Up! - Daffodil Delight; Memento - London Fog
Dies: Lil' Inkers - Stitched Squares #6; Memory Box - Circle Burst Sm
Accessories:  SU DP - Daffodil Delight; White Lustre Card


This came together so quickly - I think it took 30 minutes from start to finish!!!  The cue word yellow just shouted sunshine to me.  I used the polka dot bright paper from Stampin' Up! to make the mat layer; I also stamped a little sun on this paper and cut it out.  I used the Lil' Inker squares to cut out the white layer and then used the Memory Box die to create a "sun".  I love the words on this sentiment, absolutely perfect for the card.  I finished off the inside with a mat layer in yellow card and on the white panel a heartfelt sentiment.


Kathryn has just come home from school, weighed down by the contents of her school locker.  The children had to clear everything out today.  I think the last couple of days consist of fun activities - films, parties and signing of the Year Book.  I can't believe how fast the past year has gone.  Kathryn really has enjoyed her first year at an American Middle School - junior high!!!  She's grown up such a lot too!

I think that really is all for today. The weather has turned out to be much nicer than expected and I think I need to do a bit of weeding before we fly to the UK.  See you tomorrow.

Thursday, 20 December 2012

Anything goes ....

.... that's the theme over at this week's Do You Stack Up - DYSU#103 challenge - so this obviously fits.   I've been busy making cards to catch up with the Waltzingmouse Stamps Christmas Card Challenge and this card is for May, where the challenge was to incorporate a chipboard element.


Stamps: WMS - Woodgrain, Christmas Cottage, Vintage Christmas Background, Vintage Garden Seed Packet
Inks: Distress - Antique Linen, Tumbled Glass, Faded Jeans, Stormy Sky, Bundled Sage, Peeled Paint, Forest Moss; Stampin' Up! - Whisper White Craft; Stazon - Jet Black
Dies: Memory Box - Grand Maison Window
Accessories: Scrap chipboard; SU - Diamond Dazzles; Uniball White Pigment Pen


It has taken a good long while to come up with something for the May challenge - but I've seen a number of cards using this window frame and as I recently treated myself to the die, I thought this would be a good opportunity to use it.

I made the window frame from some scrap chipboard that came with some stamps - it took quite a few passes through the Grand Calibur to cut through the card, but it worked.  I rubbed some Whisper White craft ink across the card and rubbed it in to give an aged effect.  I made the background resemble a lounge wall.  I masked where the frame would go, stamped the Vintage Christmas background.  I protected the "wallpaper" and brayered the bottom of the wall with Antique Linen and then over stamped with the woodgrain background to make some wood panel.  I masked off the background and then stamped the snowman and trees and created the scene.  I stamped the snowman and trees again on white card and coloured them with Promarkers, cut them out and glued them in place.  I finished off with some glitter and snow and the sentiment which I stamped in Stazon to give a really crisp image.

I know that the sentiment says "Thank You", but this card is both a thank you and Christmas card for a friend who allows Jonathan and I to stay at her house when we visit.

I don't quite know how it has happened, but I'm ahead of myself!!  So much so that I've had time to play in my craft room - hence this card!!  I only have three more of the Waltzingmouse Christmas Card challenges to do - but you'll have to wait until 26th December to see them :)

That's all for today - keep safe.  Hey!!  I just realised that this is my 1000th post!!!!

Sunday, 2 December 2012

CR84FN68 - May your Holidays Sparkle ....

.... Can you believe it's December!!!  Where has this year gone?  The up side is that it's time for my second card with our gorgeous CR84FN68 colours of burgundy, grey (silver) and cream.


Stamps: My Favourite Things - Seasonal Sentiments: Stampin' Up! - Serene Snowflakes
Inks: Versamark; Stampin' Up! - Bravo Burgundy
Die: Memory Box - Winterland Tree
Accessories:  SU Card - Bravo Burgundy; Cream lustre card; Silver embossing powder

I cut a panel of Bravo Burgundy card onto which I stamped the sentiment and a variety of snowflakes in Versamark and then heat embossed them all with silver powder.  I then mounted the panel onto a cream card base.  I cut the pretty scroll tree with my new Memory Box die (it's been out for a while, but I only just got it).  A tip when cutting with such an intricate die is to use a piece of wax paper between the card and die; it makes getting the little bits out so much easier.  For the inside I simply stamped a bold Christmas sentiment.


Photo Credit

For more inspirational cards from the team either click on the links in my side bar or go directly to the CR84FN blog.

Edited to say that you have plenty of time to play along with these fabulous colours - the challenge has been extended and now closes on Wednesday 12th December.  And check out the CR84FN blog to see details of a prize - you must make sure to follow the guidelines! 


We are taking a break for the rest of the month for the holiday season - not only do we have to prepare for Christmas, but we want to have time to join in all the fun and games too!  We'll be back on Sunday 30th December with CR84FN69.

Tuesday, 23 October 2012

Dancing Skeleton .....

.... Hi!  Talk about a dull, grey day - that's what we've got here in Northville.  The upside is that it is very warm.  Still, I think I'd rather cooler and brighter.  Yesterday I thought I'd finished with Halloween cards, but it seems I was wrong.  I've made another - using two challenges:


Stamps: Waltzingmouse - Hocus Pocus
Inks: Versamark; Distress - Antique Linen
Dies: Memory Box - Dancing Skeleton
Accessories:  Stampin' Up! Design Paper - Pumpkin Pie, Basic Black; Cosmic Shimmer - Rich Gold;  White embossing powder, Glitter and card from stash


I spritzed some rich gold shimmer mist onto plain black card and allowed it to dry.  Then I stamped the greeting in Versamark and heat embossed that with detail white powder.  Next I cut three ribbons in SU design papers selecting different sides for each ribbon.  I distressed some white card with Antique Linen ink and then cut out the skeleton.  I ran the pieces through my Xyron and then attached them to the card finishing off with some glitter on the skeleton.  This was such fun to make!!!

That's all for now - I really ought to get some house stuff done!  See you tomorrow.


Monday, 17 September 2012

Waltzingmouse Blog Party - Fall Blessings ....

..... It's 17th September that  means it's time for the monthly Waltzingmouse Blog Party - the theme is Autumn (or Fall as it's called here in America).  I am beginning to get used to that!  Full details of the blog party, with times and a super inspiration photo can be found here!

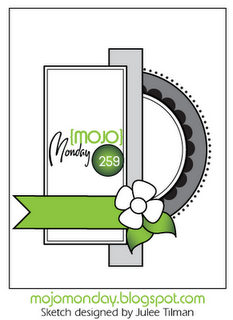
I've used this week's sketch from Mojo Monday - MOJO259 for the layout of my card.  As soon as I saw the sketch I know one of the stamps I'd be using.


Stamps:  Waltzingmouse - Blessed by You, Dainty Doilies 2 Small, Faux Fun, Peace & Plenty
Inks:  Stampin' Up! - Calypso Coral, Early Espresso; Distress - Antique Linen; Memento - Rich Cocoa
Spellbinders: Nested Lacey Pennants (S5-029), Deckled Mega Rectangles Lg (S5-015) #3, Scalloped Mega Rectangles Lg (S4-143) #3, Lacey Circles (S4-293) #5
Accessories:  Memory Box - Piestra Tile Die; Promarkers - Burnt Orange, Spice, Peach, Soft Peach; SU Card - Early Espresso, Calypso Coral, Crumb Cake; Card from stash

I used various Spellbinder dies to cut elements of this card.  I used my stamp-a-ma-jig to position the lacey doily on the cut circle and trimmed it to lie against the coral panel, and adhered them to the card base.  Next I cut the rectangles.  While the deckled rectangle remained in the die, I sponged on some Calypso Coral and Early Espresso and then went over both of them with some antique linen, which really blended the colours together.  I stamped the oak leaves and sentiment onto the panel and adhered it to the card.  I used the knitting stamp from Faux Fun on some coral card and then cut out the pennant with my Spellbinder die.  I stamped the oak leaf & acorn image twice and coloured them with Promarkers, then fussy cut them both! I attached them to the card with dimension tape.


It's a really beautiful day here - the sun is shining, it's pleasantly warm 23C (74F), soft blue skies with some cloud and the birds are singing like mad.  According to the weather forecast this is probably the last day of summer - tomorrow the temperature is expected to drop by 7C!!  Much cooler.

That's all for now - I've had a good morning in the craft room.  Not only have I managed to complete this card reasonably early, I've also had a good tidy up!  Now I'm off for a cup of coffee and will be back later to waltz my way round the Blog Party!!  See you soon.

Related Posts Plugin for WordPress, Blogger...