Wednesday, 20 April 2022

SHC - One Layer Cards

.... Morning! I'm running late with my weekly Seven Hills Craft blog post. Today I have a couple of one-layer cards to share with you. Here's the first:


Stamps: Concord & 9th - Simply You, Magnolia Messages
Inks: Kaleidacolor - Pastel; Versafine Clair - Nocturne
Accessories: White Card

This is super quick and easy to make. I used my MISTI to stamp the large leaf image in soft pastel colours. I then added a fun, bold greeting in black. The inside is blank for my own message. I was having such fun that I made another card, this one is for Ben:


Stamps: Concord & 9th - Simply You, Magnolia Messages
Inks: Gina K - Applemint; Versafine Clair - Nocturne
Accessories: White Card

I'm submitting this card to Addicted to CAS - ATCAS#218 where they want to see one-layer cards.


Just a easy as before except that I stamped the leaves in soft green and added a bold hello greeting in black. Once again, I've left the inside blank for my own message.


Sometimes you need to be able to make cards quickly. And yesterday I realised I hadn't made my cards for today's post. I've been feeling so incredibly tired for the last week - I think it's a combination of the chemotherapy and Covid. While, I'm negative and recovered from Covid, the tiredness is hanging on. In fact, I was in bed last night early and slept through until 9am this morning! I can't remember the last time I slept so long. I think I have to learn that taking a nap is a good thing.

Anyway, that's all from me today. Take care. See you soon.

signature photo Signature.png

Wednesday, 13 April 2022

SHC - Happy Easter

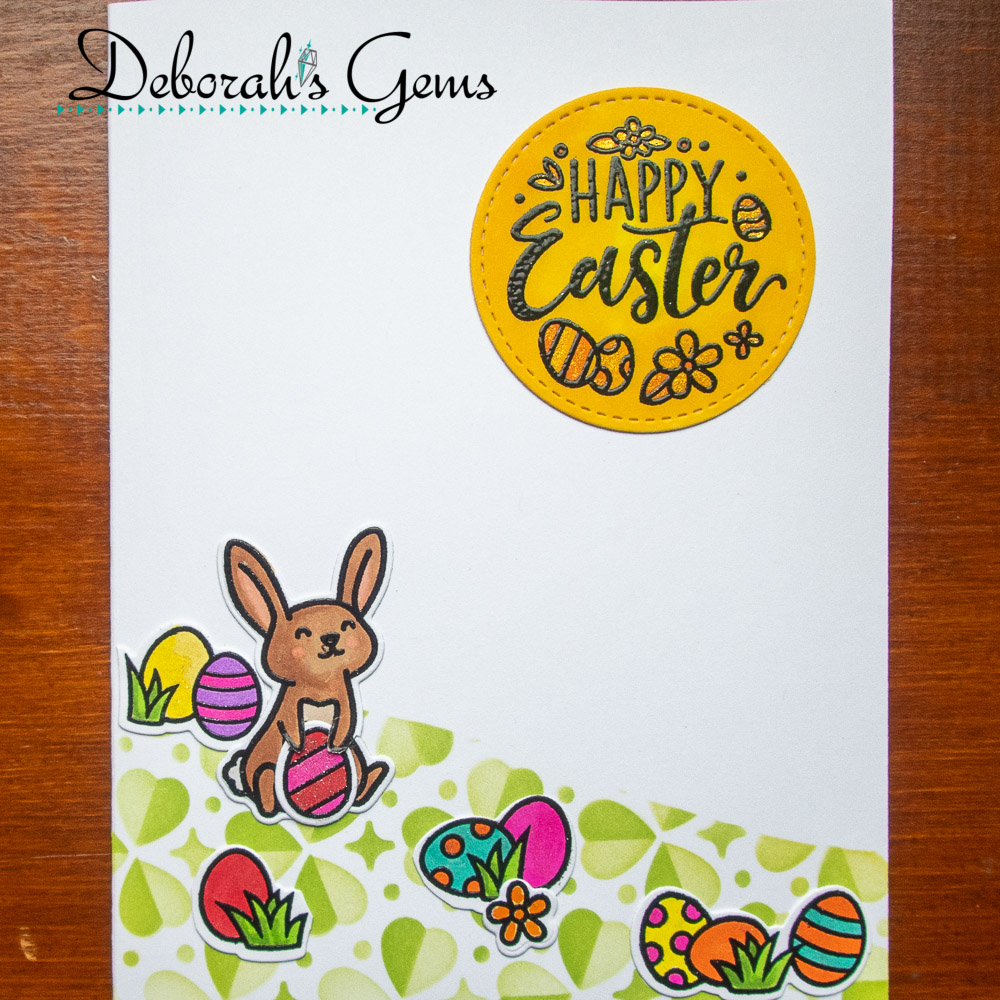
... Morning. I'm here with my Seven Hills Craft blog post. Today I've a simple Easter card to share with you:


Stamps: Lawn Fawn - Better Days, Simply Celebrate Spring, Magic Spring Messages, Scripty Autumn Sentiments, Celebration Scripty Sentiments
Inks: Gina K - Key Lime, Soft Stone; Versafine - Onyx Black; Versafine Clair - Nocturne
Dies: Lawn Fawn - Better Days, Simply Celebrate Spring, Magic Spring Messages
Accessories: White Card; SU DP - Daffodil Delight; Lawn Fawn - Clover Background Stencils, Hillside Stencils; Copic Markers; Clear Embossing Powder; Nuvo - Clear & Midas Aqua Shimmer Brushes

I'm submitting this card to Cupcake Inspirations Challenge - CIC#541 where they want to see bunnies, and to Addicted to CAS - ATCAS#217 where they want animals.


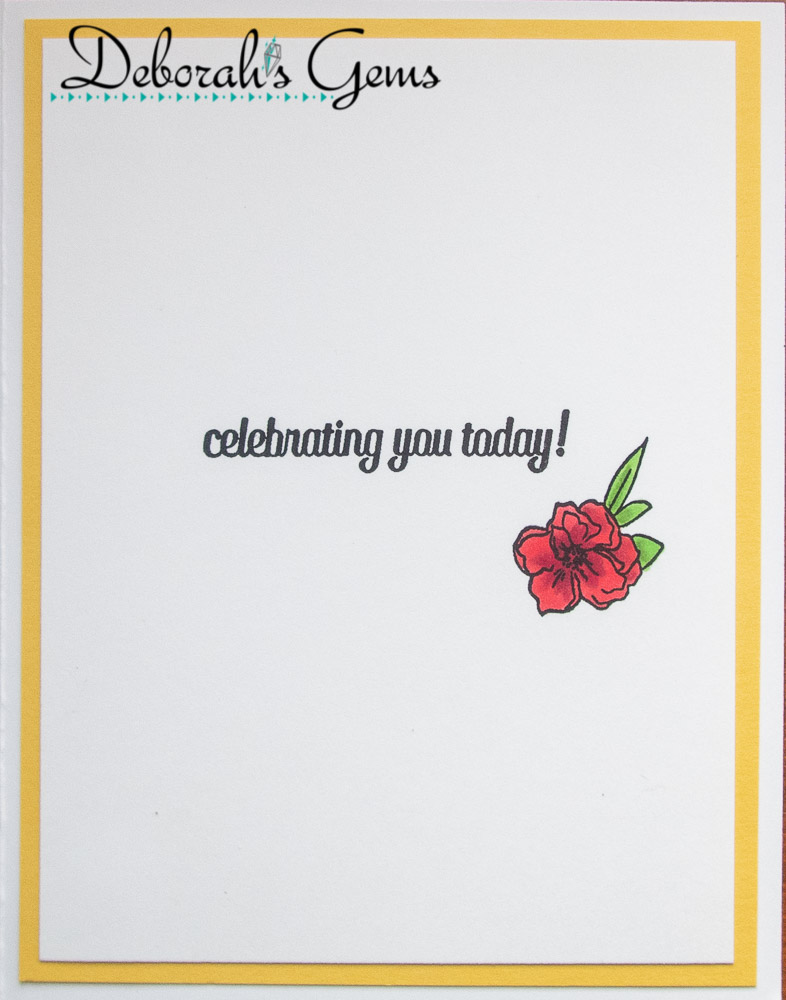
I had fun with this card. I started by creating the clover background hillside. I first masked off the top of the card with a hillside mask and then placed the clover stencils over the top. I used one shade of green ink, applied lightly for the first stencil and with a heavier hand for the second stencil. Next, I used my MISTI to stamp the bunny, some easter eggs, flowers and the greeting (sun) on white card. I removed the images and coloured them with Copic markers. I returned them to the MISTI and restamped with Versafine Onyx Black ink and heat embossed with clear powder. I used the matching dies to cut out the images. The bunny image has a heat on the belly, so I simply used a scalpel to cut under the arms and slipped in an easter egg. The easter eggs cut in a strip, so I cut them down to small groups and adhered them onto the card. To make the 'sun' I coloured the card yellow, and then stamped on top. I finished the front with the addition of some clear and gold tinted shimmer. Inside the card, I cut a mat layer of bright yellow design paper. On the white panel I created the greeting using words from two different sets and added some of the left-over die cuts.


That's all from me for today. See you again soon.

signature photo Signature.png

Wednesday, 6 April 2022

SHC - Birthdays

.... Morning. Time for my Seven Hills Craft blog post. Today I've got a couple of birthday cards to share with you. The first is for my father-in-law:


Stamps: Concord & 9th - Birthday Stacks; The Greetery - Sentiment Suite Birthday
Inks: Gina K - Applemint, Key Lime, Grass Green, Lucky Clover, Ocean Mist, Turquoise Sea; Versafine Clair - Nocturne
Dies: Altenew - Just a Number
Accessories: White & Black Card

I'm submitting this card to Happy Little Stampers Anything Goes with Dies - HLSAGD#04.


This was fun to make. I used my MISTI to stamp the birthday presents, starting in the middle and moving the card up and down to create a nice background panel. I removed the panel from the MISTI and freehand stamped the parcels with the solid square block. The block lines up easily and it's very quick. I trimmed the panel to 4" x 5¼" and layered it onto a black mat layer and added it to the front of an A2 (US size) notecard. I finished the front by die cutting a scripty birthday greeting - the shadow in black and the text in white. Inside the card, I cut a mat layer of black card. On the white panel I stamped a fun sentiment - and who doesn't like cake? In the message I'll add have a glass of wine too!! I finished the inside with a few more of the birthday presents.


Next is a card I made for our son's aunty who lives in the US - so she'll have this card by now:


Stamps: Concord & 9th - Birthday Stacks, All the Birthdays; The Greetery - Sentiment Suite Birthday
Inks: Versafine Clair - Nocturne; Gina K - Bubblegum Pink; Versamark
Dies: C&9 - Birthday Stacks
Accessories: White & Black Card; Gold Embossing Powder; Nuvo - Midas Aqua Shimmer Brush; Copic Markers

I'm submitting this card to Less is More - LIM#461 where they want us to use pink and gold - done! So glad I've managed to join in with this challenge - it's been a while. I'm also playing along with Perfectly CAS - PCAS#25 where they want us to use Die Cuts and to only use a ⅓ of a page or less.


I used black card to make an A2 side-opening notecard. I cut a piece of white card 4" wide and put it in my MISTI. I stamped the balloons towards the top of the card in a soft grey, removed the panel and coloured the balloons with Copic markers. I replaced the card and restamped with Versamark ink and heat embossed with gold powder. I then went to use the matching die to cut out the balloons and discovered that there is a right way to use the balloon stamps!! So I re-did the balloons, the right way this time, cut them out, stamped the balloon strings and heat embossed them with gold powder and then added the panel to the front of the card. I trimmed it to measure 5¼" from the tallest balloon to the bottom of the panel. I finished the front by adding a simple birthday greeting and adding some gold shimmer to the two plain balloons. Inside the card, I cut a piece of white card to be smaller then the note card. I stamped a birthday greeting in the middle and added the spare set of pink balloons to decorate the bottom of the panel.


You can actually see the gold shimmer in the balloons in the photos!! 

I'm busy making these cards in advance - typing this on 28 March - a few days after my first round of chemo. It's been okay - no sickness or nausea, but I am tired. So, I think it's good to get well ahead, just in case the next round isn't as kind!!

That's all from me today. See you again soon.

signature photo Signature.png

Wednesday, 30 March 2022

SHC - It's Your Day

..... Morning! It's time for my weekly Seven Hills Craft blog post. Last weekend was Mothering Sunday in the UK and I hope all you mums out there had a super time. I've already shared the cards I made for my mum and mother-in-law, and this week I'm sharing a card that I made for my aunt. She's very much like a second mum to me and I always send her flowers and make her a special card:


Stamps: Reverse Confetti - Farmhouse Wreath; The Greetery - Sentiment Suite: Birthday
Inks: Versafine Clair - Nocturne
Dies: Reverse Confetti - Farmhouse Wreath; C&9 - Stitched Vines Card Front Die; Gina K - Master Layouts 1
Accessories: White & Black Card; SU Card - Daffodil Delight; Copic Markers; Sheer Shimmer Spray - Sparkle

I'm submitting this card to Sunday Stamps Challenge - SSC#279 where they have this bold spring colour palette to play with. I'm also playing along with Cardz 4 Galz - C4Glz#169 where they want to see flowers for Mother's Day.


I used dies to cut a piece of yellow card to size and then ran it through my Big Shot with my new stitched vines die. I love this pretty pattern. I layered the panel on black card and adhered to the front of an A2 notecard (US size card). I spritzed the whole panel with gold tinted shimmer spray, sadly you can't see it in the photo above! Next, I used my MISTI to stamp the farmhouse wreath, the extra flowers and the string on white card. I removed the card and coloured the images with Copic markers and then returned them to the MISTI and stamped again with black ink for a crisp image. I used the matching dies to cut out the images and adhered them flat to the card. I finished the front by making a flag sentiment. I stamped the greeting on white card, trimmed it to size and then cut the flag end by hand. I snipped in the centre of the card and then cut diagonally from the corners to meet the top of the cut - a quick, easy way to add a flag. This card is flat and easy to mail. Inside the card, I cut a mat layer of yellow card and on the white panel added a greeting and another flower.


That's all from me today. Keep safe. See you soon.

signature photo Signature.png

Wednesday, 23 March 2022

SHC - Mother's Day Cards

..... Morning! It's time for my weekly Seven Hills Craft blog post. I've made a couple of Mother's day cards using products from lots of different companies. Here's my first card:


Stamps: Lawn Fawn - Magic Spring Messages; Reverse Confetti - Botanical Stamp; Altenew - Not for You; C&9 - Big on You
Inks: Gina K - Red Hot, Tangerine Twist, Wild Dandelion, Lucky Clover, Tranquil Teal, Wild Lilac; Versafine - Onyx Black; Versafine Clair - Nocturne
Dies: Lawn Fawn - Magic Spring Messages; Reverse Confetti - Botanical Dies
Accessories: White & Black Card; Lawn Fawn Stencils - Clover Background; Copic Markers; Clear Embossing Powder; Crystal Gems

I'm submitting this card to Never-Before-Used-Schtuff - NBUS#36 - most of the products are new stash!! I'm also submitting this to Happy Little Stampers Anything Goes with Dies - HLSAGD#03 and to Happy Little Stampers Stencil Challenge - HLSSC#03 where it's anything Goes.


I know that the background stencil is supposed to be clover, but when I saw it, I saw lots and lots of pretty hearts all forming triangles! I cut a piece of white card to 3¾" x 5", positioned the first part of the stencil with the whole clovers and lightly blended on a rainbow of inks diagonally across the card. Next, I used the second stencil with only half of each leaf and repeated the ink blending with a heavier hand. This gives a lovely blended background of pretty rainbow hearts!! I layered the finished panel onto a mat of black card measuring 3⅞" x 5⅛" and added the whole piece to the front of a side-opening A2 notecard (US size). I used my MISTI to stamp the greeting, removed the image from the MISTI and coloured it with Copic markers. I returned the image to the MISTI, stamped with Versafine ink and heat embossed with clear powder. I then used the matching die to cut out the greeting. I used the same process to stamp, colour and cut out the flowers. I finished the front of the card with some clear crystal gems from my stash. Inside the card, I cut a mat layer of black card. On the white panel I stamped 'I 💗 U' sentiment and added a sub-message, along with a vase of flowers. This is the card I made for my mum.


Next is the card I made for my wonderful mother-in-law:


Stamps: Lawn Fawn - Magic Spring Messages; The Greetery - Sentiment Suite - Birthday
Inks: Gina K - Wild Dandelion, Sea Glass; Versafine - Onyx Black; Versafine Clair - Nocturne
Dies: Lawn Fawn - Magic Spring Messages
Accessories: White & Black Card; Altenew - Dotted Tile Cover Plate; Clear Shimmer Spray; Copic Markers; Clear Embossing Powder

I'm submitting this card to Color Hues - CH#37 where they want us to use yellow and soft teal.


I started by cutting a piece of white card and black card to the same dimensions as in the card above. I placed the white card onto the Dotted Tile plate and ran it through my BigShot. This is such a pretty impression. I lightly blended yellow ink in the centre and faded towards the edge, and added a soft teal at the bottom and top of the card - it reminds me of a bright sun in clear blue sky. I adhered the panel to the front of an A2 notecard. I spritzed the front with a clear shimmer spray - you can see it above. I used the method outlined above to stamp the greeting, only this time I coloured with just yellow and teal Copic markers. Inside the card, I cut a mat layer of black card. On the white panel I stamped a greeting and added a couple of little flowers.


I took another photo of the card - holding it outside the window of my office with the sun shining on the card - you can just about see the shimmer in this photo, although I did have to darken the image a bit to see the shimmer.


I prepared this post last week as I was due to start chemotherapy on 17 March and I wasn't sure how I'd be feeling (I usually make my cards the weekend before my Wednesday post). Anyway, I went to hospital as planned but the team were unable to start a drip for me. Apparently I have rubbish veins. So this week I've had a PICC line put in place and I'll be starting my chemo tomorrow!!

That's all from me today. See you again soon.

signature photo Signature.png

Wednesday, 16 March 2022

SHC - Kids Cards

..... Morning! I'm here with my weekly post for Seven Hills Craft blog. Yesterday was my great-nephew's 10th birthday. I made a couple of cards for him - one from me and one from my mum. Here's the first card:


Stamps: Concord & 9th - Make Some Noise, Out of This World, All the Birthdays
Inks: Gina K - Electro Pop - Raging Red, Orange Glow, Blaring Blue, Screamin' Green, Hello Yellow; Versafine Clair - Nocturne; Hero Arts - Unicorn White
Dies: C&9 - Out of This World
Accessories: White & Black Card; Copic Markers; Nuvo - Clear & Midas Aqua Shimmer Brushes

I'm submitting this card to Never-Before-Used-Schtuff - NBUS#36 - two new sets from Concord & 9th, and also to Love to Craft Challenge Blog - LTCCB#67 where it's anything goes.


I stamped the two-step birthday greeting directly onto the note card using bright neon inks. It was reasonably easy to ink the letters are they are widely spaced. The focal image is CASED directly from the packing for the dies I used. I changed the starry background by stamping the stars on black card. I could have used my colour scraps, but I was lazy and just used white card which I coloured with Copic markers and then die cut. I adhered the starry background to the card and added the rocket and planet on top. I finished the front by stamping a few bright stars. Inside the card, I cut a mat layer of black card. On the white panel I stamped a bold red greeting and smaller birthday greeting in black ink, along with some more stars.


My next card uses Birthday Stacks - one of my favourite stamp and die sets:


Stamps: Concord & 9th - Birthday Stacks, All the Birthdays
Inks: Gina K - Red Hot, Wild Dandelion, Tangerine Twist, Lucky Clover, Bubblegum Pink, Blue Raspberry, Black Onyx
Dies: C&9 - Birthday Stacks
Accessories: White & Black Card; Felt Pens; Nuvo - Clear & Midas Aqua Shimmer Brushes


I started by cutting three piece of white card to the following measurements: 6¾" x 4¼" for the background layer, 5⅜" x 2½" for the candle layer, and 5⅜" x 1½" for the presents layer. I also cut a black layer at 5⅜" x 3" for the celebrate layer. Concord and 9th have an excellent video on their blog to show how to attach the layers. 

I stamped the balloons directly onto the background layer and used the solid circle to quickly add colour to the balloons, and then added some strings. I stamped the candles on the next layer, added colour and used the matching die to cut out the candles. I repeated this process for the presents. For the black layer I used the 'celebrate' die and cut out the word. All the dies cut little notches either side of the main images which is where you score the card. I added ¼" sticky tape to the tabs by the score lines and trimmed off the excess card. At this point I made sure all the layers were the correct depth and trimmed away any excess card. I added some extra detail with felt pens, and some sparkle to the candle flames and all the presents. On the back of the 3D card, I added a birthday greeting. I cut another of the background layers, used the shaped die to cut the curved dotted pattern, cut off the side pieces and trimmed the panel to be slightly smaller then the actual card. I stamped a greeting and added a balloon.


I took a photo looking down on the card so that you can see the 3D effect - it's a super card as it fits inside a standard A2 (US size) envelope.


You'll be seeing more cards featuring Birthday Stacks in next week's post - I made them earlier this week as I go for my first round of chemotherapy tomorrow afternoon. I'm not too worried about the actual process, but I'm not looking forward to the after effects - I'm a rubbish patient. I decided it would be a good idea to get ahead with my cards just in case I feel awful this coming weekend!!

That's all from me today - see you soon.

signature photo Signature.png

Wednesday, 9 March 2022

SHC - Simple Floral

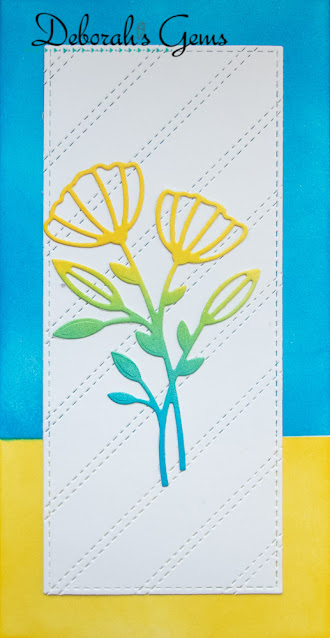
... Morning, I'm here with my weekly Seven Hills Craft blog post. This week's post is different to my usual. I have a simple, floral card to share inspired by #cardsforukraine. The idea is to flood social media with cards made either in the colours of the Ukraine flag or use a sunflower, or both. I have used the colours in my card:


Inks: Gina K - Wild Dandelion, Blue Raspberry
Dies: MFT - Mini Slimline Stitched Stax #5, In Focus Florals; C&9 - Stitched Stripe Card Front
Accessories: White Card

I'm submitting this to Fusion - FUSION#0522 where I've used their sketch and to Color Hues - CH#36 the Ukraine flag colours.


I made a mini slimline card from white card stock - it measures 6¼" x 3¼". I masked off the top of the card and blended bright yellow ink at the bottom, and then masked the bottom and blended blue ink. I used a die to cut a piece of white card smaller than the front of the card. I added detail to the panel with the stitched stripe card front die. I adhered the panel to the centre of the card. To finish the card I die cut a simple floral which I coloured to match and then added to the front. I haven't added any sentiment as yet. Inside is also blank for my own message.


That's all from me today. See you again soon.

signature photo Signature.png
Related Posts Plugin for WordPress, Blogger...