Tuesday, 10 March 2015

Big Eyes .....

.... Hello!  I've got a fun and funky card to share with you this afternoon.  I've used a couple of challenges to make the card.  The colours are from CAS Colours & Sketches - CASC&S#114 - they are so rich and lush.  The the theme of "Big Eyes" is from Left of Centre Creative Challenge - LOC#68

Change for no one - photo by Deborah Frings - Deborah's Gems

Stamps: Dylusions - Pondering Petunia, Clearly the Right Words
Inks: Memento - Tuxedo Black; Stampin' Up! - Mossy Meadow, Lost Lagoon
Accessories: White Lustre Card; SU Card - Blackberry Bliss; Cuttlebug EF - Papaya Halves; Copic Markers; Wink of Stella - Clear; Glossy Accents; SU Marker - Basic Black


When I saw the Left of Centre challenge, I knew I had to use one of my fabulous Dylusions stamps - love the way Dyan has faces with huge eyes and in this case huge specs!!  I stamped her on white card, coloured with Copic markers and then cut her out.  I edged the image with a black marker, added some sparkle to her lips and dress and finished with glossy accents on her specs.  I cut a mat layer of blackberry card and embossed the white panel for some added interest.  I finished the front with one of Dyan's fabulous quotes - I think it goes so well with this image.  On the inside I cut another mat of blackberry card and added some hands to the panel.  I've left a large space for my message.

Change for no one inside - photo by Deborah Frings - Deborah's GemsChange for no one sq - photo by Deborah Frings - Deborah's Gems

This evening Kathryn and I are off to Northville High School for the Freshman Information & Activities Night.  It looks like a busy evening is in store - registration, curriculum choices, scheduling, safety, meeting counsellors and teachers, and then finding out about the various clubs and societies at the school.  Kathryn has pretty much picked her choices for Freshman year, I can't quite believe I'm saying that - it only seems like five minutes ago she was starting school!  So I'd better come to a close and get on with some house stuff!!  Ugh!  See you soon.

signature

Monday, 9 March 2015

Bowties are cool ....

.....  Hello again!  I managed to get a bit more time in my craft room this afternoon and I played along with a few challenges and made this quirky masculine card:

Bowties are cool - photo by Deborah Frings - Deborah's Gems

Stamps: Viva Las Vegas Stamps - Plate 925 (Dr Who); Stampin' Up! - Perfectly Penned
Inks: Memento - Tuxedo Black; SU - Bermuda Bay
Accessories: White Lustre Card; SU Card - Crumb Cake, Bermuda Bay, Cherry Cobbler; SU DP - Night of Navy, Cherry Cobbler, Bermuda Bay; Black Marker


I've used a few challenges in the making of this card.  The colours are from Colour Throwdown - CTD#332, the layout and theme of bowties are from Fusion - FUSION#29 and the word challenge at Just Us Girls - JUGS#283 is MASCULINE, and I do like making guy cards.

As soon as I saw the challenge at Fusion, I knew I wanted to make a bowtie card, but it's taken me ages!!  I used this wonderful bowtie stamp which is from a Dr Who themed set and stamped it on card and design paper, cut them out, edged them with black marker and then adhered them directly to the card.  Very clean and simple.  On the inside I cut a mat layer of design paper, and on the white panel added a birthday sentiment and another bowtie!  Well, why not?

Bowties are cool inside - photo by Deborah Frings - Deborah's Gems
Bowties are cool sq- photo by Deborah Frings - Deborah's Gems

I think I've mentioned that we are all big Dr Who fans in this family.  When Matt Smith played The Doctor he wore a bowtie and always insisted that "bowties are cool!"  I tend to agree with him.  And if you want to see The Doctor, here's a link to him repeating this several times:


signature

Flowers for Mum ....

....  Good morning!  It's absolutely beautiful here today - the sun is shining and I can hear birds singing.  Our clocks went forward at the weekend and it was so nice to have a light evening yesterday - I forgot it was almost 7.30pm - it was light!!!!

This morning I've a clean, simple and pretty card to share with you.  I've used the colours from this week's Paper Players challenge - PP#235 - they are so pretty and perfect for my flowery card:

Wonderful Mother - photo by Deborah Frings - Deborah's Gems

Stamps: Stampin' Up! - You're Wonderful
Inks: SU - Crumb Cake
Accessories: White Lustre Card; SU Card - Crumb Cake; Copic Markers; Wink of Stella - Clear


It's Mother's Day in the UK on Sunday, and I only remembered (well was reminded) yesterday.  This card is for my Mum, and I'm safe sharing it here now as Mum doesn't do computers!!  This card, and my mother-in-law's (check back on Wednesday for that one), are both in the post and I'm hoping that they'll get to the UK in time.

This card came together really quickly.  I stamped the big sentiment in the centre of the card.  I stamped the flowers onto scrap white card and coloured them with Copic markers.  I left the smaller flowers as they stamped and simply cut round them and adhered them to the card.  The larger flower stamp was the wrong shape for my card, so I cut it into pieces and adhered to the card in the position I wanted!  On the inside I cut a mat layer of kraft card and stamped some more flowers on the white panel.  I left a space for my message.

Wonderful Mother inside - photo by Deborah Frings - Deborah's GemsWonderful Mother Sq - photo by Deborah Frings - Deborah's Gems

I added some sparkle to the flowers on the front of the card with clear Wink of Stella - I love the subtle effect you get with these pens.

Wonderful Mother detail - photo by Deborah Frings - Deborah's Gems

I drove into Northville this morning to get this card into the post.  It was a lovely journey today - bright, clear and I could actually see patches of grass appearing on the side of the road.  At the moment, it's a bit brown, but it won't be long before it's all green.  I love spring!  That's all for now - have a great day.

signature

Saturday, 7 March 2015

52CCT - Sketch ...

....  Good morning!   Welcome to the first of our March challenges here at 52 {Christmas} Card Throwdown.  Our aim is to get a stash of Christmas cards ready for the holiday season, so that we can enjoy the season and not have a last minute rush to get cards made.  Our host this month is Gill and she has a fabulous sketch for us to play with.  You can flip it, turn it - but we must be able to see the basic sketch in your project.  Here's my card:

Merry & Bright - photo by Deborah Frings - Deborah's Gems

Stamps: Christmas Baubles (no maker's name on the stamp); Uniko Studio - Background Builders Christmas, Simply Said Christmas
Inks: Memento - Tuxedo Black; Distress - Mowed Lawn, Festive Berries
Dies: Spellbinders - Labels 14 (S4-290) #4
Accessories: White Lustre Card; Stampin' Up! Card - Real Red; Cuttlebug EF - Winter Wonderland; Copic Markers; Ribbon; Craftwork Label Sentiment; Glitter


I like this sketch, it's very versatile.  I turned the sketch through 90° as it worked better for for the image I used.  I used the colours from this week's Merry Monday - MM#148 and have finally joined in with CASE-ing Christmas Challenge - CCC#10.  I love Christmas baubles and this is such a nice stamp (but I can't find who made it).  I cut a panel of white card which I embossed with baubles to match the image.  I stamped the image onto white card, coloured it with Copic markers, die cut it and edged the image with a red Copic marker.  I stamped the image again to layer the bauble in the front.  I added some glitter to the finished image.  I coloured the ribbon with my Copic marker to match the green bauble.  The sentiment is from my stash of Craftwork card labels and works really well with the image.  On the inside I cut a mat layer of red card, added a border of Christmas holly and a simply greeting.

Merry & Bright inside - photo by Deborah Frings - Deborah's GemsMerry & Bright sq - photo by Deborah Frings - Deborah's Gems

For more inspiration using Gill's sketch, visit our blog and check out the team's projects. 

I'm typing this on Friday morning and our current temperature is -10°C with bright sunshine, but it looks like we're in for a warm up!!  Saturday should reach a high of 3°C, and about time too!  In fact next week looks like a relative heatwave. 


We get excited when the temperature goes above freezing for the first time in months !!!!  It'll be nice to see grass after all that snow!  Yea, spring is almost here.  Sorry about that!  Have fun with the challenge and see you soon.

signature

Friday, 6 March 2015

SNG - Happy Birthday .....

... Morning!   I've got a fun birthday card for you today - suitable for a little boy or even a big boy, who is still young at heart!!

Happy Birthday - photo by Deborah Frings - Deborah's Gems

Stamps: Rick St Dennis Digi - Buddy and his Pet Plant; Uniko Studio - Simply Said Birthday, Classic Numbers
Inks: Versafine - Onyx Black; Stampin' Up! - Lucky Limeade
Dies: Lil Inkers - Stitched Stars
Accessories: White Lustre Card; Papermania DP - For Him; Copic Markers; Wink of Stella - Clear; SU Marker - Basic Black


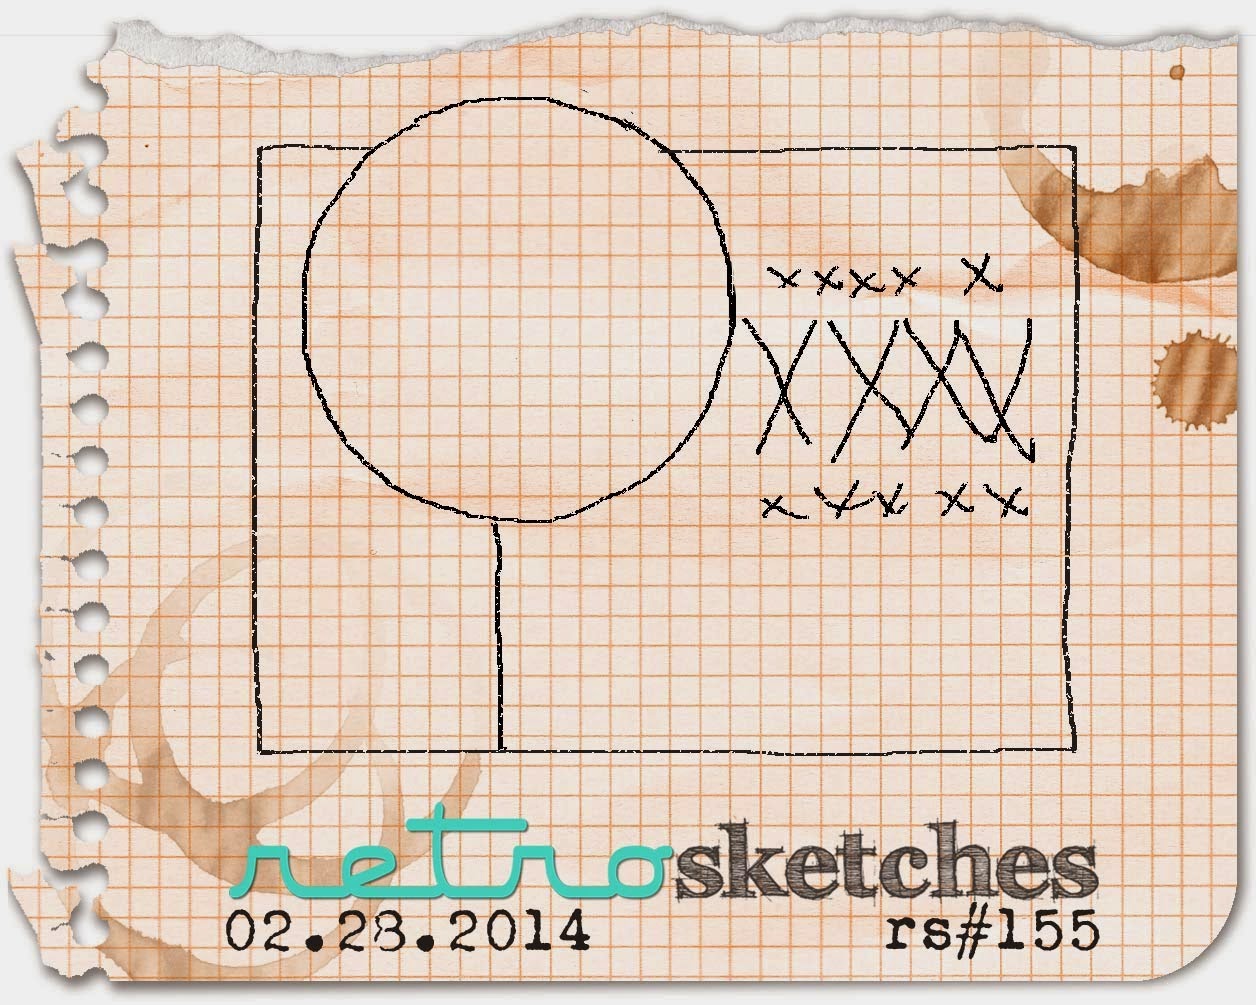
Don't you think Buddy and his Pet Plant are adorable?  You can find him and many more super fun digital images over at Rick's Zibbet and Esty shops.  I used the layout from this week's Retro Sketches challenge - RS#155, and the colours are from the current My Favourite Things Colour Challenge - MFTCC#16.  I used a couple of sheets of design paper to cover the card base.  I printed Buddy on some white card, coloured him with Copic markers, cut him out and edged the image with black marker.  I die cut the star from white card, coloured it with Copic markers and added lots of sparkle with my Wink of Stella brush.  I added a touch of sparkle to the pet plant too!  I finished the front with a simple birthday sentiment.  On the inside I cut a mat from the design paper and added a simple greeting on the white panel.

Happy Birthday Sq - photo by Deborah Frings - Deborah's GemsHappy Birthday inside - photo by Deborah Frings - Deborah's Gems

I hope the DT over at MFT are okay with my colours - when I printed off the challenge graphic I thought the colours were blue and green, it's only now that I realise the colour is lavender!!  Never mind - I'm pleased how this turned out.

We've got sunshine again, but along with the sun comes cold, cold temperatures!  But spring is on the way - the clocks go forward this weekend and the weatherman is promising much warmer temps next week - yea!!!  I was out yesterday and I spotted some grass - albeit slightly brown, but it'll green up soon - I hope.  That's all for now.  See you soon.
signature

Wednesday, 4 March 2015

TMR - DT Call and sketch ....

... Good morning from a cold, grey and snowy Northville!  It's time for our new challenge at The Male Room but, before I get to that, we've had several people move on from the team, most recently Jacqueline has had to step down - I miss you ladies.  I'd like to say how much I've enjoyed working with them and to thank Jacqueline for picking me to join the team.  That does mean we're short DT members - so we're having a DT CALL.  If you're interested check out the blog for full details.

Our challenge for the next couple of weeks is to create a masculine project based on a sketch that Jacqueline drew for us - here's my card:

Nautical thanks - photo by Deborah Frings - Deborah's Gems

Stamps: Waltzingmouse - Ocean Bound
Inks: Versafine - Onyx Black; Memento - Tuxedo Black; Stampin' Up! - Brocade Blue, Soft Sky
Dies: Spellbinders - Squares Lg (S4-126) #3, #4, and #5; PTI - Wet Paint Cuts I
Accessories: White Lustre Card; SU Card - Basic Black; SU DP - Typeset; Copic Markers; Clear Embossing Powder


I used the colours from Colour Q - cQc#282 and the theme of sailing from Cardz 4 Guys - C4G#60 along with our sketch to make this card.  I covered the card with newsprint design paper.  I die cut three squares and stamped the ship and anchor onto two with Versafine ink and embossed with clear powder.  I then inked over the images using two shades of blue.  On the centre square I stamped a life saver which I coloured with Copic markers.  I finished the front with a die cut sentiment - cut three times, adhered together to give a nice thick sentiment.  On the inside I cut a mat layer of newsprint and on the white panel added a ship's wheel. 

Nautical thanks inside - photo by Deborah Frings - Deborah's Gems

Don't forget to visit the blog to see what the rest of the team have created to inspire you.  You have until Tuesday 17th March midnight GMT (8.00pm EDT) to play along.  Don't forget to check out the details of the DT CALL if you're interested.  Have fun!

signature

Tuesday, 3 March 2015

ASM - CAS ....

....  Hello again and Good evening!  It's time for new challenge at Addicted to Stamps and More!  This week is our ever popular Addicted to CAS challenge - lots of white space, clean, simple lines, minimal embellishments - this is what I made:

Belated Birthday Wishes - photo by Deborah Frings - Deborah's Gems

Stamps: Uniko Studio - Extra Time; Stampin' Up! - Four Feathers
Inks: SU - Brocade Blue, Soft Sky; Memento - Tuxedo Black
Dies: SU/Sizzix - Feathers Framelits
Accessories: White Lustre Card; Docrafts DP - Bookprint; Enamel Dots


As you can see this is a belated birthday card (I really must remember to get cards in the post on time - it takes a while for them to get to the UK).  I've used a few challenges in the making of this card.  The colours are from this week's Colour Q - cQc#282.  I've CASEd Vicki's gorgeous card at MUSE - MUSE#107 and I've added enamel dots - the theme over at House of Cards - HOC#3Mar.  This card was really quick and easy to make.  I stamped some of the feathers on newsprint design paper and some on white card, then cut them out with the dies.  I stamped the sentiment directly on the card, arranged and adhered the feathers and finished the front with some enamel dots.  On the inside I cut a mat layer of newsprint and stamped a greeting on the white panel.

Belated Birthday Wishes inside - photo by Deborah Frings - Deborah's GemsBelated Birthday Wishes Sq - photo by Deborah Frings - Deborah's Gems

For more inspiration - check out the cards from the rest of the team.  Looking forward to seeing what you make!  Have fun.  It's been a really dull day here - wet snow, sleet and rain!!  But at least I was in the warm and dry and crafting!!

signature

What a weekend that was ....

...  Morning!  It's dull, cold, wet and snowy here in Northville today.  I'm nice and warm at home and have almost recovered from the weekend.  What was I doing?  I was at a craft class weekend held at one of my local craft shops - Scrappy Chic in Livonia.  I booked up my classes as soon as they were advertised.  Why?  Well, I've always wanted to attend classes with the amazing Dyan Reaveley and she came to Michigan last weekend.  It was a blast!!!

There were three classes on Saturday - Technique Tag Book, Tags of Imagery and Quirky Watercolour Book.  They were all very fast paced and so much fun.  Dyan is a great teacher - she tells us, shows us and goes through it with us.  We learnt various techniques using Dyan's Dylusions Inks - the most vibrant colours.  I've got two books started and will complete them in the next few weeks.  I've also got some fabulous image tags which I think I'll put into my new art journal.

Dyan and Chris - photo by Deborah Frings - Deborah's Gems

Dyan and Chris - just before the start of our first class on Saturday morning.

Tag Techniques - photo by Deborah Frings - Deborah's GemsTag Techniques2 - photo by Deborah Frings - Deborah's Gems

Some of the technique tags from our fist class on Saturday morning - just love the bold, bright colours.

On Sunday there was an all day class - Art Journal Inky Extravaganza.  We were all given a brand new art journal with lovely clean pages and the first thing that Dyan made us do was spray ink - deliberately.  And then we played!  Oh, it was such fun.  I've got lots of backgrounds started, some are more finished than other, but this journal is going to be used.  Dyan brought in a number of her own journals - they are stunning and I took lots of photos.

Dyan - photo by Deborah Frings - Deborah's Gems

Dyan - during the technique tag class

Technique tags 3 - photo by Deborah Frings - Deborah's Gems

Another of the tags from the technique class - using stencils and inks here

Imagery Tag - photo by Deborah Frings - Deborah's Gems

The first of the imagery tags - rough layout, still lots of work to do.

Dyan, Chris & Class - photo by Deborah Frings - Deborah's Gems

Sunday morning - at the start of our art journal class.

I met lots of fabulous ladies over the weekend and would like to thank them for making it such a fun experience.  Special thanks go to Chris and her staff at Scrappy Chic for (a) getting Dyan over and (b) setting us a brilliantly organised and fun weekend.  Finally, thanks so much to Dyan for coming and teaching us - do come back again soon.

signature
Related Posts Plugin for WordPress, Blogger...