
I'm starting off with a card that showcases the stencil - Scattered Polka Dots:

Stamps: Festive Sentiments, Most Wonderful, Stunning Snowflakes
Inks: Stampin' Up! - Emerald Envy, Tranquil Tide; Versamark; Delicata - Silvery Shimmer
Dies: Die-namics - A2 Rectangles Set 1 #10, A2 Stitched Rectangles Set 2 #8
Accessories: White Lustre Card; Silver Mirri Card; SU Card - Tranquil Tide; Silver Embossing Powder; Uniko Stencil - Scattered Polka Dots

I taped the polka dot stencil to white card and sponged on the inks - I used the darker green on one side and the emerald green on the other and blended them together in the centre. I used a stitched edge die to cut out the finished panel. I used a plain die to cut a mat layer of metallic silver mirri card. I positioned the stencilled panel in the MISTI and stamped the sentiment in Versamark and heat embossed with silver powder. I was watching one of Jennifer McGuire's videos earlier this week where she showed her thick embossing technique for sentiments and I used it on this sentiment. I do like the effect. I attached the finished panel to the mirri card with dimensional tape. On the inside, I cut a mat layer of dark green card and on the white panel added a Christmas greeting in green, along with a few silver snowflakes. I'm submitting this card to CAS Colours & Sketches - CASC&S#248 - I just adore the colours!!


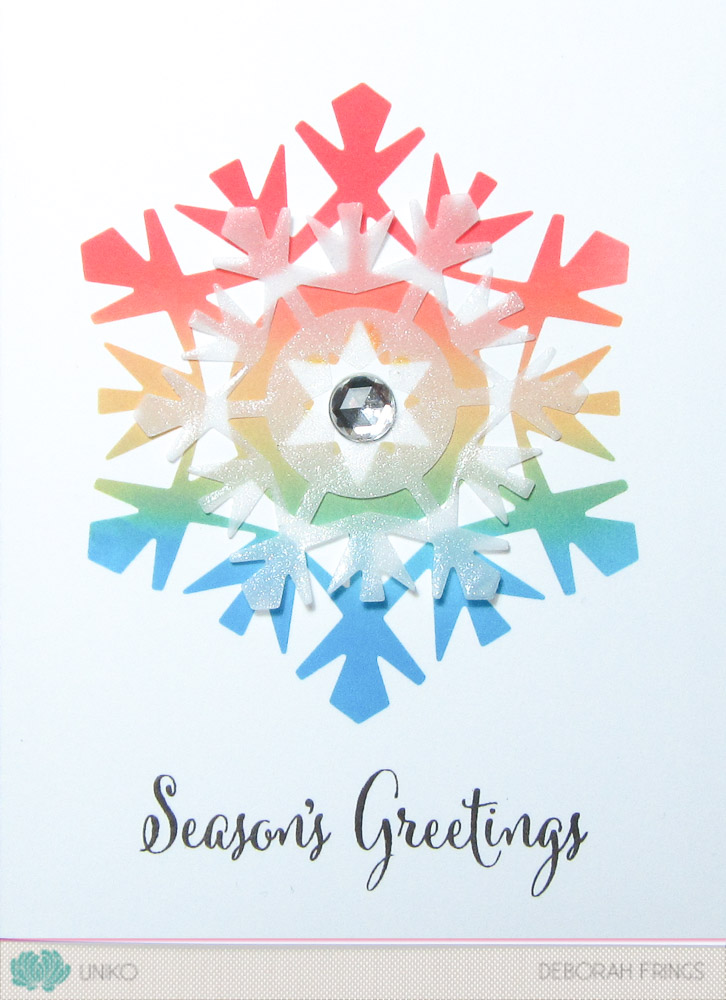
Next up, I have a couple of cards made using the Designer Dies Snowflake Trio:
Stamps: Uniko - Simply Said Christmas, Stunning Snowflakes
Inks: Gina K - Black Onyx; Distress Oxides - Candied Apple, Fossilized Amber, Salty Ocean
Dies: Uniko - Snowflake Trio
Accessories: White Lustre Card; Gina K Card - Black Onyx; Vellum; Wink of Stella - Clear; Gem; Inkadinkado - Masking Paper


I cut a piece of masking paper to the size of the card base and then die cut the largest snowflake, being very careful to keep all the little pieces. I also die cut another large snowflake from some scrap card. I removed the die cut snowflake mask from the panel and attached it to the front of the card. I used blending foam to add red, yellow, and blue inks, and where they blended it created orange and green. I carefully removed all the masking paper to reveal the finished rainbow snowflake. I die cut a smaller snowflake in vellum, covered it with clear Wink of Stella, added tiny amounts of glossy accents to the small points on the inside star and adhered it on the rainbow snowflake. I finished the front with a single large, clear gem. On the inside, I cut a mat layer of black card and on the white panel stamped a simple greeting and some colourful little snowflakes. I'm submitting this card to AAA Cards - AAA#102 where the team want to see ink blending, and also to Less is More - LIM#353&354 where they want to see Firework colours.


With the left-over die cut snowflake mask, I made another card:

Stamps: Uniko - Stunning Snowflakes
Inks: Gina K - Black Onyx; Distress Oxides - Candied Apple, Fossilized Amber, Salty Ocean
Dies: Uniko - Snowflake Trio; Die-namics - Peace
Accessories: White Lustre Card; Gina K Card - Black Onyx; Wink of Stella - Clear; Glossy Accents


My last card was made using the new Flower Power #1 - #6 Dies, along with the Wonky Stripes Stencil:

Stamps: Uniko - Flower Power #2, Flower Power #6, Simply Said
Inks: Distress Oxide - Fossilized Amber, Salty Ocean; Gina K - Lipstick, Cherry Red, Black Onyx; Versamark
Dies: Uniko - Flower Power #1 - #6; Die-namics - A2 Rectangles Set 1 #3, A2 Stitched Rectangles Set 2 #3
Accessories: White Lustre Card; Gina K Card - Black Onyx; Uniko Stencil - Wonky Stripes; Clear Embossing Powder

First, I have to give credit to Jane for the idea of using washi tape on the stencil to mask areas. I created the little block pattern by using the masked stencil and blended leftover yellow and blue distress inks, which resulted in this lovely soft green. I used dies to cut a tiny panel in black card and from the stencilled panel. I used the two-step rose from Flower Power #6 and cut it out with the matching die. The leaves are from Flower Power #2. I stamped them in Versamark, heat embossed and used the leaf die (which works for all the Flower Power leaves) to cut them out. I added some sparkle to the leaves. I finished the front with a tiny, simple birthday sentiment. On the inside, I simply added one of the die cut roses. I'm submitting this one to CASology - CAS#274 where the cue word is 'TINY'.


That's all from me today. Don't forget to visit the rest of the team and follow along with the Blog Hop. Here's the list:
Deborah (that's me!)
Make sure to comment as you go along the Blog Hop for your chance to win ALL the products being revisited. You've got until midnight (GMT), that's 7.00pm EDT in the States, on Sunday 18th November to comment. The winner will be announced on Sunday 19th November.
I do hope you like my creations - let me know which is your favourite. Have a good weekend, see you soon.


