... Hi, I'm back again! This is going to be a picture heavy post - but I do hope you enjoy it!
Bev of Uniko is releasing 5 new sets today, so grab a cup of coffee, sit down and enjoy!
I'm starting off with a couple of examples using Block Party Birthday - this is the first of a new style of stamp from Uniko:
Stamps: Uniko - Block Party Birthday, A Gift for You
Inks: Versafine - Onyx Black
Accessories: White Lustre Card; Stampin' Up! Card - Real Red; SU Punch - Hexagon; Zig Clear Color Brushes; Spectrum Noir Sparkle - Clear; Cear Embossing Powder
I stamped this image directly on the card and embossed it with clear powder, and I stamped it again on a piece of scrap card. I punched out three hexagons and coloured them with Zig brushes - no water colouring here, just bold, bright colour. I added sparkle to the open spaces on the main card. I adhered the three coloured hexagons with dimensional gel. I like the spotlight technique. On the inside I cut a mat of red card and on the white panel added some words and a large gift! I'm submitting this card to
Seize the Birthday - STB1602 where the theme is Anything Goes.
My next card uses only a section of the large stamp:
Stamps: Uniko - Block Party Birthday, Fontiments Birthday
Inks: Versafine - Onyx Black; Memento - Tuxedo Black; SU - Hello Honey
Dies: Die-namics - Basic Stitch Lines, Wonky Stitched Ovals Stax #3
Accessories: White Lustre Card; SU Card - Hello Honey; Copics; Spectrum Noir Sparkle - Clear
I got the idea of using just a portion from
Lindsey. The layout is based on the sketch at
Freshly Made Sketches - FMS#276, the colours are from
Colour Throwdown - CTD#431 and I used faux stitching which is the challenge at
City Crafter Challenge Blog - CCCB#350. I used my MISTI to stamp the image on some scrap white card, I used Memento as I planned to use Copics to colour the image. After colouring, I put the image back in my MISTI and stamped in Versafine black and embossed the image with clear powder - this gives a really clean, crisp black outline. I selected an area in the image and cut it out with a fancy edge die. I cut a panel of yellow card for the the background and I added faux stitching to the edges. I cut out the left over balloon and adhered it to the panel. On the inside of the card I cut a mat layer of yellow card and added a greeting and some candles to the white panel.
Next up is a card for one of my friends in the UK:
Stamps: Uniko - Originally Organic Additions, Flower Power #5
Inks: Versafine - Onyx Black
Dies: Lil Inkers - Wonky Stitched Rectangles #4
Accessories: White Lustre Card; SU Card - Pear Pizzazz; Tim Hotlz Water Colour Card; Zig Clean Colour Brushes; Spectrum Noir Sparkle - Clear; Clear Embossing Powder
I used the colours from the current challenge at
Your Next Stamp - YNS#58 and it's based (loosely) on the sketch at
CAS(E) this Sketch! - CTS#210. This involved lots of careful stamping, so my MISTI was used a lot! I started by cutting a panel of water colour card with a die. I put that on my card and then started stamping and embossing with clear powder. Once finished, I used my Zig Clean Color brushes and a clear Spectrum Noir brush to add colour. I attached the die cut panel flat to the card and finished the front with a simple greeting and a tiny little flower in the centre. On the inside I cut a mat layer of green card and added a greeting and flower to the white panel.
Next is probably the most clean and simple of my cards:
Stamps: Uniko - Background Block Halftone, Pure Florals Gerbera, All Occasion Sentiments #6
Inks: SU - Cucumber Crush, Watermelon Wonder, Peekaboo Peach; Versafine - Onyx Black
Dies: Lil Inkers - Wonky Stitched Rectangles # 3; Uniko - Gerbera
Accessories: White Lustre Card; SU Card - Peekaboo Peach; Spectrum Noir Sparkle - Clear
The colours are from
CAS Colours & Sketches - CASC&S#211 - love them! I stamped the halftone image on some scrap card and die cut a shaped panel. Next I stamped the gerbera daisy outline and then used the solid image inked up once in peach and once in melon. I used the matching die to cut out the daisy. I finished the front with a simple greeting. On the inside I cut a mat layer of peach card and on the white panel stamped a narrow halftone dot border, an outline gerbera and added a greeting.
Now I've a very masculine card for you - it's quite clean and simple too:
Stamps: Uniko - Explosion Additons, Nautical Treasures, Background Builders Vines
Inks: Versafine - Onyx Black; Memento - Tuxedo Black; SU - Bermuda Bay, Daffodil Delight, Pumpkin Pie
Accessories: White Lustre Card; SU Card - Tempting Turquoise; Vellum; Copics; Clear Embossing Powder; Spectrum Noir Sparkle - Clear
I really like the big dotty explosion stamp and I think it works as a sun! I decided to make a Father's Day card for my stash. I started by cutting a strip of blue card on which I stamped some vines - they look kind of wavy! I stamped the yatch on white card and embossed it with clear powder. I carefully coloured the sails and then used a scalpel to cut the boat out. I wanted to use the large BAM! stamp, but didn't want to obscure the sun, so I stamped it on vellum, heat embossed it and then added some blue ink to the back of the image. Once completely dry, I cut it out and adhered it to the card, adding some sparkle to the letters. I finished the front by adding some decoration to the main sail and a sentiment. On the inside I cut a mat layer of turquoise card and on the white panel stamped a greeting.
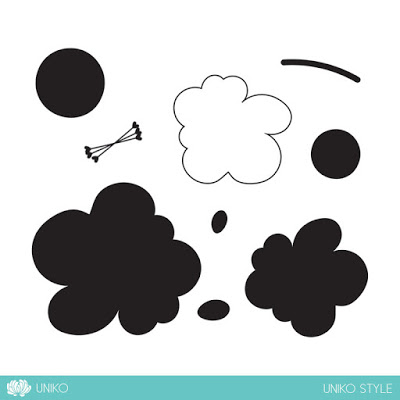
That brings us to the last of the new stamp sets available today - Uniko Style. This is a lovely set and I think you might be surprised how I've used it here:
Stamps: Uniko - Uniko Style, Sweet Baby
Inks: SU - Smoky Slate, Bashful Blue
Accessories: White Lustre Card; SU Card - Bashful Blue; SU/Sizzix EF - Chevrons; Spectrum Noir Sparkle - Clear
My inspiration for this card comes from the photo at
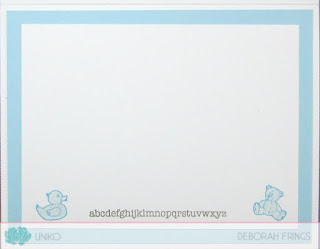
Addicted to Stamps and More! - ATSM#230. From the photo I've taken the colours - blue, white and grey, the chevrons and the clouds. Who knew that this little outline image in this set would work so well as clouds?? I started by cutting a mat layer of pale blue card - the last of my much loved SU Bashful Blue! I cut a white panel slightly smaller and used my MISTI to position the greeting. I embossed some scrap white card and stamped the outline flower/cloud, then I carefully cut them all out and adhered them to the panel. I added some sparkle around each cloud and finished with some little blue dots! On the inside is a mat of pale blue card, and on the white panel I simply added some baby toys - all sparkly - and an alphabet line!

That brings me to the end of my cards showcasing the new release. And now, as is our tradition at Uniko, we invite you to join the Design Team Blog Hop. Simply hop along the links below and leave a comment as you go for your chance to win the ENTIRE release, plus a couple of extras. A winner will be picked at random from all the comments left along the hop before midnight (GMT) on Saturday 4th March.
Deborah - that's me!
Now before I go, here's a complete look at all the sets available today:
Block Party Birthday
Originally Organic Additions
Background Blocks Halftone
Explosion Additions
Uniko Style
That's all from me today - thanks so much for getting this far - see you soon!