Thursday, 15 January 2015

RSD - Progressive Challenge Team B ...

.... Good morning.  It's time for Team B to share our creations for the RSD Progressive Challenge.  The theme for the first part of the challenge is Anything Goes - you can use any of Rick's images to create a card, scrapbook page or a 3D project.  If you play along with this first part of the challenge, then next month you'll get an image from Rick to play along with the second part of the challenge - hence progressive!  As well as the free image, your project will be entered into a draw to win even more.  Don't forget to share you project on Rick's Facebook page too!  Here's my card:

Unsupervised - photo by Deborah Frings - Deborah's Gems

Stamps: Rick St Dennis Digi - Phonecia Phlegm; Dylusions - Say It How It Is
Inks: Stampin' Up! - Lucky Limeade, Pumpkin Pie
Dies: Die-namics - Rounded Banner Stax #7, Fishtail Flags Layers Stax #2
Accessories: White Lustre Card; Kaisercraft DP - Happy Snaps; Vellum; Copic Markers; Jolee's Boutique - Skulls; Martha Stewart Glitter


I had such fun colouring in this image - Phonecia Phlegm is available at Rick's Zibbet shop along with many more images.  I used the sketch from this week's MFT Card Challenge - MFTWSC#211 for the layout. 

I used Copic markers to colour the image and cut it out with my Die-namics Rounded Banner die.  The die is actually shorter than the image, but it is really easy to get dies to cut longer images - check this video from Chrissie Stokes.  I used a couple of sheets of design paper (to match the colours in the image) on the card and edged the image with an orange marker.  I found a fun sentiment to go with the image, stamped it in orange and lime, cut out the words and adhered them to a vellum fishtail banner - I didn't want to hide too much of the image.  I finished the front with a skull embellishment to match her skull earring.  On the inside I cut a mat layer of orange dotty paper and on the white panel adhered the rest of the sentiment.  This one is going into my stash.

Unsupervised Sq - photo by Deborah Frings - Deborah's GemsUnsupervised inside - photo by Deborah Frings - Deborah's Gems

Check out the Sparkle and Glitter blog to see what the rest of Team B have made for the Anything Goes theme.  You can see Team A's projects here.  To add your finished project to the RSD Progressive Challenge Anything Goes Part I - Click Here.

We're still in the grip of an arctic blast here in North America, but at least the sun has been shining!  Wherever you are, be safe!  That's all for now.

signature

Tuesday, 13 January 2015

Cannot Espresso ....

.... Good morning!  I'm going to keep this short and sweet as the deadline for My Favourite Things Wednesday Sketch Challenge - MFTWSC#210 is fast approaching.  One of my favourite drinks is coffee and I treated myself to some new dies and stamps - here's my card:

Espresso Much - photo by Deborah Frings - Deborah's Gems

Stamps: MFT - Perk Up
Inks: Stampin' Up! - Cherry Cobbler, Baked Brown Sugar
Dies: Die-namics - Coffee Cup, Fishtail Flags Layers Stax #3; Lil Inkers - Stitched Rectangles #4
Accessories: White Lustre Card; SU Card - Cherry Cobbler; Teresa Collins DP - Far and Away; Wink of Stella - Clear; SU Marker - Cherry Cobbler


I think the papers are perfect - like a nice latte!  I cut a coffee cup from white card and the holder from red card, adding the dotty star to echo the paper.  I used the fishtail dies to cut the banner, edged it with a red marker and stamped the sentiment.  On the inside I cut a mat layer of red card and stamped a simple coffee cup on the white panel - there a big space for a message from me.  I added a touch of sparkle to the cup holder - see on the detail photo.

Espresso Much inside - photo by Deborah Frings - Deborah's GemsEspresso Much detail - photo by Deborah Frings - Deborah's Gems

It's a beautiful day here in Northville - bright blue skies and lots of sunshine - so much brighter than yesterday.  The downside to that is that the temperature is only -14°C (6°F)!!!  Still, I'm much rather it cold than actually snowing.  That's all for now.

Edited to add:  It seems I'm not the only one to use a coffee theme on my card - I've appear to have CASEd Erin, Cammy and Shemaine!!  Great minds think alike :)

signature

Monday, 12 January 2015

SNG - Turtle Art ....

....  Good morning!  I think many of you know that I like the turtle images drawn by Rick St Dennis and I've got another to share with you this morning.  This is a fun guy - he likes to get inky and messy - a bit like most of us!!

Artemis Turtle - photo by Deborah Frings - Deborah's Gems

Stamps: Rick St Dennis Digi - Artemis The Sunday Painter; Stampin' Up! - Work of Art; Stamp free with Stamp Crafter
Inks: SU - Strawberry Slush, Bermuda Bay, Tempting Turquoise, Wild Wisteria; Versafine - Onyx Black
Dies: Spellbinders - Squares Lg (S4-126) #7, Lacey Squares (S4-295) #5
Accessories: White Lustre Card; Copic Markers; Sakura Glaze Pen

I printed Artemis on white card and coloured him with Copic markers and Sakura Glaze pens; if you like him you can find him on Rick's Zibbet shop where you can check out even more of Rick's images.  I cut out the finished image with a square die.  I coloured some white card to match the turtle's body and die cut the lacy square for a mat layer.  I added splodges of colour to the corners of the card and stamped on words that seemed absolutely perfect.  The words come from a stamp that I got free with the Stamp Crafter several years ago.  On the inside of the card I stamped the colours again and finished a fun sentiment.

Artemis Turtle - photo by Deborah Frings - Deborah's Gems

I've got a bit of a dull day planned today - I've got to call several different medical insurance companies to sort out some bills - I can't think of a duller way to spend the day!  But it has to be done.  I do hope you have a better day.  Take care - see you tomorrow!

signature

Sunday, 11 January 2015

You make me smile ...

....  Good afternoon!  I do hope you're all having a super weekend.  Ours has been good fun.  We've been out to the Plymouth Ice Festival yesterday afternoon and this morning, and today I've been into my craft room to play!  First of all a card I made today for a friend in the UK:

Birthday Wishes - photo by Deborah Frings - Deborah's Gems

Stamps: Waltzingmouse - Eat Cake
Inks: Stampin' Up! - Blushing Bride; Versafine - Onyx Black
Accessories: White Lustre Card; Kaisercraft DP - XO; Wink of Stella - Clear and Silver


I used the inspiration photo from the current Fusion Challenge - FUSION#25 to create this card.  The elements I took from the photo were the peach/pink colours, the chalkboard background and the cake.  I covered the base of the card with some pretty design paper echoing the flowers in the photo.  I used the Eat Cake set to create a yummy (and calorie free) birthday card which I fussy cut out.  The big chalkboard sentiment is also from the paper pack and I finished the front with a stamped sentiment.  This card is going to be a bit late (I really must get my cards off earlier).  On the inside I cut a mat layer in the same design paper and on the white panel added a fun greeting and another little cake!

Birthday wishes inside - photo by Deborah Frings - Deborah's GemsBirthday wishes sq - photo by Deborah Frings - Deborah's Gems

I told you earlier that we've been out to the Ice Festival in Plymouth.  We all went out yesterday afternoon to see the ice carvings - we left it late to warm up a bit!  As it was, it was still about -17°C (1°F) and felt quite a bit colder as there was a wind!!  Despite that, there was still quite a crowd, which made taking photos a challenge.  However, here's one of a carving in front of a bar taken yesterday afternoon:

Barcardi in Ice - photo by Deborah Frings - Deborah's Gems

The light yesterday was really bad - so grey and overcast, I added a bit of colour to the image.  I'm glad I took this yesterday, as we found the carving in pieces this morning.  Jonathan and I woke early and decided to go back this morning and try to get some more photos.  Many of the carvings are illuminated and you really only see that when it's dark.  This one was taken about 7.45am this morning:

Purple Eagle - photo by Deborah Frings - Deborah's Gems

It was still really quite dark at 7.45am and the purple light behind this eagle looked beautiful.  I've simply cropped the image and added a frame - otherwise, it's straight from the camera without any fancy editing!  I'm going to finish the rest of the photos later this afternoon and will add a link if you want to see them.  I have to say that it was much warmer today - a mere -7°C (19°F) and no wind - a big improvement!  That's all for now.
signature

Saturday, 10 January 2015

52CCT - Colours .....

...  Good morning all.  I think when I picked the colours for this week's 52 {Christmas} Card Throwdown challenge, I was expecting to have lots of snow around.  And that's exactly what it's like.  We're having a real arctic blast of winter here in America.  I shovelled 3" of snow off the drive yesterday and at the time of writing this post (Friday afternoon) we've had a bit more snow - but the skies are blue and the sun is shining.  What are the colours?  You have to use  
Shades of Blue  
and this is my card:

Cupcake Tree - photo by Deborah Frings - Deborah's Gems

Stamps: Waltzingmouse - Frame It
Ink: Kaleidacolor - Blue Breeze
Dies: Spellbinders - Petit Oval Sm (S4-140) #6, Scalloped Petit Ovals Sm (S4-141) #6
Accessories: White Lustre Card; Blue Mirri Card; Blue Glitter Paper; Cuttlebug EF - Winter Wonderland; Martha Stewart - Snowflake Punch; Wink of Stella - Clear


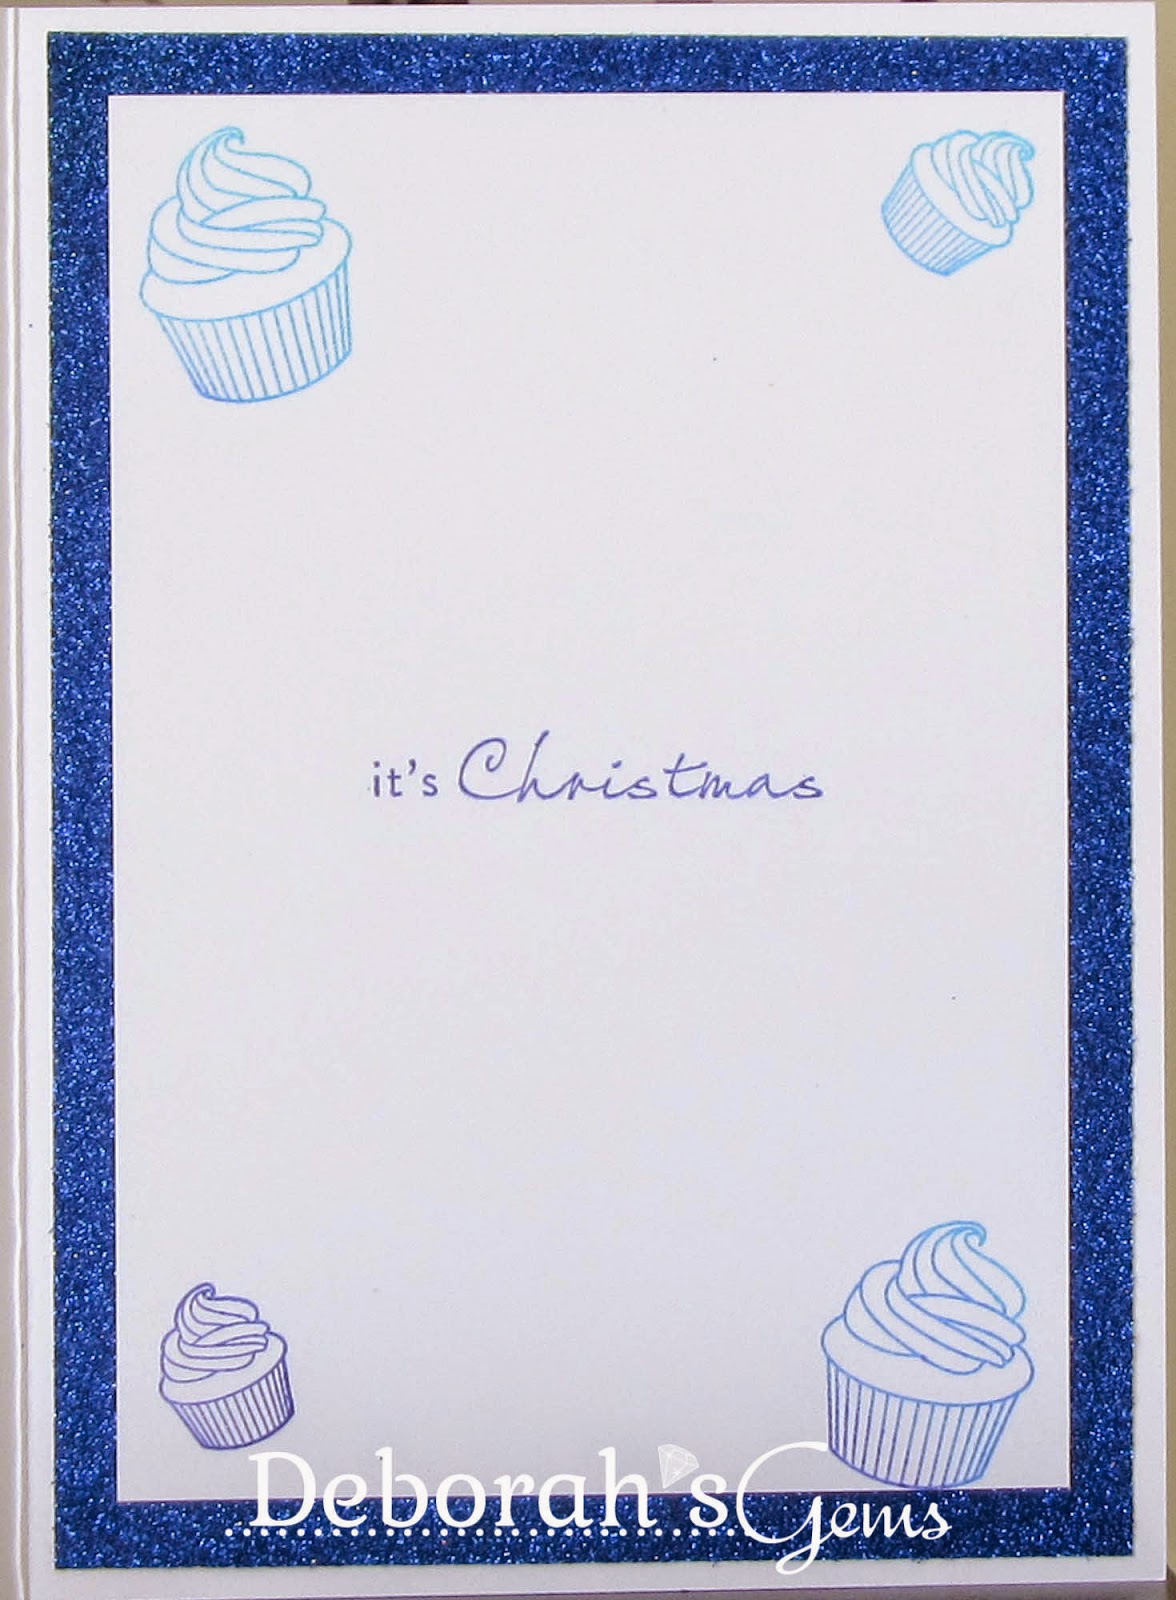
I got the inspiration for my Cupcake Christmas tree from the graphic for this week's Merry Monday - MM#140 challenge which is to use snowflakes on your card.  I stamped lots of little cupcakes in shades of blue, used my aqua pen to drag the ink in and give a hint of colour to the case and icing and then fussy cut them all out.  I then layered them up to create a Christmas tree.  I added clear Wink of Stella to all the icing and used an oval die to cut out the tree.  I layered this onto blue metallic card.  To add interest I embossed some white card with more snowflakes, layered it onto blue metallic card and then direct to the card base.  I finished the front with a dark blue glitter snowflake to go on top of the tree.  On the inside I cut a mat layer of blue glitter paper and on the white panel added a few more cupcakes and a simple greeting.  I took a close up of the cupcakes so that you can see the sparkle.

Cupcake Tree detail - photo by Deborah Frings - Deborah's GemsCupcake Tree inside - photo by Deborah Frings - Deborah's Gems

 
Cupcake Tree Sq - photo by Deborah Frings - Deborah's Gems

For more inspiration using all the BLUES check out the cards from the rest of the team - they have created some wonderful cards.  Have fun!

signature

Thursday, 8 January 2015

Uniko Studio sponsors Time Out Challenge ....

....  Good morning all!  I'm joining you this morning with a fun post - Uniko Studios is sponsoring the first TIME OUT Challenge of 2015 - photo inspiration and there are prizes too (see below).  The whole team is joining in with the challenge and this is my card:

Wish - photo by Deborah Frings - Deborah's Gems

Stamps: Uniko Studio - Time, Big & Bold Wish
Inks: Versamark; Stampin' Up! - Crushed Curry, Night of Navy, Baked Brown Sugar
Dies: Uniko Studio - Graphic Flowers
Accessories: White Lustre Card; SU Card - Baked Brown Sugar, Crushed Curry; Craft Concept EF - Woodgrain; Clear Embossing Powder; Felt; Sequins


Isn't the photo super?  I took the following inspiration from the photo - the wooden planks, the bold word and the graphic flowers on the second pillow from the left.  This month's challenge at CAS-ual Fridays - CFC#135 is to use felt and sequins, both used on this card, so I'm playing along with them too.  I cut a mat layer of brown card onto which I adhered my wood grain panel (white card embossed and rubbed over with brown ink).  I stamped the word "wish" onto yellow card using Versamark, embossed with clear powder and fussy cut it out.  I attached it to the card with dimensional tape.  I used the Graphic Flower dies to recreate the flowers - one in felt and two on paper.  I added sequins to the centre of each flower.  On the inside I cut a mat layer of brown card and on the white card I added the word "big" to finish the sentiment - Wish Big!  I also stamped a few more graphic flowers.

Wish Inside - photo by Deborah Frings - Deborah's GemsWish Sq - photo by Deborah Frings - Deborah's Gems

There are two £15 gift vouchers to win.  There are a couple of ways to win one of these gift vouchers:
  1. Join in the challenge at TIME OUT challenges.  You can use any stamps, but obviously we'd love to see your creations with Uniko Studio stamps!  The challenge is open now and runs until Wednesday 21st January, 5.00pm GMT (Noon EDT).  TIME OUT will do a random draw for this prize.
  2. Comment on our post at Uniko Studios - we love to read your comments.  We will do a random draw for this prize.
For more inspiration using this lovely photo - check out the cards from the rest of the Uniko Studio Design Team as well as Team from TIME OUT Challenges.  Really looking forward to seeing your creations - have fun!!

signature

Wednesday, 7 January 2015

TMR - New Beginnings ...

....  Good morning!  I hope you all had a super Christmas and New Year and are ready to get back to making cards for the men in our lives!  It's time for our first challenge of 2015 at The Male Room - for the next couple of weeks we'd like to see your projects with the theme of New Beginnings.  Here's my take:

Happy New Home - photo by Deborah Frings - Deborah's Gems

Stamps: Stampin' Up! - Holiday Home; Uniko Studios - All Occasion Sentiments #1
Inks: Versafine - Onyx Black
Dies: SU/Sizzix - Homemade Holiday Framelits
Accessories: White Lustre Card; SU Card - Real Red


Our theme of New Beginnings gives huge scope - new baby, new home, new school, new year, new adventures - it's your choice.  I decided to make a card for a new home.  I kept it really simple with a row of houses stamped in black and one stamped on red card and die cut.  To finish the front I simply added a sentiment.  On the inside I cut a mat of red card and a very bold sentiment on the white card.  Now, this card uses several items that have never been used before (although I've had them for a few months) - the Holiday Home stamps and the matching framelits and so I'm submitting this card to Darnell's Never Before Used Schtuff - NBUS#3.  Can you believe she's on her third challenge?

Happy New Home inside - photo by Deborah Frings - Deborah's GemsHappy New Home Sq - photo by Deborah Frings - Deborah's Gems

For more inspiration with our theme of New Beginnings - check out the blog to see what the rest of the team have made.  Just remember you need to have a masculine feel to your project - looking forward to seeing what you make!  Have fun.

signature

Tuesday, 6 January 2015

Brilliant! ....

....  Good afternoon!  I can't believe that it's taken me until 6th January to post a card to my blog (I know I had the one for 52CCT, but that was made before Christmas last year) - I had fun with this one.

Brilliant - photo by Deborah Frings - Deborah's Gems

Stamps: Stampin' Up! - Be the Star
Inks: Versafine - Onyx Black
Dies: Lil Inkers - Stitched Stars #2, #3 and #4
Accessories: White Lustre Card; SU Card - Real Red; Silver Holographic Mirri Card; Copic Markers

I made this card with a couple of challenges in mind.  The first is Less is More - LIM#205 where the team have a colour challenge to use Black, a Metallic and one other colour.  The second is Darnell's Never Before Used Schtuff - NBUS#3 challenge - the theme is Anything Goes, but we have to specific our NBUS. 


My NBUS on this card is my Lil Inker Stitched Stars dies - I love the effect of the faux stitching.  I layered some metallic silver holographic paper behind the stars - just love that shimmer.  I then layered it onto some red card and finished the front with a simple sentiment.  On the inside I cut a mat layer of red card, cut a white panel which I left blank for my own message and added a couple of the die cut stars.  I coloured them with Copic markers.

Brilliant inside - photo by Deborah Frings - Deborah's GemsBrilliant Sq - photo by Deborah Frings - Deborah's Gems

We are all still feeling somewhat jetlagged after our trip to the UK in December.  It's still a struggle to stay up much later than 9.00pm and we're all waking up silly early - 3.00am for me this morning!!!  I did try to go back to sleep, but it wasn't working.  Hopefully it won't be too long before our body clocks switch back to US time!!

We flew back to the States on New Year's Day - a thrilling way to spend the day!  The plane was absolutely packed and we were unable to sit together.  The upside of this was that I got a window seat - and I love watching take off and landing.  I decided to take the opportunity of taking a few photos - and I'm rather pleased how well they came out.  Here are a few from the trip.

New Year's Day - photo by Deborah Frings - Deborah's Gems

Watching a British Airways plane take off in front of us - you can just see the wing of our plane in the corner of the photo.  It really was dull and grey when we left Heathrow.

New Year's Day 2 - photo by Deborah Frings - Deborah's Gems

This one was taken as we flew over Canada - no idea where it is, but it does look rather spectacular with all the snow and the rivers.

New Year's Day 3 - photo by Deborah Frings - Deborah's Gems

This one was taken on our approach to Detroit Airport.  There are so many lakes in Michigan and while there's no snow in this picture, you can see the ice around the edges of the lakes.  I suspect if I took this photo today the lakes would be totally covered in ice!!

New Year's Day 4 - photo by Deborah Frings - Deborah's Gems

Another on the approach to the airport.  The sun was shining really brightly and I could see the GM building and Downtown Detroit in the distance, along with the casino in Windsor, Canada.  I wasn't sure how it would come out, and I'm really pleased with it.  It does show just how much open land there is in Detroit.

New Year's Day 5 - photo by Deborah Frings - Deborah's Gems

This last one was taken as we arrived at our gate.  It was a really long flight - 8 hours in total - and we were all so pleased to have arrived home.  It was a beautifully bright day, but very cold and no snow!  Sadly I can't say that about today - we had snow last night.  Not as much as in many states, but enough that I had to go out and shovel this morning.  It looks fab outside at the moment - the skies is blue, the sun is shining and the snow is sparkling!  That's all for now - see you tomorrow.

signature

Saturday, 3 January 2015

52CCT - Sketch ...

... Good morning!  I do hope that you all had a super Christmas and a wonderful New Year.  Here at 52 {Christmas} Card Throwdown we've got some new team members, lots of new challenges and a new look too.  I'm hosting the challenges this month and first up is a sketch for you to play with.  Feel free to turn the sketch and you don't have to use a star.  Here's my take:

Merry Christmas - photo by Deborah Frings - Deborah's Gems

Stamps: Stampin' Up! - Cheerful Christmas; Winnie & Walter - Happy Christmas, Winter Wonderland
Inks: Versafine - Onyx Black
Dies: Spellbinders - Labels 24 (S4-353) #3
Accessories: White Lustre Card; Kaisercraft DP - North Pole; SU Card - Real Red; SU Markers - Real Red, Pistachio Pudding, Marina Mist; Silver sticker


I've gone for a folksy feel on my first card for 2015.  The stamps and paper are from different companies, but they work really well together.  I cut two coordinating pieces of design paper to cover the base of the card and then adhered a silver glitter sticker over the top to hide the join.  I used marker pens to selectively colour the stamped image and matched the colours to the papers used.  I cut it out with a die (one that hasn't been used for ages).  I made the mat layer by drawing round the outside of the die.  I finished the front with a bold sentiment on a white banner.  On the inside I have another mat in green gingham and a simple greeting on the white panel.

Merry Christmas inside - photo by Deborah Frings - Deborah's Gems

For more inspiration using the sketch, check out the blog to see what my team mates have made.   Don't forget to drop by and visit our new team members and leave a comment.

There's a really good reason for joining in with our weekly challenges, if you make one card every week during the year, you'll have a stash of 48 cards ready at the beginning of December.  Of course, if like me you make more than one card each time, you make have even more cards ready.  This challenge helps to reduce stress at Christmas.  Looking forward to seeing your creations.

signature
Related Posts Plugin for WordPress, Blogger...