Showing posts with label US - Pure Florals Rose. Show all posts

Friday, 2 February 2018

Uniko Challenge Reminder .....

.... Morning! Wow, it's February already and it's also time for a reminder about our challenge over at Uniko - USC#45. We have a fun theme of SOMETHING OLD, SOMETHING NEW and there's the option of adding LOVE as the theme. I skipped that last time, but today's card has a love theme:

Love You - photo by Deborah Frings - Deborah's Gems

Stamps: Uniko - Marvellous Mehndi, Pure Floral Rose
Inks: Versafine - Onyx Black; Gina K - Black Onyx
Accessories: White Lustre Card; SU Card - Bermuda Bay; Copics; Clear Embossing Powder; Gems


I've used the gorgeous Mandela from Marvellous Mehndi for the main image on my card - it's such a lovely image to colour! I stamped it on white card, coloured it with Copics, stamped with Versafine, embossed with clear powder, and then cut it out with my new Scan'n'Cut machine (more of that later). I used the sketch and colours from this week's CAS Colours & Sketches challenge - CASC&S#257, and as I've attached the images to this card I'm also submitting it to Inkspirational - INK#153 where the keyword is Attachment. I cut a panel of aqua card, stamped on the greeting, and adhered it flat to the card. I attached the large image flat to the card and used dimensional tape to attach the little flower. I finished the front by adding some small black gems to the centre of each image. On the inside, I cut a mat layer of aqua card and on the white panel finished the greeting and added a couple of little images from the stamp set.

Love You inside - photo by Deborah Frings - Deborah's GemsLove You sq - photo by Deborah Frings - Deborah's Gems

For more inspiring projects from the Design Team, and from our guest designer, Anita, do visit the Uniko blog. There's still plenty of time to join in the fun - deadline for submission is midnight (GMT) Friday 23rd February, that's 7.00pm EDT. We have prizes too:

  • Main winner, chosen by the Design Team - £25 eGift Certificate
  • Random twist winner - £4 in stock clear stamp set of winner's choosing
  • Random Uniko stamps winner - £4 in stock clear stamp set of winner's choosing
  • Top 3 chose by the Design Team - 150 Loyalty Reward Points

My mum got me a Scan'n'Cut for Christmas. I opened up the box earlier this week and had a quick play. I cut out the following images:

Extras - photo by Deborah Frings - Deborah's Gems

All the images above are Uniko designs; some are digital and some are stamped. The rose, the large Mandela, the paisley images, and the time doily are all stamped and embossed. The smaller Mandela, the heart, hugs, and the snowflake are digital images that Bev sent me. As you can see the Scan'n'Cut works brilliantly. I did have a small mishap with the snowflake as the grey lines on the digital were so pale that it looked one of the flowers was separate - it should work perfectly when I stamp the image. I'm thrilled with the machine and will be doing lots of stamping this weekend!!

That's all for now - I'm looking forward to checking out your creations - have fun!!

signature

Saturday, 16 December 2017

Uniko - December Release, DT Blog Hop & Giveaway ...

... Hello! I do hope you've enjoyed my introductions. Today Uniko releases five new stamps sets and some fun stencils too! This is going to be a long post, so grab a coffee, put your feet up and enjoy!

All the snow that has been falling around here gave me the inspiration for this card:

Hugs & - photo by Deborah Frings - Deborah's Gems

Stamps: Uniko - Big & Bold Hugs, Scattered Polka Dots Lg Bg, Rustic Christmas, Simply Said Christmas
Inks: Versamark; Gina K - Black Onyx; Delicata - Silvery Shimmer
Accessories: White Lustre Card; SU Card - Smoky Slate; Vellum; Kaleidoscope & Silver Embossing Powders


I stamped the large polka dot background directly onto the card base in Versamark and heat embossed with Kaleidoscope powder for a lovely iridescent sparkle - snow!!! I stamped the tree on white card, embossed it in silver and then carefully cut it out and adhered it to the card. The large 'hugs' sentiment was stamped on vellum, heat embossed in silver and carefully cut out. I used dimensional pads to attach it to the card. I finished the front with the little ampersand in black - the sentiment continues inside the card. I layered the white panel on pale grey card and finished the sentiment with 'Christmas Wishes' and added some sparkly silver snowflakes. I'm submitting this card to CASology - CAS#279, and also to CAS-ual Fridays Challenge - CFC#189 where they want to see a White Christmas.

Hugs & inside - photo by Deborah Frings - Deborah's GemsHugs & sq - photo by Deborah Frings - Deborah's Gems

Next up a soft, delicate spring card:

Celebrate Spring - photo by Deborah Frings - Deborah's Gems

Stamps: Uniko - Spring Botanicals Snowdrop
Inks: Gina K - Black Onyx; Distress - Shabby Shutters, Tumbled Glass
Accessories: White Lustre Card; Uniko Stencil - Doodle Flower; Nuvo Aqua Shimmer - Clear


This is a very simple one-layer card. I stamped the snowdrop onto the front of the card and then masked it off. I taped the stencil to the front of the card and then lightly sponged on pale green and pale blue inks. I removed the mask, stamped the sentiment and added a touch of sparkle to the snowdrop flowers. On the inside I stamped one of the greetings from this set. I'm submitting this card to Addicted to Stamps and More! - ATSM#272 where they want to see us make our mark.

Celebrate Spring inside - photo by Deborah Frings - Deborah's GemsCelebrate Spring sq - photo by Deborah Frings - Deborah's Gems

Next I have two cards made using a single stamped panel - I got the idea from Jennifer McGuire:

Happy Mother's Day - photo by Deborah Frings - Deborah's GemsLove & Kisses - photo by Deborah Frings - Deborah's Gems

Stamps: Uniko - Pure Florals Rose, Happy Succulents,
Inks: Gina K - Black Onyx, Kraft; Distress Oxide - Wild Honey; Versafine - Onyx Black
Dies: Die-namics - A2 Stitched Rectangles Stax Set2 #9
Accessories: White Lustre Card; SU Card - Crumb Cake; Shimmer Spritz - Frost; Vellum; Clear Embossing Powder

I cut a panel of kraft card 5½" x 4¼" and stamped the small solid rose randomly over the card. I then lightly spritzed the panel with a frost shimmer spray and dried it. I used a stitch edge die to cut out a corner of the panel. I adhered the bottom part of the panel to a white card base. I used the stitch edge die to cut a white rectangle and made the top part of the card on the left. Before adhering it to the card, I stamped the words 'mother's day' in the bottom corner. I stamped the outline rose on white card, cut it out and attached it to the panel. I stamped the word 'happy' on vellum, cut it out and adhered it flat to the card. I used craft foam behind the white die cut panel to give some dimension. On the inside I cut a mat layer of kraft card, and on the white panel I stamped a greeting and little rose bud.

I made the card on the right with the top portion of the cut out panel which I attached flat to a white card base. I finished the front by adding a simple greeting. On the inside, I cut a mat layer of kraft card and added a greeting to the white panel.

Happy Mother's Day inside - photo by Deborah Frings - Deborah's GemsLove & Kisses inside - photo by Deborah Frings - Deborah's Gems

My last card is a thank you card - always needed in my stash:

Thank you so much - photo by Deborah Frings - Deborah's Gems

Stamps: Uniko - So Much (Free with qualifying orders while stocks last)
Inks: Gina K - Black Onyx, Versafine - Onyx Black
Dies: Die-namics - Inside & Outside Stitched Square Stax #6
Accessories: White Lustre Card; SU DP - Crumb Cake; Copics; Clear Embossing Powder


I used the colours from Colour Throwdown - CTD#473 and the sketch from Freshly Made Sketches - FMS#317. I die cut the square and stamped the floral image, coloured it with Copics, restamped with Versafine and then heat embossed with clear powder. I cut a thin strip of kraft design paper and adhered it to the card front. Next I added the stamped panel and finished with a bold thank you. I've not done the inside of this card yet.

As usual, we have our Design Team Blog Hop and a chance for you to win the ENTIRE release - simply comment along as you visit our blogs. Deadline for comments is midnight GMT Saturday 23rd December.

Deborah - that's me
Izzy

And now, before I go, here's a chance for you to see all the new stamps and stencils:


Spring Botanicals Snowdrop


Big & Bold Hugs


Large Background Scattered Polka Dots


Large Background Scattered Polka Hearts


Pure Florals Rose 

Stencil - Broken Lines


Stencil - Doodle Flower


Stencil - Lattice

Thanks so much for sticking with me - it's a long post. That's all for now.

signature

Friday, 15 December 2017

Uniko - Pure Florals Rose .....

....  Hello! I can't quite believe how quickly this week has gone by. Today is the last of the Uniko Introductions. We are showcasing Pure Florals Rose - a wonderful addition to the series. I've made a couple of cards for today, here's the first:

Happy Birthday - photo by Deborah Frings - Deborah's Gems

Stamps: Uniko - Pure Florals Rose, Simply Said, Fontiments
Inks: Gina K - Kraft, Black Onyx, Red Velvet, Jelly Bean Green; Versafine - Onyx Black
Dies: Die-namics - A2 Stitched Rectangles Set 2 #9
Accessories: White Lustre Card; SU Card - Crumb Cake; Clear Embossing Powder; Zig Clean Colour Brushes; Nuvo Aqua Shimmer - Clear; Uniko Stencil - Lattice; Tim Holtz Watercolour Card

So glad my parcel arrived on Wednesday, I was able to use the Lattice stencil to make this lovely background. I taped the stencil to the white panel and lightly sponged on some kraft ink, keeping it darker in the corner and fading out towards the top of the card. I adhered the panel to a kraft card base. I stamped the small rose and leaves on watercolour card with Versafine ink and heat embossed with clear powder, this gives a line which makes it so easy to colour. I used my zig clean colour brushes to lay down some colour which I blended out with a clear glitter brush - sadly you can't see the sparkle in the picture above!! I stamped the little birthday sentiment on the white panel and then used dimensional pads to adhered the rose and leaves. On the inside, I cut a white panel on to which I stamped a simple sentiment and the outline images.

Happy Birthday inside - photo by Deborah Frings - Deborah's GemsHappy Birthday sq - photo by Deborah Frings - Deborah's Gems

I used the colours from this week's challenge at Global Design Project - GDP#117.

My next card is relatively CAS - well I think it is!!

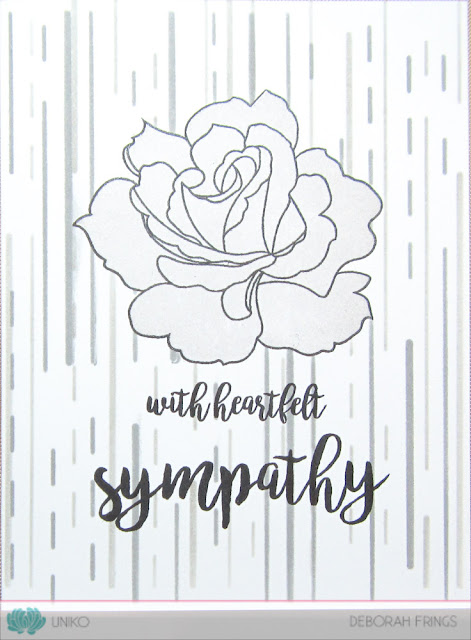
With heartfelt sympathy - photo by Deborah Frings - Deborah's Gems

Stamps: Uniko - Pure Florals Rose, Pure Florals Lily
Inks: Gina K - Black Onyx; Stampin' Up! - Smoky Slate; Distress - Hickory Smoke; Delicata - Silvery Shimmer
Accessories: White Lustre Card; SU Card - Smoky Slate; Uniko Stencil - Broken Lines


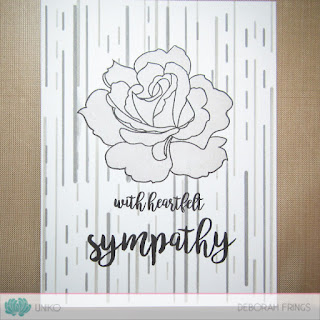
This is a one-layer card. I used my MISTI to stamp the outline rose towards the top centre of the card and masked the rose. I taped the stencil to the card and sponged on dark grey ink, then I shifted the card slightly to the left and sponged on light grey ink. I removed the mask and put the card back into the MISTI. Then I stamped the solid rose in silver ink. I finished the front with a sentiment. I picked sympathy because Kat said that the grey rose made a lovely sympathy card! I agree. On the inside, I cut a mat layer of pale grey card and added a sentiment and another rose to the white panel.

With heartfelt sympathyinside  - photo by Deborah Frings - Deborah's GemsWith heartfelt sympathy sq - photo by Deborah Frings - Deborah's Gems

I'm submitting this to CASology - CAS#279 where they want to see GREY and this is much more CAS than the other one!

Don't forget to visit the Uniko blog to see more inspiration projects from the rest of the Design Team. And come back tomorrow - it's RELEASE DAY!!!

Yesterday was a snow day for Kat - she had a much-needed lie-in and spent the day working on a physics project. I was in my craft room making cards, but I did take the opportunity to get out my camera and take a photo of all the snow and the bright blue skies we had. I've hung large baubles from one of the trees in my front garden and it looks so pretty:


If you look closely at the ornament you can see my reflection!!!  That's all for now - see you soon.

signature
Related Posts Plugin for WordPress, Blogger...