Wednesday, 29 November 2017

Mixed Media .....

.... Hi! Hope you're all having a good week, it's been lovely here in Northville, in fact, it was really warm yesterday and didn't feel much like autumn!! I don't have a card for you today, I've got a page from my small Dylusions journal. After Dyan came to our local craft shop, Scrappy Chic, two years ago, those of us who attended her classes set up an Art Journal club. We're called the Scrappy Chic Kitchen Roll Sprayers Art Journal Club and we still meet on the last Sunday of each month. Last Sunday the challenge was to create a Christmas something - tag, page, card, etc. I thought it was time to create a page instead of just making backgrounds!!!

Christmas - photo by Deborah Frings - Deborah's Gems

Stamps: Dylusions - Christmas Backgrounds, Bordering on the Edge, Christmas Words
Inks/Paints: Dylusions Paints - Polished Jade, Cut Grass; Distress Ink - Pine Needles; Archival Ink - Paradise Teal
Accessories: Dylusions Small Journal; Dylusions Holiday Colouring Sheets; Zig Clean Colour Brushes; Sakura Stardust Pens; Stencils; Wink of Stella - Clear; Ranger - Collage Glue Stick; Stabilo - Black Watercolour pencil


I used a background that I made ages ago using the baby wipe technique and I'm fairly sure that the colours I used were Polished Jade, Cut Grass and Lemon Zest (although you can't see much of the lemon). I added a simple border and some holly using a stencil and stamp. These fun Santa characters come from the Holiday Colouring Sheets booklet. I used Zig brushes to colour them and then carefully cut them out along with the ornament and fir branch border. I used the collage glue stick to adhere the images to the page. I drew around all the images with a black watercolour pencil and smudged it out with a water brush. I added lots of sparkle to the beards with a clear Wink of Stella brush and finished the page with a simple Christmas greeting. It was such fun making this page. I'm going to submit it to the following challenges:

Christmas detail - photo by Deborah Frings - Deborah's GemsChristmas sq - photo by Deborah Frings - Deborah's Gems

You can see all the sparkle on the beards in the detail photo above. I really must create more finished pages - it really is lots of fun. That's all for now. See you again soon.


signature

Sunday, 26 November 2017

New Calendars .....

..... Hi! Good morning. We've really been enjoying our holiday weekend - all very relaxed. I had a fun time in my craft room yesterday afternoon - I made some calendars for next year. They are really easy to make. I did ten in all:

Calendars - photo by Deborah Frings - Deborah's Gems

Stamps: Visible Image - Somewhere in Time, Ahead of our Time, Rays of Light
Inks: Stampin' Up! - Smoky Slate, Lemon Lime Twist, Berry Burst, Emerald Envy; Gina K - Passionate Pink, Cherry Red, Sweet Mango, Jelly Bean Green, Blue Lagoon, Blue Raspberry, Wild Lilac
Accessories: White Lustre Card; Vippies Designs - Large Self Adhesive Calendar Pads


To make the calendar you cut a panel of white card 11½" x 4¼" - basically cut a sheet of letter size paper in half vertically. Score across the centre at 5½" and fold. Next cut a panel of card 5" x 4¼", this should be scored at 1", 2½", and 4". Fold at the centre and crease into place, and crease the other two folds in the opposite direction - you should end up with a piece of card in the shape of a W.

On the large folded card stamp your design. I decided to use these wonderful time-related images - so appropriate for a calendar. I used my MISTI to stamp the images - it was so quick and I was able to restamp any images that needed extra pressure! Once I'd finished all the stamping, I added tape to the outside flaps of the "W" card and adhered them to the inside of each printed card. I finished each calendar by adding the calendar pad. Here's a close up of two of the calendars:


I have kept two of the calendars - one for my craft room and one for my office desk. The rest are going to be sent to family and friends. I'm entering these calendars into the November challenge at Love to Craft Challenge Blog - LTCCB#16, where anything goes.

I've got a really fun day planned for the last day of our holiday. This afternoon I'm off to my local craft shop - Scrappy Chic - for some art journaling fun, and then in the evening Jonathan and I are off to Royal Oak to see Squeeze! So excited. That's all for now. See you soon.

signature

Friday, 24 November 2017

Peace and Joy ...

.... Morning! It's Black Friday here in the States, and I see is making its way to the UK too. I've had a look at some of the many crafty sales and so far I've been good!! But I may sneak back in a while and place an order, or two!! I started today off with a long walk around our sub-division - it's a gorgeous morning with blue skies, bright sunshine and no wind, which means it's merely cold and not freezing!! In my earlier post I said that I got to spend quite some time in my craft room yesterday afternoon and I made another Christmas card for my stash:

Peace and Joy - photo by Deborah Frings - Deborah's Gems

Stamps: Altenew - Bells & Bows, Beautiful Inside; Lawn Fawn - Snowy Backdrops
Inks: Gina K - Black Onyx; Delicata - Silvery Shimmer; Memento - London Fog, Grey Flannel
Dies: Die-namics - Squares Set 1 #2
Accessories: White Lustre Card; SU Card - Basic Black; Vellum; Gems


 I combined a few challenges on this card:
I've had this Altenew Bells & Bow set for a while and this is the first time I've used it. To create this lovely bow it takes four stamps and it really helps to have a MISTI (or something similar). However, it is very easy to line up the stamps. I used a shimmery ink for the base layer and I think the bows look almost metallic! After stamping, I carefully cut them all out and layered them on small black squares. I stamped a simple snowy panel behind the squares and finished the front with a greeting layered on vellum and some square gems. On the inside, I cut a mat layer of black card and on the white panel added more snow and a simple Christmas greeting.

Peace and Joy inside - photo by Deborah Frings - Deborah's GemsPeace and Joy sq - photo by Deborah Frings - Deborah's Gems

Not only was yesterday Thanksgiving, it was also the 54th anniversary of one our favourite family programmes - Dr Who. We had a viewing fest and for some reason, we picked the sad ones - the one where Rose 'dies', the one where Donna (my favourite) 'dies', and the one where Amy and Rory 'die'. There were many tears and lots of enjoyment! If you're a Dr Who fan, you'll enjoy the clip below which shows how the opening sequence of title and music has changed since 1963:


That's all for now - see you again soon. Have a great weekend.

signature

Uniko Challenge - Christmas ....

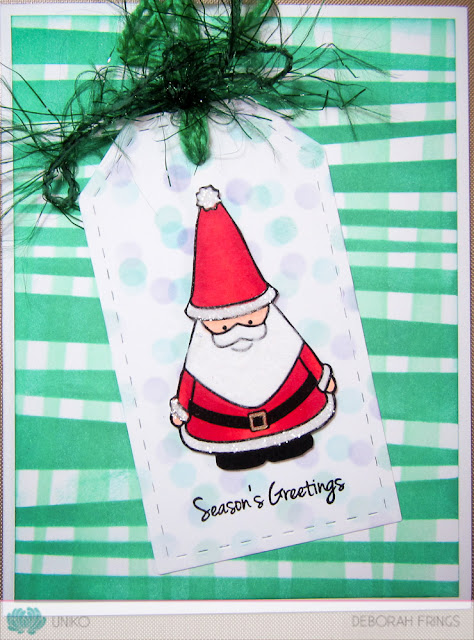
... Hello! Yesterday was Thanksgiving here in the States - Kat has a couple of days off school and Jonathan is off work - and we've had a very relaxing time. We went out to lunch at a local golf club, where the food is amazing, it was just super. And I got to spend some time playing in my craft room. It's time for our new challenge at Uniko and the theme is Christmas. I had fun making my card:

Season's Greetings - photo by Deborah Frings - Deborah's Gems

Stamps: Uniko - Jolly Christmas, Festive Sentiments, Most Wonderful, Reach for the Stars
Inks: Versafine - Onyx Black; Distress - Cracked Pistachio, Lucky Clover, Evergreen Bough, Tumbled Glass, Wilted Violet
Dies: Waltzingmouse Stamps - Stitched Tags #3
Accessories: White Lustre Card; Stampin' Up! Card - Emerald Envy; Uniko Stencils - Wonky Stripes, Scattered Polka Dots; Clear Embossing Powder; Copics; White Flock; Martha Stewart Coarse Crystal Glitter; Green Fibres


Plaids are very on-trend at the moment, so I decided to use the Wonky Stripes stencil to create my own fun plaid. I taped the stencil to the card and sponged on pale green ink, then I turned the stencil and repeated the process with a bold, bright green. I used my ordinary distress inks for this card. I stamped Santa on some scrap card, coloured him with Copics and put the image back in the MISTI, restamped in Versafine and embossed with clear powder and then carefully cut him out. I added some gold ink to the belt buckle, used white flock for his beard and coarse crystal glitter for the trimming on his clothes. I used a die to cut out the tag and sponged on some dots using a few shades of ink, stamped the greeting, attached Santa with some dimensional pads and finished the tag with some green fibres from my stash. On the inside, I cut a mat layer of green card and added a greeting to the white panel, along with some stars!

Season's Greetings inside - photo by Deborah Frings - Deborah's GemsSeason's Greetings sq - photo by Deborah Frings - Deborah's Gems

I'm submitting this card to Merry Monday - MM#266 where they want to see Santa, and also to Happy Little Stampers Mixed Media - HLSMM#11 where they want to see a tag.

Don't forget to visit the Uniko blog to check out more inspiring projects from the rest of the team. We are joined this month by Sue of Sue's Card Craft - her card is just fabulous! If you do decide to play along with our Christmas challenge there are prizes too:

  • Main winner - picked by DT - £25 e-gift certificate
  • Random Uniko stamps winner - £4 - in stock clear stamp set of winner choice
  • Top 3 - chosen by DT - 150 loyalty reward points

You've got plenty of time to join in with us. Deadline for submission is midnight (GMT) Friday 29th December - that's 7.00pm EDT in the States.

It's Black Friday today and I plan to check out some of the many Crafty sales going on today! See you again soon.

signature

Tuesday, 21 November 2017

25 Tags of Christmas ...

... Hi! It's day 21 of Tracey McNeeley's 25 Days of Christmas Tags and today Uniko is sponsoring the challenge. I've made some very simple, but fun Christmas tags:

Trio of Christmas Tags - photo by Deborah Frings - Deborah's Gems

Stamps: Uniko - Background Blocks Falling Snowflakes, Festive Sentiments, Most Wonderful, Peace on Earth
Inks: Versamark; Gina K - Black Onyx; Distress - Salty Ocean, Mermaid Lagoon, Chipped Sapphire, Cracked Pistachio, Evergreen Bough, Lucky Clover, Shaded Lilac, Wilted Violet Dusty Concord
Dies: Lil Inkers - Dotted Tags
Accessories: Strathmore Smooth Bristol Card; Ribbons; Clear Embossing Powder; Grey Mirri card

For this set of tags, I used my Lil Inker dotted dies to cut the card. I stamped the snowflakes on each tag in Versamark and heat embossed with clear powder. Then I coloured the tags with Distress inks to reveal the falling snow - I love this technique. There's a couple of tiny dies in the tag set that cut a hole in the tags and also cut out hole reinforcers - I used mirri card to create them. I finished the front of each tag with a simple greeting in black and a simple ribbon treatment. Here's a close up look at each tag:


Don't forget to visit Tracey's blog to see more inspiration from the rest of the Uniko design Team. This challenge runs throughout November and there are opportunities to win prizes. Full details of the 25 Days of Christmas Tags challenge can be found on Tracey's blog here.

That's all from me today - see you again soon.

signature

Friday, 17 November 2017

Getting organised ...

.... Hi! Good afternoon. No card to share with you today, but a few photos of some recent crafting organisation. I was lucky enough to visit Village Paper & Ink, Gina K's shop in Wisconsin earlier this year. My wonderful husband treated me to all the full-size ink pads in Gina's collection (I didn't get the pigment inks). I was thrilled to bits to get them all.

I got them home and, for a while, they stayed in the carrier bag. Finally, I took off all the cellophane and started to use them, but I still didn't really have anywhere to put them. Last Sunday I ordered a Slim Inkpad Holder (72 pads) from Stamp'n'Storage and it arrived yesterday. I've spent the last few days reorganising and labelling the ink pads. It's not my idea, but one I've borrowed from Jennifer McGuire. Here's a photo of my new unit full of Gina K ink pads, along with some of my other ink pads:


The unit fits nicely on the cabinet and makes it really easy to get at all the pads. The photo below is a close up of the labels.


I also have a couple of ink pads storage units for my Distress ink pads and also for the Distress Oxide pads:


This unit contains all my distress ink pads. I didn't take a photo of the oxide unit, as it's still got quite a few empty slots for when Tim releases more oxides!! That's all for now. I've still got a lot more tidying up to do. See you soon.
signature

Wednesday, 15 November 2017

Christmas Cheer ....

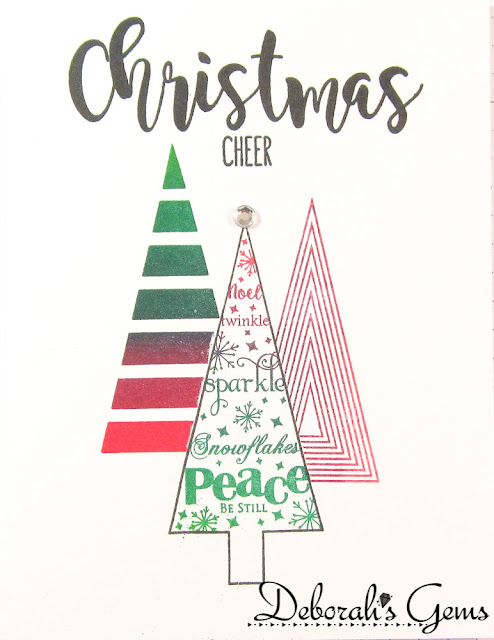
... Hi! It's a really dull, damp, grey day here in Northville. Perfect for staying indoors and playing! I've made a very clean, simple and graphic Christmas card to share with you today:

Christmas Cheer - photo by Deborah Frings - Deborah's Gems

Stamps: Uniko - Christmas Pop, Festive Sentiments
Inks: Gina K - Black Onyx; Kaleidacolor - Fruitcake
Accessories: White Lustre Card; Gem


This was about as easy as it gets. I used my MIST to position the outline Christmas tree stamp, left the card in the MISTI and then positioned and the sentiment tree. I cut a mask for the tree and stamped a couple more behind the main image. I finished the card with a simple, bold sentiment at the top of the card. I added a tiny gem to the middle tree. I've not done the inside yet but will add something soon.

Christmas Cheer sq - photo by Deborah Frings - Deborah's Gems

I'm submitting this card to Cardz 4 Guyz - C4G#182 where the team want to see Christmas tree(s), and I'm also playing along with CASology - CAS#275 where the cue word is 'sharp', and these trees are very sharp!

That's all for now. See you soon.

signature

Sunday, 12 November 2017

More Plaid ...

.... Morning! I had fun making yesterday's plaid card and plaids are very on trend at the moment, so I made a couple more cards. First up is a very simple card:

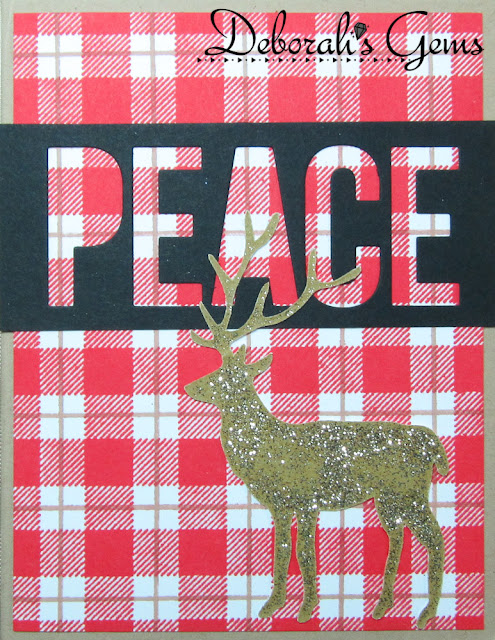
Peace - photo by Deborah Frings - Deborah's Gems

Stamps: Concord & 9th - Plaid Background; Uniko - Stunning Snowflakes, Festive Sentiments, Most Wonderful
Inks: Gina K - Kraft, Red Velvet
Dies: Die-namics - Peace
Accessories: White Lustre Card; Gina K Card - Kraft, Black Onyx; Saved Deer


This card came together so quickly. I adhered the plaid background to the card base. I die cut the word 'peace' and used it on one of my Uniko cards yesterday, I found the leftover negative space on my desk and decided to use it on this card. I finished the front with a sparkly stag - another saved element - I got this on one of last year's Christmas cards. On the inside, I stamped a Christmas greeting and some snowflakes on the white panel. I'm submitting this card to Merry Monday - MM#264, for their red and kraft challenge. I'm also playing along with City Crafter Challenge Blog - CCCB#287 where they want us to use the word 'love' or 'peace'.

Peace inside - photo by Deborah Frings - Deborah's GemsPeace sq - photo by Deborah Frings - Deborah's Gems

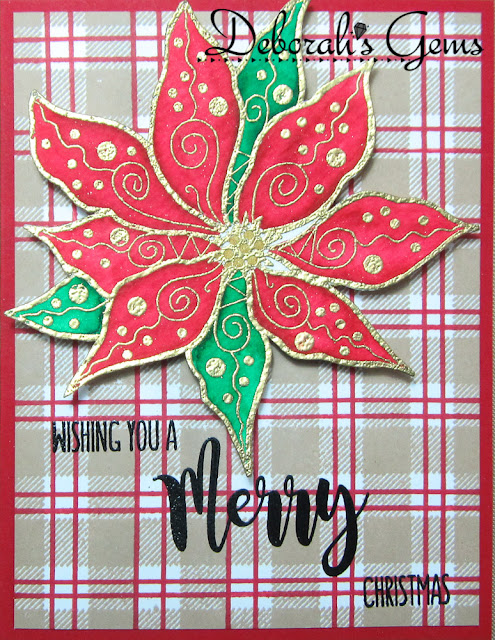
This next card features another plaid, along with a very pretty poinsettia:

Merry Christmas - photo by Deborah Frings - Deborah's Gems

Stamps: Magenta - Poinsettia; Uniko - Festive Sentiments, Most Wonderful; Concord & 9th - Plaid Background
Inks: Gina K - Kraft, Cherry Red; Versafine - Onyx Black; Versmark
Accessories: White Lustre Card; Gina K Card - Red Velvet; Clear and Gold Embossing Powders; Zig Clean Colour Brushes; Wink of Stella - Clear, Gold; Tim Holtz Water Colour Card


I changed the plaid on this card by stamping the thin lines twice. I adhered it directly to the red card base. I stamped this fun poinsettia in Versamark on watercolour card, embossed it with gold powder and coloured it with Zig brushes. I added a touch of sparkle to the red petals. I carefully cut it out and attached it to the card with dimensional pads. I stamped the sentiment directly on the panel and heat embossed it with clear powder. On the inside, I stamped a Christmas greeting and the poinsettia.

Merry Christmas inside - photo by Deborah Frings - Deborah's GemsMerry Christmas sq - photo by Deborah Frings - Deborah's Gems

I'm submitting this card to The Card Concept - CC#81, I think this is in the clean and graphic style. I'm also submitting it to Addicted to Stamps and More! - ATSM#267 where it's Make Your Mark week.

Finally, as I mentioned earlier, plaids are very on trend at the moment and the theme at Inkspirational - INK#147 is TREND. Another trend in this set of cards is that they are all for Christmas:

Plaid Christmas - photo by Deborah Frings - Deborah's Gems


I've had so much fun making these plaid cards, that I think I'm going to make a whole lot more. They come together really quickly and if I change the colours and decorations I should be able to get a whole lot more made today! That's all for now. See you soon.

signature
Related Posts Plugin for WordPress, Blogger...