Showing posts with label Waltzingmouse Fanatics Challenge. Show all posts

Saturday, 13 December 2014

WMSFC Finale ...

...  It is with much sadness that I have to tell you that this will be the last challenge at Waltzingmouse Fanatics.  Tara and I have really enjoyed hosting this challenge.  Kathy joined the team a few months ago and I'd like to thank her for the wonderful cards she's made for our challenges. We have decided that as this is our last challenge we're going to go with something that everyone likes:

ANYTHING WALTZINGMOUSE GOES!

The winner of our final challenge will get a super prize from Claire Brennan - details below.  Here's my card:

Season's Greetings - photo by Deborah Frings - Deborah's Gems

Stamps: Waltzingmouse - Nutcracker Sweet, Flurries
Inks: Distress - Weathered Wood; Memento - Tuxedo Black; Versafine - Onyx Black
Dies: Spellbinders - Mega Rectangles Sm (S4-144) #4, Mega Rectangles Lg (S4-142) #3
Accessories: White Lustre Card; Gold Mirri Card; Stampin' Up! Card - Smoky Slate; Copic Markers; Martha Stewart - Ornament Border Punch; Glamour Dust

WMSFC#33 - photo by Deborah Frings - Deborah's Gems

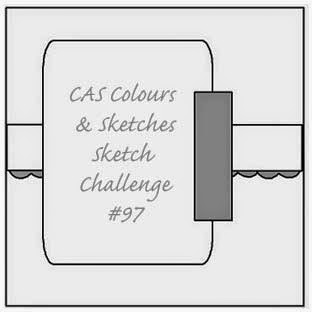
The idea for this card comes from my photo on the challenge graphic; I took it at Bronners - a huge Christmas shop in Frankenmuth, Michigan.  They had a wonderful display of Nutcrackers soldiers and Claire has the perfect set of stamps.  This week's challenge at CAS - Colours & Sketches - CAS#104 is to make a Christmas card using one of their previous sketches - I used one from October this year. 

I stamped the image on white card, coloured it with Copic Markers and the cut it out with a die.  While still in the die I masked off the image and sponged on a dark background.  I added some glitter and white snowflakes.  I layered the completed image on to gold mirri card.  I used a snowflake stamp to cover the background - first and second generation impressions.  I stamped the greeting on white card, layered it on gold mirri and attached it behind the image.  I punched an ornament border along gold card and then adhered a strip of white card on which I stamped a simple pattern.  The main image has been attached with dimensional tape.  For the inside I cut a mat layer of grey card and lightly inked the edges before adhering it to the card.  On the white panel I stamped more snowflakes, a subtle impression of the soldier and a greeting.

Seaon's Greetings inside - photo by Deborah Frings - Deborah's GemsSeaon's Greetings sq - photo by Deborah Frings - Deborah's Gems

Claire Brennan, designer and owner of Waltzingmouse Stamps, is offering the winner a £20 prize voucher.  The voucher is valid until March 2015 and is for use at Claire's online store.  In order to be eligible for the prize your project MUST include at least one Waltzingmouse image, sentiment or digi.

We have extended the deadline for submission of your project - we might all be a bit busy at Christmas!  You have until Thursday 1st January 2015 to upload your projects - winners will be announced on Saturday 3rd January.

Don't forget to check out the fabulous inspiration projects from Tara and Kathy.  Finally, thanks go to all our friends and supporters.  Wishing you a Merry Christmas and a Happy New Year.  Bye for now!

signature

Saturday, 29 November 2014

WMSFC - Sketch ....

...  Hi!  It's time for our new challenge at Waltzingmouse Fanatics Challenge - WMSFC#32 and we have a sketch for you to use.  I ended up making a couple of cards, here they are:

Noel - photo by Deborah Frings - Deborah's Gems

Stamps: Waltzingmouse - Tis the Season, Yonder Star Background, Festive Foliage, Oven Fresh Gingerbread, Very Vintage Christmas, Big Bloom Poinsettia, Elf Made, Secret Santa Set, Frosty in the Meadow, Alpine Village
Inks: Versafine - Onyx Black; Distress - Shaded Lilac, Evergreen Bough, Tumbled Glass, Picked Raspberry, Spiced Marmalade, Mowed Lawn, Festive Berries, Mustard Seed, Salty Ocean, Seedless Preserves, Sooty Black; Versmark
Accessories: White Lustre Card; Stampin' Up! DP - Pumpkin Pie; Clear Embossing Powder; Wink of Stella - Silver; SU Punch - Hexagon


I really liked the sketch when I drew it - I have to say I wasn't too keen on it once I started working on my cards!  I made the background by stamping Yonder Star BG in Versamark, heat embossing with clear powder and then inking with Distress pads.  I then removed the embossing powder by ironing with a hot, dry iron and lots of scrap paper.  I punched lots of white hexagons and stamped simple, graphic designs in black and then inked them each in bright colours.  I used a silver Wink of Stella brush to add some sparkle to all the images and lightly edged them all with black ink.  I finished the front with a simple, bold sentiment.  On the inside I cut a mat layer in orange and stamped a Christmas greeting.

Noel inside - photo by Deborah Frings - Deborah's GemsNoel detail - photo by Deborah Frings - Deborah's Gems

My second card is a little more clean and simple - but only a little!!

Warm Winter Wishes - photo by Deborah Frings - Deborah's Gems

Stamps: Waltzingmouse - Yonder Star Background, Elf Made, Flurries, Little Deer
Inks: Memento - Tuxedo Black; Kaleidacolour - Fruit Cake; Stampin' Up! - Smoky Slate
Accessories: White Lustre Card; SU Card - Smoky Slate; SU Punch - Hexagon
I didn't use nearly so many stamps on this card!  I punched the hexagons from plain white card, put temporary tape on the back to hold them in place and then stamped the Yonder Star background in these gorgeous colours.  On the card base I stamped some tree trunks and added a bird and bauble using the same colours.  I finished with a sentiment.  On the inside I cut a mat layer of grey card, stamped a flurry of snowflakes and finished with a bold sentiment.

Warm Winter Wishes - photo by Deborah Frings - Deborah's Gems

For more inspiration using our sketch - check out the blog to see what Tara and Kathy have made.  That's all for now - see you soon.

signature

Saturday, 15 November 2014

WMSFC - Theme ....

.... Hello again.  I'm back with my post for our new Waltzingmouse Fanatics challenge - WMSFC#31.  This time we've got a theme for you to play with - the theme is flowers.  Here's my take:

Mothers - photo by Deborah Frings - Deborah's Gems

Stamps: Waltzingmouse - Roses in Bloom, Pic-Nic Patterns, Crackle Background
Inks: Stampin' Up! - Crisp Cantaloupe, Always Artichoke; Versamark; Memento - Tuxedo Black
Dies: Lil Inkers - Stitched Rectangles #3
Accessories: White Lustre Card; SU Card - Always Artichoke, Crisp Cantaloupe; Copic Markers; Winks of Stella - Clear


I used the colours in our challenge graphic - I took the photo at a tulip farm in Holland, Michigan in May 2013 - for my card.  I based the layout on a recent sketch from My Favourite Things Wednesday Sketch Club - MFTWSC#201.  I used the large crackle background over the entire card base in pale peach.  I cut green and peach mats using a die, stamping a pattern on the green and adding a white panel with verse to the peach panel.  The rose, rose bud and leaf were stamped on white card, coloured with Copic markers and assembled to make one focal image.  I added sparkle to the rose and rose bud with a clear Wink of Stella brush.  I adhered the finished roses with dimensional gel.  On the inside I cut a mat layer of green card and on the white panel added another rosebud, leaving a large blank area for my message.  Also below is a close up of the rose showing the sparkle.

Mothers inside - photo by Deborah Frings - Deborah's GemsMothers detail - photo by Deborah Frings - Deborah's Gems

For more inspiration with our flower theme - check out the blog for projects from Kathy and Tara.  I'd like to remind everyone that you must use at least one Waltzingmouse image, sentiment or digi on your projects.  That's all for now - have fun!

signature

Monday, 3 November 2014

Elf made ....

.... Good morning!  The clocks went back at the weekend and I really hoped that I'd sleep in on Sunday.  I woke at 7.15am - great result, sadly, that was old time and it was actually 6.15am!  The one thing I really hate about going back to winter time is the dark evenings - ugh!  Anyway, enough of that, I've got a fun Christmas card to share with you today:

Elf Made - photo by Deborah Frings - Deborah's Gems

Stamps: Waltzingmouse - Elf Made, Flurries
Inks: Memento - Tuxedo Black, Grey Flannel; Stampin' Up! - Lucky Limeade, Bermuda Bay, Melon Mambo, Wisteria Wonder
Dies: WMS - Stitched Tag #1 and #2
Accessories: White Lustre Card; SU Card - Bermuda Bay; Copic Markers; Cuttlebug EF - Ice Crystals; Glitter; Sequins

WMSFC#30 - photo by Deborah Frings - Deborah's Gems

I've used the sketch from this week's CAS(E) this Sketch - CTS#98 for the layout, but I've turned it through 90° to make a portrait style card.  I used the colours from our Waltzingmouse Fanatics challenge - WMSFC#30, and I was going to submit it to Less is More, but I just realised that it has some green in it!!  As there's a tag on this card, I'm also submitting it to the current Addicted to CAS - ATCAS#51 challenge where the cue word is Tag!  I embossed the background with ice crystals and adhered the panels directly to the card.  I stamped the little elf girl (my new Waltzingmouse set) on white card, coloured her with Copic markers, then cut her out and attached her with dimensional gel.  She actually has a bell on her hat and is holding mistletoe, but it's tough to cut around them so I cut them off!  I die cut the tag and stamped on the details, and then layered it onto a smaller turquoise tag.  I finished the front with some sequins.  On the inside is a mat layer of turquoise card and on the white panel a greeting and another elf girl.

Elf Made inside - photo by Deborah Frings - Deborah's GemsElf Made sq - photo by Deborah Frings - Deborah's Gems

That's it for now - see you soon.

signature

Saturday, 1 November 2014

WMSFC - Colours ....

....  Hello again.  I'm back with my card for our Waltzingmouse Fanatics Challenge - WMSFC#30 - we have a colour challenge for you.  Here's my take:

Hello - photo by Deborah Frings - Deborah's Gems

Stamps: Waltzingmouse - Pic-Nic Patterns, Offbeat Backgrounds, Sewing Box Hugs, Spring Baskets; Stampin' Up! - Endless Birthday Wishes
Inks: SU - Melon Mambo, Lucky Limeade, Concord Crush; Memento - Tuxedo Black, Grey Flannel
Dies: Spellbinders - Squares Lg (S4-126) #3, Squares Sm (S4-128) #3
Accessories: White Lustre Card; SU Card - Lucky Limeade, Bermuda Bay; SU DP - Melon Mambo, Wisteria Wonder; Copic Markers


Our colours this week are teal, lilac, bright pink, lime green and purple - you don't have to use them all, but I managed!!  I used the sketch from this week's Mojo Monday - MOJO#369; it's been ages since I played along with them.  I used the dimension they provided, 5½" × 7" and score at 3½" to make a 5½" × 3½" card (still fits an A2 envelope).  I didn't want a solid purple, so I made my own paper by stamping the polka dots in purple and then stamping the flower on top.  I stamped the flower several times and fussy cut to get the layers I needed.  As I need to send this through the post, I kept the flowers flat.  I die cut some square to layer behind each flower.  I stamped the trellis pattern in pink and used that behind the squares.  I finished the front with a stamped stripe, paper bow and simple sentiment.  On the inside I cut a mat layer in Melon Mambo design paper and a white panel for my message.

Hello - photo by Deborah Frings - Deborah's Gems
For more inspiration with our fun and bright colours, check out the blog to see what Tara and Kathy have made.  Hopefully, you'll have more fun with this week's challenge - you didn't much like the Halloween theme!!!

Don't forget you MUST use at least one Waltzingmouse stamp, sentiment or digi on your project.  You have until Thursday 13th November 10.00pm GMT (5.00pm EST) to play along.


That's all - see you soon.

signature

Saturday, 18 October 2014

WMSFC - Halloween ....

....  Hello again!  I'm back with our new challenge at Waltzingmouse Fanatics.  Before I get to that though, I'd like to say thank you to all those who played along with our last challenge - it was so nice to see such fab cards - the thumbnail display was so, so pretty!!  Anyway, it's time to tell you our theme this time - and you already know it:

HALLOWEEN

You can go vintage, scary, cute, clean and simple, shabby chic - whatever takes your fancy, just make a Halloween themed project.  You must use at least one Waltzingmouse stamp, sentiment or digi.  I love Halloween and have made a couple of cards.  Here's the first:

Nevermore - photo by Deborah Frings - Deborah's Gems

Stamps: Waltzingmouse - All Hallow's Eve, Text-It; Stampin' Up! - Gorgeous Grunge
Inks: SU - Smoky Slate, Concord Crush; Versamark; Memento - Tuxedo Black
Accessories: White Lustre Card; SU Card - Smoky Slate, Concord Crush; Ribbon; Copic Markers

I used the colours from this week's Inspirational - INK#67 challenge and the layout is based on the sketch at Freshly Made Sketches - FMS#158.  I think the colours are perfect for a Halloween card.  I made the card base from grey card and stamped the text in grey for a tone-on-tone look.  I found the ribbon at my local craft shop, but it's actually cream, so I coloured it with my Copic markers.  I stamped the raven onto some white card and cut it out.  I decided to colour the raven with very pale purple markers as black birds often have a purple or blue cast.  I stamped a grunge border on the purple panel.  I finished with a sentiment stamped in Versamark and heat embossed in white.  The purple panel was adhered with dimensional tape.  On the inside I cut a white panel, stamped a spooky church ruin and simple sentiment.  Both the inside and purple panel have distessed edges.

Nevermore inside - photo by Deborah Frings - Deborah's Gems

My next card has a much more contemporary feel and is quite clean and simple too.

Boo to You - photo by Deborah Frings - Deborah's Gems

Stamps: Waltzingmouse - Great Big Owl; Stampin' Up! - Making Spirits Bright
Inks: Versafine - Onyx Black; Memento - Tuxedo Black; Archival - Jet Black
Dies: WMS - Big Owl Dies
Accessories: White Lustre Card; SU Card - Bermuda Bay, Early Espresso; Clear Embossing Powder; Copic Markers

I used the layout from the current CAS(E) this Sketch! - CTS#96.  I think I've mentioned that I love owls and when Claire released this set I just loved it.  However, this is the first time it's actually been inked up!  I stamped the owl and circles in Versafine, hear embossed with clear powder and cut them out with the matching dies.  I decided to go for a funky owl using lilac and turquoise.  I cut the branch from brown card and adhered the owl and branch directly to the card base.  I lined the circles along the edge of the card and then cut away the bits between each circle.  I used my stamp-a-ma-jig to position the sentiment along the circles.  I decided to add a fun sentiment to the owl's belly and it is attached with dimensional tape.  On the inside I covered the base with turquoise card and on the white panel stamped a fun greeting and added some more circles.

Big Owl inside - photo by Deborah Frings - Deborah's Gems

In the photo below you can see what I mean about cutting out the card between the circles.  For more Halloween inspiration - check our the projects from Kathy and Tara. 

Big Owl detail - photo by Deborah Frings - Deborah's Gems

 You have plenty of time to play along, deadline is Thursday 30th October 10.00pm BST (5.00pm EDT).  That's all for now - see you soon.

signature

Saturday, 4 October 2014

WMSFC - Anything Goes ....

....  Hello again!  I'm back with our new challenge at Waltzingmouse Fanatics - WMSFC#28 and, as it's World Card Making Day, we've decided to go for a simple theme:

ANYTHING GOES

So you can go wild - you can make cards, scrapbook pages, 3D projects, art journal pages - whatever you fancy, BUT you MUST use at least ONE WALTZINGMOUSE stamp, sentiment or digi.  I've kept to a card - I need lots of Christmas cards to mail out, so I've added to my collection using some of Claire's new stamps:

A Snowman - photo by Deborah Frings - Deborah's Gems

Stamps: Frosty in the Meadow, Woodgrain, Alpine Village
Inks: Stampin' Up! - Pear Pizzazz, Sahara Sand; Versafine - Onyx Black
Accessories: White Lustre Card; Kaisercraft DP - Mistletoe; Copic Markers


I love, love these new sets from Claire - they are so easy to colour and, as I've done here, to paper piece.  I stamped the image onto four different papers from the Kaisercraft pack and then cut out bits and layered the image.  I added a bit of dimension by colouring some shadows with my Copic markers.  I'm submitting this card to the current Jingle Belles challenge - JB:14:20 to use at least three different design papers (done) and to CAS(E) this Sketch! - CTS#95.  I have taken the liberty of flipping the sketch to fit my design.  On the inside I used some more of the design paper to make a mat and on the white panel I went wild and created a snowy forest with a sentiment too.

A Snowman inside - photo by Deborah Frings - Deborah's Gems

Before I go - I would you to join me in welcoming Kathy (Cherwell Lys Alpacas) to the Waltzingmouse Fanatics design team.  Kathy has been a regular player since Tara and I started the challenge.  Kathy often makes more than one card each time too - do check out her card and welcome her to the team.  Submission deadline is Thursday 16th October, 10.00pm BST (5.00pm EDT).  Have a really fun day - whatever you are doing!  See you soon.

signature

Saturday, 20 September 2014

52CCT/WMSFC - Theme ...

.....  Hello!  Can you believe we're already on our third challenge in September, the month is flying by.  Asha has a fabulous challenge for us at 52 {Christmas} Card Throwdown - the theme is NORDIC CHRISTMAS.  I had so much fun that I made three cards!!  And over at Waltzingmouse Fanatics - WMSFC#27 our challenge for the next couple of weeks is CHRISTMAS - we want to see your Christmas projects, but you must include at least one Waltzingmouse stamp, sentiment or digi!  

Good Jul Red - photo by Deborah Frings - Deborah's Gems

Good Jul Blue - photo by Deborah Frings - Deborah's GemsGood Jul Green - photo by Deborah Frings - Deborah's Gems

Stamps: Waltzingmouse - Nordic Winter, Folk Art Christmas Additions, Alpine Christmas
Inks: Stampin' Up! - Real Red, Gumball Green, Pacific Point
Dies: WMS - Folk Art Christmas
Accessories: White Lustre Card; SU Card - Real Red, Gumball Green, Pacific Point; Canvas Paper


I used the sketch from this week's Freshly Made Sketches - FMS#154 for the layout.  Nordic (or Scandinavian) Christmas tend to be clean and simple and are often simply red and white (or kraft), but they can also be layered and in other colours like blue and green.  With this theme there really was only one stamp set that I could use - Waltzingmouse's Nordic Christmas!!  Perfect.  I stamped the border stamp in all the colours and then trimmed to fit on the cards.  I stamped three different images in different colours and cut them out with the matching dies.  I made the panel out of canvas paper and distressed the edges to give a more folksy feel.  On the inside I cut a mat layer (to match the colour on the front) and on the white panel I stamped another Nordic image and a Christmas Greeting.

Good Jul inside - photo by Deborah Frings - Deborah's Gems

For more inspiration with our Nordic Christmas theme, check out the cards from the rest of the 52CCT team - they are just fabulous.

Don't forget to check out Tara's card for our Waltzingmouse Fanatics challenge too.  You have until Thursday 2nd October 10.00pm BST (5.00pm EDT) and don't forget you MUST use at least one Waltzingmouse stamp, sentiment or image.

Really looking forward to seeing your creations - have fun!!

signature
Related Posts Plugin for WordPress, Blogger...