Showing posts with label SU - Endless Birthday Wishes. Show all posts

Wednesday, 17 January 2024

Birthday Fun

.... Good afternoon! It's a beautiful day here in Northop Hall - blue skies, brilliant sunshine and absolutely freezing 😁, so I've been enjoying the weather inside my craft room. I've got a fun birthday card to share today:


Stamps: Stampin' Up! - Giggle Greetings, Endless Birthday Wishes
Inks: Gina K - Jelly Bean Green; Versafine Clair - Nocturne
Dies: MFT Die-namics - Chevrons, Stitched Tag Corner Rectangle Stax #4
Accessories: White & Green Card; Taylored Expressions Stencil - Bokeh; Copper Satin Mirri Card; Copic Markers; Gems

This card is for four challenges - Freshly Made Sketches - FMS#619, Color Hues - CH#79 - copper & green, The Male Room - TMR#182 - funny/pun, and Inkspirational - INK#307 - use a stencil.


Continuing my aim to use older stash, I found the chevron dies and cut out green and copper stripes. I found the fun image and sentiment in a (much) older SU stamp set. I stamped the image twice. I coloured the cat on one image and then fussy cut it out, and I used the fancy stitched die to cut out the other image. I adhered the cat to the panel. To get the green mat layer, I drew around the outside of the die and then cut it out - gives a lovely thin frame. I used the Bokeh stencil with a light green ink for a subtle background, added the two chevrons to the edge and finished by adding the stamped panel. I added a line of tiny copper coloured gems to the bottom of the image.


Inside the card I cut two pieces of white card. On the larger pieces, I added green ink around the edges to match the colour on the front of the card. On the white panel I adhered the two remaining chevron strips at the bottom of the panel, and then added a simple greeting.


This card is for my nephew, Gareth, who has his birthday next week. He enjoys silly cards!!

Before I go, I must say thanks to everyone for stopping by and leaving comments. It's so nice to be back making cards. That's all for now. See you soon.

signature photo Signature.png

Wednesday, 22 June 2016

TMR - Stash ....

.... Hello! This is one of my scheduled posts as I'm currently visiting family and friends in the UK. It's time for our new challenge at The Male Room - TMR#38. For the next two weeks we want you to use BUTTONS - many buttons - on your masculine themed projects. I'm sure that like me, many of you have far too many buttons in your stash - I only managed to use three on my card, but I'm sure I'll think of more ways to use the rest of my buttons!!

Oh Happy Day - photo by Deborah Frings - Deborah's Gems

Stamps: Stampin' Up! - Starburst Sayings, Endless Birthday Wishes
Inks: SU - Tangerine Tango, Bermuda Bay; Versafine - Onyx Black
Dies: SU/Sizzix - Starburst Framelits #1 and #3
Accessories: White Lustre Card; SU Card - Bermuda Bay (from Tin of Cards); SU - Buttons; Copics; Baker's Twine; Glossy Accents; Wink of Stella - Clear


I wanted to make a bold, vibrant birthday card so picked orange and turquoise. The striped card is a special that comes from last year's Tin of Cards set - I think the subtle strip is perfect for a guy card. I stamped the images in orange and cut them out with the matching dies. You can't see it in the photo above, but the centre of the celebrate image was attached with gel glue for some dimension. I found some matching buttons in my stash, threaded them with bakers twine and adhered them to the card. I finished the front by adding glossy accents to the little dots in the words Happy and drawing a border around the card. On the inside is another mat of striped card and on the white panel a birthday greeting.


Do visit our blog to see more inspiration projects from the rest of the design team. Have fun with this challenge - be creative! Deadline for submission is midnight (BST) Tuesday 5th July, that's 7.00pm (EDT) for those in the States.

signature

Sunday, 7 February 2016

CIC - Colours ...

.... Hello!  Welcome to the first challenge of February here at Cupcake Inspirations Challenge - CIC#346.  This week we have some fabulous colours for you to use - White, Berry and Silver.  I made a birthday card for my stash - I always need birthday cards!

Happy Birthday - photo by Deborah Frings - Deborah's Gems

Stamps: The Paper Shelter Digi - Whimsical Dragon; Happy Little Stampers - Fun Birthday Sentiments; Stampin' Up! - Endless Birthday Wishes
Inks: Versamark
Dies: Lil Inkers - Dual Stitched Rectangles #4
Accessories: White Lustre Card; SU DP - Melon Mambo; Copic Markers; Wink of Stella - Clear; Sequins; Silver Embossing Powder


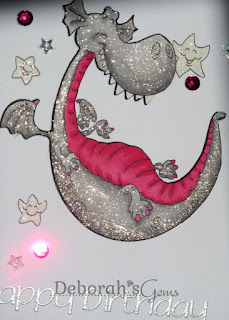
Don't you just love this fabulous little dragon?  I printed him twice on white card, cutting out one image with a stitched edge die and on the other I just cut out the dragon's body.  I coloured her with Copic makers and added lots of sparkle to her body and the little stars.  I stamped the sentiment in Versamark and heat embossed it with silver powder.  I finished the front with some little sequins.  On the inside I cut a mat layer of deep pink design paper and on the white panel added a little birthday cake.  I also took a close-up photo of the sparkle on the dragon - I just love the way Wink of Stella adds so much shimmer!!

Happy Birthday inside - photo by Deborah Frings - Deborah's GemsHappy Birthday detail - photo by Deborah Frings - Deborah's Gems

There's lots more inspiration from the rest of the design team on our blog.


Our challenge this week is sponsored by The Paper Shelter (who kindly provided this super image). The winner will get $15 gift certificate to spend at The Paper Shelter.  That's all for now!  Have fun.

signature

Tuesday, 22 December 2015

Happy Birthday ....

.....  Morning!  It's silly warm here, in a relative way of course, and yesterday we had so much rain!!!  I've a birthday card to share with you this morning.  I made this for Kat's best friend, Alyx, who is 15 years old today.  I took Kat over to Alyx's place yesterday lunchtime and we don't get her back until this evening!!! Yea!!

Happy Birthday - photo by Deborah Frings - Deborah's Gems

Stamps: Sweet Pea Stamps Digi - Minerva by Enys Guerrero; Stampers Anonymous Tim Holtz - Crazy Talk; Stampin' Up! - Endless Birthday Wishes
Inks: Versafine - Onyx Black
Dies: Lil Inkers - Dual Stitched Rectangles #4
Accessories: White Lustre Card; Bazzill Card - Green; Copic Markers; Wink of Stella - Clear, Gold


Kat picked this image from my digital collection.  I got it from Sweet Pea Stamps (sadly now closed) and the artwork is by Enys Guerrero - I love her style.  I printed the image three times on white card.  I cut out one image using the stitched edge die.  I coloured the background on this image.  I coloured the other images and cut out layers Minerva as the middle layer and the roses as the top layer.  I used Copic markers and added lots of sparkle to the roses, the feather in her hat, and to the gold edges (see photos at the end of the post).  On the inside I cut a mat layer of green card and added a birthday cake image.  I left the panel blank as Kat wanted to write her own message.  I've based this card on the sketch over at Fusion - FUSION#45 - it is a loose take on the sketch!  Oh yes, I've also used the colours as inspiration!

Happy Birthday inside - photo by Deborah Frings - Deborah's GemsHappy Birthday sq - photo by Deborah Frings - Deborah's Gems

Here are a couple of close-up photos of the sparkle:

Happy Birthday detail - photo by Deborah Frings - Deborah's Gems

We had a fun day on Sunday making Alyx's birthday present.  Kat wanted to create a personalised memory picture, I think she'd seen something on Pinterest (no idea where).  She collected lyrics from some of Alyx's favourite bands, got quote from some books and also Alyx's favourite quotes.  She finished by picking three photos of them.  We sized them to fit the Stampin' Up! heart punch and adhered them to a green background (Alyx's favourite colour).  We put the finished page in a simple black frame:

Happy Birthday present - photo by Deborah Frings - Deborah's Gems

Kat gave this to Alyx yesterday when I took her over.  I'm pleased to say that Alyx was really pleased with the picture and the card!  That's all for today!

signature

Tuesday, 17 February 2015

ASM - Make Your Mark ...

...  Hello!   Good evening.  I hope that everyone is keeping well.  We're are still in the grip of an arctic blast - Monday morning we had temperatures of -25°C in the morning - it did warm up to -13°C by lunchtime, but it was so cold that the only thing to do was stay inside.  That was the perfect excuse to play in my craft room and colour this image.

It's time for the new challenge at Addicted to Stamps and More!  And this week it's Make Your Mark - use any colouring medium to make your project.  I've used Copic markers on my card:

Happy Bithday - photo by Deborah Frings - Deborah's Gems

Stamps: QKR Digi - Patchwork Sun; Uniko Studio - Simply Said Birthday; Stampin' Up! - Endless Birthday Wishes
Inks: SU - Early Espresso, Bermuda Bay, Pumpkin Pie
Accessories: White Lustre Card; SU Card - Bermuda Bay; Copic Markers


Our sponsor this week is QKR Stampede and I used their wonderfully cheerful Patchwork Sun on my card.  The winner of this week's challenge will get 3 digi images from QKR.  I've used the colours and layout from this week's Fusion - FUSION#28 challenge.  The colours are so warm and rich, a lovely contrast to all the white snow outside our house!!! 

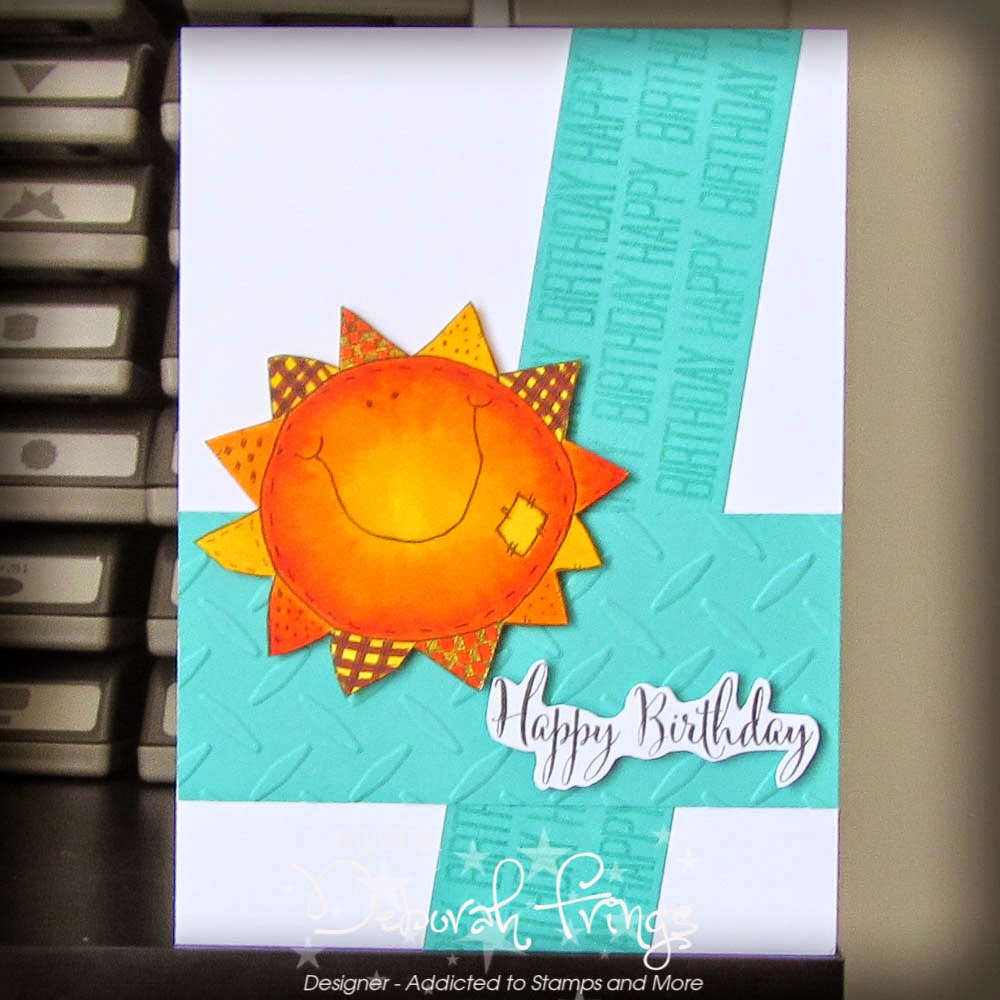
I cut two strips of aqua card.  On one I stamped a birthday sentiment in aqua and the other was embossed.  I stamped the birthday greeting on white card, fussy cut it out and adhered it to the card with dimensional tape.  The sun was also attached with tape.  On the inside I cut a mat layer of aqua card and on the white panel added a simple greeting and a birthday cake!!

Happy Birthday inside - photo by Deborah Frings - Deborah's GemsHappy Birthday Sq - photo by Deborah Frings - Deborah's Gems

For more inspiration in "Making Your Mark" check out the blog to see what my team mates have made.  That's all for now - see you soon.

signature

Saturday, 1 November 2014

WMSFC - Colours ....

....  Hello again.  I'm back with my card for our Waltzingmouse Fanatics Challenge - WMSFC#30 - we have a colour challenge for you.  Here's my take:

Hello - photo by Deborah Frings - Deborah's Gems

Stamps: Waltzingmouse - Pic-Nic Patterns, Offbeat Backgrounds, Sewing Box Hugs, Spring Baskets; Stampin' Up! - Endless Birthday Wishes
Inks: SU - Melon Mambo, Lucky Limeade, Concord Crush; Memento - Tuxedo Black, Grey Flannel
Dies: Spellbinders - Squares Lg (S4-126) #3, Squares Sm (S4-128) #3
Accessories: White Lustre Card; SU Card - Lucky Limeade, Bermuda Bay; SU DP - Melon Mambo, Wisteria Wonder; Copic Markers


Our colours this week are teal, lilac, bright pink, lime green and purple - you don't have to use them all, but I managed!!  I used the sketch from this week's Mojo Monday - MOJO#369; it's been ages since I played along with them.  I used the dimension they provided, 5½" × 7" and score at 3½" to make a 5½" × 3½" card (still fits an A2 envelope).  I didn't want a solid purple, so I made my own paper by stamping the polka dots in purple and then stamping the flower on top.  I stamped the flower several times and fussy cut to get the layers I needed.  As I need to send this through the post, I kept the flowers flat.  I die cut some square to layer behind each flower.  I stamped the trellis pattern in pink and used that behind the squares.  I finished the front with a stamped stripe, paper bow and simple sentiment.  On the inside I cut a mat layer in Melon Mambo design paper and a white panel for my message.

Hello - photo by Deborah Frings - Deborah's Gems
For more inspiration with our fun and bright colours, check out the blog to see what Tara and Kathy have made.  Hopefully, you'll have more fun with this week's challenge - you didn't much like the Halloween theme!!!

Don't forget you MUST use at least one Waltzingmouse stamp, sentiment or digi on your project.  You have until Thursday 13th November 10.00pm GMT (5.00pm EST) to play along.


That's all - see you soon.

signature

Wednesday, 22 October 2014

One for three - birthday ...

... Hello again!  I'm on a bit of a roll today!  House stuff done, time in craft room this morning and another quick card to share with you.

HB2U - photo by Deborah Frings - Deborah's Gems

Stamps: Waltzingmouse - Offbeat Backgrounds; My Favourite Things - Document It Rock On, Gift Card Greetings; Stampin' Up! - Endless Birthday Wishes, Delightful Dozen
Inks: Versamark; SU - Night of Navy, Old Olive, Concord Crush
Dies: Lil Inkers - Stitched Squares #4, Stitched Circles #2 & #3
Accessories: White Lustre Card; SU Card - Old Olive, Concord Crush; SU DP - Old Olive; Vellum; Silver Embossing Powder

 I'm submitting this one to several challenges:

I've made a birthday card for my stash - I've just realised that I don't have very many actual birthday cards.  This is definitely more masculine in feel.  I stamped the chevron pattern in all three colours and then cut out a square.  I also cut a vellum square which I adhered directly on top of the stamped square - makes the pattern a little more subtle.  I inked up a bold, graphic sentiment in Versamark and heat embossed with silver powder.  I finished the front with a stamp on the circle - it's a games controller!  The inside has a mat of green design paper and a fun sentiment on the white panel, along with a birthday cake!

HB2U inside - photo by Deborah Frings - Deborah's Gems

That's all for today!  Bye for now.

signature

Sunday, 19 October 2014

Twins birthday cards ....

.....  Good morning!  I hope you're all enjoying a good weekend.  Kathryn is away at her friends for a sleepover.  Her friends are twins and are celebrating their birthday this weekend.  Kathryn asked me to make special cards for them both - one likes Dr Who (doesn't everyone?) and the other likes Batman.  So I had lots of fun making them these cards.

The first is the Batman themed card.

Batman Birthday - photo by Deborah Frings - Deborah's Gems

Stamps: Stampin' Up! - Perfectly Penned, Endless Birthday Wishes
Inks: Distress - Black Soot; Versafine - Onyx Black
Accessories: White Lustre Card; SU Card - Basic Black, Daffodil Delight; Wink of Stella - Black; Cameo - Batman Logo

When Kathryn asked for a Batman card, I had to really think about it.  I have lots of Halloween type bats, but I knew that she wanted the "proper" Batman logo.  Then I remembered that I had the logo in my selection of cut files for the Silhouette Cameo.  This is only the fourth time I've actually used my Cameo (a situation which I'm going to fix).  It was so easy to find the image, set it to the appropriate size and then send it to cut!  I cut some yellow card, adhered it to the card base and distressed the edges with black ink.  Then it was simply a case of adhering the logo and a bold birthday greetings - which I over stamped several times to give a slight offset shadow.  On the inside of the card I cut a mat of yellow and used the negative space of the cut file and stamped a greeting inside.

Batman Birthday inside - photo by Deborah Frings - Deborah's Gems

The next card has a Dr Who theme - in this family we are big Dr Who fans, so this wasn't difficult at all!

Dr Who Birthday - photo by Deborah Frings - Deborah's Gems

Stamps: Viva Las Vegas Stamps - Plate 925; Dare 2B Artzy - Live Life; Craft's Meow - Typically Teen; SU - Endless Birthday Wishes
Inks: Memento - Tuxedo Black; SU - Night of Navy, Brocade Blue, So Saffron; Versafine - Onyx Black
Accessories: White Lustre Card; SU Card - Night of Navy; Copic Markers; Wink of Stella - Blue

I had so much fun colouring in the Tardis.  I used lots of the tips that I picked up while doing the Online Card Class - Copic Markers for Cardmakers.   I coloured the whole Tardis in light blue, then added some darker blue shading.  I used a grey marker on the shadow side - I love the effect that this gives.  I stamped another Tardis, coloured the windows and cut them out.  I used a white marker to add the writing around the top of the Tardis.  I added a touch of sparkle to the Tardis using a blue Wink of Stella brush.  I stamped the background to look a bit like Gallifrian symbols (see below).  I finished the front with a simple greeting.  On the inside I cut a panel of white card and adhered a big bow tie (from Matt Smith's incarnation of The Doctor) and a birthday greeting.

Dr Who Birthday - photo by Deborah Frings - Deborah's Gems

I hope that Kathryn's friends like their very individual birthday cards!!  Below is a photo of some Gallifrian symbols from inside the Tardis (the new version).

Photo credit

I have most of the day to myself - so I think I'm going to be playing in my craft room!  Jonathan is off out to a photo shoot and I'm not expecting Kathryn home for ages yet!!  That's all for now.  See you soon.

signature

Wednesday, 20 August 2014

TMR - Stars ....

.... Hello - this another of my scheduled posts (so I hope it works okay)!  It's time for our new challenge at The Male Room.  For the next couple of weeks we'd like to see your masculine style projects with the theme of:

STARS

Here's my card and it's going into my stash.  I can never have enough male cards!!

Happy Birthday - photo by Deborah Frings - Deborah's Gems

Stamps: Stampin' Up! - Be the Star, Endless Birthday Wishes
Inks: SU - Early Espresso, Summer Starfruit, Tempting Turquoise
Dies: SU/Sizzix - Stars Framelits; Die-namics - Fishtail Flags Layers Stax #2
Accessories: White Lustre Card; SU DP - Island Indigo; SU Card - Summer Starfruit; Wink of Stella Brush - Clear


I used a couple of challenges in the making of this card - the colours are from Colour Q - cQc#253 and the layout is based on the sketch from Seize the Sketch - STS#26 (sadly, I'm too late to submit to either challenge).   I cut a panel of design paper and adhered it to the card.  Then I stamped three different stars and cut them out with the co-ordinating dies.  I added some sparkle to the stars, but you can't see it in the photo above, but in the one below (out of focus to show the shimmer) you certainly can!!  I attached the large and medium stars directly to the card and used dimensional tape for the smallest star.  I stamped a birthday greeting on the flag.  The inside is blank for my message.

Stars detail - photo by Deborah Frings - Deborah's Gems

For more inspiration using the STARS theme on your masculine cards - do visit our blog and check out the cards from the rest of the Design Team.  Can't wait to see what you make.  Have fun!

signature
Related Posts Plugin for WordPress, Blogger...