Showing posts with label Addicted to Stamps and More. Show all posts

Saturday, 13 September 2025

Fall Colours

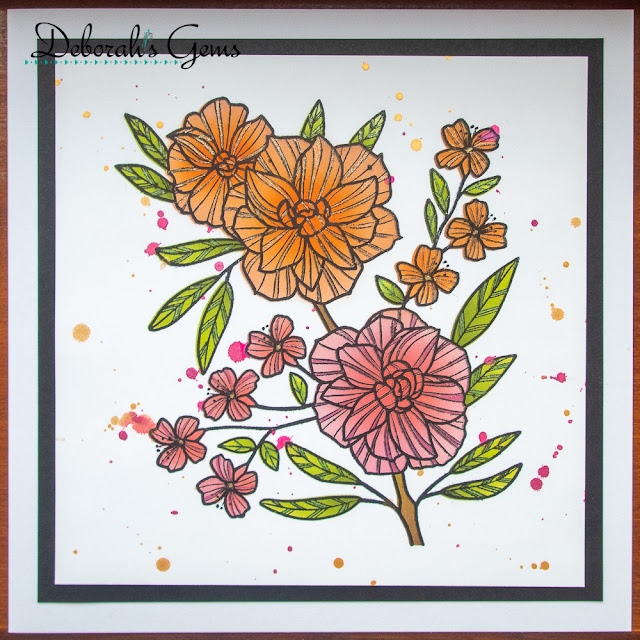
...Morning!! So much for making a card everyday!! Instead, I've been doing some reorganising in my craft room - it's nearly done. However, I did get chance to make a card yesterday - we had autumn sunshine and I noticed that autumn colours are creeping in already. So, here's the card:


Stamps: Waffle Flower - Multiple Fall Leaves; C&9 - Triple Step Autumn Leaf, Harvest Wreath Turnabout; Stampin' Up! - Cookie Cutter Halloween
Inks: Versafine Clair - Nocturne; Gina K - Faded Brick, Fresh Asparagus, Sandy Beach; Memento - Tuxedo Black
Accessories: White Card; SU Punch - Cookie Cutter; Copic Markers

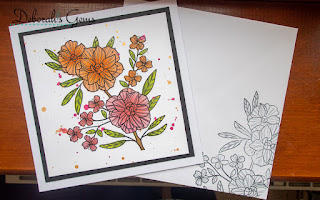
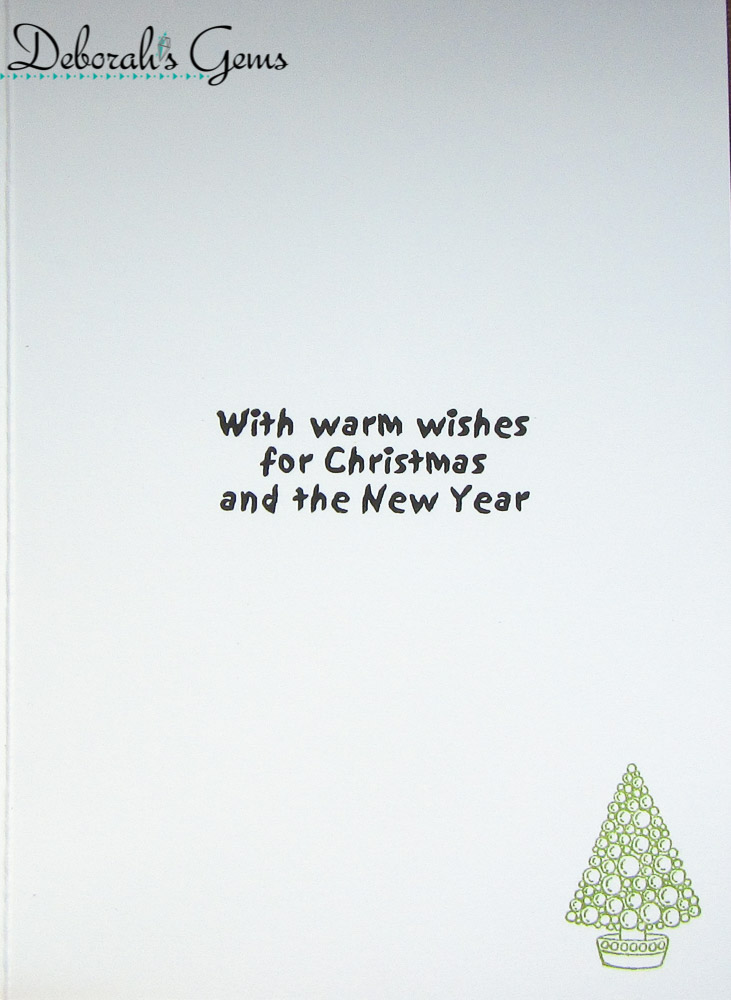
I masked off an area in the centre of the notecard, I lightly inked the background, stamped some outline leaves, which I coloured with Copic markers, and finished by adding some solid images in coloured inks. I removed the tape (sadly there was some spreading of the alcohol ink) and stamped a greeting. Next, I stamped the cute scarecrow, coloured him with Copics and used the co-ordinating punch to cut him out. For the inside of the card, I cut a piece of white card slightly smaller than the notecard, added some autumnal leaves and a simple greeting in bold black ink.


This one is already in the post, off to my Aunt in Barry and confirming a date for our lunch next month - so looking forward to seeing her.

I'm playing along with the following challenges - CAS Colours & Sketches - CASC&S#568 (used their sketch); Addicted to Stamps and More! - ATSM#501 (make your mark); CAS on Friday - CASOF#317 (Theme - Fall); and Never-Before-Used-Schtuff - NBUS#78 (I've had the Cookie Cutter image and punch for years, and this is the first time I've used it on a card!!!).


That's all for now - I'm spending the rest of the day finishing off the reorganisation that I started. I've got rid of a large black DVD unit (used to store SU and Uniko stamps) - it blocked the light, and now I have a much brighter room. There's no autumnal sunshine today, just rain - lots of it. I'm not going to grumble as we need the rain, but it's dull!!! Bye for now.

signature photo Signature.png

Sunday, 31 August 2025

Grateful for You

.... Hello! In my Friday post, I mentioned that I attended the Uniko/Dies to Die For workshop earlier this month. Bev and Tracey put on a brilliant workshop with lots of opportunity to make cards (and shop too!!). I started work on several cards and brought them home to complete. This is the first of the completed cards:


Stamps: Uniko - Background Blocks Swiss Dots; C&9 - So Many Sayings
Inks: C&9 - Briar Rose, Wildberry, Eucalyptus, Juniper; VFC - Nocturne, Twilight 
Dies: Pinkfresh Studio - Petal Perfection; C&9 - So Many Sayings
Accessories: Pinkfresh Studio - Petal Perfection Layering Stencils; White Card; Copic Markers

I'm submitting this card to Time Out Challenges - TOC#296 where the theme is support/friends/encouragement, and to Addicted to Stamps and More! - ATSM#500 to use diecuts and/or stencils.


We did have instructions for suggested cards, but I went rogue!! I stamped the dotty background in soft grey directly onto a white note card (it was going to be one layer). I took the opportunity to try out Pinkfresh Studios dies and matching layering stencils and made this lovely flower. I stamped C&9 So Many Saying in black ink and used the co-ordinating die to cut them out (I have lots still to use). I used dimensional pads to add the greeting. When I got home I found I'd made the card upside down, so I simply cut the completed panel off, trimmed it to fit on the front of an A2 (US size) card, edged it with a green Copic markers and added it to the card base. Inside the card, I cut another piece of white, edged it with the green marker and glued to the inside of the card. I had more die cut flowers, so I simply added a flower to finish the inside.


The workshop that I attended was held in Warrington and hopefully, Bev and Tracey will be back there again soon. However, if you fancy attending a Uniko/Dies to Die For Workshop, the ladies are holding another retreat on Sunday 12 October in Worsall Village Hall, Yarm. It's only £60 and well worth it.

Jonathan and I went to the cinema yesterday to see The Roses - it's a remake(ish) of The War of the Roses. It stars Olivia Colman and Benedict Cumberbatch in the main roles. The script is brilliant - witty, sharp, bitchy, sweary (very) and so black. It was a joy to watch them both, and the rest of the cast were brilliant. I recommend it.  That's all for today. See you soon.

signature photo Signature.png

Wednesday, 20 October 2021

SHC - Mum's Birthday Card ...

... Morning! It's time for my weekly Seven Hills Craft blog post. Today's card is very special - I made it for my mum. Mum was 82 years young on Monday. We celebrated by going to the local garden centre for lunch and to get more plants for mum's garden. Here's the card:


Stamps: Concord & 9th - In Bloom; Altenew - Just a Number
Inks: Gina K - Peach Bellini, Sweet Mango, Tangerine Twist, Innocent Pink, Dusty Rose, Lipstick Red, Key Lime, Jelly Bean Green, Fresh Asparagus, Warm Cocoa, Dark Chocolate; Versafine Clair - Nocturne
Accessories: White Card; Gina K - Black Onyx Card; Cosmic Shimmer Mist - Candy Pink, Rich Gold; Sakura Stardust Pens; C&9 - In Bloom Stencils Pack

I'm submitting this card to Addicted to Stamps and More - ATSM#416 where it's make your mark, and to Seize the Birthday - STB#225 where the topping is to use a Stencil.


This is a large card measuring 7¾" square. I started by cutting a piece of white card to 6½" square and using my MISTI, I stamped the large floral and leaf image from In Bloom in a soft grey ink. Next I used the matching stencil pack to add colour to the image. I taped on the flower stencil (masking off the additional bits that I wasn't using) and used pink and orange inks to colour the flowers. I started with the lightest shades and built up to the darkest. I changed to the leaf stencil and coloured the leaves green and the stem brown. Next I placed the complete leaf and flower mask over the coloured image and spattered pink and gold shimmer spray over the flowers. Once dry, I put the image back into the MISTI and restamped with a bold black ink. I added more sparkle to the image by colouring the stripes on the flowers and leaves with glitter pens. I used dimensional tape to adhered the finished panel to a black mat layer, and added the whole lot to the front of the card.

Inside the card, I cut another mat layer of black card. On the white panel, I stamped the large floral image in soft grey and added a bold birthday greeting in black ink, along with a fun sentiment in red ink.


Here's a close up of the flowers showing the added sparkle from the glitter pens:


As this was a special card for mum's 82nd birthday - I decided to decorate the envelope too. I stamped a partial impression of the large floral image on the front and added a couple of flowers on to the flap at the back of the envelope.


That's all from me today. Thanks so much for stopping by. Keep safe and I'll see you again next week.

signature photo Signature.png

Tuesday, 15 June 2021

C24C - Trees and Ornaments ....

... Good morning! I hope that you all had a good weekend - it was wonderful here in north Wales with bright sunshine and high temperatures. For me, it was also fun as it was the start of Euro 2020!! I did find time to make my card for our new challenge at Christmas 24 - C24C#36. For the next couple of weeks we want to see your Christmas cards that feature Trees AND Ornaments. Here's my take:


Stamps: Penny Black - Xmas Constellation; MFT - Bitty Holiday Wishes; Uniko - Most Wonderful
Inks: Gina K - Applemint, Key Lime, Lucky Clover, Jelly Bean Green, Grass Green, Christmas Pine; Versafine Clair - Nocturne
Dies: Gina K - Master Layouts 2
Accessories: White & Black Card; Gina K Card - Lucky Clover; Gems from stash

I'm submitting this card to Addicted to Stamps and More - ATSM#407 where the theme is Christmas, and to Merry Little Christmas Challenge Blog - MLCCB#35 where it's always Anything Christmas Goes.


I've been watching a lot of Gina K videos recently and at the beginning of June, Gina did some wonderful ink blending on video and I was inspired have a go. I die cut a panel of white card and masked of a ½" border all the way round the panel and then set to work blending a lot of green inks. Once I was happy with the blending, I removed the masking paper and stamped this lovely abstract Christmas tree in the middle of the panel. I added greeting above and below the image and layered the panel onto black card. I made a notecard from some co-ordinating card and adhered the panel in the centre. I finished the front by adding lots of iridescent gems to the little stars and dots on the stamped image - these are my Christmas ornaments. Inside the card, I cut a mat layer of black card. On the white panel I stamped the abstract Christmas tree in lime ink and added a greeting in black ink.


I love the way Gina K inks blend so smoothly and the depth of colour they give. This is such a pretty tree too - I've had it ages, but it's been a while since I inked it up. I took a close-up photo to show the pretty iridescent gems - they really glow in the light:


That's all from me today - do visit our Christmas 24 Challenge blog to see more inspiration from the team. I look forward to visiting your blogs to see your creations. Have fun!!

signature photo Signature.png

Thursday, 1 April 2021

C24C - Snow People ....

... Good morning! It's April 1st - can't quite believe how it got to be April so quickly!! Hey ho! It does mean that it's time for our new challenge at Christmas 24 Challenge - C24C#31. We want to see your Snow People on your Christmas cards. Now, that can be snowmen, or just people enjoying the snow - your choice! Here's my take:


Stamps: Bugaboo Digital - Scene It Snowmen Fun; Lawn Fawn - Winter Scripty Sentiments, Simply Celebrate Winter; Colorado Craft Company - Frosty's Hat
Inks: Gina K - Stormy Sky; Versafine Claire - Nocturne
Dies: Spellbinders - Mega Rectangles Lg (S4-142) #4
Accessories: White Card; Carta Bella DP - Snow Fun; Copic Markers; Glitter

I'm submitting this card to several challenges. I've used the sketch from Freshly Made Sketches - FMS#479, the colours are from Fab Friday - FABF#210, and the theme at Addicted to Stamps and More - ATSM#402 is Christmas.


I love this fun image from Bugaboo Stamps - it's a digital image so you can print it whatever size you need. I printed it on white card and used a rectangle die to cut it out. I coloured the image with Copic markers and edged it with a dark grey marker pen. I used a strip of dark grey design paper down the side, adhered the image on top and finished with a fun sentiment that matches the image. On the inside, I cut another piece of the design paper for the mat layer. On the white card I stamped a Christmas greeting and another line of cute little snow folk!


That's all from me today - don't forget to visit our Christmas 24 Challenge blog to see more inspiration cards from the rest of the design team. Have fun and I look forward to visiting your blogs to see your creations. See you soon.

signature photo Signature.png

Thursday, 25 February 2021

Dancing Queen ....

... Good morning! A friend recently asked me to make a birthday card - the brief was dance, pink, purple, and sparkle. I sent him a few ideas and this is the one he picked to send:


Stamps: Visible Image - Born to Perform; Hero Arts - Cupcakes
Inks: Versafine - Onyx Black
Accessories: White Card; Copic Markers; Clear Embossing Powder; Glitter; Sakura Stardust Pens

I'm submitting this card to Addicted to Stamps and More! - ATSM#399 where the theme is Any Occasion, and to Seize the Birthday - STB#208 - it's always AG Birthday. 


I stamped the ballerina in Versafine black ink and heat embossed her with clear powder. I placed a mask over her and stamped the middle cupcake. I added a mask to that cupcake and stamped the remaining cakes. I used Copic markers to colour the frosting to match the brief - shades of pink and purple. After colouring the cupcakes I restamped them in Versafine black ink and embossed with clear powder - this gives a lovely crisp image. I added the birthday greeting (which comes from the Cupcakes stamp set). I trimmed the panel to be slightly smaller than the card base, edged it with a pink marker, and adhered it to the card. I used a dark pink Sakura Stardust pen to add some subtle shimmer to the middle cake. I drew a line of pink ink along the embossed line and used a dry paint brush to pull the shimmer out. I finished the front by adding some glitter to the cupcake frosting. On the inside, I cut another piece of white card and stamped the greeting and another cute little cake with a candle. It sparkles too!


That's all for today. See you soon.

signature photo Signature.png

Monday, 1 February 2021

C24C - Red, Gold and Green ....

Morning!! Well, January went fast 😁 I'm here today with my card for our new challenge at Christmas 24 Challenge - C24C#27. We've gone for a very traditional feel for this challenge. Your Christmas creations must use RED/GREEN AND GOLD. Here's my card:


Stamps: MFT - Bitty Holiday Wishes; Elusive Stamps - Christmas Ornament (now discontinued)
Inks: Versafine - Onyx Black; Memento - New Sprout; Versafine Clair - Nocturne
Dies: MFT - Circle Stax Set 1 #8, Circle Stax Set 2 #0; Lil Inkers - Stitched Squares #6
Accessories: White Card; White Hammered Card; Gold Satin Mirri Card; Clear Embossing Powder; Copic Markers; Nuvo - Midas Aquashimmer Brush; Sakura Metallic Gold Pen

I'm submitting this card to the Holly & Ivy Christmas Challenge - H&ICC#86, where it's Anything Christmas Goes.


I've been going through my stamp stash and came across some lovely (but discontinued stamps) from Elusive Stamps. I used my MISTI to stamp the image onto white card. I removed it from the MISTI, coloured selected areas with red and green Copic markers, returned it to the MISTI and restamped with Versafine black ink. I heat embossed the image with clear powder and cut it out with a circle die. I used a metallic gold pen to colour the lines. I then cut a gold circle slightly bigger than the ornament and layered them together. I stamped the ornament hanger, embossed it, fussy cut and coloured with the gold metallic pen. I cut a panel of white hammered card with a square stitched die, adhered the bauble and added to the front of a 6" square card. I stamped a simple greeting along the bottom of the card. To finish the front, I added gold shimmer to the white areas of the ornament. Sadly, you can't really see it in the photo, but it's so pretty in real-life!!


On the inside of the card, I cut a mat layer of the white hammered card. On the plain white card I stamped a Christmas greeting and stamped a smaller version of the big ornament in pale green. I made another card using these colours and a fun flower Christmas tree stamp:


Stamps: Elusive Stamps - Christmas Tree (now discontinued)
Inks: Versafine - Onyx Black; Memento - New Sprout, Angel Pink, Bamboo Leaves; Versafine Clair - Nocturne
Accessories: White Card; Clear Embossing Powder; Copic Markers; Sakura Metallic Gold Pen

I'm submitting this card to Addicted to Stamps and More - ATSM#397 where the theme is Christmas.


Using the same technique as I did for the bauble I stamped the tree, coloured the image with Copic markers and a gold metallic pen, restamped and heat embossed it. I then carefully fussy cut it out. I stamped a simple sentiment on the card, added some very non-traditional snowflakes in pale green and soft pink and adhered the finished flower Christmas tree. On the inside, I simply stamped a Christmas greeting and added a tiny green tree.


I love the traditional Christmas colours with the clean and simple look of both these cards. Don't forget to visit our Christmas 24 Challenge blog to see more inspiration from the rest of the design team. That's all from me for now. See you again soon.

signature photo Signature.png
Related Posts Plugin for WordPress, Blogger...