Showing posts with label WMS - Elf Made. Show all posts

Saturday, 8 October 2016

52CCT - Colours & DT Call .....

... Hello! It's time for our new challenge at 52 Christmas Card Throwdown - 52CCT40-16. This week is our colour challenge and Kaja has picked some really pretty colours for us to use - PALE GREY, SOFT BLUE AND SOFT GREEN. I had fun:

Cheer - photo by Deborah Frings - Deborah's Gems

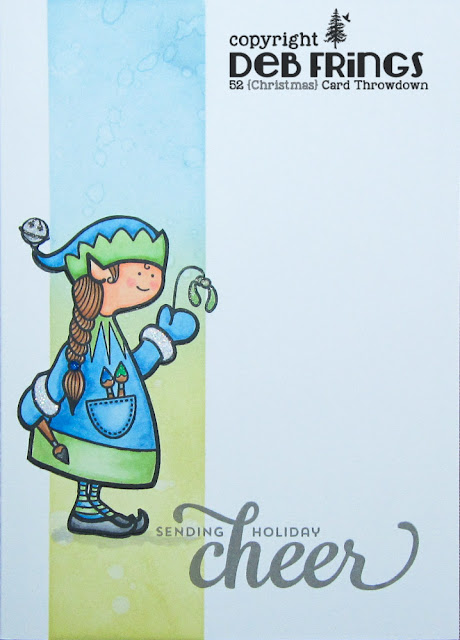
Stamps: Waltzingmouse - Elf Made
Inks: Distress - Shabby Shutters, Faded Jeans; Stampin' Up! - Smoky Slate; Memento - Tuxedo Black
Accessories: White Lustre Card; SU Card - Smoky Slate; Copics; Wink of Stella - Clear; Glitter; Glossy Accents


I masked off the card to create the vertical panel. I blended on soft green and soft blue and then sprinkled water droplets on the ink. I used my MISTI to position the sentiment and stamped it twice to give a crisp image. I stamped the little elf directly on the card and also on a scrap of white card. I coloured the image on the white card with Copics, carefully cut it out, edged it with a black marker and then adhered it on to the card base. I added some sparkle to the bell and mistletoe with a clear Wink of Stella brush. I added glitter to the cuffs of her mittens and finished by added a touch of glossy accents to the mistletoe and hair tie. On the inside I cut a mat layer of pale grey card and on the white panel stamped a greeting and some little wrapped chocolates. They're called Kisses - they look great, but I don't like the taste!!!

Cheer inside - photo by Deborah Frings - Deborah's GemsCheer sq - photo by Deborah Frings - Deborah's Gems

I used the sketch from this week's CAS(E) this Sketch! - CTS#193 for the layout and I got the idea of an elf from Merry Monday - MM#216 where they want to see elves. For more inspiration using our pretty pastel colours, do visit our blog to see what the Design Team have made.  Don't forget that we're having a Design Team call - full details on the our blog.

We're having a reasonably quiet weekend. Although Kat is going to a BBQ with her school choir at a local cider farm and Jonathan is going to be out at a photo shoot. So I'll have time to play in my craft room. Perfect. Have a fun weekend!

signature

Saturday, 20 June 2015

52CCT - Theme ....

......  Morning!  It's time for our new challenge at 52{Christmas} Card Throwdown.  This week is our theme challenge and Danielle picked it before she stepped down from the team.  I really love the the theme, so I'm hosting today - what's the theme?  We want your Christmas or winter cards to feature Christmas Elves, and I guess that includes the Chief Elf too!!  Here's my card:

Holiday Cheer - photo by Deborah Frings - Deborah's Gems

Stamps: Waltzingmouse - Cabin Plaid Background, Elf Made, Candy Jar Christmas Fillers
Inks: Stampin' Up! - Pear Pizzazz, Real Red; Versafine - Onyx Black
Dies: Spellbinders - Wonky Rectangles (S4-306) #5 and #6
Accessories: White Lustre Card; SU DP - Real Red; Copic Markers;  Wink of Stella - Clear and Gold; SU Marker - Basic Black


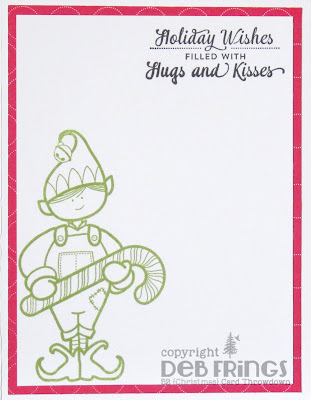
I decided to feature one of Santa's little helpers on my card and I have the perfect set of stamps too.  I stamped the background with a lovely plaid pattern.  I stamped the elf on white card, coloured him with Copic markers and then cut him out.  I ran a black marker around the edge to cover any white card.  I die cut a red panel and white panel for the centre of the card.  I stamped an elf made certificate on the white panel using a number of inks and then adhered it to the card.  I stamped the extra candy canes on white card, coloured them to match the one the elf is holding and then covered them clear Wink of Stella.  I stamped a Christmas greeting using my MISTI (love that machine) and then adhered the elf and candy canes. On the inside I cut a mat layer of red design paper and on the white panel I stamped another elf and a Christmas greeting.

Holiday Cheer inside - photo by Deborah Frings - Deborah's Gems

Do visit the blog to check out what the rest of the team have made.  I'm really looking forward to seeing what you make featuring Christmas Elves!!

By the time this post goes live, we will be on our way to Las Vagas airport to catch our flight home.  The week has gone really fast.  That's all for now, see you soon.

signature

Wednesday, 10 December 2014

TMR - Christmas ....

... Hello!  It's time for our new challenge at The Male Room.  Our challenge this week is really simple, we want to see your masculine styled projects with the theme of Christmas.  Here's my card:

Christmas Wishes - photo by Deborah Frings - Deborah's Gems

Stamps: Waltzingmouse - Tis the Season, Cabin Plaid Background, Elf Made
Inks: Kaleidacolor - Fruitcake
Dies: Spellbinders - Mega Rectangles Sm (S4-144) #3
Accessories: White Lustre Card; Stampin' Up! Card - Basic Black

This card came together so quickly.  I used the large plaid background stamp from Waltzingmouse, inked up with Fruitcake (very festive colours) and simply covered the whole of the card.  I think the plaid works really well for a masculine card.  I kept it simple by stamping a bold sentiment in the same colours, cutting it out with a die and layering onto some black card.  Simple!  On the inside I cut a mat layer of black card and a multicoloured greeting on the white panel.  Done! 

Christmas Wishes inside - photo by Deborah Frings - Deborah's Gems

For more inspiration with masculine themed Christmas cards - check out the blog and see what the rest of the team have made.  This is the last challenge this year, we're taking a break over Christmas and will be back with new challenges for you in 2015.  Have fun!


signature

Friday, 5 December 2014

Creepmas Day 3 ....

.... Good morning!  It's Day 3 of the Smeared & Smudged 12 Days of Creepmas.  If you look quickly at this card, it could almost pass as purely Christmas!  It would have to be a quick look mind!

Tinsel in a Tangle - photo by Deborah Frings - Deborah's Gems

Stamps: Rick St Dennis Digi - Creepmas Tree Monster; Reverse Confetti - Tinsel 'n' Trim; Waltzingmouse - Elf Made
Inks: Versafine - Onyx Black
Accessories: White Lustre Card; Anita's DP - Classic Christmas Red; Copic Markers; Vellum; Wink of Stella - Clear


I used the sketch from this week's Retro Sketches - RS#134 for the layout.  I used some design paper from my stash (it goes really well with my Creepmas tree monster).  I printed this guy on to some scrap paper, coloured him with Copic markers, added some sparkle to the ornaments, cut him out and finished him with chunky glitter on his hat.  If you like my Creepmas tree - you'll find him, and many more digis, at Rick's Zibbet shop.  On the inside I cut a mat layer in the same design paper and added a bold sentiment on the white panel.

Tinsel in a Tangle inside - photo by Deborah Frings - Deborah's GemsTinsel in a Tangle sq - photo by Deborah Frings - Deborah's Gems

Here's the list of all the folk playing along with the 12 Days of Creepmas - I'm off to check out what they've made.

 photo JollyBlogger2014_zpse7278384.jpg
Terra- Hop Hostess
Black Dragon
Maureen
Teresa
Julia
Sue The Nanny
Jane
Susan
Nan
Shell
Kim
Monique
Airless Chambers
Keren
Sarah
Leigh
Lisa
Lady Brayton

That's all for today - do come by tomorrow to see my new card for 52 {Christmas} Card Throwdown.  See you then!

signature

Monday, 1 December 2014

RSD - AC - Creepmas Day 1 .....

... Hello - good morning!!!  I think you all know by now that I really, really like Halloween.  Well, I've discovered my second favourite holiday - Creepmas.  We all know that the retail industry likes to get Christmas decorations and gifts in the shops early, well several years ago, in response to all this getting in the way of Halloween, many people decided to let Halloween creep into Christmas - Creepmas!!!  And this makes me happy - I can play with somewhat left of centre images and still have "Christmas" cards.

Today is the first day of the Smeared and Smudged 12 Days of Creepmas challenge.  I have the honour of being the first of Rick's team to share my project with you:

Be Good - photo by Deborah Frings - Deborah's Gems

Stamps: Rick St Dennis Digis - Creepmas Dolls, Creepmas Bones Senti; Waltzingmouse - Elf Made, Jolly Old Elf
Inks: Versafine - Onyx Black; Stampin' Up! - Gumball Green
Dies: Lil Inkers - Stitched Rectangles - #2, Stitched Squares #6
Accessories: White Lustre Card; Kaisercraft DP - Mistletoe; Copic Markers; Wink of Stella - Clear

I've used a couple of Rick's image on this card and you can get them at his Zibbet shop.  I printed the Creepmas Dolls onto white card, coloured with Copic markers and then fussy cut it out.  I added some shimmer to the image with my Wink of Stella brush in clear.  I went mad with the colours and did the toys eyes crazy colours.  I created the sentiment on the front by combining a couple of sentiments from Waltzingmouse.  I covered the front of the card with this red gingham paper and kept it quite simple by adhering just the digi image and sentiment.  On the inside of the card I used another sheet of design paper and added a fun Creepmas greeting.

Be Good inside - photo by Deborah Frings - Deborah's Gems

I've decided (very late) to join in too - so here's the full list of those playing along:

 photo JollyBlogger2014_zpse7278384.jpg
Terra- Hop Hostess
Black Dragon
Maureen
Teresa
Julia
Sue The Nanny
Jane
Susan
Nan
Shell
Kim
Monique
Airless Chambers
Keren
Sarah
Leigh
Lisa
Lady Brayton

I do hope I'm not too late and that I get added to the list!!  That's all for today!  See you soon.

signature

Tuesday, 18 November 2014

Snowflake Blues ...

... Good morning from a bitterly cold, but bright, Northville.  The arctic blast has really arrived in Michigan now - my friend in Kalamazoo has a snow day, sadly we don't have that here and Kathryn had to go to school!  Still the cold has put me in the mood to make another Christmas card:

Merry Christmas - photo by Deborah Frings - Deborah's Gems

Stamps: Uniko Studio - The Hands of Time; Stampin' Up! - Sassy Salutations; Waltzingmouse - Elf Made
Inks: SU - Brocade Blue; Distress - Shaded Lilac; Versamark; Versafine - Onyx Black
Dies: Uniko Studio - Snowflakes
Accessories: White Lustre Card; Blue Glitter Paper; Vellum; Clear Embossing Powder


I'm submitting this to the new Uniko Studio Challenge - USC#16, they've changed the rules a bit - you don't have to use Uniko Studio stamps anymore (although they'd love it if you do) on your project.  The theme for the new challenge is Anything Goes or Anything Goes with their sketch.  I used the sketch.  I stamped the large stamp in Versmark, heat embossed with clear powder and then inked over with lilac.  I then stamped a selection of smaller snowflakes over the card, added a greeting stamped on vellum and finished with a large blue glitter die cut snowflake.  I layered the white panel on blue glitter paper.  On the inside is a mat layer of blue glitter and on the white panel a Christmas greeting and more snowflakes.

Merry Chirstmas inside - photo by Deborah Frings - Deborah's GemsMerry Chirstmas sq - photo by Deborah Frings - Deborah's Gems

I have to say that this came together really quickly!  While we have the sun shining at the moment and no snow, the forecast is for snowy squalls blowing in this afternoon.


A quick screen shot from the weather forecast earlier this morning.  I'm not really complaining, we haven't got it half as bad as many in the States - some areas have had over 3 feet of snow overnight, and we're no where near that.

I think Ben and Sophie are finding the temperatures something of a shock.  I took them out yesterday and the walk between car and shop was a shock every time we did it!  Both the kids smoke and have to go outside if they want a cigarette, I have to say that if I were them, I'd definitely be thinking of giving up!!  Not sure what our plans are for today - maybe a quick trip to Northville before the snow arrives.  That's it for now - see you soon.


signature

Saturday, 15 November 2014

52CCT - Theme ...

.... Hello.  It's the middle of November - only five more Saturdays to go before Christmas!!  Oh, that sounds really close now :)))  I think I'd better tell you about our challenge at 52 {Christmas} Card Throwdown.  This week we have a theme challenge and Jacqueline has asked us to make a Christmas Window, here's my take:

Warm Winter Wishes - photo by Deborah Frings - Deborah's Gems

Stamps: Waltzingmouse - Flurries, Frosty in the Meadow, Elf Made
Inks: Versafine - Onyx Black; Stampin' Up! - Old Olive
Dies: Poppy Stamps - Grand Gothic Arch; Lawn Fawn - Stitched Hillside Borders
Accessories: White Lustre Card; SU Card - Smoky Slate; Anita's DP - Classic Blue Christmas; Clear Embossing Powder; SU Markers - Daffodil Delight, Early Espresso; Glitter and sequins; Acetate


I've seen shaker cards all over the Internet for the last few weeks, so I thought I'd make my Christmas window a shaker card.  I cut a panel of white card slightly smaller than the base and cut out the window shape (I've kept the white window frame for use later).  I put the panel onto the card base and lightly traced round the inside of the window frame.  I also cut a frame in grey which I attached to the white panel with double sided tape.  I cut a piece of acetate larger than the window and attached it to the tape.  I cut some snowy design paper to size and adhered it to the card base and stamped the trees.  On white card I stamped the little house, embossed with clear powder, cut it out and coloured the windows and doors.  I adhered this flat to the card.  Next I cut a white hill and adhered that flat.  I finished off with a large tree right in the foreground.  I put dimensional tape all the way round the stamped image (making sure there were no gaps) and finished by adding some glitter and sequins.  I put some dimensional tape at the corners of the window panel and a placed it on top of the foam ring.  And the shaker card works!!!! Yea!  On the inside I cut a mat layer of grey and stamped some more trees and a sentiment on the white panel.  Here's a close up of the window - you can really see the sparkle and shimmer of the glitter and sequins.

Warm Winter Wishes inside- photo by Deborah Frings - Deborah's GemsWarm Winter Wishes detail - photo by Deborah Frings - Deborah's Gems

Don't forget to visit the blog to see what the rest of the team have made using the theme Christmas Window.  And a reminder that we're still running our DT Call - you need to play along with all the challenge this month, simply add the initial DT after your name when you link up!  That's it for now.

signature

Saturday, 8 November 2014

52CCT - Colours ....

... Hello all!  It's time for our new challenge at 52 {Christmas} Card Throwdown and Jacqueline has some great colours for us to play with - RED AND GREEN, with either SILVER OR GOLD.  I had such fun with this challenge that I made two cards:

Ugly Sweater Red - photo by Deborah Frings - Deborah's GemsUgly Sweater Green - photo by Deborah Frings - Deborah's Gems

Stamps: Simon Says Stamps - Ugly Sweater, Sweater Words & Appliques; Waltzingmouse - Elf Made
Inks: Memento - Tuxedo Black
Dies: Spellbinders - Crown Ovals (S4-303) #3; SSS Dies - Sweaters; Impression Obsession - Christmas Lights (099K)
Accessories: White Lustre Card; Stampin' Up! Card - Real Red, Garden Green; Gold Mirri Card; Copic Markers; Wink of Stella Brush - Gold


I think you can see from the pictures that I opted to go with Red, Green and Gold.  When I was a kid we often had new sweaters just for Christmas, usually with a particularly Christmassy image and that was the idea for these cards.  I could have done lots more, but decided on a red sweater with a Christmas tree and a green one with Santa's face.  I stamped them on scrap card, coloured them with Copies and cut them out with the matching dies.  I stamped the face and tree separately, coloured them, fussy cut and adhered them to the sweaters.  I decided to layer them on these fun ovals and added a row of Christmas lights.  I finished the front with a fun sentiment.  On the inside I cut a mat layer to mat the sweater colour and stamped a simple Christmas greeting.

Ugly Sweater Green - photo by Deborah Frings - Deborah's GemsUgly Sweater Red inside - photo by Deborah Frings - Deborah's Gems

For more inspiration cards using our colours of Red and Green with either Silver or Gold, check out the blog to see what the rest of the team have made.

Don't forget that we're still running the DT Call.  If you want to be considered you need to play along with all the challenges this month, add the initals DT after your name when you link up!  That's all for now.  Have fun.

signature

Thursday, 6 November 2014

Non-traditional Christmas ...

....  Good morning!  This is my fourth attempt at making a card for this week's challenge at Less is More - LIM#196, where the team would like us to make a Christmas card with non-traditional colours.  Here's my take:

Christmas Day - photo by Deborah Frings - Deborah's Gems

Stamps: Woodware - Christmas Date; Waltzingmouse - Elf Made#
Inks: Memento - Tuxedo Black; Stampin' Up! - Pumpkin Pie
Accessories: White Lustre Card; SU Card - Tempting Turquoise; Copic Markers; Signo White Pen

Why is this the fourth attempt?  Well the first attempt was the card I posted on Monday, it's certainly non-trad colours, but includes lime green!  The second and third attempts are images that I coloured earlier this week, only realising at the end that I'd added red on one and green on the other!  Silly me!!

I CASEd Kath's card (she entered our 52CCT stash challenge), I really liked the stamp she used, so I got it.  Instead of Kath's traditional red and green, I went wild with colour.  I used Copic markers to colour the whole image.  Initially I used the colourless blender to remove the blue from the snow, but it wasn't very clear, so I used my white pigment pen to colour the snow.  I cut it out, edged it with a black marker and adhered it to the card with dimensional tape.  Before attached the image, I drew a frame by hand, to echo the frame on the image.  On the inside of the card I cut a mat layer of turquoise card and stamped a simple sentiment in orange on the white panel.

Christmas Day inside - photo by Deborah Frings - Deborah's GemsChristmas Day Sq - photo by Deborah Frings - Deborah's Gems

Not only have I been busy with card making, but I've also been editing photos from shoots that I did earlier this year - much earlier!!!  I'll share a few photos soon.  That's all for now - see you soon.

signature

Monday, 3 November 2014

Elf made ....

.... Good morning!  The clocks went back at the weekend and I really hoped that I'd sleep in on Sunday.  I woke at 7.15am - great result, sadly, that was old time and it was actually 6.15am!  The one thing I really hate about going back to winter time is the dark evenings - ugh!  Anyway, enough of that, I've got a fun Christmas card to share with you today:

Elf Made - photo by Deborah Frings - Deborah's Gems

Stamps: Waltzingmouse - Elf Made, Flurries
Inks: Memento - Tuxedo Black, Grey Flannel; Stampin' Up! - Lucky Limeade, Bermuda Bay, Melon Mambo, Wisteria Wonder
Dies: WMS - Stitched Tag #1 and #2
Accessories: White Lustre Card; SU Card - Bermuda Bay; Copic Markers; Cuttlebug EF - Ice Crystals; Glitter; Sequins

WMSFC#30 - photo by Deborah Frings - Deborah's Gems

I've used the sketch from this week's CAS(E) this Sketch - CTS#98 for the layout, but I've turned it through 90° to make a portrait style card.  I used the colours from our Waltzingmouse Fanatics challenge - WMSFC#30, and I was going to submit it to Less is More, but I just realised that it has some green in it!!  As there's a tag on this card, I'm also submitting it to the current Addicted to CAS - ATCAS#51 challenge where the cue word is Tag!  I embossed the background with ice crystals and adhered the panels directly to the card.  I stamped the little elf girl (my new Waltzingmouse set) on white card, coloured her with Copic markers, then cut her out and attached her with dimensional gel.  She actually has a bell on her hat and is holding mistletoe, but it's tough to cut around them so I cut them off!  I die cut the tag and stamped on the details, and then layered it onto a smaller turquoise tag.  I finished the front with some sequins.  On the inside is a mat layer of turquoise card and on the white panel a greeting and another elf girl.

Elf Made inside - photo by Deborah Frings - Deborah's GemsElf Made sq - photo by Deborah Frings - Deborah's Gems

That's it for now - see you soon.

signature
Related Posts Plugin for WordPress, Blogger...