Showing posts with label WMS - Candy Jar Christmas Fillers. Show all posts

Thursday, 15 July 2021

C24C - Sweet Treats ....

..... Good morning! I'm here with my card for our new challenge at Christmas 24 - C24C#038 where we want to see Christmas cards with the theme of Sweet Treats. I love peppermint candy canes that you can get at Christmas, so I made a jar of them for my card:


Stamps: Waltzingmouse Stamps - Candy Jar Christmas Fillers, Half Baked Gingerbread Joy, 2011 Holiday Ornaments
Inks: Versafine - Onyx Black; Gina K - Soft Stone
Dies: Gina K - Master Layouts 2; WMS - Jar Fillers
Accessories: SU Card - Real Red; White & Black Card; Clear Embossing Powder; Acetate; Copic Markers

I'm submitting this card to Happy Little Stampers Anything Goes with Dies Challenge - HLSAGD#07. I used dies to cut out the candy canes and to create the layers.


I've used some old favourite stamps on this card - sadly Waltzingmouse Stamps closed a while ago, but I love Claire's designs and they often come out for Christmas cards. I used red card to make the A2 (US size) side opening note card. I used Gina K's Master Layout 2 die set to cut the black mat layer and the white panel with the stitched edge. I stamped the jar directly on the white panel, and added a greeting. I stamped the jar again on some embossable clear acetate. I fussy cut the jar on the acetate panel and left a tab either side of the jar. On white card I stamped the candy canes, coloured them with Copic markers, and die cut them with the matching die. I adhered the canes with dimensional pads. I used a scalpel to cut down the side of the jar on the white panel. I slipped the tab into the cut and adhered the tab to the back of the panel. I adhered the whole panel to the front of the card. I like to make a clear jar to put over the contents - it's a fun look! On the inside, I cut a mat layer of black card and on the white panel added some more candy canes, a Christmas greeting and Mrs Claus's shop sign.


I took a photo of the jar to show the dimension with the clear acetate jar over the top of the candy canes.


That's all from me today. Do visit our blog - Christmas 24 Challenge - to see more inspiration from the rest of the team. See you soon.

signature photo Signature.png

Saturday, 10 December 2016

Christmas Candy ....

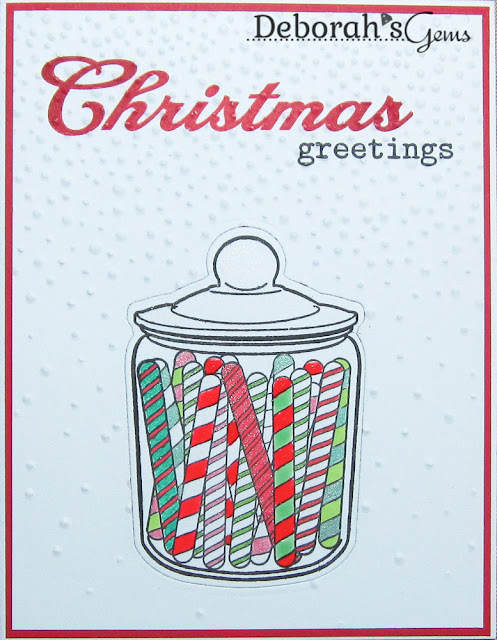
.... Hello! I hope you're all having a good weekend. I've been busy in my craft room this afternoon - still working on those few extra Christmas cards that I need. We're getting well into Christmas mode here at home - Jonathan has been playing his Christmas playlist - such fun and I've got a few decorations up. I still haven't put up the tree yet! Here's my card,filled with Christmas Candy:

Christmas Greetings - photo by Deborah Frings - Deborah's Gems

Stamps: Waltzingmouse - Candy Jar Christmas Fillers, Say It Loud Winter Holiday; Winnie & Walter - The Big, The Bold & Merry
Inks: Versafine - Onyx Black; Memento - Tuxedo Black; Stampin' Up! - Real Red
Dies: Waltzingmouse - Sweetie Jar
Accessories: White Lustre Card; SU Card & DP - Real Red; Copics; Kaisercraft Pens; Sakura Pens; Zig Pens; Spectrum Noir - Sparkle Brush Clear; SU/Sizzix EF - Softly Falling


I'm submitting this card to Merry Monday - MM#225 where they want to see CANDY CANES. Also to Just Us Girls - JUGS#373 where the trend week is JARS, and at Happy Little Stampers CAS Challenge - HLSCASDec where we pick a favourite challenge from this year - I've gone for INLAID DIES.

I pulled out an old favourite set from Waltzingmouse Stamps. I think this little jar is adorable and you can fill it with candy canes, as I've done here, or with peppermint candies. I stamped the jar and cut it out with the matching die and then coloured the candy canes using a variety of pens - I do like the colours and sparkle. I cut a panel of red card slightly smaller than the base and adhered to the base. I cut a white panel smaller still, stamped the greeting and die cut the jar. I removed the jar and embossed the rest of the panel with "falling snow". I attached the panel to the card and used strong glue to replace the candy jar in the space. On the inside I cut a mat of red design paper and on the white panel added a greeting and some more candy canes!

Christmas Greetings inside - photo by Deborah Frings - Deborah's GemsChristmas Greetings sq - photo by Deborah Frings - Deborah's Gems

I took a close-up of the candy jar showing all the different candy canes and all the sparkle too! Sorry about the photos - it really is grey and has is now dark! I hate the early nights.


I've just realised that this card works for the current Inkspirational Challenge - INK#123 where the team wants a CAS card with sparkle - I think this counts! That's all for now.

signature

Saturday, 24 September 2016

52CCT - Technique .....

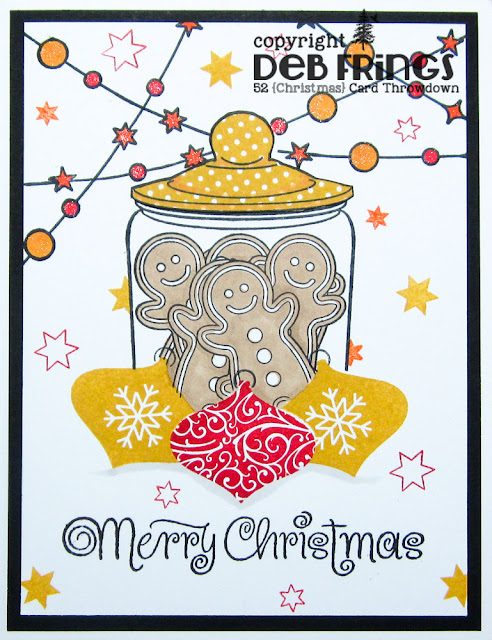
.... Hello! We've come to the last Saturday of the month, so that means it's time for our technique challenge at 52 Christmas Card Throwdown - 52CCT38-16. Fabiola has picked a really fun technique for us to use this week - MASKING. This technique allows you to build depth into your card without adding too many layers - great for posting. Here's my card:

Merry Christmas - photo by Deborah Frings - Deborah's Gems

Stamps: Waltzingmouse - Candy Jar Christmas Fillers, 2011 Holiday Ornaments; Winnie & Walter - Party Hangover; Clearly Besotted - All Occasion Sentiments; Stampin' Up! - Watercolour Wishes
Inks: Versafine - Onyx Black; SU - Real Red, Hello Honey, Pumpkin Pie, Soft Suede
Accessories: White Lustre Card; SU Card - Basic Black; SU DP - Real Red; Copics; Wink of Stella - Clear


I've used the colours from this week's Colour Q Challenge - cQc#360 for my card. I'm also playing along with Addicted to Stamps and More! - ATSM#212 where they want us to make our mark. I pulled out some much loved Waltzingmouse stamps to create the jar of gingerbread kids with pretty Christmas ornaments in front of them. I used scrap paper to work out the layout and to determine which order to stamp the images. The red ornament was stamped first as it is foremost in the picture. Using masks I continued to stamp the other ornaments and then the jar of cookies. I created the lid added another mask and then stamped the decorations. I coloured the cookies and decorations with Copic markers. I finished the front of the card by stamping the greeting and adding some sparkle with a clear Wink of Stella brush to the decoration. On the inside I cut a mat layer of red design paper. On the white panel I added a sentiment along with some more decorations and a little gingerbread kid.

Merry Christmas inside - photo by Deborah Frings - Deborah's GemsMerry Christmas sq - photo by Deborah Frings - Deborah's Gems

Do visit our blog for some more inspiration with the masking technique. You've got plenty of time to join in with us - deadline for submission is midnight BST (7.00pm EDT) Friday 30th September. Have fun!

signature

Saturday, 20 June 2015

52CCT - Theme ....

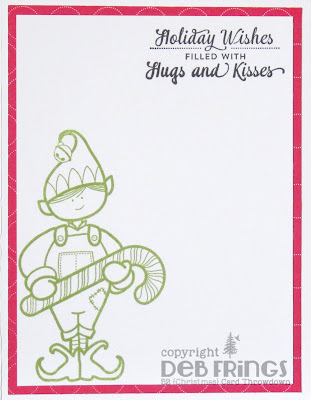
......  Morning!  It's time for our new challenge at 52{Christmas} Card Throwdown.  This week is our theme challenge and Danielle picked it before she stepped down from the team.  I really love the the theme, so I'm hosting today - what's the theme?  We want your Christmas or winter cards to feature Christmas Elves, and I guess that includes the Chief Elf too!!  Here's my card:

Holiday Cheer - photo by Deborah Frings - Deborah's Gems

Stamps: Waltzingmouse - Cabin Plaid Background, Elf Made, Candy Jar Christmas Fillers
Inks: Stampin' Up! - Pear Pizzazz, Real Red; Versafine - Onyx Black
Dies: Spellbinders - Wonky Rectangles (S4-306) #5 and #6
Accessories: White Lustre Card; SU DP - Real Red; Copic Markers;  Wink of Stella - Clear and Gold; SU Marker - Basic Black


I decided to feature one of Santa's little helpers on my card and I have the perfect set of stamps too.  I stamped the background with a lovely plaid pattern.  I stamped the elf on white card, coloured him with Copic markers and then cut him out.  I ran a black marker around the edge to cover any white card.  I die cut a red panel and white panel for the centre of the card.  I stamped an elf made certificate on the white panel using a number of inks and then adhered it to the card.  I stamped the extra candy canes on white card, coloured them to match the one the elf is holding and then covered them clear Wink of Stella.  I stamped a Christmas greeting using my MISTI (love that machine) and then adhered the elf and candy canes. On the inside I cut a mat layer of red design paper and on the white panel I stamped another elf and a Christmas greeting.

Holiday Cheer inside - photo by Deborah Frings - Deborah's Gems

Do visit the blog to check out what the rest of the team have made.  I'm really looking forward to seeing what you make featuring Christmas Elves!!

By the time this post goes live, we will be on our way to Las Vagas airport to catch our flight home.  The week has gone really fast.  That's all for now, see you soon.

signature
Related Posts Plugin for WordPress, Blogger...