Showing posts with label Memento Inks. Show all posts

Saturday, 9 November 2013

52CCT - Snowflake kisses ....

... Good morning everyone!  It's time our new challenge at 52 {Christmas} Card Throwdown and Louise has picked a monochromatic colour theme for us!  I had lots of fun with these colours and here's my card:

Snowflake Kisses - Photo by Deborah Frings - Deborah's Gems

Stamps: Uniko Studio - Stunning Snowflakes, All Occasion Sentiments #4
Inks: Memento - London Fog, Grey Flannel; Stampin' Up! - Smoky Slate; Versafine - Onyx Black
Dies: Unkio Studio - Snowflakes
Accessories: White Lustre Card; Black Glitter Card; Gunmetal Grey Satin Card


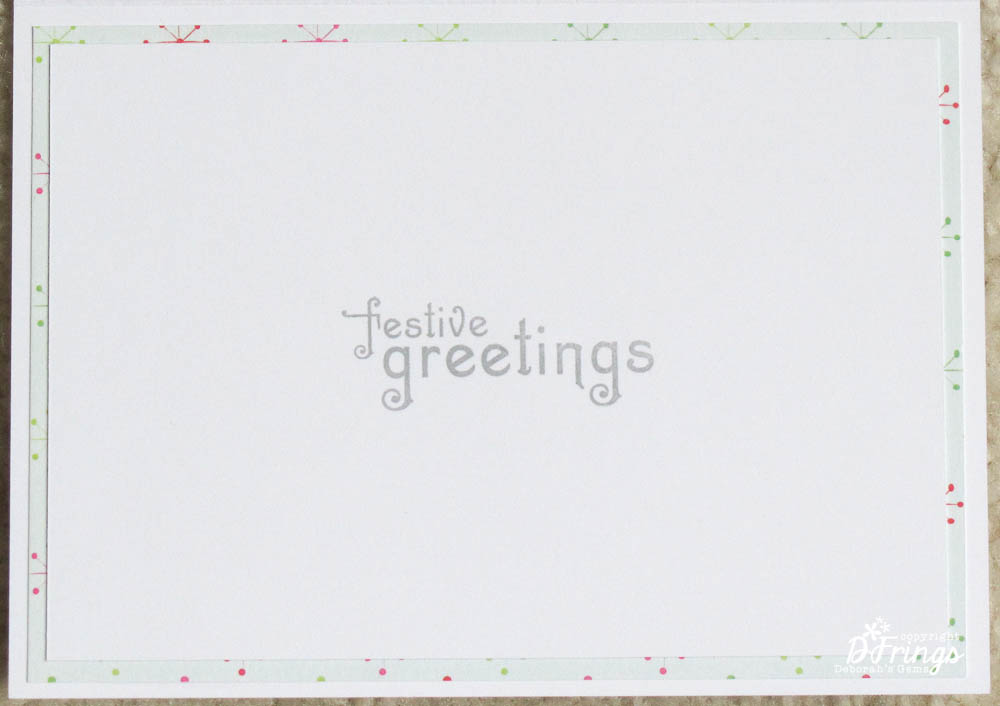
I've another snowflake card to share with you today - I just love this set from Beverley.  I used the layout from Clean & Simple Stamping - FTL265, so versatile.  I cut a panel of white card and edged it with strips of gunmetal grey satin card - it looks black in the photo, but in real-life it is definitely grey.  I stamped snowflakes all over the card using three shades of grey.  I die cut three snowflakes, attaching the two darker ones directly to the card base and used dimensional tape for the white snowflake.  Inside I cut mat layer of the grey card and stamped more snowflakes all over the inside, as well as a very big and bold sentiment.

Snowfalke Kisses inside - Photo by Deborah Frings - Deborah's Gems

Don't forget to check out the rest of the team's inspiration cards - they are all just lovely.  We are off to see Thor today - I've really been looking forward to this movie and will post a review later this weekend.  That's all for now - have a good weekend!

Tuesday, 29 October 2013

ASM - Round the Clock .....

.... Good evening everyone!  It's time for our new challenge at Addicted to Stamps and More! - ASM#69 - it's our CAS week.  It seems our colours last week weren't very popular, but hopefully you'll enjoy this one more!  Here's my card:


Stamps: Stampin' Up! - Gorgeous Grunge; Uniko Studio - Extra Time
Inks: Memento - Peanut Brittle, Toffee Crunch, Pistachio, Espresso Truffle; SU - Sahara Sand
Accessories:  SU Card - Sahara Sand; White Lustre Card; Twine

Once again, I've gone with a more masculine card and, you've guessed it, this is another for my son Ben.  I've used a couple challenges to make it:

I really like the colours on the Uniko challenge graphic.  I cut a panel of Sahara Sand card for the mat and on the white layer I stamped the distressed stripes along the top of the card, a clock at the bottom right and a simple sentiment.  I wound some twine around the top of the card.  I adhered the white panel to the card with dimensional tape.  The inside has a mat of Sahara Sand and some more distressed stripes and space for a message to Ben.  I'm not sure whether this has enough white space for Chrissie and Jen, but it is really clean and simple!


I have CASed a card I saw on Debbie Blake's blog - she made a set of rainbow cards with the Gorgeous Grunge stamps.  I love the rainbow colours, but actually the style works really well with these colours too!  That's all for now.  See you soon.

Monday, 9 September 2013

Birthday invitations .....

.... Morning - I was busy making Kathryn's birthday invitations yesterday - she's having her party on Saturday 14th, so I've left it a bit late!!  However, it shouldn't be a problem as she and her friends have been discussing it for a while!  I used the theme from this week's CAS- Colours & Sketches Challenge - CASC&S41 - rainbow colours.  Here are the cards I made:


Stamps: Lil Inkers - Notebook Doodles; My Favourite Things - Just the Ticket, Playlist, For the Record
Inks: Memento - Tuxedo Black; Stampin' Up! - Real Red, Pumpkin Pie, Daffodil Delight, Pacific Point, Garden Green, Pool Party
Dies: Lil Inkers - Notebook
Accessories: White Lustre Card; Various Copic and Sakura Stardust pens; SU Markers - Basic Grey, Real Red, Basic Black


This is the first time I've inked up the doodle stamps.  I used Copics and Sakura Stardust pens to colour in the doodles, it was such fun!  Then I cut out eight notebook pages and stamped on the lines.  For the words on the pages I used a mixture of stamps from My Favourite Things and some of the doodle images.  The reverse of the invitation gives details of the party:


I've blanked out the address and telephone number.  Each card is slightly different; I used different colours to stamp "legit" and "OMGEE!" on each card.  I put each invitation card into a glassine envelope and added a name label.


Below are the other three invitation cards - as you can see - there are a few subtle differences between them.


That's all for now.  I've got a really busy day lined up - sadly all involving housework.  My ironing basket is piled high - so I'll be doing it all in front of the TV and watch a movie at the same time.  See you soon.

Wednesday, 31 July 2013

One for four ....

... Good afternoon from a somewhat dull, grey and rather humid Northville! Not easy to take photos when it's like this, so please excuse the photo!  I've made a card and managed to use four challenges to make it, and they are:


Stamps: Sweet Stamp Shop - Chemistry
Inks: Memento - Tuxedo Black
Dies: Lil' Inkers - Instant Camera Die
Accessories: Stampin' Up Card - Smokey Grey; Promarkers - Cyan, Sunflower, Pumpkin, Cool Grey 1 & 3; White Lustre Card


The Male Room is a new challenge that launched today and, as the name says, focuses on projects for Men/Boys.  I know that lots of people aren't too keen on guy cards, but I really enjoy making them, so I had to play along with their inaugural challenge - it's an easy one too - as Anything Goes!!!  I've also managed to play along with Muse this week - just love Lynn Mangan's inspiration card and have used the layout for my card.  This week's Colour Throwdown challenge are bold and bright and I think perfect for a guy card.  Finally, I'm submitting this to the Sweet Stamp Shop challenge to "Use What you Have".  I've have a super stash of SSS stamps and I've had the chemistry set for a while (I'm a science nerd) and haven't inked it up before, so that's the one I'm using!  I'm trying to build a stash of cards to send to Ben - I try to send one a week - and I think he'll like this theme!

I cut the Camera die twice - once in grey and one in white.  I stamped the flask image directly onto the white panel, used the second impression and then coloured it with Promarkers.  I stamped the chemical symbols onto another scrap of card and cut them out and adhered them over the flask.  I stamped the bulb onto some more scrap, coloured with Promarkers and adhered it to the card with dimensional tape.  I love the fun sentiment - Ben might think it means him :))  Here's a photo of my SSS stash - got lots of ideas for the new ones!


Well, I think that's all for today.  I've off to get dinner ready.  Kathryn is having a friend over for a sleepover tonight - she's so excited!!

Saturday, 20 July 2013

A Christmas recipe ....

.... Hello!!  Patricia has a lovely challenge for us this week at 52 {Christmas} Card Throwdown - it's a recipe.  She'd like us to make a card using the following recipe:
  • One ribbon
  • Two design papers
  • Three gems - they can be crystals, pearls or a combination
Here's my take on the challenge:


Stamps: Waltzingmouse - Compliments of the Season II
Inks: Memento - London Fog
Dies: Spellbinders - Labels 20 (S5-026) # 4
Accessories: Papermania - Festive Frolics DP; Cuttlebug EF - Snowflakes; WMS - Lace Ribbon; K & Co Chipboard Letters; White Lustre Card; Gems
 

I was a bit stumped by the recipe at first, but once I decided to spell out the word "JOY" - it was much easier to work out how to use the two papers!  I picked two patterns Festive Frolics (I've had this pad a while) and decided to use the red paper for the background and to cover the letter "O"; I used a paler green for the letters "J and Y".  The chipboard letters came in a pack with decorations, so I first had to remove the gems and sand off the paper and glitter.  I ran my selected DPs through my Xyron and adhered the paper to the letters.  Using my scalpel I cut off the excess and sanded off the edges to make sure that the papers wouldn't lift off the letters. I added this pretty white lace ribbon to the card and over the top I put the die cut shape which I'd embossed with snowflakes.  I adhered the letters with Glossy Accents and applied three gems!

For the inside I used some more of the pale green paper to make a mat layer and stamped a simple sentiment in pale grey on the white panel.


Do go to the 52 {Christmas} Card Throwdown blog to check out the inspiration cards from the rest of the Design Team - they are just awesome!

That's all for now - hope you have a super weekend.  Bye for now.

Saturday, 15 June 2013

Christmas Ornaments ....

..... or baubles - whatever you want to call them.  Those wonderful jewels that hang on our Christmas trees.  This week's challenge at 52 {Christmas} Card Throwdown is a theme to feature Christmas Ornaments/Baubles on your cards.  Here's mine:


Stamps: Waltzingmouse - Vintage Ornaments, Ornate Ornaments, Yonder Star
Inks: Memento - London Fog; Stampin' Up! - Night of Navy, Bashful Blue; Versamark
Dies: Spellbinders - 2012 Heirloom Ornaments (S5-116) #4
Accessories: Silver Foil Card; White Lustre Card; Silver Embossing Powder; Luminarte - Radiant Rain Mist Ice; Habico - Blue Bow


I have to give credit for the idea of using the ornaments on the background to Elizabeta Kushner - she made this wonderful card.  My card was really easy to make.  I simply started stamping the ornament in the middle of the card and worked out.  I made a mask to cover the ornament so that I could stamp the sun ray pattern inside.  I mounted the background paper onto a silver mat.  To complete the front I stamped the ornament again on white card and embossed with silver powder.  After cutting out with the matching die, I used my aqua pen to paint the ornament.  I added a sentiment and attached the ornament with dimensional tape and finished off with a dark blue and silver bow!

I kept the inside quite simple; a silver mat layer and stamped a sentiment and sun ray patterns on the white panel.  I think this design would work nicely with gold and red too!


I've scheduled this post - so hopefully it has gone up as planned!  Kathryn and I are in the UK now - a busy month planned visiting family and friends.  I do hope to have Internet access and be able to visit you - can't wait to see what you make!  Don't forget to check out the Design Team's cards.  Bye for now.

Sunday, 9 June 2013

Wheely!!!

... Good morning - a very quick post this morning to share a card that I've made for this week's CASology - CAS47 challenge.  The cue word this week is "WHEELS" and I've gone for a slightly relaxed view of wheels:


Stamps: Stampin' Up! - Summer Afternoon, Pursuit of Happiness
Inks: Memento - Tuxedo Black
Dies: Spellbinders - Eyelet Squares (S4-305) # 3, Squares Sm (S4-128) #5
Accessories:  SU Card - Pacific Point; Copics; White Lustre Card


The wheels in this image are so relaxed, they are stationary!!  I really like the image - so sweet, and I thought it went really well with the sentiment to pause and take time to "just be happy".  I stamped the image in Memento ink, coloured with Copics and cut it out with the dies.  I mounted the finished image onto a funky blue frame.  I finished off with the simple sentiment.

Yesterday afternoon I was out at a photo shoot with Jonathan - it's the first time I've gone to a proper shoot!!  We went to a pool party - nine models and a whole lot of photographers - all trying to take photos.  It was brilliant.  I learnt such a lot about taking photos and I'm sure my next shoot will be better.  I plan to go through the photos today and select a few to put up on Flickr, as well as a few here.  That's all for now.  See you soon.

Wednesday, 22 May 2013

Christmas - Merry & Bright ....

...  Hi again - I've got five cards to share with you this afternoon.  They are all for the current Jingle Belles Challenge - JB13:10 to use bright colours on the cards.  These colours are really bright, in fact they are fluorescent!!  I recently purchased the Hero Arts neon inks and I think they're just perfect for this challenge.  I've made two mini sets - one set at 6¼" × 4½" and the other set at 5½" × 4¼".  Here they are:


The two cards above are the larger ones. 


Stamps: Waltzingmouse - Yonder Star Background, Ornate Ornaments
Inks: Hero Arts - Neons: Pink, Orange, Blue, Green; Memento - Tuxedo Black; Versamark
Dies: Spellbinders - Heirloom Ornaments 2012 (S5-116) #4, Labels 4 (S4-190) #3, Romantic Rectangles (S5-090) #3, A2 Fancy Weave (S5-136) #2
Accessories:  Black card; Black embossing powder; Copics - FRV1 (Pink), FB2 (Dull Blue), FYR1 (Orange), FYG2 (Dull Green); White Lustre Card


I love the graphic that the girls gave us for this challenge - that's why I picked Christmas ornaments.  The larger set are the result of an accident while stamping - I inadvertently stamped on both sides of the card!!  Yes, I know - how did I do it??  Not a clue.  Anyway, I simply cut the card in half and layered onto some black card and then onto white card bases. The ornaments were all stamped in Versamark and heat embossed with black powder to give a lovely glossy finish.  I then coloured each ornament with my new fluorescent Copics.  I cut a number of different backgrounds to go behind the ornaments so that they would stand out against the bright backgrounds.  And in the spirit of total openness, the reason two of the cards have different sentiments is because I stamped the original sentiment upside down!!!  Actually I rather like the bold coloured sentiment - I simply coloured them while still in the die with the chisel end of the Copic - worked a treat.  I kept the inside of all the cards really simple - a black mat with white panel on which I stamped a bold sentiment.

That's all for now - it's time for lunch.  See you tomorrow.

Thursday, 9 May 2013

Shades of love ....

... Hello everyone - I've got a really busy day lined up today.  I'm off to the Great Lakes Mega Meet at the Suburban Showcase in Novi.  I found this show by accident last year, but this year I found it deliberately!!  I've signed up for a couple of classes about colouring with Copics and a class about Zentangles.  I've been fascinated by Zentangles and I've seen some beautiful ones drawn by Susan G and Paula P - and I'm finally going to have a go myself.

In the meantime, here's a card I made for a couple of challenges:

Stamps: Sweet Stamp Shop - Colour Wheel
Inks: Memento - Tuxedo Black
Accessories: White Lustre Card; Copics - Y0000, Y00, Y13, Y18, V0000, V20, V22, V25; White twine


First of all - this is card does not have a violet border - that's just the mat it was on when I took the photo!  I decided to have another go at the Less is More challenge and this time I picked violet and yellow.  I thought I'd play with the colour wheel as I have this super stamp.  I stamped it in memento ink and coloured the two wedges with my Copics.  Next I cut a small panel of white card and layered the colours from each end to meet in the middle with the palest of each - the colours are not as fluorescent as they appear in this photo - I'll post a new picture tomorrow!  I stamped the sentiment onto a smaller bit of card and attached it to the main panel and finished by wrapping some white twine around the panel.  I attached the panel with dimensional tape.  A clean, simple and reasonably quick card to make.  It was lots of fun.

That's all for now - I'm off out now - should be so much fun.  Interesting classes, lots of stalls with so many goodies - but I'm not coming back with anything new ;)))))  See you!

Wednesday, 8 May 2013

Complementary birthday card ....

.... Morning - it's another gorgeous day here in Northville and I've managed to get a hour in my craft room this morning and made a birthday card for a couple of challenges:


Stamps: Verve - Polka Stars; CAS-ual Friday Stamps - Bold Wishes
Inks: Memento - Danube Blue, Tangelo
Dies: Lil' Inkers - Stitched Squares # 6 & 7
Accessories:  White lustre card


The challenge at CAS-ual Friday is such fun - they've given us a grid and we have to pick a line - I selected the line that included: polka dots, square card and birthday - yep!!  And at Less is More the ladies want us to make a CAS card using colours from opposite sides of the spectrum wheel.  I nearly went for green and red, but decided that these polka dot stars needed orange and blue!!  This card was very easy to make - stamping the stars onto white card, cutting them out and attaching them to the card.  The two orange stars have been given a little dimension.  For the inside I used the huge "Wish Big" stamp - love it!


That's all for this morning - off out to the shops and then I've got a huge pile of ironing to do - better find a good movie to watch while I do it.  See you soon.


Related Posts Plugin for WordPress, Blogger...