Showing posts with label Stampin Up. Show all posts

Thursday, 31 July 2014

Cards from SU class ...

....  Hello!  I thought it was time that I shared the cards that we made at our last Stampin' Up! Get together with Karin, Julie and the rest of the team.  As always, we had lots of fun.  The first card is a super clean and simple design inspired by Julie Freysinger.

Happy Birthday - photo by Deborah Frings - Deborah's GemsHappy Birthday inside - photo by Deborah Frings - Deborah's Gems

Stamps: Stampin' Up! - Endless Birthday Wishes, Gorgeous Grunge
Inks: SU - Real Real, Daffodil Delight, Pumpkin Pie, Pacific Point
Dies: SU/Sizzix - Little Letters Framelits
Accessories: SU Card - Whisper White, Daffodil Delight, Pacific Point

On the smaller piece of white card I used the framelits to cut out the word "Happy" and stamped birthday beneath.  On the larger white panel I stamped the striped image from Gorgeous grunge following a rainbow pattern, then I attached the smaller panel with dimensional tape.  The whole panel was layered onto yellow card and then attached to the blue card base.  On the inside I stamped a birthday cake and sentiment.  Such a fun card and would work in monochromatic colours too.

Next we made a very non-traditional baby card CASEd from a card by Martha Inchley.  We used two of the new in colours - Hello Honey and Blackberry Bliss, although you could easily make this card using traditional blue and pink.

Congratulations - photo by Deborah Frings - Deborah's GemsCongratulations inside - photo by Deborah Frings - Deborah's Gems

Stamps: Stampin' Up! - Something for Baby, And Many More
Inks: SU - Hello Honey, Blackberry Bliss
Dies: SU/Sizzix - Baby's First Framlits
Accessories: SU Card - Whisper White, Blackberry Bliss, Hello Honey; SU DP - Moonlight; SU Punch - 1¾" Circle; SU Ribbon - Blackberry Bliss; SU Markers - Black, Pumpkin Pie

It was so easy to do the little duck, I inked the image with Hello Honey, wiped off the bill and then coloured the bill with an orange marker and stamped.  I added a tiny dot for the eye and then cut it out with the matching die.  I do like these bold, non-traditional colours. 

Next we made a screen card - I've seen so many fabulous versions on the Internet and thought it would be hard to make, actually it's not bad at all.  This one is CASEd from Frenchie Martin

Happy Birthday Screen - photo by Deborah Frings - Deborah's Gems

Happy Birthday Screen inside - photo by Deborah Frings - Deborah's Gems

Stamps: Stampin' Up! - Traveler, Any Many More
Inks: Stazon - Jet Black

Accessories: SU Card - Crumb Cake, Basic Black, Very Vanilla; SU DP - Typeset; SU Punches - Modern Label, Word Window, Decorative Label, Circle 1"

This is actually very easy to make and Frenchie has a super video on her blog showing how to make the card - click here to check it out. 

The last card we made is my favourite - I just love this set!!

Kindness - photo by Deborah Frings - Deborah's GemsKindness inside - photo by Deborah Frings - Deborah's Gems

Stamps: Stampin' Up! - Kinda Eclectic
Inks: SU - Mossy Meadow, Hello Honey, Lost Lagoon, Tangelo Twist, Blackberry Twist
Dies: SU/Sizzix - Banner Framelits
Accessories: SU Card - Mossy Meadow, Hello Honey, Whisper White; SU Punch - Elegant Butterfly, Bitty Butterfly

This card is CASEd from Heather's card.  I love the collage effect of these stamps, they work together perfectly. On the white panel we stamped the sun and leaf images and on some scrap white card stamped the two butterflies.  The banner was made by stamping the dotty image and sentiment and then cutting out with the banner framelit.  The butterfly is layered, has a pearl decoration and adhered with dimensional tape.  The sentiment flag is attached with tape.  On the inside I added a couple of butterflies, but left space for a message.

I have to admit that when I first saw the new in colours, I wasn't taken by them.  However, having used them on these cards I think they're fab!  I particularly love Blackberry Bliss and Mossy Meadow.

That's it for now.

signature

Friday, 20 June 2014

Stampin' Up! CASE cards ....

....  So much for getting back into a routine now that Mum is back in the UK!!!  Kathryn finished school last Thursday for her long, long summer break and while I had planned to stick to my routine - it's sort of fallen by the wayside!!!  And I can't really blame Kathryn, I think it has more to do with the Football World Cup in Brazil - I've been watching it - a lot!!!  So today's cards were actually made at a recent Stampin' Up! get together run by Karin.  I had lots of fun.

The first card is a masculine card with a vintage, nautical theme.  It's a CASEd (Copy and Share Everything) card based on Georgia Giguere's lovely card. We changed the white card she used to Very Vanilla, giving a more vintage feel.  The rest of the group made their card into a Father's Day card, but I decided I needed another masculine birthday card.

Nautical B'day - photo by Deborah Frings - Deborah's GemsNautical B'day inside - photo by Deborah Frings - Deborah's Gems

Stamps: Stampin' Up! - Open Sea, Endless Birthday Wishes, And Many More
Inks: SU - Sahara Sand, Early Espresso, Marina Mist
Dies: SU/Sizzix - Deco Labels Framelits, Circles Framelits
Accessories: SU Card - Crumb Cake, Marina Mist, Very Vanilla; Essential Paper Piercing Kit; Candy Dot Brads; Window Sheets

Next we made a really fun birthday card with a cute image and pun sentiment.  This one was CASEd from Lori Hellig's card.  This is pretty much as she made it, but with a variation in the design paper.  Every card looked different depending on where you punched out the circles to create the "cheese" layer.  We added a bit of dimension by shading around the cut out circles.  I coloured the image on the front of the card with Blendabilities, which I found bled just a bit, but I like the colours.  On the inside I used my Copic markers which didn't bleed, but don't quite match the card colour.

Cheese Card - photo by Deborah Frings - Deborah's GemsCheese Card inside - photo by Deborah Frings - Deborah's Gems

Stamps: SU - Giggle Greetings
Inks: Memento - Tuxedo Black; SU - So Saffron
Dies: SU/Sizzix - Circles Framelits
Accessories: SU Card - Lost Lagoon, Hello Honey, So Saffron, Whisper White; SU Circle Punches 1", ¾" and ½"; SU DP - Moonlight; SU Blendabilities (image on front card); Copic Markers (inside image)

Next we used the fabulous Swallowtail stamp, this card is CASEd from Jan Tink's wonderful card.  Not only do we use the beautiful butterfly, but also my other favourite new SU set - Work of Art.  The only real change here is that we only used three little flags for the greeting.  The butterfly was "coloured" by using second generation impressions from various Work of Art stamps.  I can see this card working in lots of other colours.

Butterfly - photo by Deborah Frings - Deborah's GemsButterfly inside - photo by Deborah Frings - Deborah's Gems

Stamps: SU - Swallowtail, Work of Art, Gorgeous Grunge
Inks: SU - Blackberry Bliss, Lost Lagoon, Hello Honey
Dies: SU/Sizzix - Banners Framelits (you), Hearts a Flutter (Just for)
Accessories: SU Card - Sahara Sand, Blackberry Bliss, Lost Lagoon, Whisper White, Hello Honey; SU Ribbon - Hello Honey; SU Gems

Our last card was a super clean and simple thank you card based on Susan Itell's CAS creation.  We switched up the colours and papers used, and I can see this working layout working for so many cards!  I used an aqua brush to paint on Blushing Bride ink and allowed it to dry.  Then it was simply a case of stamping the sentiment and adding the little flowers and gems.  I covered the envelope flap with some design paper; such a good way to use up scraps of paper. 

Thank You - photo by Deborah Frings - Deborah's Gems

Stamps: SU - Watercolour Thank You
Inks: SU - Night of Navy, Blushing Bride
Accessories: SU Card -Whisper White, Night of Navy; SU DP - Flower Pot; Itty Bitty Punch Pack; SU Pearls

I spent yesterday afternoon watching the England v Uruguay match.  I started with a feeling of optimism for an England win, but it was just awful!  We ended up losing the match with a score of 2 - 1 to Uruguay.  It looks like England is heading home unless something really strange happens in the last few matches.  So it looks like I'm going to be supporting USA now!  Sorry, I know this is totally off topic ;)

I think we're off to the cinema today to see either Maleficent or How to Train Your Dragon 2.  I think it depends on what time Kathryn gets up!  That's all for now.  See you tomorrow!

signature

Saturday, 8 March 2014

WMSFC/52CCT - Take two ....

...  Hello again!  I've another card to share with you this morning.  Once again it's based on our sketch at Waltzingmouse Fanatics and our colours at 52 {Christmas} Card Throwdown.  After I'd finished my earlier card for 52CCT/WMSFC, I made this card:

Sparkly Stuff - photo by Deborah Frings - Deborah's Gems

Stamps: Waltzingmouse - Sewing Box Christmas, Faux Fun; Reverse Confetti - Tinsel 'n' Trim; CAS-ual Friday Stamps - Christmas Carols
Inks: Stampin' Up! - Crumb Cake, Cherry Cobbler, Calypso Coral, Island Indigo; Versafine - Onyx Black
Accessories: White Lustre Card; SU DP - Cherry Cobbler; Buttons


I think this goes to show just how versatile the colours and the sketch are!  This time I kept it quite clean and reasonably simple.  I stamped the knit pattern twice onto white card and then carefully cut the zig-zag to follow the stitches, attached the kraft stitches to the coral ones and then adhered them to the card.  I stamped the tree onto white card, very, very carefully cut it out and than ran it through the Xyron to make it self-adhesive.  I stamped the tree pot onto some cherry DP and layered it onto the image.  I stamped a really fun sentiment at the top and finished the tree with button baubles!  On the inside I used more of the cherry DP to make a mat and on the white panel I stamped some snowflakes and a sentiment.

Sparkly Stuff inside - photo by Deborah Frings - Deborah's Gems

I'm submitting this card to the Merry Monday challenge - MM#98 as they want to have country charm with some stitching, yes - although it's faux, and some buttons - yes - lots!  For more inspiration with our sketch check out Tara's card. 

You have plenty of time to play along; the deadline is Thursday 20th March, 5.00pm GMT (that's 1.00pm EDT).  For just this challenge the UK is only 4 hours ahead of Eastern Daylight time, as their clocks don't go forward until 30th March!!!  Looking forward to seeing your creations with our sketch.

I'm having a very crafty weekend.  Last night I was at a Gelli Plate Journal class run by Amy Flowers - I'll share pictures later in the week.  And today, I'm at a couple more of Amy's classes - the first is Watercolour & Rubber Stamps 201 which should really interesting, and then later in the afternoon it's Layer Cake Collage - making a canvas with collage techniques, acrylic paints and pan pastels.  On Sunday, my crafty activity is photography - this has now become a family hobby.  Kathryn has discovered that she likes photography - and she's good!  That's all for now.  Have a good weekend!

signature

Friday, 7 March 2014

You make me happy ....

...  Hello!  This morning I have a clean, simple and bright card to share with you.

Happy - photo by Deborah Frings - Deborah's Gems

Stamps: Stampin' Up! - Petal Parade, See Ya Later
Inks: SU - Daffodil Delight, Lucky Limeade
Dies: Spellbinders - Lotus (S4-269); SU - Word Bubble Framelits
Accessories: White Lustre Card; SU Card - Lucky Limeade


This week at Less is More - LIM#161 they have a colour challenge to use GREEN and YELLOW, such bright, fresh, springlike colours.  I'm also submitting this card to MUSE - MUSE#57 where Vicki Dutcher is the Muse.  I stamped the leaves directly on the card, and stamped the flower and sentiment onto some scrap white card.  I die cut the Lotus doily and the sentiment.  I cut the flower out by hand.  On the inside I cut a mat layer of lime card and stamped some flowers on the white panel. 


I'm not entirely happy with this card - I really should have stamped another row of leaves above the one on the card.  But by the time I realised that I'd already attached the doily, sentiment and flower, so it'll just have to do!  That's all for now. 
signature

Thursday, 6 March 2014

Enjoy the ride ....

.... Hello everyone!  There are some fab challenges about at the moment, and perhaps it's because we're all fed up with winter that there are so many challenges with bright, cheerful colours!  I've a fun card to share with you this morning:

Enjoy the Ride - photo by Deborah Frings - Deborah's Gems

Stamps: The Craft's Meow - Life is a Carnival
Inks: Stampin' Up! - Real Red, Daffodil Delight; Versafine - Onyx Black
Accessories: White Lustre Card; SU Card - Lucky Limeade; Promarkers


I used the cue word from this week's CASology - CAS#85 "Carnival" and the colours from Colour Throwdown - CTD#282 which I think are just perfect for a carnival card.  When I saw the cue word I knew that I'd be using this set from The Craft's Meow; I've had the set for a month or so but this is the first time it's seen ink!  I stamped the carousel onto scrap white card, coloured it with Promarkers and cut it out.  I stamped the sentiment in red to echo the pennant and centre of the carousel and attached the carousel with dimensional tape.  On the inside I cut a mat layer of lime card, stamped a second generation image of the Ferris wheel in yellow and finished with a simple sentiment.

Enjoy the Ride inside - photo by Deborah Frings - Deborah's Gems

That's all for now - I'm still busy working on my backlog of ironing!   Ugh!  Still, it does give me chance to catch up with a couple of TV shows that I like!  See you soon.

signature

Tuesday, 4 March 2014

ASM - Photo inspiration ....

....  Good evening - despite all the snow around my house, I know that spring is on the way because it's still light as this post goes live!!!! Yea!  Our challenge at Addicted to Stamps and More! this week is photo inspiration, and here's my take:

Be Brave - photo by Deborah Frings - Deborah's Gems

Stamps: Impression Obsession - You Are Amazing
Inks: Memento - Tuxedo Black; Stampin' Up! - Melon Mambo
Dies: Spellbinders - Squares Lg (S4-126) #6, Squares Sm (S4-128) #6
Accessories: White Lustre Card; SU Card - Basic Black; Cosmo Cricket DP - DeLovely; SU DP - Basic Black; Copics


International Women's Day is celebrated globally on 8th March each year.  This year the UN has designated the theme "Equality for Women is Progress for All".  While there has been considerable progress in achieving equality for women in the West, in many parts of the the world little has changed.  Women have to be very brave, very courageous to stand up for their rights, such as Mala Yousafazi who was shot by the Taliban for standing up for the rights of girls to be educated.  Our challenge graphic shows a Women's Day logo - to unite and support each other.  I've taken the colours from the graphic to make this card.  I used the layout from Clean & Simple Stamping - FTL#282 and the theme of shades of grey at CAS-ual Fridays - CFC#129

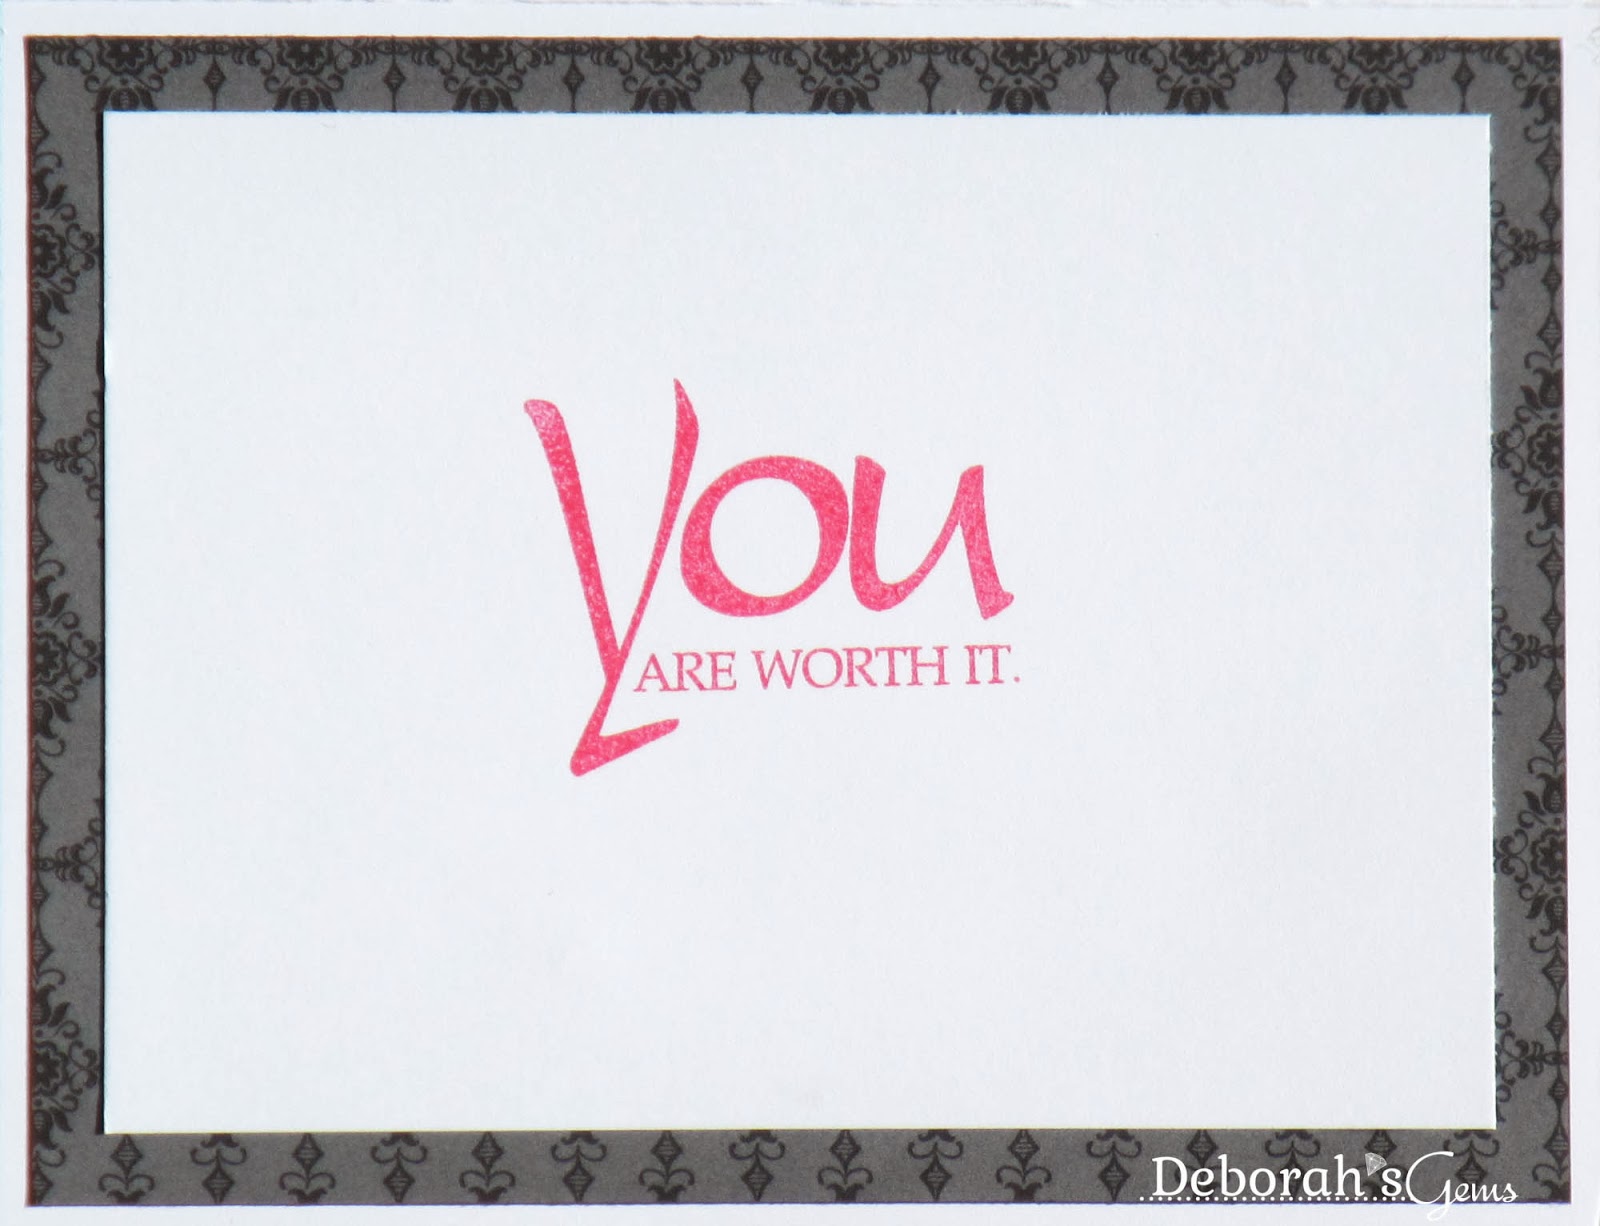
I turned the sketch to make a horizontal card.  I die cut the square and stamped the sentiment three times, then used Copics to colour going from black, through shades of grey to pink and then mounted it onto a black mat layer.  I used strips of design paper to make the backing panel.  On the inside I cut a mat layer of black/grey design paper and on the white panel stamped the bold sentiment - "You are worth it".

Be Brave inside - photo by Deborah Frings - Deborah's Gems

Our Guest Designer this week is Darnell if you haven't visited her blog - it is worth a trip.  Not only does Darnell make great cards, she is also one of the kindest and funniest ladies I've met in blogland!  As well as Darnell's card, the rest of the team have some fabulous inspiration cards to share with you. 


Our sponsor is StampArt Designs and the winner of the challenge will receive 5 digi images.  That's all for now!  See you soon.

signature

Saturday, 1 March 2014

52CCT - Sketch ....

... Good morning everyone, and welcome to 52 {Christmas} Card Throwdown.  It's the first challenge of March, really!!!  Our hostess this month is Patricia, and, as always, we start the month with a sketch for you to play with, here's my take:

Warm Winter Wishes - photo by Deborah Frings - Deborah's Gems

Stamps: Uniko Studio - Stunning Snowflakes; Stampin' Up! - Sassy Salutations
Inks: SU - Island Indigo, Bermuda Bay, Pool Party
Dies: Uniko Studio - Snowflakes
Accessories: White Lustre Card; SU DP - Winter Frost; SU Card - Island Indigo, Bermuda Bay, Pool Party; Silver Card


We still have so much snow around us here that I immediately thought of snowflakes for the sketch.  I used the colours from this week's Merry Monday challenge - MM#97.  I cut a mat layer in dark aqua and cut a panel of pale aqua design paper to layer on top.  I die cut snowflakes in silver and dark and mid aqua card.  I stamped snowflakes onto the card and added a simple sentiment.  I finished off with the stars that came from the centre of the snowflakes.  On the inside I cut a mat layer in pale aqua.  On the white panel I sponged on a solid snowflake using the waste from the large die cut snowflake, I stamped some more snowflakes and finished with a bold sentiment.

Warm Winter Wishes inside - photo by Deborah Frings - Deborah's Gems

For more inspiration using this sketch, check out the cards from the rest of the team.  If you've been playing along since the beginning of January you have made a great start on this year's cards.  If not, now's the time to join in!  That's all for now - see you soon.

signature

Friday, 28 February 2014

Coffee and friends .....

.... Hello!  I can't quite believe that it's Friday already!  This week has simply flown by.  This morning's card was made using three challenges:
Coffee & Friends - photo by Deborah Frings - Deborah's Gems

Stamps: Stampin' Up! - Tea Shoppe; Reverse Confetti - Be A Barista
Inks: Crumb Cake, Pistachio Pudding
Dies: Die-namics - Mini Delicate Doilies; Spellbinders - On the Edge (S5-168)
Accessories: White Lustre Card; SU DP - Crumb Cake; SU Card - Pistachio Pudding; Gold Paper; SU Punch - 1 3/8" Circle; Gold Marker Pen


I cut a mat panels of gold paper and Crumb Cake design paper and adhered them to the card.  I stamped the coffee cups onto white card, punched them out and mounted them onto some mini gold filigree doilies.  To make the sentiment panel I die cut the edge and added the green and white panels.  Before attaching the white card I edged both sides with a hint of gold using a large marker pen.  I finished the front with a simple sentiment.  On the inside I cut a mat layer of design paper and finished with a sentiment.

Coffee & Friends inside - photo by Deborah Frings - Deborah's Gems

I do like the layout of Lisa's card, it's very versatile and I had fun with it.  From the FUSION graphic I took the theme of tea cups although, of course, mine are coffee cups!  And I just love the soft, subtle colours that the Just Add Ink DT picked for us this week.

After my visit to the hair dresser yesterday, Jonathan and I headed over to Kathryn's school - it was parent/teacher conferences.  We are both so very proud of our daughter, not only is she a kind, considerate and helpful young lady, but she's very bright too.  It was a delight to meet Kathryn's teachers!  My car is at the auto shop today being fixed.  Somehow I've got a crack in the rear bumper!  No idea how it happened, but I suspect the ice might have something to do with it :)  As I can't leave the house today, I suspect I'll be playing in my craft room.  Bye for now!

signature
Related Posts Plugin for WordPress, Blogger...