Showing posts with label Cuttlebug. Show all posts

Wednesday, 19 February 2014

TMR - Retirement ....

....  Good morning everyone!  It's time for our new challenge over at The Male Room.  We have some news - from now on we will have a thumbnail display for your submissions using inlinkz.  Our theme this time is "Retirement" - you can make a card, scrapbook layout, 3D project - anything so long as it has a masculine feel and is based on the retirement theme.  Here's my card:

Retirement - photo by Deborah Frings - Deborah's Gems

Stamps: Papermania - It's a Man's World Couch Potato
Inks: Stampin' Up! - Not Quite Navy
Accessories: White Lustre Card; Core'dinations Black Magic; Cuttlebug EF - D'Vine Swirls; Kanban - Fishing


I have some Kanban toppers, a set especially for men, that I got years ago and have hardly used at all.  But they are just perfect to make a retirement card.  I had a selection of images - golf, fishing, darts, music, walking - and I decided on a fishing theme.  I used the layout from CAS - Colours & Sketches - CASC&S#61, except I didn't actually notice the bit about it being non-rectangular!!!  I really should read things more carefully!  However, that's where I got the layout!

I embossed some core'dinations card with swirls, sanded to reveal the blue core - and I think it suggests waves!  I layered the image onto some more core'dinations card and finished the front with a simple, elegant sentiment which I adhered with dimensional tape.  On the inside I cut a mat layer of blue (the reverse side of the core'dinations card), cut a panel of white and added a simple sentiment and another fishing image.

Retirement inside - photo by Deborah Frings - Deborah's Gems

For more inspiration cards based on the retirement theme, check out the cards from the rest of the team.  You have plenty of time to play along, deadline is Tuesday 4th March, midnight GMT.  Have fun!!

I must say that we had so many fabulous entries for our Valentine theme - it's going to be so, so difficult to pick the Top Three!   See you soon.

signature

Saturday, 25 January 2014

52CCT - Technique challenge ...

.... Good morning everyone, can you believe it's already the last challenge of January!  Where has the time gone?  This week at 52 {Christmas} Card Throwdown we have a technique for you.  Mynnette would like to see double embossing on our cards - you know, both dry embossing and heat embossing.  Here's my take:

Season's Greetings - photo by Deborah Frings - Deborah's Gems

Stamps: My Favourite Things - Seasonal Sentiments; Trio of Hanging Ornaments (don't have the name of the company)
Inks: Versamark; Distress - Squeezed Lemonade, Shaded Lilac, Peacock Feathers; Stampin' Up! - Bermuda Bay, Wild Wisteria; Memento - London Fog
Dies: Spellbinders - Labels 10 (S5-022) #4
Accessories: White Lustre Card; Core'dinations Black Magic; SU Card - Wild Wisteria; Cuttlebug EF - Christmas Countdown; Black Embossing Powder; Lakeland - Metallic Banner

I'm surrounded by so much snow here that my initial thought was to make a card featuring snowflakes, but I decided enough!  I embossed some core'dination card with the Christmas Countdown folder and sanded back to reveal the lilac core.  I cut a mat of lilac card for the embossed layer and adhered to the card base.  I stamped the ornaments (sadly I don't know what company made this one) in Versamark and heat embossed with black powder.  I added colour to the image by sponging on distress inks.  I finsished the front with a simple metallic sentiment banner.  On the inside I cut a mat layer of lilac card and on the white panel stamped a bold Christmas sentiment and finished by adding some of those snowflakes!!

Season's Greetings inside - photo by Deborah Frings - Deborah's Gems

I have to say that I really enjoyed the monochromatic cards you made for last week's challenge - it's going to be tough to pick a winner!  I hope you have fun with this week's technique and don't forget to check out the blog to see inspiration cards from the rest of the team.  See you soon.

signature

Thursday, 21 November 2013

One for three ....

.... Hello everyone!  Where is this week going?  I can't believe it's already Thursday.  I've been quite busy sorting out bits for Christmas and working on various DT cards.  Today's card is for three challenges:

Merry Christmas - Photo by Deborah Frings - Deborah's Gems

Stamps: Waltzingmouse - Folk Art Christmas Additions, Seasonal Flourishes
Inks: Versamark; Versafine - Onyx Black; Stampin' Up! - Bashful Blue
Accessories: White Lustre Card; Docrafts DP - Classic Blue Christmas; Heat it Up! - Silver Tinsel; Cuttlbug EF - Snowflakes; Copics - G24, B12; Clear Embossing Powder; Vellum

I used Retro Sketches - RS90 for the layout; it's been a while since I played along with this challenge, so it's nice to be back.  I included some design paper in a CAS way - which is the theme for this week's Less is More Challenge - LIM146.  And I featured a bell, the cue word for this week's CASology - CAS71 challenge.


I was thrilled to receive my new Waltzingmouse stamps and dies in the post yesterday - thank you so much Lynn. They arrived in time for me to use the pretty bell on my card - I stamped it in Versamark, heat embossed with silver tinsel embossing powder and then cut it out.  I coloured the flowers and leaves with Copics.  I embossed the card base with snowflakes and added a strip of blue design paper with more snowflakes.  I stamped the sentiment on vellum and embossed it with clear powder.  I gave the bell a little dimension by using gel glue to adhere it to the card.  For the inside I cut a mat panel of the snowflake paper and on the white panel stamped another bell and sentiment.

Merry Christmas inside - Photo by Deborah Frings - Deborah's Gems

That's all for today.  I've got a busy morning planned and then I'm meeting up with some friends at lunch.  It's always nice to get together for a chat and drink.  See you tomorrow!

Saturday, 16 November 2013

52CCT - Recipe Challenge ....

... Morning everyone - it's the middle of the month - time is just flying by!  The big day is only 5½ weeks away, but before that we have Thanksgiving here in the US - I'm still getting used to a rehearsal for Christmas!!  Moving on, this week at 52 {Christmas} Card Throwdown Louise has a recipe for us to follow:
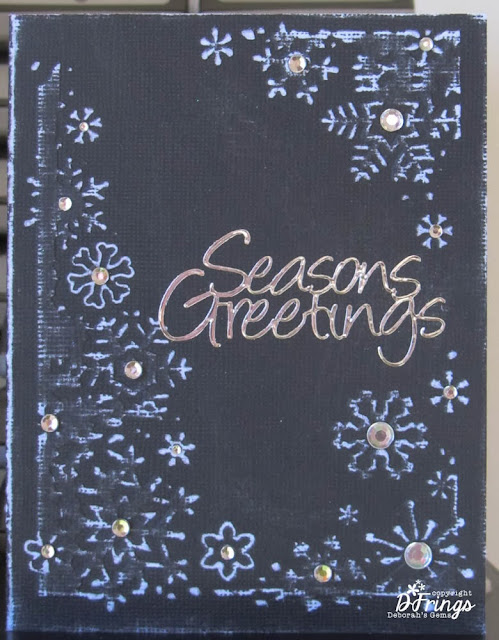
  • A one layer card
  • Only a hint of colour
  • Bling or ribbon
Here are my takes on the recipe - I got a bit carried away!

52CCT Christmas 1 - Photo by Deborah Frings - Deborah's Gems

52CCT Christmas 2 - Photo by Deborah Frings - Deborah's Gems

52CCT Christmas 3 - Photo by Deborah Frings - Deborah's Gems

Stamps: Stampin' Up! - More Merry Messages
Inks: Versafine - Onyx Black
Accessories: Cuttlebug Embossing Folders - Winter House, Distressed Snow, Christmas Wreath; Core'dination Card - Black Magic; Peel Off Sentiments; White Lustre Card; Gems; Glitter

I've been thinking about this recipe for a while pondering how to show a hint of colour, then it occurred to me that embossing Core'dination card and sanding would give a lovely hint of colour.  I used three of my Christmas EF embossed them, sanded and added gems and glitter.  I was going to stamp the front of each card with a sentiment, but decided that this was the perfect opportunity to use some of my (many) peel off sentiments.  I cut white panels for the inside of the card and all are stamped with the same verse - see below.

52CCT Christmas 1 inside - Photo by Deborah Frings - Deborah's Gems

If you've not played along with us before, now is the perfect time to join in - you've still got time to make a stash for Christmas this year.  And if you're ahead of the game - well, what's to stop you starting on your stash for Christmas 2014?? :) ;)  Don't forget to visit the blog and check out the inspiration cards from the rest of the team.  As always they are just gorgeous.  See you soon!

Wednesday, 6 November 2013

Playful hello ....

.... Good afternoon everyone - it's really dull here today; I've had the lights on all day!!!  Ugh!  And my day wasn't helped by the fact that I woke up with a thumping migraine, so I had to miss my Stampin' Up! class and rest.  Fortunately, my head, while not totally better, has improved this afternoon.  I've a fun card to share with you now, made with three challenges in mind:


Stamps: Stamp A Mania - Mexican Pottery Set; Personal Impressions - Big Sentiments
Inks: Stampin' Up! - Early Espresso; Versamark
Accessories:  White Lustre Card; SU Card - Early Espresso; Promarkers - Umber, Pastel Yellow, Spice, Blue Pearl; Cuttlebug EF - D'Vine Swirls; White Embossing Powder


I decided to make a fun card to go into my stash.  I got this stamp at Mega Meet earlier this year - the style lends itself to block colouring.  This week's colours at Colour Q have a south-west sort of feel - so they work together well.  I embossed the card base with D'Vine Swirls to suggest the sea and stamped a simple sentiment on the banner.  The inside is simply a mat of brown with white card to write my message. 

I've spent the last week and a half going through my stamping catalogues and bringing them up to date.  Since moving to the States I've been fortunate enough to buy stamps from companies I'd seen in the UK, but were a bit expensive to ship!  I've been making up for lost time ;)  It's been a fun experience and I've rediscovered stamps I'd forgotten I had!  And I can see the floor by my desk again! Yea!!  That's all for now - see you soon.

Saturday, 2 November 2013

WMSFC - Stormy seas ....

... Hello, I'm back again with my post for the our new challenge at Waltzingmouse Fanatics - WMSFC#5.  This time we have some cool colours for you to play with - the inspiration photo is a stormy sea and that's where I got the inspiration for my card:

Yippee-Skippee - Photo by Deborah Frings - Deborah's Gems

Stamps: Waltzingmouse - My Kind of Guy, Ocean Bound, Safe Harbour Sentiments; Stampin' Up! - Yippee-Skippie!
Inks: SU - Night of Navy, Not Quite Navy, Island Indigo, Tempting Turquoise, Pool Pary, Smoky Slate
Dies: Die-namics - Fishtail Flags Layers Stax # 2 & 3
Accessories: White Lustre Card; SU Card - Island Indigo, Pool Party; Cuttlebug EF - Charles; SU Marker - Pool Party


I think Tara must have guessed that the UK would be hit by a huge storm when she picked this graphic for our challenge!  I love the image and the sea gave me the nautical theme.  I've gone for another masculine style card, although in different colours, this would work for a girl too.  I've used the sketch from last week's Sketch Saturday - SS282 (too late to link up this one closed yesterday).  I decided to copy the stacked colours from the graphic on the side of the card - using the single line stamp.  I cut a panel of white card and embossed with this fabulous chevron - love the texture of the dots - echoing the dots in the stamp!!  I cut a couple of flags and stamped this fun sentiment at the end.  I finished the front with the life saver.  For the inside I cut mat layer in Island Indigo and used another of the wonderful sentiments from Safe Harbour.

sYippee-Skippee Inside - Photo by Deborah Frings - Deborah's Gems

Don't forget to check out Tara's card using our colours.  I'm really looking forward to seeing your creations with these cool colours.

That's all for now - see you soon.

Friday, 11 October 2013

White on White Christmas .....

... Good morning, it's another beautiful sunny day here in Northville - mind I did spot some frost on a few front lawns this morning, so it was obviously quite chilly last night.  This card has been made with a couple of challenges in mind:


Stamps:  Waltzingmouse - Compliements of the Season II, Big Blooms Poinsettia, Yonder Star
Inks: Versamark; Memento - London Fog
Dies: Spellbinders - Fleur de Lis Squares (S4-318) #4, Squares Sm (S4-128) #6
Accessories:  Cuttlebug EF - Winter Wonderland; Silver and White Embossing Powder; White Lustre Card; White Glitter Paper; Ranger - Pearl Drops


I love white on white - I always think cards look so elegant.  This was easy to make.  I embossed the card base, cut a couple of panels and stamped the smallest poinsettia on vellum.  I then cut out the poinsettia and layered it finishing with some pearls and a white enamel dot in the centre.  The sentiment was stamped with Versamark and heat embossed with silver powder.  For the inside I cut a mat layer in white glitter paper and on the white panel I stamped a couple of poinsettia and a bold sentiment.


It occurs to me, as I type this post, that this card might not be clean and simple enough for Chrissie and Jen, but I'm linking it up anyway as I really like the card.  The layout is loosely based on this week's Freshly Made Sketch - I've sort of shifted it in a bit and put in a couple of layers!!  I think I'm going to have another go at this week's LIM challenge to try and make a cleaner, simpler card!  That's all for now.

Saturday, 5 October 2013

Teal snowflakes .....

.... Morning all!  It's the first Saturday of October and here in Michigan we're having an Indian summer - not exactly conducive to making Christmas cards, but that's why we have challenges!!!  This month's challenges at 52 {Christmas} Card Throwdown are being hosted by Danielle and her sketch is really super - lots of scope here.  This is my card:


Stamps: Stampin' Up - Festive Flurry, Sassy Salutations, More Merry Messages
Inks: SU - Pool Party, Coastal Cabana, Island Indigo; Versamark
Dies: SU/Sizzix - Framelits Festive Flurry
Accessories:  SU Card - Island Indigo; SU DP - Winter Frost Speciality; Cuttlebug EF - Christmas Stars; White Embossing Powder; Piccolo - Pure Sparkle Silver Glitter; White Lustre Card


I love snowflakes on Christmas cards and this SU set is just fab, so nice to have the co-ordinating dies too.  Initially I was going to make this card in shades of blue, but I remembered that I had the Winter Frost paper and that included all the shades of teal.  I made the base from Island Indigo.  I cut the design paper to 2¼" square and the white card to 2" square.  I embossed the white squares with the little Christmas stars.  I used my stamp-a-ma-jig to position the sentiment stamped it in Versamark and heat embossed with white powder.  I stamped the largest of the snowflake stamps in Pool Party and the second smallest in Coastal Cabana (second generation image) and die cut them both.  On the smaller snowflake I added a touch of glitter to the central star.  For the inside I cut a panel of white card, randomly stamped the smaller snowflake and finished off with a sweet verse.


As there are a few stars on this card, I'm submitting it to the current Festive Friday Challenge - FFC18 to feature a star.  I haven't played along with this challenge for ages, then I make two cards in two days!!

Now that I've made this card, I think I may make a couple more - I'm going to do the one in shades of blue, but I think it will work in greens and pinks too!  Don't forget to visit the blog and check out the inspiration cards from the rest of the Team.


It's World Card Making Day today - what are you planning to do?  I'm going to a craft class at my local shop - Stampeddlar - we're going to be making some little (can't really call them cute) Apothecary Halloween bottles.  I'll post pictures later this week.  Jonathan has been in Phoenix all week - and today is his last full day - he'll be taking lots of photos.

That's all for now.  See you soon.

Thursday, 26 September 2013

Autumn glory ....

... Good morning!  It's a beautiful autumn morning here in Northville - the skies are brilliant blue, it's lovely and warm and the trees around here are turning all shades of red, orange, green and gold.  And I've been inspired to make a card for a few challenges:


Stamps: WMS - Peace & Plenty, Blessed by You
Inks: Stampin' Up! - Cherry Cobbler, Coral Calypso, Pear Pizzazz, Wild Wasabi, Early Espresso
Accessories: Promarkers - Various; SU Card - Cherry Cobbler, Coral Calypso, Pear Pizzazz, Wild Wasabi, Early Espresso; White Lustre Card; Cuttlebug EF - Swiss Dots


I think our Waltzingmouse Fanatics colours are perfect for this autumn themed Thanksgiving card.  I really like the clean, graphic lines of the sketch.  I embossed the smaller squares with dots for some texture and attached them to the contrasting card and adhered the panels to the card base.  I inked up the solid leaves using the rock 'n' roll technique, stamped off onto some scrap and then stamped on the white panel with the second and third generation impression - which gives a nice subtle background.  I inked the sentiment in Early Espresso and stamped onto the card.  I stamped the cluster of oak leaves and acorns onto some scrap white card, coloured it with Promarkers and then cut it out.  I attached the leaves with some silicon gel to give a little dimension.  The inside is simply a mat of Cherry Cobbler and white card.

Calling all you Waltzingmouse fanatics out there - I know there a quite a lot of you!!  Our colour challenge features warm, rich shades perfect for autumnal themes, for masculine cards, for Thanksgiving cards and even for feminine cards.  Tara and I are really looking forward to seeing what you make - you have until Thursday 3rd October, 5pm (Noon EDT) to join in!

Now, I'm off out to enjoy some of this gorgeous autumnal sunshine!  See you all soon.

Saturday, 21 September 2013

Waltzingmouse Fanatics Challenge #2 ....

.... Good morning!!  Waltzingmouse Fanatics Challenge is back today with our second challenge.  This time out we're giving you a colour scheme to follow.  We've gone for hot, autumnal colours - you don't have to use them all (although it would be great if you do), but you must use at least 3 colours.  Here's my card:


Stamps: WMS - Two Step Sprig, Country Labels 4
Inks: Stampin' Up! - Coral Calypso, Cherry Cobbler, Early Espresso, Wild Wasabi, Pear Pizzazz
Dies: Spellbinders - A2 Brackets Borders One (S5-181)
Accessories:  SU Card - Crumb Cake, Cherry Cobbler; White Lustre Card, Cuttlebug EF - Swiss Dots; Basic Grey - Candy Buttons


I use the layout from this week's Seize the Sketch challenge - STC#4.  I'm really pleased that I was able to include ALL the colours from our swatch!!  I made the card base from Crumb Cake card and cut the scalloped panel from Cherry Cobbler (love that colour).  I used the Two Step Sprig set to make the flowers and leaves.  I cut a strip of vellum, embossed it and then cut the Vs.  I finished off the card with some enamel dots.  I left the inside blank so that I can write a message.  I'm so pleased how this one turned out!

We had twenty fabulous entries to our first challenge - it was really tough picking a winner and top three - we'd love to see this number beaten!! 

You have until Thursday 3rd October 5pm GMT (Noon EDT) to submit your entries.  Don't forget to visit Tara and check out her card.  See you all soon.

Saturday, 14 September 2013

Christmas colours .....

.... Hi everyone, it's time for another challenge from 52 {Christmas} Card Throwdown.  Ruth has picked us some wonderful colours for our cards - kraft, red and white, here's my take:


Stamps:  Waltzingmouse - Compliments of the Season Two; Stampin' Up! - Sassy Salutations
Inks: SU - Crumb Cake, Real Red
Dies: Spellbinders - Create a Flake Three (S4-340), 2010 Snowflake Pendant (S4-286)
Accessories: Cuttlebug EF - Snow Crystals; White Lustre Card; SUDP - Crumb Cake, Real Red; Martha Stewart Snowflake Punch; Red Ribbon; Vellum; White Glitter Paper; Gem


I used a couple of additional challenges in the making of this card.  I used the layout from this week's CAS - Colours and Sketches - CASC&S42 and also this week's Simon Says Stamp Wednesday Challenge - Emboss It.  I started by stamping the sentiment at the top right in Crumb Cake ink and then embossing snowflakes over the front.  I cut a strip of design paper and layered on red ribbon and attached the panel directly to the card.  Next it was simply a case of die cutting the snowflake - I used vellum for the bottom layer, white glitter paper for the middle and finished with a punched snowflake in red.  I top it all with a single crystal gem. I think these colours are just lovely for Christmas Cards and this card was really quick to make. For the inside I simply cut a mat layer in Crumb Cake.  Using the little snowflake negative as a stencil, I sponged snowflakes over the white card and finished with a bold sentiment in red.


Below is a close up of the snowflake - you can really see the shimmer of the glitter and the sheer embossed pattern in the vellum.


That's all for now.  Don't forget to check out the inspiration cards from the rest of the Design Team - as always, they have awesome cards to share.  And for September Margaret, a long time player of our challenge, has joined us as our Guest Designer.  Have a super weekend.

Related Posts Plugin for WordPress, Blogger...