Showing posts with label My Favourite Things. Show all posts

Wednesday, 5 February 2014

TMR - Valentine .....

.....  Good morning!  I've been keeping a secret and I can share it now!  I am absolutely delighted to be joining Jacqueline and the rest of the Design Team at The Male Room - a challenge site specially for guy cards.  I think you all know that I actually enjoy making guy cards - I use quite a lot with sending them to Ben and Jonathan.

Our theme at The Male Room is Valentine.  Your card/project should encapsulate the theme and  have a masculine feel.  Here's my card:

I Love You! - photo by Deborah Frings - Deborah's Gems

Stamps: My Favourite Thing - LJD Homespun Hearts
Inks: Stampin' Up! - Real Red, Island Indigo
Dies: Cheery Lynn - Hearts 'n' Gears; Die-namics - LJD Rustic Hearts
Accessories: White Lustre Card; SU Card - Real Red, Island Indigo


I've used the colours from this week's Dynamic Duos - DD#88 and the layout/theme from the current FUSION challenge - FUSION#3.  This card came together really quickly.  I found the lovely heart die a couple of weeks ago - the gears give it a really masculine feel.  I cut the larger heart out in red cut out a couple of white hearts and stamped them in teal.  I stamped a couple more red hearts and some teal buttons directly onto the card base.  I finished the front with a simple, but heart-felt sentiment.  For the inside I cut a mat layer in teal, added the smaller gear heart and a dotty heart too.

I Love You! Inside - photo by Deborah Frings - Deborah's Gems

I'm not actually giving this to Jonathan on Valentine's Day as we actually met on 15th February 2000 - so I'm giving it to him then.  Wow, that's 14 years ago!  The time has simply flown by!  It's been marvellous and there's still so much to come :)

Do check out the inspiration cards from the rest of the team - lots of lovely cards to see!  I can't wait to see what you create for our masculine Valentine theme.  See you soon.

signature

Saturday, 25 January 2014

52CCT - Technique challenge ...

.... Good morning everyone, can you believe it's already the last challenge of January!  Where has the time gone?  This week at 52 {Christmas} Card Throwdown we have a technique for you.  Mynnette would like to see double embossing on our cards - you know, both dry embossing and heat embossing.  Here's my take:

Season's Greetings - photo by Deborah Frings - Deborah's Gems

Stamps: My Favourite Things - Seasonal Sentiments; Trio of Hanging Ornaments (don't have the name of the company)
Inks: Versamark; Distress - Squeezed Lemonade, Shaded Lilac, Peacock Feathers; Stampin' Up! - Bermuda Bay, Wild Wisteria; Memento - London Fog
Dies: Spellbinders - Labels 10 (S5-022) #4
Accessories: White Lustre Card; Core'dinations Black Magic; SU Card - Wild Wisteria; Cuttlebug EF - Christmas Countdown; Black Embossing Powder; Lakeland - Metallic Banner

I'm surrounded by so much snow here that my initial thought was to make a card featuring snowflakes, but I decided enough!  I embossed some core'dination card with the Christmas Countdown folder and sanded back to reveal the lilac core.  I cut a mat of lilac card for the embossed layer and adhered to the card base.  I stamped the ornaments (sadly I don't know what company made this one) in Versamark and heat embossed with black powder.  I added colour to the image by sponging on distress inks.  I finsished the front with a simple metallic sentiment banner.  On the inside I cut a mat layer of lilac card and on the white panel stamped a bold Christmas sentiment and finished by adding some of those snowflakes!!

Season's Greetings inside - photo by Deborah Frings - Deborah's Gems

I have to say that I really enjoyed the monochromatic cards you made for last week's challenge - it's going to be tough to pick a winner!  I hope you have fun with this week's technique and don't forget to check out the blog to see inspiration cards from the rest of the team.  See you soon.

signature

Monday, 13 January 2014

Happy Birthday Ben .....

....  Good morning, and a quick warning that this is a photo heavy post!  Today our son, Ben, is 18 years old!  He is, according to the law in the UK, an adult, but he'll always be my little boy - well strictly big boy!!!  Here's the card I made for Ben, and that he has hopefully received today:

Happy 18th Birthday - photo by Deborah Frings - Deborah's Gems

Stamps: Uniko Studio - Round in Circles; Stampin' Up! - Delightful Dozen; My Favourite Things - Document It Hello My Name Is, Textile Rectangles
Inks: SU - Baked Brown Sugar, Baja Breeze, Coastal Cabana, Midnight Muse
Dies: Die-namics - High Rise Numbers
Accessories: White Lustre Card; SU Card - Baked Brown Sugar; Kanban DP - Industriana; WMS - Twine; SU Marker - Baja Breeze

I used a couple of challenges to make this card.  The colours are from Colour Q - cQc#221 the last challenge they did in 2013 and which I couldn't play along with, but I think they are just perfect for a guy card.  The layout is from the new FUSION challenge - FUSION#1.


I was going to make a Steampunk, layered card, but ended up with this rather clean and graphic card instead!  I do still have an element of Steampunk in the backing paper from Kanban - the colour is a dark Baja Breeze.  To make the centre panel, I stamped the sentiment at the bottom and then decided where to put the number which die cut and then layered in the brown numbers.  I stamped some distressed circles above and the dotty circle below.  I completed the panel with some twine and then adhere the panel with dimensional tape.  For the inside I made a mat layer of the rivet backing paper and stamped more circles randomly around the edge of the white card.  I finished with a fun birthday greeting.

Happy 18th Birthday inside - photo by Deborah Frings - Deborah's Gems

It was really lovely to see Ben when we were back in the UK at Christmas.  I'm convinced he's taller, but he says not.  He has, however, grown his hair and dyed it black.  A few photos of the changing looks of Ben:

Ben Christmas - photo by Jonathan Frings - Deborah's Gems
Christmas 2013 - Ben,  almost 18 years old!

1996 - 2 months

 Christmas 1996 - 11½ months old - one of my favourite photos of Ben

 May 2000 - 4½ years old

 September 2007 - 11½ years old

November 2012 - 16¾ years old

If you've made it this far - well done!  I think it's probably only me who is interested in how Ben has changed, but I thought I'd share anyway!!  That's all for now.  See you soon.

signature

Friday, 10 January 2014

Blue words ....

.... and it's probably not what you were thinking :)  I've made this little card for three challenges:

Photography - photo by Deborah Frings - Deborah's Gems

Stamps: My Favourite Things - Document It: Captured Memories
Inks: Kaleidacolour - Blue Breeze
Dies: Lil Inkers - Instant Camera Die
Accessories: White Lustre Card; Stampin' Up! Card - Pacific Point; SU - Hexagon Punch

Over at CAS-ual Friday the team have asked us to choose a word that describe what you hope for the year or a target to set.  I've picked the word "Photography" as this year I really want to create some scrapbooks of our time in the States.  Less is More have a colour theme of Winter Blues which I thought would work, so I used a die to cut the photo in blue and again in white, and then stamped a number of photography related words on the white panel.  I finished the front with the cute hexagon which I mounted with dimensional tape.  I'm submitting this to Keep it Simple - where their theme is text; it's the first time I've played along with this challenge.

I've left the inside blank as I think I'm going to put this on the wall in my craft room as a reminder that I want to scrapbook our photos into a number of different albums!!

It's been much warmer here today - in fact we got above 0°C.  The result is melting snow, slushy roads and thick, thick fog!  I think I prefer the crisp, dry cold that we had earlier in the week.  That's all for now.  It's time to start getting dinner ready.  Do drop by tomorrow to check out the new challenges from 52 {Christmas} Card Throwdown and Waltzingmouse Fanatics!  See you soon.

signature

Sunday, 8 December 2013

Prize ribbon ...

... Good morning everyone!  It's really cold here, but we've been really lucky not to have lots of snow too.  In fact, it's the kind of winter weather that I like - cold, crisp and sunny!  This morning I've a simple card to share with you:

#1 Daughter - Photo by Deborah Frings - Deborah's Gems

Stamps: Waltzingmouse - Simple Sprig, Compact Family; My Favourite Things - First Place Sentiments
Inks: Stampin' Up! - Regal Rose, Riding Hood Red, Pear Pizzazz; Versafine - Onyx Black
Dies: Spellbinders - Circles Lg (SS4-114) #2, Circles Sm (S4-116) #2 & 3, Pinking Circle Lg (S4-170) #2
Accessories: White Lustre Card; SU Card - Pear Pizzazz, Regal Rose; Clear Embossing Powder; Ribbon

I've been thinking about the CASology - CAS73 cue word since they published the challenge - RIBBON.  The dictionary definition is "a long, narrow strip of fabric especially for tying something or for decoration".  So I thought of a parcel with a lovely bow - but I'm not good at bows.  Then I realised that a ribbon can also be a Prize ribbon, so I made a rosette for my No 1 Daughter.  To be fair, she's my only daughter!  I used the pretty colours from this week's Colour Throwdown - CTD271 challenge. I made the rosette from layers of card some plain and some stamped, finishing on the top with a simple #1!!  I layered the ribbon behind and adhered it to the card with dimensional tape.  I added a bit of interest on the front by stamping (using second impressions) some flowers and the word daughter.  The inside is a simple mat of pink with a white panel for a message from us.


We were out at a Christmas party yesterday - always nice to get together with friends and celebrate.  It's beginning to feel a lot like Christmas now - parties starting, so many of the houses around here have their outside lights up (goodness only knows what their electricity bills will be like, but they are so pretty) and Jonathan's playing Christmas songs as I type.  Love it!  Well, that's all for now.  See you tomorrow.

signature

Saturday, 23 November 2013

52CCT - Acrylic block background ....

.... Morning everyone, it's time for our technique challenge at 52 {Christmas} Card ThrowdownLouise wants us to create a background using the acrylic block technique.  By that, she means inking acrylic blocks, spritzing with water and stamping on to card - hey presto a quick and easy background.  I've included a link at the bottom of this post to a tutorial that I found on U-tube (there are lots more).  Here are my cards - yes, I got carried away and made a couple of cards:
Xmas Constellation - Photo by Deborah Frings - Deborah's Gems
Card Size: 4¼" × 5½"
Merry Christmas Constellation - Photo by Deborah Frings - Deborah's Gems
Card Size: 4½" × 6¼"
Stamps: Penny Black - Xmas Constellation; Stampin' Up! - More Merry Messages, Dictionary
Inks: Distress - Forest Moss, Pine Needles, Shabby Shutters, Peeled Paint, Evergreen Bough, Mowed Lawn; Stampin' Up! - Garden Green, Wild Wasabi, Coastal Cabana, Pistachio Pudding; Versafine - Onyx Black
Dies: Spellbinders - A2 Matting Basics A (S5-131) #5, A2 Matting Basics B (S5-132) #5, Wonky Rectangles (S4-306) #6
Accessories: White Lustre Card; Clear Embossing Powder; Black Card; Sakura Micron Pen; Kanban Sentiment Strip; My Favourite Things - MPD Graduated Diamonds Stencil; Signo White Gel Pen

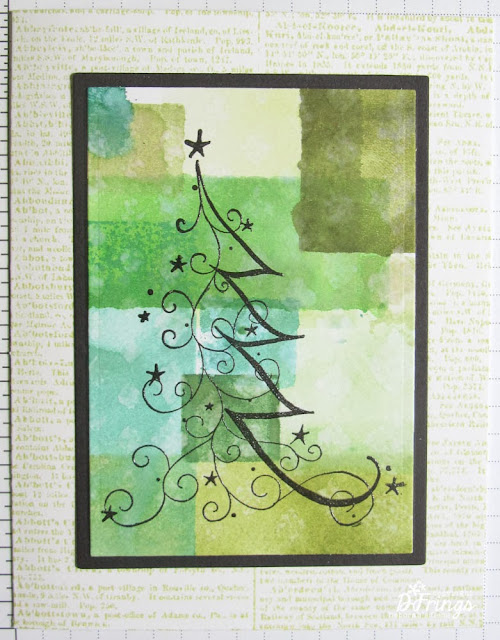
I had lots of fun with this technique and ended up getting quite inky!  But that was half the fun.  I used several different sized acrylic blocks - long and thin, tiny squares, and a couple of different sized rectangles.  I inked the backs, spritzed and stamped.  I overlapped some of the stamped images dried them with a heat gun and then added more.  The top card has a somewhat smoother finish to the stamped blocks because I added more water to the acrylic blocks; the bottom card has a slightly blotchy look because of less water.  On the top card, if you look closely, you might just see a subtle patten of graduated diamonds.  I achieved this effect by spritzing water through a stencil and allowing it to react with the stamped blocks.  I didn't add any texture to the background on the bottom card.  I stamped the Christmas tree on each background and heat embossed with clear powder.

On the first card I used the Matting Basics to cut a rectangular image which I matted onto black card.  I stamped the Dictionary background on the card base and then adhered the Christmas tree.  It has the look of a painted canvas.

On the larger card I decided to have a bit of fun with placement of the image.  For this card I die cut the tree using the Wonky Rectangles and, after stamping the dictionary background, adhered the image directly to the card.  I put the die over the top of the image and lightly drew round the die.  Then, using a Micron pen I created a "Zentangle" type frame.  I finished the front of this card with a greeting that I found in my scrap stash - just happened to be the right colour!

For the inside of each card I cut a mat layer in black and on the white panel stamped the Christmas tree and added a sentiment.

Xmas Constellation inside - Photo by Deborah Frings - Deborah's Gems
Inside of top card
Merry Christmas Constellation inside - Photo by Deborah Frings - Deborah's Gems
Inside of bottom card
I think this is only the second time I've tried this technique - it was lots of fun and I'll certainly use it again.  Don't forget to check out the inspiration cards from the rest of the team.  I'm looking forward to seeing what you make with this technique.  See you soon.


Christmas tag .....

.... Hello again!  I'm back with a submission for Challenge 3 at the Waltzingmouse Pajama Party.  Claire wants us to make a Christmas tag for her - something that will appeal specifically to her.  So here's my tag - I had such fun making it:

Christmas Tag - Photo by Deborah Frings - Deborah's Gems

Stamps: Waltzingmouse - Nutcracker Sweet, Victorian Frippery; My Favourite Things - Sheet Music Background
Inks: Stampin' Up! - Sahara Sand, Real Red, Old Olive; Versafine - Onyx Black
Dies: Stampeddler Plus Memories - Six Blind Mice
Accessories: White Lustre Card; SU Card - Sahara Sand; SU DP - Real Red; SU Ribbon - Real Red; Copics - G21, G46, FYG2, R17, FYG1; Clear Embossing Powder; Black Card; SU Marker - Basic Black; Gems; White Ribbon

I used the sketch from Mojo Monday - MOJO320 for the layout, adapting it slightly for the tag.  And the theme is from the current Merry Monday - MM#84 which is to feature a Christmas tree and some bling. 


I made the tag base from white card and stamped the sheet music background in a soft neutral colour.  I added a strip of red paper, trimming to fit the tag shape.  I stamped the tree onto some scrap white card, embossed it with clear powder, coloured with Copics and then cut it out.  I made the mat layer from Sahara Sand and white card, adding a red ribbon on which to ground the Christmas tree.  I adhered a few gems and attached the tree with dimensional tape.  I finished the front of the tag with a cute little mouse (attached with dimensional tape) - especially for our chief Mouseketeer - Claire Brennan!  The mouse is from a die set produced by my local craft shop - Stampeddler.  Over the Halloween period there were hundreds of these little mice all over the shop!  There are six dies in the set, three large mice (the ones they used in the shop) and three smaller mice exactly the right size for a Christmas tag!!!

I kept the reverse of the tag really simple.  I stamped some elegant lines in Sahara Sand and added some words in red.  I finished this side with a tiny Christmas wreath at the top of the tag.  I added the ribbon by cutting a small slit in the top of the tag, threaded the chiffon ribbon through and tied it with some more red ribbon.

Christmas Tag Reverse - Photo by Deborah Frings - Deborah's Gems

Oh, by the way, I should say that this is a scheduled post.  That's all for now! 

Thursday, 31 October 2013

Hugs & Kisses .....

... Hello everyone!  I had a super time last night - got to spend the whole evening in my craft room; Jonathan was out at a photo shoot so I made a few cards and tidied my space!!

Hugs & Kisses - Photo by Deborah Frings - Deborah's Gems

Stamps: My Favourite Things - First Class Friend; Amy Tangerine - Aspire
Inks: Stampin' Up! - Cherry Cobbler, Old Olive, Blushing Bride, Baked Brown Sugar
Accessories:  SU Card - Cherry Cobbler, Blushing Bride; Tim Holtz - Washi Tape; White Lustre Card

I've used a couple of challenges in the making of this card:

I really struggled to get past the challenge graphic for CTS this week - but in the end the little postmark bit led me to First Class Friends - and a card for my Mum.  I used some of my washi tape on the card, picking the bit that said "journey" - our trip to the US has been a big journey for the whole family.  And like Ben, I often send my Mum cards, just because.  I stamped the chevron image in the lightest colour to allow the words and popped up ampersand to shine.  I used Baked Brown Sugar as I don't have Close to Cocoa.  The inside has a mat in pink and a simple sentiment - Mum is always in my heart!

Hugs and Kisses - Photo by Deborah Frings - Deborah's Gems

My Mum keeps all the cards I send her - when I was in the UK in the summer, I saw that she has them all on her cabinet.  She says that it's a way to be close to me!  I love her!  And I believe Ben keeps all my cards too - although I suspect they might be in a box!!  That's all for now.  I'm off to do some cleaning today - I've a special visitor coming tomorrow!!  Will tell you later :)

Oh yes, before I go - have a super Halloween!

Wednesday, 23 October 2013

Attitude ....

.... Hello again!!  I'm back with a very clean and simple, and one layer, card for a couple of challenges:

Stamps:  Penny Black - Fantasy Tree; My Favourite Things - Clearly Sentimental about New Beginnings
Inks: Versafine - Vintage Sepia; Versamark; Stampin' Up! - Cherry Cobbler
Accessories: White Lustre Card; SU Card - Cherry Cobbler; Doodlebug Sprinkles; Vellum; Clear Embossing Powder


I've adapted the sketch for a square card.  I stamped the tree directly onto the card base and embossed it with clear powder.  I didn't want to hide the tree so I stamped the sentiment onto vellum and embossed that too.  I ran the vellum through my Xyron to make it self-adhesive and applied to the card.  I finished off the front with some enamel dots in co-ordinating colours.  I've left the inside very plain - simply a mat of red and on the white panel a tree - allowing space for me to write a message.  Chrissie and Jen want to see more than just leaves, so I thought this was a good opportunity to get out this stamp - I've neglected it a bit of late!


It's a gorgeous day here - with lots of sunshine and blue skies, mind there are a few dark clouds that keep coming over, but no snow or rain yet!!  Strange to think that in Chicago they had the first snowfall of the season yesterday, albeit only a dusting!  Bye for now!

Tuesday, 22 October 2013

ASM - Adventure ....

...  Good evening everyone!  Hope you've had a good day.  It's been rather cold here, but at least we've had some sunshine!  It's time for our new challenge at Addicted to Stamps and More! - ASM#68 - and we have some colours for you to play with - Black, Green and Mustard.  Here's my card:


Stamps: Stampin' Up! - Gorgeous Grunge, Off the Grid; My Favourite Things - Hello My Name Is, Expand Your View
Inks: SU - Certainly Celery, More Mustard; Memento - Tuxedo Black
Dies: Die-namics - Fishtail Flags Layers Stax #4
Accessories:  White Lustre Card; SU DP - Certainly Celery; Project Life - Grid Journalling Card; Doodlebug Sprinkles; Black Card; Promarker - Honeycomb


When I saw our challenge graphic for the first time, I knew that I wanted to make a guy card.  I love More Mustard and Certainly Celery (both now discontinued).  I created the background by mixing stamps from Off the Grid and Gorgeous Grunge - sort of reminds me of my son's school books!!  I cut the flag from Certainly Celery design paper.  I made the sentiment by mixing stamps from Hello My Name Is and Expand Your View - both sets have some fab words.  I stamped them onto a grid journalling card, cut it down to size and then rounded two of the corners and layered it onto black card.  I finished the front with some enamel dots.  The inside is simply a repeat of the background, but created using second and third generation impressions - that way I can still write a message inside.  I used the layout from the current Seize the Sketch - STS#6 challenge.

 
Don't forget to check out the inspiration cards from the rest of the Design Team - we have a really mixed selection of cards for you - showing just how versatile the colours are!  That's all for now.  I'm off to do some more ironing - sadly that stuff never goes away ;)

Related Posts Plugin for WordPress, Blogger...