Saturday, 23 November 2013

Christmas tag .....

.... Hello again!  I'm back with a submission for Challenge 3 at the Waltzingmouse Pajama Party.  Claire wants us to make a Christmas tag for her - something that will appeal specifically to her.  So here's my tag - I had such fun making it:

Christmas Tag - Photo by Deborah Frings - Deborah's Gems

Stamps: Waltzingmouse - Nutcracker Sweet, Victorian Frippery; My Favourite Things - Sheet Music Background
Inks: Stampin' Up! - Sahara Sand, Real Red, Old Olive; Versafine - Onyx Black
Dies: Stampeddler Plus Memories - Six Blind Mice
Accessories: White Lustre Card; SU Card - Sahara Sand; SU DP - Real Red; SU Ribbon - Real Red; Copics - G21, G46, FYG2, R17, FYG1; Clear Embossing Powder; Black Card; SU Marker - Basic Black; Gems; White Ribbon

I used the sketch from Mojo Monday - MOJO320 for the layout, adapting it slightly for the tag.  And the theme is from the current Merry Monday - MM#84 which is to feature a Christmas tree and some bling. 


I made the tag base from white card and stamped the sheet music background in a soft neutral colour.  I added a strip of red paper, trimming to fit the tag shape.  I stamped the tree onto some scrap white card, embossed it with clear powder, coloured with Copics and then cut it out.  I made the mat layer from Sahara Sand and white card, adding a red ribbon on which to ground the Christmas tree.  I adhered a few gems and attached the tree with dimensional tape.  I finished the front of the tag with a cute little mouse (attached with dimensional tape) - especially for our chief Mouseketeer - Claire Brennan!  The mouse is from a die set produced by my local craft shop - Stampeddler.  Over the Halloween period there were hundreds of these little mice all over the shop!  There are six dies in the set, three large mice (the ones they used in the shop) and three smaller mice exactly the right size for a Christmas tag!!!

I kept the reverse of the tag really simple.  I stamped some elegant lines in Sahara Sand and added some words in red.  I finished this side with a tiny Christmas wreath at the top of the tag.  I added the ribbon by cutting a small slit in the top of the tag, threaded the chiffon ribbon through and tied it with some more red ribbon.

Christmas Tag Reverse - Photo by Deborah Frings - Deborah's Gems

Oh, by the way, I should say that this is a scheduled post.  That's all for now! 

Peace and plenty ....

.... Good evening , I'm back again.  This time I've a Thanksgiving card to share with you:

Peace and Plenty - Photo by Deborah Frings - Deborah's Gems

Stamps: Waltzingmouse - Peace and Plenty, Blessed by You, Seasonal Flourish; Stampin' Up! - Dictionary
Inks: SU - More Mustard, Bashful Blue, Pumpkin Pie
Accessories: White Lustre Card; SU Card - Crumb Cake, Bashful Blue

It's time for the Waltzingmouse Pajama Party and when Claire sent out the invitation she gave us four categories to play with!  This card has been made for the first category where the theme is thanks/thanksgiving.  I used a couple of other challenges to make the card, the layout is based on the current sketch from Clean and Simple Stamping - FTL267.  I used the colours from Colour Q - cQc216.


I stamped the words directly onto the card base and over stamped the words with this lovely tree.  I made the sentiment panel by cutting a mat layer in Crumb Cake and stamped the sentiment in the centre of the white panel.  I added a couple of little blue acorns (inspiration from the cQc graphic).  The inside is very simple with a mat in pale blue and an elegant sentiment.

Peace and Plenty inside - Photo by Deborah Frings - Deborah's Gems


That's all for now, you should know that this post has been scheduled!  Kathryn, Jonathan and I are at the cinema watching The Hunger Games - Catching Fire.

Friday, 22 November 2013

Newsflash ....

.... Good afternoon - it's really dull here today.  But the upside is time spent crafting - I've got a cute card today:

You Are Amazing - Photo by Deborah Frings - Deborah's Gems

Stamps: My Favourite Things - Read All About It
Inks: Memento - Tuxedo Black
Dies: Spellbinders - Circles Sm (S4-116) #5, Big Scalloped Circles Sm (S4-250) #5; Memory Box - Piestra Tile
Accessories: White Lustre Card; Stampin' Up! Card - Tangerine Tango, Island Indigo; SU DP - Tangerine Tango, Island Indigo; Copics

I'm playing along with a couple of challenges that I've missed recently - My Favourite Things Wednesday Sketch Club - MFTWSC151 and Just Add Ink - JAI#192.  I really like the fun colours and they work perfectly with this cute stamp.  I flipped the sketch upside down.  I die cut the white panel and mounted it onto orange card and then layered again onto Island Indigo.  I stamped the image onto white card and cut it out with a circle die.  I coloured some of the image with copics and paper pieced the rest.  I finished the front with this sentiment.  I'm not sure where this card is going yet and so I've not decorated the inside.


That's all for the moment.  I've had a busy morning doing some shopping.  This afternoon Kathryn and I are off to the dentist for a check up - I don't mind it, but Kathryn hates it!  So as a special treat we are all off to the movies this evening to see The Hunger Games - Catching Fire.  See you later!

Thursday, 21 November 2013

One for three ....

.... Hello everyone!  Where is this week going?  I can't believe it's already Thursday.  I've been quite busy sorting out bits for Christmas and working on various DT cards.  Today's card is for three challenges:

Merry Christmas - Photo by Deborah Frings - Deborah's Gems

Stamps: Waltzingmouse - Folk Art Christmas Additions, Seasonal Flourishes
Inks: Versamark; Versafine - Onyx Black; Stampin' Up! - Bashful Blue
Accessories: White Lustre Card; Docrafts DP - Classic Blue Christmas; Heat it Up! - Silver Tinsel; Cuttlbug EF - Snowflakes; Copics - G24, B12; Clear Embossing Powder; Vellum

I used Retro Sketches - RS90 for the layout; it's been a while since I played along with this challenge, so it's nice to be back.  I included some design paper in a CAS way - which is the theme for this week's Less is More Challenge - LIM146.  And I featured a bell, the cue word for this week's CASology - CAS71 challenge.


I was thrilled to receive my new Waltzingmouse stamps and dies in the post yesterday - thank you so much Lynn. They arrived in time for me to use the pretty bell on my card - I stamped it in Versamark, heat embossed with silver tinsel embossing powder and then cut it out.  I coloured the flowers and leaves with Copics.  I embossed the card base with snowflakes and added a strip of blue design paper with more snowflakes.  I stamped the sentiment on vellum and embossed it with clear powder.  I gave the bell a little dimension by using gel glue to adhere it to the card.  For the inside I cut a mat panel of the snowflake paper and on the white panel stamped another bell and sentiment.

Merry Christmas inside - Photo by Deborah Frings - Deborah's Gems

That's all for today.  I've got a busy morning planned and then I'm meeting up with some friends at lunch.  It's always nice to get together for a chat and drink.  See you tomorrow!

Wednesday, 20 November 2013

Warm winter wishes ....

... Good morning!  It's very cold here in Northville - this morning there was a heavy frost.  It was so pretty sparkling on the roof tops and trees, and gave me the idea for this morning's card:

Warm Winter Wishes - Photo by Deborah Frings - Deborah's Gems

Stamps: Uniko Studio - Stunning Snowflakes; Stampin' Up! - Lovely as a Tree
Inks: SU - Smoky Slate; Versafine - Onyx Black
Dies: Spellbinders - Page Maps On the Edge (S5-168, Squares Lg (S4-126) #7, Squares Sm (S4-128) #7; Die-namics - Fishtail Flags Layers Stax #2
Accessories: White Lustre Card; SU Card - Basic Black, Smoky Slate; Clear Embossing Powder; Glitter

I cut the scalloped border with a Spellbinder die and attached it to the grey square.  On the white square I stamped these lovely trees and added some glitter to suggest frost.  I stamped the sentiment on grey card and cut it out with the Fishtail die.  I finished the front with a simple, but stunning, snowflake.  I stamped it onto white card, heat embossed with clear powder and then fussy cut it out.  I added some more glitter to the snowflake and adhered it to the card with dimensional tape.  I've not done the inside yet - I'm not sure whether this will form part of my Christmas stash or be a birthday card - I've lots of birthdays in January!  I'm really pleased with this photo - you can actually see the sparkle from the giltter!

I used three challenges in the making of this card:


That's all for today - I've got another pile of ironing calling my name!  So I it's time to set up the board, tune into The Walking Dead (I've a few to catch up) and get it done!  I'll certainly keep warm!!  See you tomorrow!

Tuesday, 19 November 2013

ASM - Make your mark ....

... Good evening everyone - it's time for our Make Your Mark challenge at Addicted to Stamps and More!  Just a quick reminder about our rules for the challenge - your entry MUST contain the use of Markers - Stampin' Write, Copics, Promarkers, Flexmarkers etc etc and you can link up to a maximum of 10 challenges which includes ours!  This is my card using markers:

365 Day Trip - Photo by Deborah Frings - Deborah's Gems

Stamps: Papertrey Ink - Harvest Berries, Stylish Sentiments - Birthdays
Inks: Distress - Chipped Sapphire, Weathered Wood
Dies: Spellbinders - Labels 30 (S5-157) #3; PTI - Harvest Berries
Accessories: White Lustre Card; Distress Markers - Stormy Sky, Weathered Wood; Stampin' Up! Card - Smoky Slate, Midnight Muse; SU Ribbon - Midnight Muse

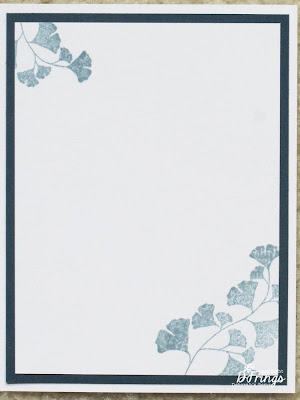
I used my Distress markers to stamp the pretty Harvest Berry leaves.  I coloured directly on the the stamps with the markers, spritzed some water into the air and passed my stamp through the water droplets and then stamped the image.  This technique gives a light, even coverage of water and allows the markers to blend as you stamp.  The smaller images were stamped on to die cuts - these images are solid and you can see the blending a little better on them.  I made the sentiment label by stamping onto white card using a die to cut it out and made another die in light grey card.  I cut the grey die cut in half and attached to the sentiment slightly offset to give a border.  I added the ribbon to the card and adhered the sentiment label over the top using dimensional tape.  Inside I cut a mat layer in navy and on the white panel stamped some more leaves, with a space for my message.

365 Day Trip inside - Photo by Deborah Frings - Deborah's Gems

I used a couple of challenges to make this card - I used the layout from CAS(E) this Sketch! - CTS54 and the theme of a clean, simple leaf card is from this week's The Paper Players Challenge - PP172


Don't forget to check out the inspiration cards from the rest of the design team - as always they are just fab.  Before I go - thanks to everyone who played along last week with our Anything Goes challenge - we had a record number of submissions and that makes it really hard to pick a winner!!  See you soon.

Saturday, 16 November 2013

WMSFC#6 - Festive Greetings ....

.....  Hello again!  I'm back with our new challenge at Waltzingmouse Fanatics - WMSFC#6.  This time instead of colours or a sketch, we'd like you to make a Christmas card, but using non-Christmas stamps.  Here's my take on the challenge:

Festive Greetings - Photo by Deborah Frings - Deborah's Gems

Stamps: Waltzingmouse - French Country, Funky Flowers, Compliments of the Season II; Stampin' Up! - More Merry Messages
Inks: Versafine - Onyx Black; SU - Real Red, Pink Pirouette, Wild Wasabi; Memento - London Fog
Accessories: White Lustre Card; Clear Embossing Powder; Copics - R17, G20, G21, G24; Sequins


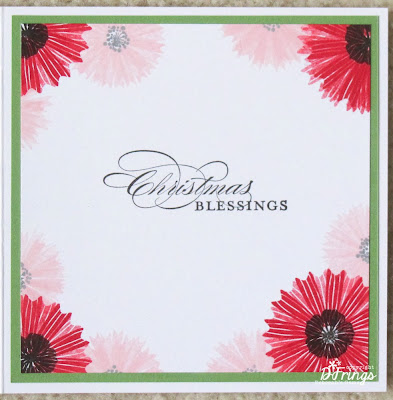
Creating a Christmas Card with non-Christmas stamps is really easy with Waltzingmouse Stamps.  I decided to use traditional green and red for my colours.  I stamped the pretty border image, embossed it with clear powder and then coloured it with Copics.  The red and green give a nice Christmas feel.  I created my own stylised poinsettia by using the stamps from Funky Flowers and layering!  It was really easy to stamp and cut out the layers.  I finished the front of the card with some bling in the form of sequins and a simple sentiment.  For the layout I used the current sketch from CAS - Colour & Sketches - CASC&S51.  For the inside I cut a mat layer in green and on the white panel I stamped lots more flowers and a flowing sentiment.

Festive Greetings inside - Photo by Deborah Frings - Deborah's Gems

Remember, you must use at least one Waltzingmouse image and/or sentiment on your card.  And in this case your images must not be Christmas - no snowflakes, Santas, baubles etc, but obviously you can use a sentiment!  You've got plenty of time to play along with the challenge until Thursday 28th November 5.00pm GMT (that's Noon EST in the US).  Don't forget to check out Tara's card - it's amazing!  I'm really looking forward to seeing your cards for this challenge - have fun!

52CCT - Recipe Challenge ....

... Morning everyone - it's the middle of the month - time is just flying by!  The big day is only 5½ weeks away, but before that we have Thanksgiving here in the US - I'm still getting used to a rehearsal for Christmas!!  Moving on, this week at 52 {Christmas} Card Throwdown Louise has a recipe for us to follow:
  • A one layer card
  • Only a hint of colour
  • Bling or ribbon
Here are my takes on the recipe - I got a bit carried away!

52CCT Christmas 1 - Photo by Deborah Frings - Deborah's Gems

52CCT Christmas 2 - Photo by Deborah Frings - Deborah's Gems

52CCT Christmas 3 - Photo by Deborah Frings - Deborah's Gems

Stamps: Stampin' Up! - More Merry Messages
Inks: Versafine - Onyx Black
Accessories: Cuttlebug Embossing Folders - Winter House, Distressed Snow, Christmas Wreath; Core'dination Card - Black Magic; Peel Off Sentiments; White Lustre Card; Gems; Glitter

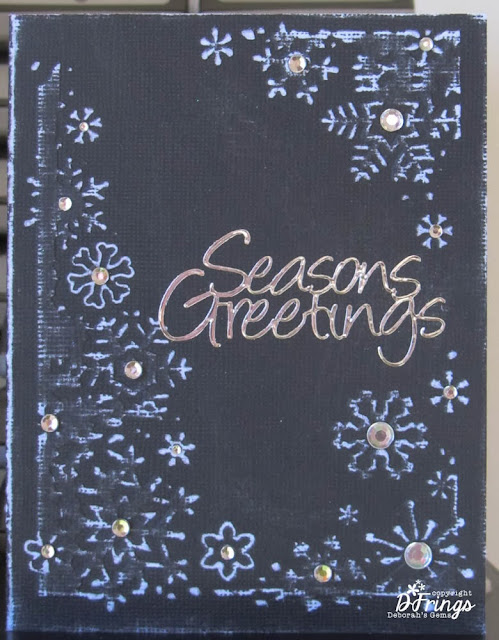
I've been thinking about this recipe for a while pondering how to show a hint of colour, then it occurred to me that embossing Core'dination card and sanding would give a lovely hint of colour.  I used three of my Christmas EF embossed them, sanded and added gems and glitter.  I was going to stamp the front of each card with a sentiment, but decided that this was the perfect opportunity to use some of my (many) peel off sentiments.  I cut white panels for the inside of the card and all are stamped with the same verse - see below.

52CCT Christmas 1 inside - Photo by Deborah Frings - Deborah's Gems

If you've not played along with us before, now is the perfect time to join in - you've still got time to make a stash for Christmas this year.  And if you're ahead of the game - well, what's to stop you starting on your stash for Christmas 2014?? :) ;)  Don't forget to visit the blog and check out the inspiration cards from the rest of the team.  As always they are just gorgeous.  See you soon!

Friday, 15 November 2013

Thankful & blessed ....

.... I think that sums up my feeling about my life!  And it's a wonderful sentiment to have on the front of my Thanksgiving card:

Thankful & Blessed - Photo by Deborah Frings - Deborah's Gems

Stamps: CAS-ual Friday Stamps - Amber Waves
Inks: Stampin' Up! - Crushed Curry, Pumpkin Pie, Rich Razzleberry
Accessories: SU Card - Bravo Burgundy, Crushed Curry; White Lustre Card; SU DP - Pumpkin Pie; SU Punch - Label Bracket; Cuttlebug EF - Autumn Type


This week's colours from Colour Q - cQc215 are just perfect for a Thanksgiving card - really warm and rich.  I used the layout from Seize the Sketch - STS#8.  I made the card base from Bravo Burgundy.  I embossed the white panel with Autumn Type - all the words are just great for the season.  I created the horizontal strip by cutting a mat layer in SU DP and making my own DP by stamping with Amber Waves.  I really like the sentiment.  I stamped the small bunch of corn onto white card and punched it out and made the backing mat by cutting a yellow mat in half and attaching to the back of the white panel.  I finished the inside with a white panel on which I stamped the large bunch of corn and a sentiment.

Thankful & Blessed inside - Photo by Deborah Frings - Deborah's Gems

It's another nice morning here in Northville, and quite a bit warmer than recently.  That's all for today - do drop by tomorrow for the new challenges at 52 {Christmas} Card Throwdown and Waltzingmouse Fanatics!  See you then.

Thursday, 14 November 2013

Happy Thanksgiving ....

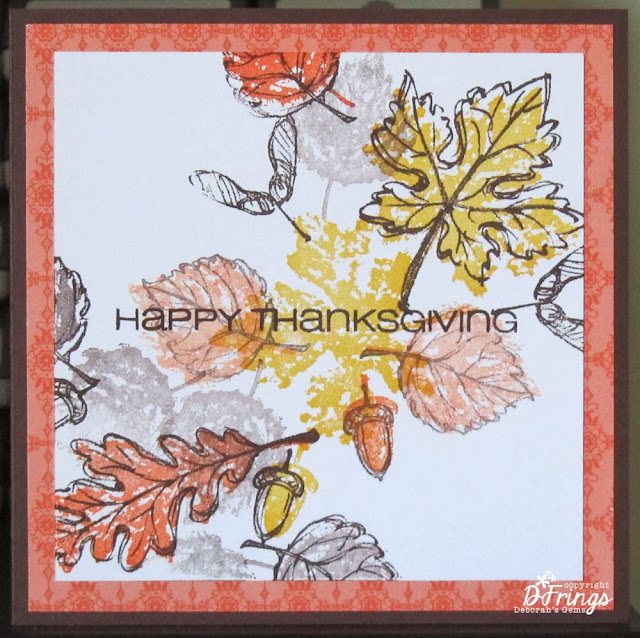
....  Good afternoon everyone.  I hope you've had a good day - I've been busy in my craft room working on various DT projects - you'll see them soon!  I also made a Thanksgiving card - only two weeks away now! 

Happy Thanksgiving - Photo by Deborah Frings - Deborah's Gems

Stamps: Stampin' Up! - Falling Gently; CAS-ual Friday Stamps - Amber Waves
Inks: SU - Crushed Curry, Tangerine Tango, Chocolate Chip
Accessories: SU Card - Chocolate Chip, Tangerine Tango; SU DP - Tangerine Tango; White Lustre Card


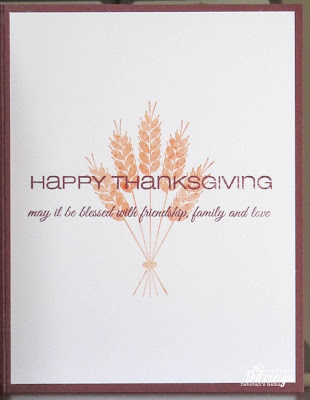
I used the colours from this week's The Paper Players - PP171 and the layout is based on the current Muse Challenge - MUSE43.  I really like these warm autumn colours - although, I have to admit they are a bit out of my comfort zone!  Therese has snowflakes cascading across her card.  I've been watching the leaves from my office window as they are blown around the street, so I thought, why not?  I made the base from Chocolate Chip card and cut a mat panel in Tangerine Tango design paper.  On the white panel I stamped leaves, acorns and "helicopters" being tossed about in the wind.  I stamped a clean, simple sentiment across the leaves and on the inside panel added the accompanying sentiment.

Happy Thanksgiving inside - Photo by Deborah Frings - Deborah's Gems

That's all for now - I must go off and make a start on dinner - won't be long before Jonathan's home!  See you tomorrow.

Related Posts Plugin for WordPress, Blogger...