Monday, 12 December 2016

Candlelight ...

.... Morning! Wow, that weekend went fast! The snow storm arrived as promised and we have lots of it outside - the guy who clears the drive came yesterday and should be here again today, it's a good thing, otherwise I have to do it! Kat has a snow day and so does Jonathan - so we're all going to be safe and warm inside. If you do have to drive anywhere - take it slow, keep your distance and be safe.

Anyway, on to more pleasant things - I've a very clean and simple Christmas card to share with you today:

Peace & Joy - photo by Deborah Frings - Deborah's Gems

Stamps: Winnie & Walter - The Big, The Bold & Merry; Stampin' Up! - Jar of Cheer
Inks: Versafine - Onyx Black; Memento - Tuxedo Black; SU - Crumb Cake
Dies: SU/Sizzix - Everyday Jar Framelits
Accessories: White Lustre Card; SU DP - Season of Style; Copics; Spectrum Noir - Sparkle Brush Clear; Copic Markers


The card is based on the current Fusion Challenge - FUSION#63, both the sketch and the candles in the jars on the graphic photo. I'm also submitting this card to The Card Concept - CC#63 where I picked up the red, green and kraft colours, along with the bold words.

I stamped the jar on some white card and used the matching die to cut it out. I stamped the candle and holly inside the jar and then decided to reduce the height of the jar. I coloured the candle and holly with Copics and added lots of sparkle to them. I cut a panel of design paper for the base of the card and then stamped the bold greeting in black. I adhered the jar to the card and added an extra layer of holly for some depth. On the inside I cut a mat layer of the design paper and on the white panel stamped a greeting and another candle.

Peace & Joy inside - photo by Deborah Frings - Deborah's GemsPeace & Joy sq - photo by Deborah Frings - Deborah's Gems

I took a close-up of the candle in the jar to show you the sparkle - it's lovely in real-life!!

Peace & Joy detail - photo by Deborah Frings - Deborah's Gems

I think that I've made all of the cards I need this year, so I plan to spend most of today writing them, sticking on address labels and stamps, and putting them in the post. Hopefully, the postman will arrive to pick them up! That's all for now!

signature

Sunday, 11 December 2016

Uniko Revisit and Blog Hop ....

..... Morning! We're in the grip of an arctic blast of air here in Northville and we've had snow too! So it's kind of appropriate that at Uniko we are revisiting STUNNING SNOWFLAKES. This is one of my all time favourite sets. Here's my card:

Merry Christmas - photo by Deborah Frings - Deborah's Gems

Stamps: Uniko - Stunning Snowflakes, Simply Said Christmas, Most Wonderful
Inks: Versamark; Stampin' Up! - Melon Mambo, Pumpkin Pie, Tempting Turquoise, Pacific Point
Dies: Uniko - Snowflakes; Spellbinders - A2 Matting Basics
Accessories: White Lustre Card; SU Card - Pacific Point, Pumpkin Pie; Tim Holtz Water Colour Card; Zig Real Brush Pens; Pink Glitter Paper; Clear Embossing Powder


I've gone for non-traditional colours - I think they make Christmas card zing! I'm playing along with CAS Colours & Sketches - CAS#203 where the team want us to use a previous 2016 sketch and make it seasonal; I've used the sketch #195. I've used the colours from Colour Throwdown - CTD#422 and, as it's a holiday card, I'm submitting to Addicted to Stamps and More! - ATSM#223.

I die cut a panel of white water colour card and stamped these gorgeous snowflakes in Versamark, heat embossed them with clear powder and then revealed them with water colour paints. I think emboss resist is one of my favourite techniques! I stamped the greeting on some scrap white card and cut it out with a die. I love the bold pop of orange with the die cut snowflake and the subtle hint of sparkle too. On the inside I cut a mat layer of dark blue card and on the white panel added a sentiment and some funky snowflakes!

Merry Christmas inside - photo by Deborah Frings - Deborah's GemsMerry Christmas sq - photo by Deborah Frings - Deborah's Gems

This is a blog hop so you should have come here from Bev's blog, but just in case you've come here direct, here's the full Blog Hop list - all links fixed - should be working okay now!

Bev (Uniko)
Deborah (that's me!)

We have a prize too - you have until midnight (GMT) on Sunday 18th December to comment along the Hop for the chance to win the featured set - Stunning Snowflakes - or, if you have this set a Gift Certificate to the same value. Have fun!

signature

Saturday, 10 December 2016

Christmas Candy ....

.... Hello! I hope you're all having a good weekend. I've been busy in my craft room this afternoon - still working on those few extra Christmas cards that I need. We're getting well into Christmas mode here at home - Jonathan has been playing his Christmas playlist - such fun and I've got a few decorations up. I still haven't put up the tree yet! Here's my card,filled with Christmas Candy:

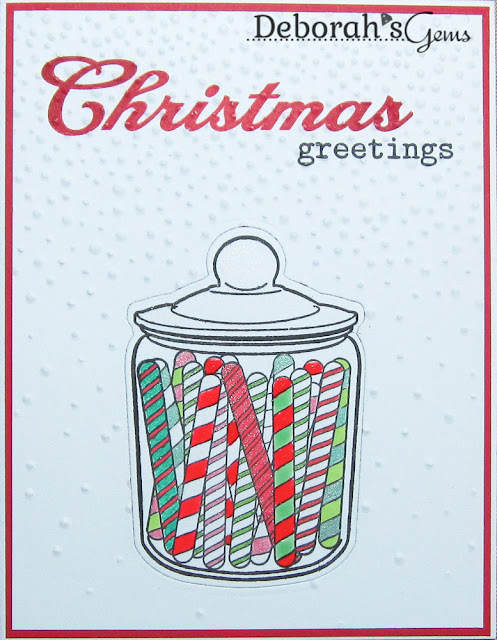
Christmas Greetings - photo by Deborah Frings - Deborah's Gems

Stamps: Waltzingmouse - Candy Jar Christmas Fillers, Say It Loud Winter Holiday; Winnie & Walter - The Big, The Bold & Merry
Inks: Versafine - Onyx Black; Memento - Tuxedo Black; Stampin' Up! - Real Red
Dies: Waltzingmouse - Sweetie Jar
Accessories: White Lustre Card; SU Card & DP - Real Red; Copics; Kaisercraft Pens; Sakura Pens; Zig Pens; Spectrum Noir - Sparkle Brush Clear; SU/Sizzix EF - Softly Falling


I'm submitting this card to Merry Monday - MM#225 where they want to see CANDY CANES. Also to Just Us Girls - JUGS#373 where the trend week is JARS, and at Happy Little Stampers CAS Challenge - HLSCASDec where we pick a favourite challenge from this year - I've gone for INLAID DIES.

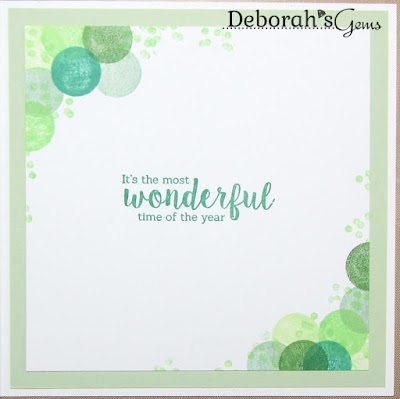
I pulled out an old favourite set from Waltzingmouse Stamps. I think this little jar is adorable and you can fill it with candy canes, as I've done here, or with peppermint candies. I stamped the jar and cut it out with the matching die and then coloured the candy canes using a variety of pens - I do like the colours and sparkle. I cut a panel of red card slightly smaller than the base and adhered to the base. I cut a white panel smaller still, stamped the greeting and die cut the jar. I removed the jar and embossed the rest of the panel with "falling snow". I attached the panel to the card and used strong glue to replace the candy jar in the space. On the inside I cut a mat of red design paper and on the white panel added a greeting and some more candy canes!

Christmas Greetings inside - photo by Deborah Frings - Deborah's GemsChristmas Greetings sq - photo by Deborah Frings - Deborah's Gems

I took a close-up of the candy jar showing all the different candy canes and all the sparkle too! Sorry about the photos - it really is grey and has is now dark! I hate the early nights.


I've just realised that this card works for the current Inkspirational Challenge - INK#123 where the team wants a CAS card with sparkle - I think this counts! That's all for now.

signature

Friday, 9 December 2016

Colour of 2017 ....

.... Morning! It's really cold and crisp here today. And that's okay as I've been in my craft room making more Christmas cards! I made today's card in honour of the Pantone colour of 2017 - Greenery. I love all shades of green and this one makes me very happy! Here's my card - you might recognise this snowflake:

Season's Greetings - photo by Deborah Frings - Deborah's Gems

Stamps: Uniko - Simply Said II, Most Wonderful; Stampin' Up! - Twinkle Trees
Inks: SU - Emerald Envy, Mint Macaron, Gable Green, Green Galore, Garden Green, Certainly Celery, Pistachio Pudding
Dies: Waltzingmouse - Folk Art Snowflake
Accessories: White Lustre Card; SU Card - Pistachio Pudding; Green Glitter Paper


To make this card I die cut the snowflake from some white card. I removed the snowflake and used the negative space as a mask. I created a bokeh background using many shades of green, some of them sadly discontinued. I removed the mask, cut the panel to size and then adhered the white die cut snowflake over the green background. I added a simple greeting in one corner and then layered the panel on some pale green glitter paper and attached the whole lot to the card base. On the inside I cut a mat layer of pale green card and on the white panel stamped a greeting and added more bokeh greenery!

Season's Greetings inside - photo by Deborah Frings - Deborah's Gems

I'm submitting this card to Addicted to Stamps and More! - ATSM#223 where the theme is HOLIDAY. I'm also playing along with AAA Cards - AAA#79 where they would like to see a CAS Christmas card. Finally, I'm submitting this to CAS-ual Fridays Challenge - CFC#162 where they want to see SNOWFLAKES and GLITTER. I think this card brings the number of cards in my Christmas stash to 108 which is good, as I need to write the cards this weekend and get them in the post. Some have many miles to travel before they reach their destination! That's all for today. Keep warm and be safe.

signature

Wednesday, 7 December 2016

TMR - Theme ...

.... Morning! I'm back with my card for our new challenge over at The Male Room - TMR#50. We have a very simple theme, and you won't be at all surprised to know that it's CHRISTMAS/WINTER WISHES/DECEMBER CELEBRATIONS. I had fun making another Christmas card for my stash (now 106 cards):

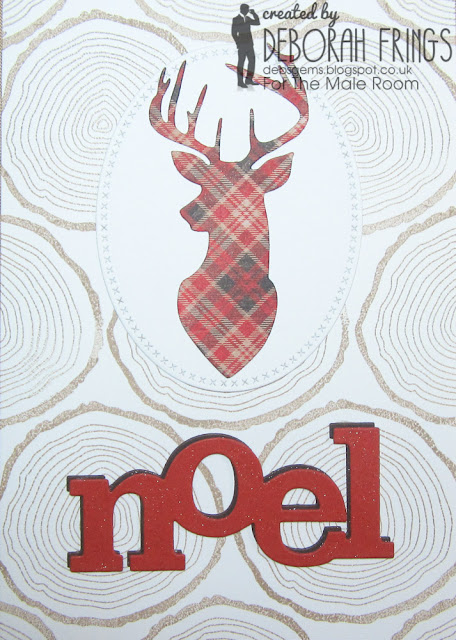
Noel - photo by Deborah Frings - Deborah's Gems

Stamps: Winnie & Walter - Winter Woodland, Comfort & Joy
Inks: Stampin' Up! - Cajun Craze, Crumb Cake; Versafine - Onyx Black
Dies: Kaisercraft - Deer Head; Die-namics - Cross Stitched Ovals #4; W&W Cutaway - Noel
Accessories: White Lustre Card; SU Card - Early Espresso, Cajun Craze; Tim Holtz Idea-ology - Tidings; Wink of Stella - Clear


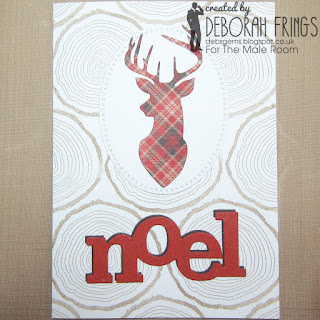
I think that a stag's head makes a perfect masculine Christmas card and I had fun with this one. I stamped the background with the cut tree trunk rings in light brown. I die cut a plain white oval on which I adhered the stag's head. I die cut it from some lovely plaid design paper. I made the word "noel" with three die cuts - one in dark brown and the other two in Cajun Craze. I adhered the dark brown slightly offset to create a drop shadow effect. I finished the front with a light dusting of clear Wink of Stella on the word noel. On the inside I cut mat layer of the plaid paper and on the white panel added a greeting, another stag's head and some birds.

Noel inside - photo by Deborah Frings - Deborah's GemsNoel sq - photo by Deborah Frings - Deborah's Gems

I'm really pleased how this one turned out. I'm going to submit this to AAA Cards - AAA#79 where the theme is CHRISTMAS, although it might not be CAS enough for them!

For more inspiration do visit our blog to see more from the Design Team. This challenge has an extended deadline to allow for the fact that most of us are very busy this month, and also to allow you to keep any special cards hidden until after 25th December. Submission deadline is midnight (GMT) on Saturday 31st December - that's 7.00pm EST for those in the States. Have fun!!

signature

Tuesday, 6 December 2016

Clean, simple Christmas ...

.... Good afternoon! I actually feel like it's early evening as I've been up since 4.00am this morning! It's really dull and grey today, so I decided to have a play with the current challenge at Less is More - LIM#305 where they want us to use one or more of the primary colours - RED, BLUE AND YELLOW. I used all the primary colours on my card. I'm back on the Christmas card theme and here's my card:

Christmas Greetings - photo by Deborah Frings - Deborah's Gems

Stamps: Stampin' Up! - Twinkle Trees; Winnie & Walter - The Big, The Bold & Greetings, Sentimental Winter
Inks: SU - Real Read, Ballet Blue, Yoyo Yellow, Crumb Cake; Versafine - Onyx Black
Accessories: White Lustre Card; SU DP - Crumb Cake; Spectrum Noir - Sparkle Brush Clear


I must apologise for the quality of the photo - it's so dark here that even with my daylight bulb, the white looks a bit grey!!

This is a simple one layer card. I started by stamping the greeting - love the blue (shame its discontinued) to act as a ground for the tree. I stamped trunk in a neutral kraft then added lots of decorations - red tinsel, and yellow and blue lights. I also added lots of sparkle with a clear Spectrum Noir brush - I traced over the word "greetings" and over the tinsel and star. On the inside I cut a mat layer of kraft design paper and added a continuation of the greeting along with piles of "lights" in the corners of the white card.

Christmas Greetings inside - photo by Deborah Frings - Deborah's GemsChristmas Greetings sq - photo by Deborah Frings - Deborah's Gems

The cue word over at Just Us Girls - JUGS#372 is CHRISTMAS TREE so I'm submitting this card there and I'm also playing along with City Crafter Challenge Blog - CCCB#341 where they want to see Christmas trees too.

That's all for today - I really do have to get on with some ironing - the pile is going to fall over soon!

signature

Monday, 5 December 2016

Marvellous Mehndhi ...

.... Morning all! I'm taking a bit of a break from Christmas cards today. December and January are full of family and friend birthdays, so I thought I'd make a few for my stash. Here's the first:

Happy Birthday - photo by Deborah Frings - Deborah's Gems

Stamps: Uniko - Marvellous Mehndi, Simply Said; Cas-ual Friday Stamps - Whole Shebang
Inks: Versafine - Onyx Black; Memento - Tuxedo Black
Dies: Memory Box - Contempo Circle Border
Accessories: White Lustre Card; Bazill Card - Lime Green; Vellum; Zig Real Brushes; Spectrum Noir - Sparkle Brush Clear; Clear Embossing Powder; Tim Holtz Water Colour Card


I stamped the mandala image twice - once on the card and once on watercolour card. I embossed the image on water colour card with clear powder and then coloured it with Zig Real Brushes. I also added some sparkle with my clear Spectrum Noir brush. I fussy cut the water colour image, edged it with a black marker and adhered it to the card with the green die cut border beneath it. I stamped the sentiment on a scrap of white card, attached it to a piece of die cut vellum and then adhered it over the flower. On the inside I cut a mat layer of green card and on the white panel added a fun greeting and a paisley pattern.

Happy Birthday inside - photo by Deborah Frings - Deborah's GemsHappy Birthday sq - photo by Deborah Frings - Deborah's Gems

I used the colour from this week's Colour Throwdown - CTD#421 - love these colours. The layout is based on the sketch from this week's Freshly Made Sketches - FMS#265.

I've got a busy week coming up - I've got to finish sorting out my Christmas card list, get the labels printed, cards written and then posted. It's a fairly major job. And in between all my crafting fun, I also need to make sure that the house is clean and tidy. Oh yes, must get the Christmas tree up too! That's all for now! Do drop by again soon.

signature

Sunday, 4 December 2016

Snowflake sparkle ....

... Hello! I'm still on a Christmas card roll. I've got a really clean, simple and sparkly card to share with you this morning:

Snowflake Shimmer - photo by Deborah Frings - Deborah's Gems

Stamps: Uniko - Simply Said Christmas, Most Wonderful, Stunning Snowflakes
Inks: Stampin' Up! - Melon Mambo, Sweet Sugar Plum, Raspberry Ripple; Versafine - Onyx Black
Dies: Waltzingmouse - Folk Art Snowflake
Accessories: White Lustre Card; Magenta Glitter Paper; SU Card - Raspberry Ripple; Stick It


I made this card using one of my favourite techniques - inlaid dies. I covered the back of the card with some Stick It adhesive - double sided, very thin and easy to die cut. I positioned the die and using my precision plate I ran it through my Big Shot several times to ensure that all the little pieces were cut through. I removed the snowflake and all the bits from the card panel. I then adhered a piece of bright magenta glitter paper to the inside of the card. Then I simple replace the snowflake die cut. I added a tiny seasonal greeting to the corner of the card. On the inside I cut a mat layer of dark pink card and on the white panel added a greeting and some smaller snowflakes.

Snowflake Shimmer sq - photo by Deborah Frings - Deborah's Gems

I'm submitting this card to a few challenges. The first is CAS-ual Fridays Challenge - CFC#162 where the team would like to see snowflakes and glitter. The second is Simon Says Wednesday Challenge where the theme is ANYTHING GOES. Finally, I'm playing along with Love to Craft Challenge Blog - LTCCB#5 where they too have an ANYTHING GOES challenge. And also to TIME OUT Challenges - TOC#71 - where the theme is CHRISTMAS with optional sparkle!  And this card brings my stash total to 104! I'm getting there.

signature
Related Posts Plugin for WordPress, Blogger...