Showing posts with label WMS - Frame It. Show all posts

Wednesday, 27 September 2023

Sympathy Cards

.... Hello again! Yesterday I shared some sympathy cards I've had to make. Today, I'm sharing some more. This is the first:


Stamps: MFT - Deepest Sympathy; Gina K - Fancy Feathers
Inks: Gina K - Lovely Lavender, Ocean Mist, Soft Stone; Versafine Claire - Nocturne
Dies: Gina K - Fancy Feathers, Master Layouts 8, Lots of Dots
Accessories: White & Black Card; SU Card - Smoky Slate; Silver Satin Mirri Card


This card was inspired by the card Gina K made in a five minute video using the Fancy Feathers die. I changed up the colours, the feather used, the direction of the dots and the stamps used. Inside the card, I cut a mat layer of black card. On the white panel I stamped two of the smaller feathers and added a simple greeting in black.


This is the second:


Stamps: Waltzingmouse Stamps - Fine Feathers; Waffle Flower - With Sympathy Duo
Inks: Gina K - Lovely Lavender, Ocean Mist, Stormy Sky; Versafine Claire - Nocturne
Dies: WMS - Fine Feathers
Accessories: White & Grey Card; Gina K Stencil - Lush Leaves; Silver Thread; Crystal Gem; Copic Marker


I started by stencilling a background pattern onto white card - I simply used the ink left over on the brushes. I trimmed the panel to size and added a black border to the top and bottom with a black Copic marker. I stamped the message in black ink and added some wings below with a tiny gem in the middle. I finished the front by adding two feathers - one stamped in blue and one in lilac. The stamp set and dies from WMS are both discontinued. For the inside, I cut a piece of white card which I edge with a black marker. I then stamped a simple message and added another of the feathers to the corner of the panel.


And this is the final card:


Stamps: Gina K - Bold Bloom, So Many Sentiments; WMS - Frame It
Inks: Versafine Claire - Nocturne
Dies: Gina K - Master Layouts 2
Accessories: White & Black Card; Copic Markers; Sakura Stardust Pens

I'm submitting this card to Never-Before-Used-Schtuff - NBUS#54 - this is the first time I've used that beautiful flower.

I used my MISTI to stamp the image on white card, removed it and coloured it with Copic markers. I returned the image to the MISTI and restamped with Versafine Claire Nocturne ink - such a deep black. I used a stitched edge die to cut out the image, stamped a sentiment below, adhered it to a black mat and glued it to the front of an A2 (US size) white note card. I added a touch of sparkle to parts of the flowers and leaves with Sakura Stardust pens. Inside the card, I cut a mat layer of black card. On the white panel I stamped a simple sentiment and added the flower in the corner.


I mentioned yesterday, that these have been the hardest cards I've had to make. They were all for my family. My lovely cousin, Neil, died on Monday 18 September - he was only 57 years old. 


Neil was such kind man and much loved by all the family. Neil's passing has left a huge hole in our hearts.

signature photo Signature.png

Friday, 29 May 2020

CASOF - GD - Happy Birthday ...

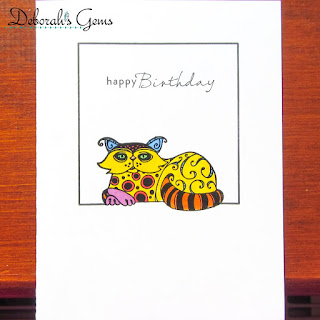
... Hi! Recently, I was picked as winner of the flower challenge at CAS on Friday and, as a result, I'm their Guest Designer for this week's challenge. So this week at CAS on Friday - CASOF#181, the DT want us to make a clean, simple card with the theme of Animal. Here's my card:


Stamps: Waltzingmouse Stamps - Frame It; Inkadinkadoo - Patterned Pets; MFT - Sassy Pants Birthday Greetings 2
Inks: Gina K - Jet Black Amalgam; Versafine - Onyx Black
Accessories: White Card; Copic Markers; Clear Embossing Powder

I'm submitting this card to Perfectly CAS - PCAS#9 where the theme is to use only a third of the card along with Animals, and to Addicted to CAS - ATCAS#185 where the theme is Rainbow.


For me this is an ultra CAS card - I do tend towards CAS, but it's not often that I go as CAS as this!!! I stamped the square frame onto the white card base and, using my MISTI, carefully positioned the funky cat image in the space. I stamped the cat, coloured it with Copic markers, repositioned it in the MISTI and restamped using Versafine ink and then heat embossed the image. This technique gives a really clean, crisp image - which is exactly what you need for a CAS card. I finished by adding the simple sentiment. On the inside, I added a sassy and fun birthday greeting along with the same cat, but this time I didn't colour the image.


I had fun colouring the cat all the colours of the rainbow! That's all from me today - see you again soon.

signature photo Signature.png

Monday, 2 March 2020

Happy Birthday ...

... Hello again! I hope your day is going well. I've had a busy morning - laundry, shopping, taxi service for daughter, etc. And I've also managed to grab sometime upstairs to play. Here's a very clean, simple birthday card:


Stamps: Waltzingmouse Stamps - Frame It; Funstamps - 3D Flower 2 FF68
Inks: Gina K Amalgam - Black
Accessories: White Card; Copic Markers; Nuvo Aquashimmer Brush

I made this card for the following challenges - Colour Throwdown - CTD#582 and Addicted to CAS - ATCAS#179 where the theme is symmetry.


One of my resolutions this year is to use my older stamp sets, and this card uses two sets. The frame and sentiment are from Waltzingmouse Stamps, always one of my favourite companies. The flower is from a set that I got from QVC and works perfectly for the symmetry theme. I stamped the frame and sentiment directly on the card. I stamped the flower in the centre of the square and again on scrap card. I used Copic markers to colour the flower and then cut out layers. I added some sparkle to the pink and kraft layers with a clear Aquashimmer brush. On the inside I stamped a cute little cupcake, coloured to match the flower. There's plenty of space for my message. I took a close-up photo of the flower to show the subtle sparkle.


That's all for now - must get the laundry put away. See you again soon.

signature photo Signature.png

Saturday, 14 May 2016

52CCT - Colours ...

.... Morning! It's time for our new challenge at 52 Christmas Card Throwdown and this week it's our colour challenge. Fabiola has picked super colours for us to play with - BLUE, GREY AND KRAFT. Here's my card:

It's Christmas - photo by Deborah Frings - Deborah's Gems

Stamps: Waltzingmouse - Frame It, Festive Foliage
Inks: Memento - Grey Flannel; Stampin' Up! - Crumb Cake
Dies: Lil Inkers - Dual Stitched Squares #3; Spellbinders - Squares Lg (S4-126) #7
Accessories: White Lustre Card; Kaisercraft DP - Silver Bells; SU Card - Crumb Cake; Glitter


You might be experiencing a case of deja-vu looking at this card! I CASEd my own card from April, when I made pink and grey ornament card. I cut a mat of kraft card slightly smaller then the card and layered on the design paper. I die cut a square of kraft card and a smaller square in white. I stamped on the fir tree branches and a greeting and finished by adding some baubles that I'd cut from a sheet of design paper. Before adhering this panel I added glitter to the base layer. On the inside I cut another mat of design paper and finished with a simple panel. I'm submitting this card to the current challenge at Addicted to Stamps and More! - ATSM#193 where the theme is HOLIDAYS.
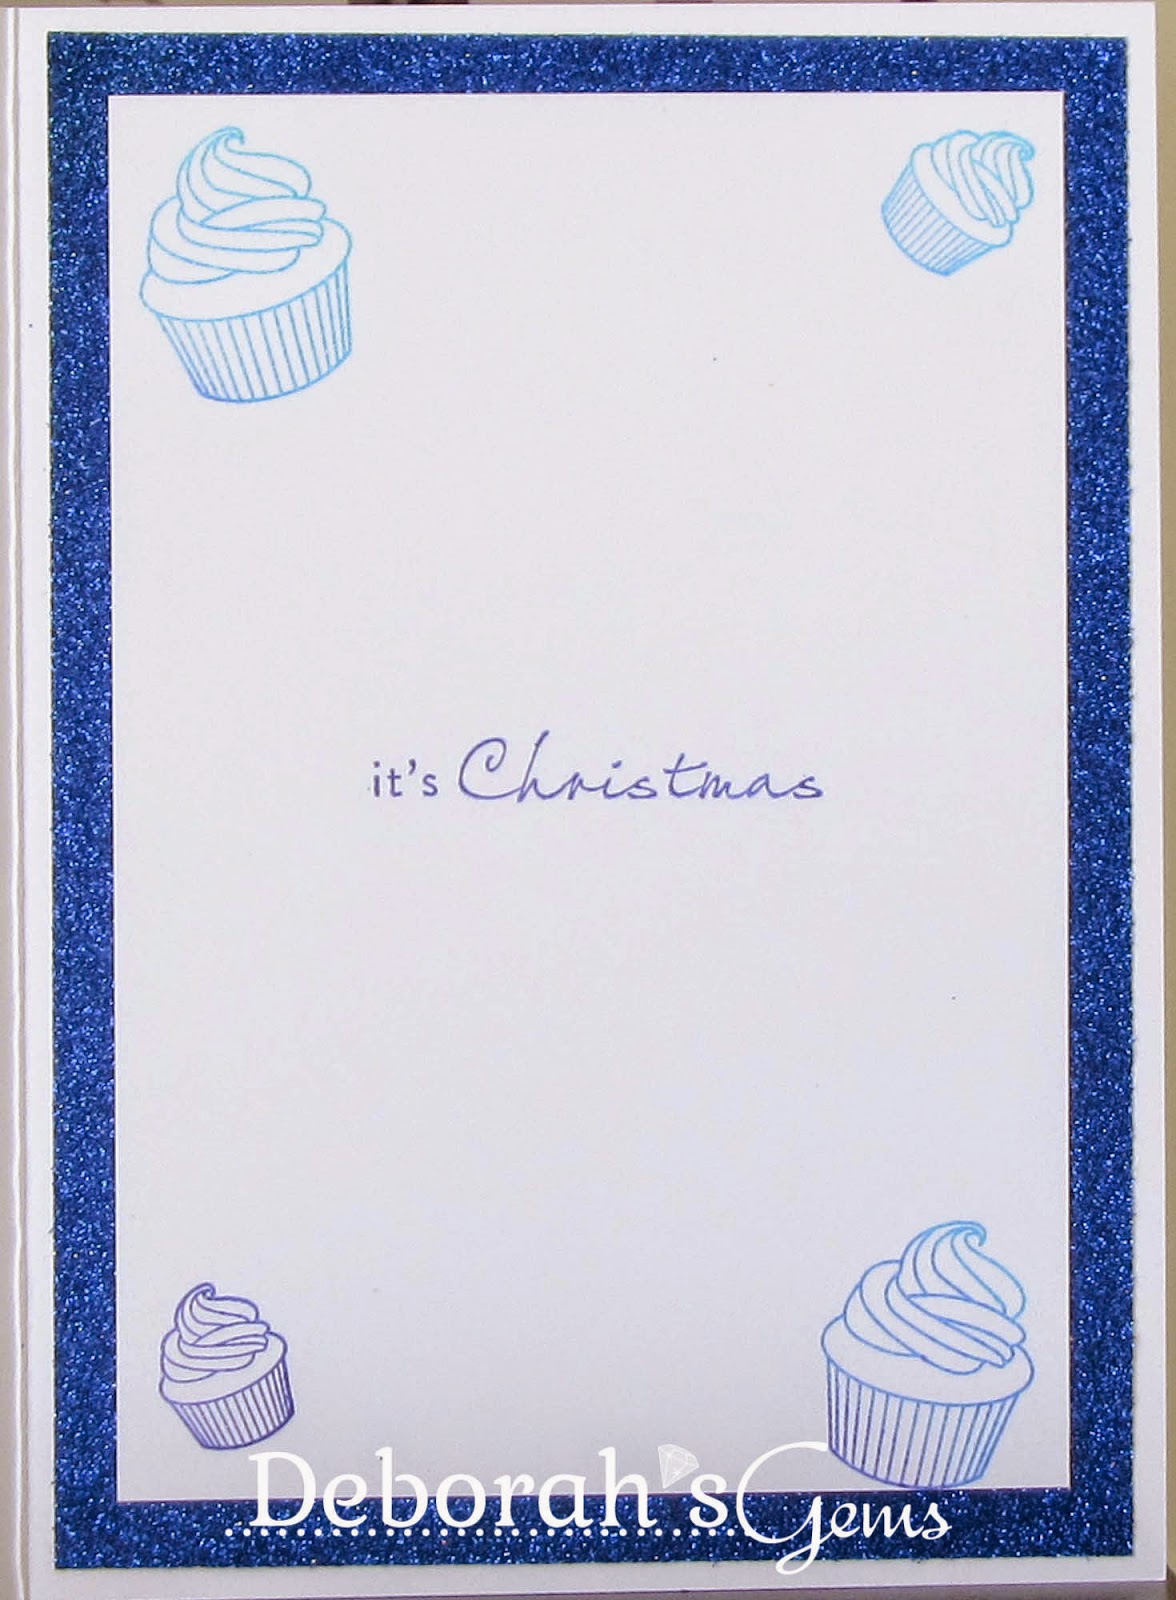
It's Christmas inside - photo by Deborah Frings - Deborah's Gems

For more inspiration with these super colours, do visit our blog to see more from the rest of the Design Team. You've got plenty of time to play along - deadline for submission is midnight Friday 20th May (7.00pm EDT).

Before I go - here are both my cards side by side. I think I might make a teal one too.


And that's all for today folks - see you tomorrow!

signature

Saturday, 2 May 2015

52CCT - Sketch ....

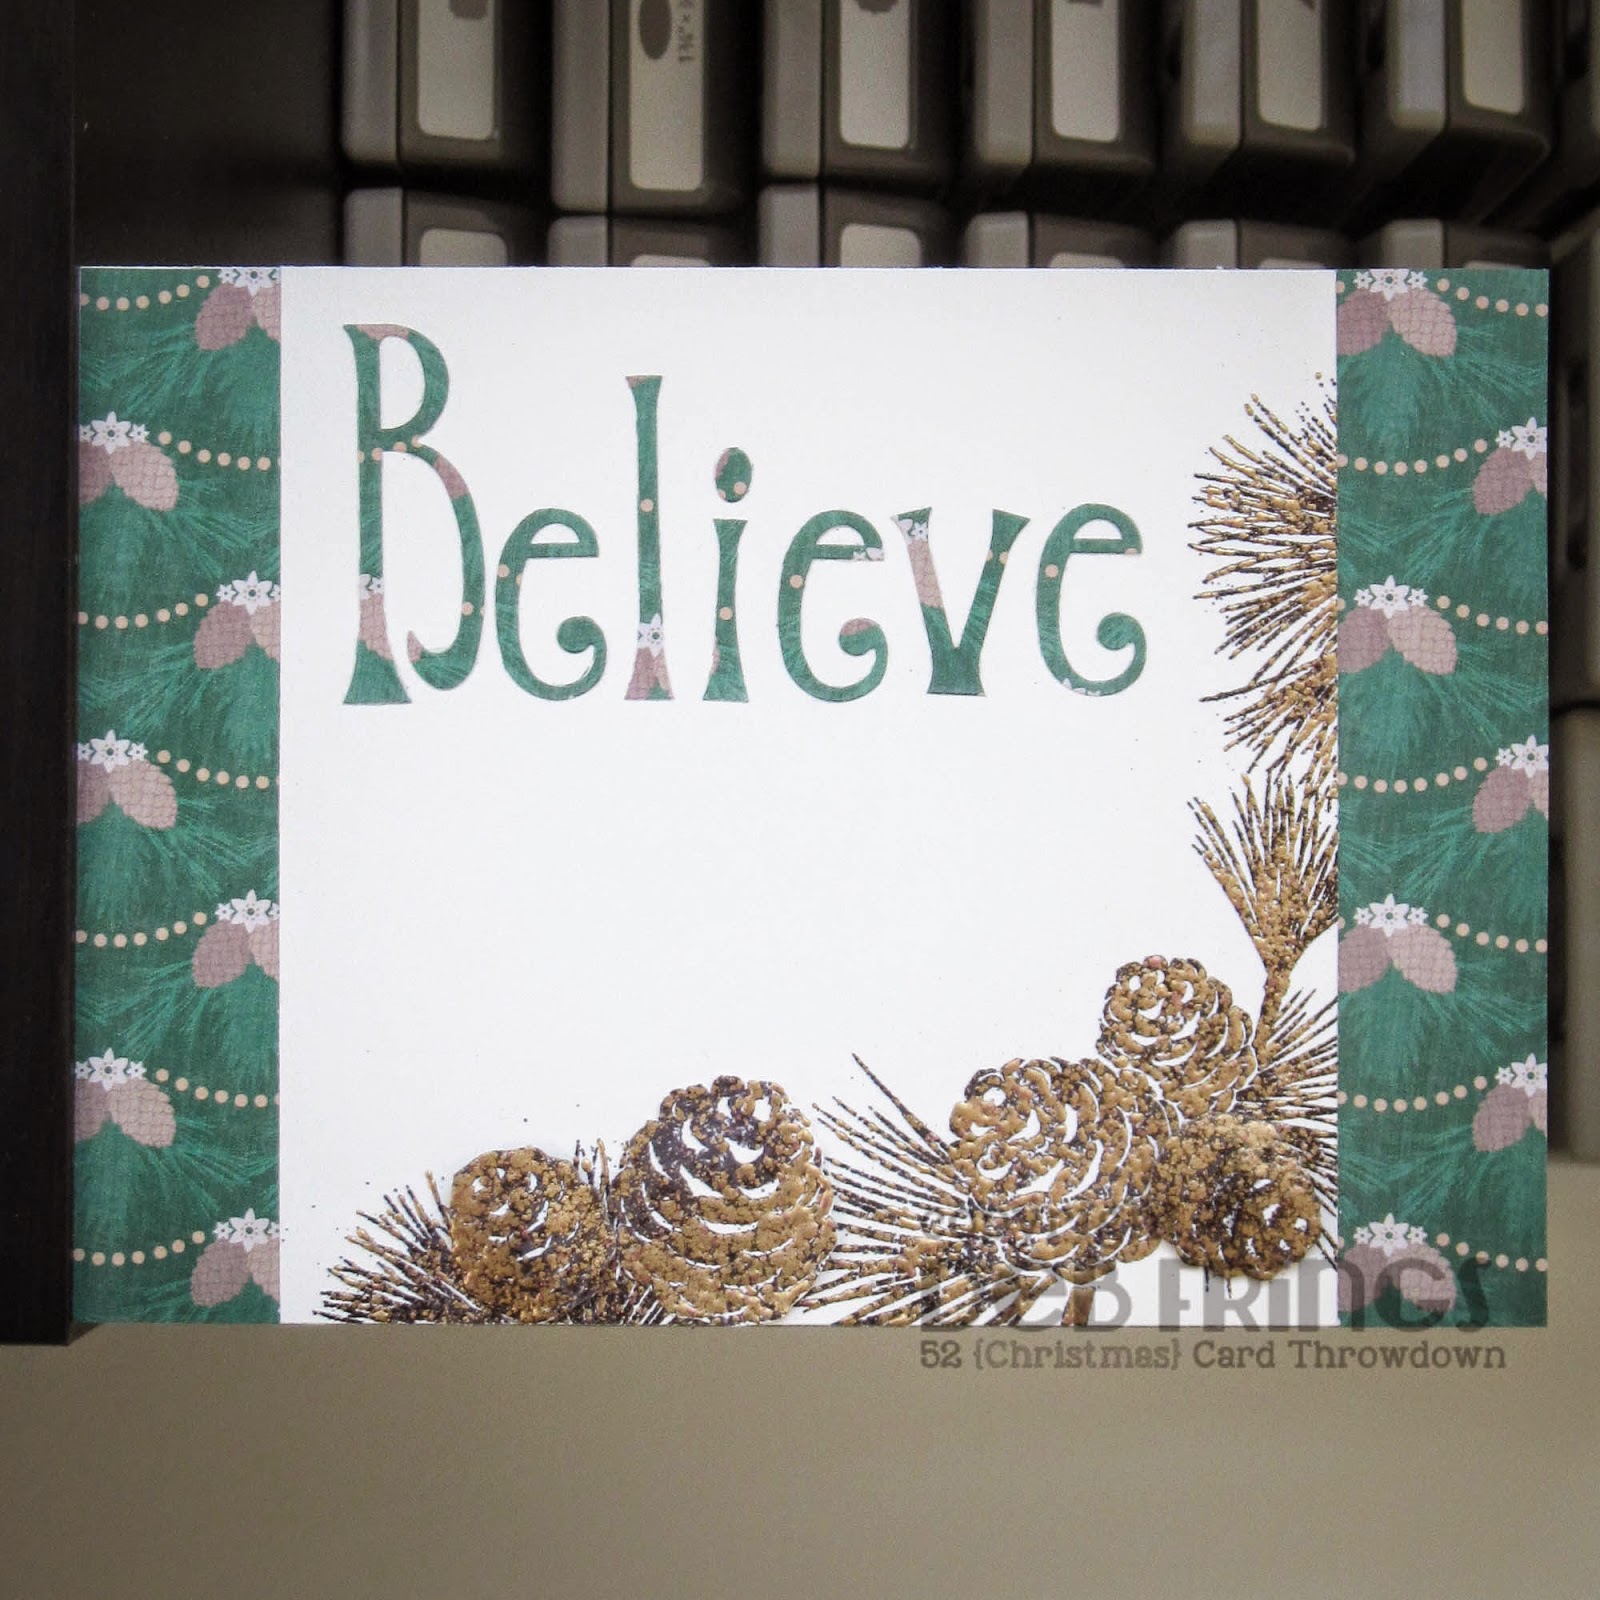
....  Good morning!  Welcome to the first challenge of the month at 52 {Christmas} Card Throwdown and our hostess is Patricia.  As normal, we have a sketch for you and Patricia is happy for you to flip it, change it to a square or make it a mirror image, but we must be able to see the basic sketch in your finished card.  Here's my take:

Believe - photo by Deborah Frings - Deborah's Gems

Stamps:  Waltzingmouse - Festive Foliage, Frame-It
Inks: Versamark; Memento - Tuxedo Black
Dies: Provo Craft - Hippie Chick
Accessories: Cream Lustre Card; Kaisercraft DP - Holly Bright; Stampendous - Frantage Aged Gold Embossing Enamel; SU Markers - Mossy Meadow, Garden Green, Wild Wasabi, Early Espresso, Crumb Cake, Soft Suede


The challenge over at Merry Monday - MM#156 this week is to use green, pine cones and the word Believe - check!  I flipped our sketch through 180° as it worked better for my design.  I covered the card with some lovely pine cone design paper in green. On the central panel I stamped some pine cones and branches in Versamark and embossed with Frantage embossing enamel.  I love the effect this embossing powder gives, but it does have a tendency to fly off the card!  I die cut some letters from the design paper to make the word and adhered them direct to the card.  I finished the front with a couple of extra pine cones that I attached with dimensional gel (but you can't really see that in this photo!!  On the inside I cut another sheet of the design paper and stamped a simple greeting and a few more pine cones too.

Believe inside - photo by Deborah Frings - Deborah's GemsBelieve sq - photo by Deborah Frings - Deborah's Gems

Do check out our blog to see what the rest of the team have made for you.  You've until Friday 8th May midnight BST (7.00pm EDT) to submit your card.  Have fun!!

signature

Saturday, 10 January 2015

52CCT - Colours .....

...  Good morning all.  I think when I picked the colours for this week's 52 {Christmas} Card Throwdown challenge, I was expecting to have lots of snow around.  And that's exactly what it's like.  We're having a real arctic blast of winter here in America.  I shovelled 3" of snow off the drive yesterday and at the time of writing this post (Friday afternoon) we've had a bit more snow - but the skies are blue and the sun is shining.  What are the colours?  You have to use  
Shades of Blue  
and this is my card:

Cupcake Tree - photo by Deborah Frings - Deborah's Gems

Stamps: Waltzingmouse - Frame It
Ink: Kaleidacolor - Blue Breeze
Dies: Spellbinders - Petit Oval Sm (S4-140) #6, Scalloped Petit Ovals Sm (S4-141) #6
Accessories: White Lustre Card; Blue Mirri Card; Blue Glitter Paper; Cuttlebug EF - Winter Wonderland; Martha Stewart - Snowflake Punch; Wink of Stella - Clear


I got the inspiration for my Cupcake Christmas tree from the graphic for this week's Merry Monday - MM#140 challenge which is to use snowflakes on your card.  I stamped lots of little cupcakes in shades of blue, used my aqua pen to drag the ink in and give a hint of colour to the case and icing and then fussy cut them all out.  I then layered them up to create a Christmas tree.  I added clear Wink of Stella to all the icing and used an oval die to cut out the tree.  I layered this onto blue metallic card.  To add interest I embossed some white card with more snowflakes, layered it onto blue metallic card and then direct to the card base.  I finished the front with a dark blue glitter snowflake to go on top of the tree.  On the inside I cut a mat layer of blue glitter paper and on the white panel added a few more cupcakes and a simple greeting.  I took a close up of the cupcakes so that you can see the sparkle.

Cupcake Tree detail - photo by Deborah Frings - Deborah's GemsCupcake Tree inside - photo by Deborah Frings - Deborah's Gems

 
Cupcake Tree Sq - photo by Deborah Frings - Deborah's Gems

For more inspiration using all the BLUES check out the cards from the rest of the team - they have created some wonderful cards.  Have fun!

signature

Saturday, 19 April 2014

52CCT - Theme ....

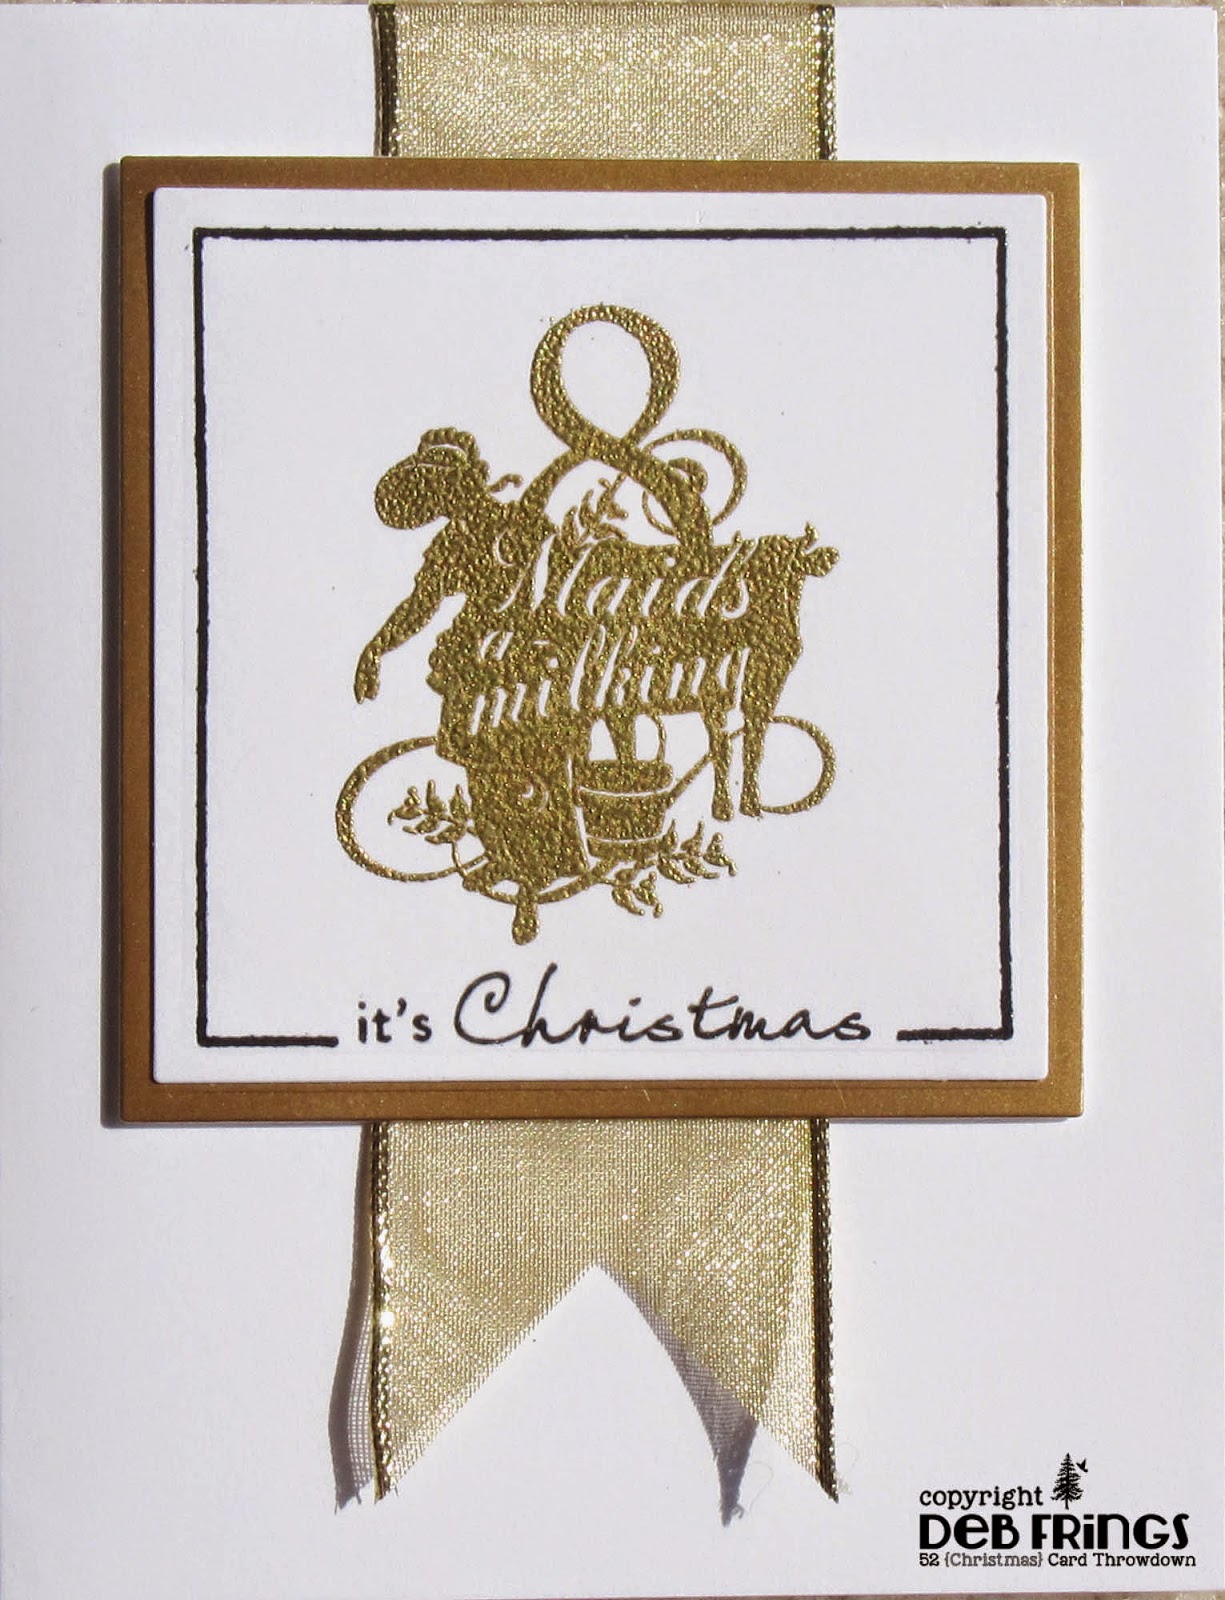
....  Morning all!  I'm back with our new challenge at 52 {Christmas} Card Throwdown.  I had lots of fun picking the challenges this month, particularly this week's!  I've gone for the theme of "The Twelve Days of Christmas", which, I think you'll agree, means you have plenty of scope with the challenge.  And I'd better apologise now, as this is a very photo heavy post.  I made a card for every day of the twelve days!  Here they are:

12DOC 1 - photo by Deborah Frings - Deborah's Gems

12DOC 2 - photo by Deborah Frings - Deborah's Gems

12DOC 3 - photo by Deborah Frings - Deborah's Gems

12DOC 4 - photo by Deborah Frings - Deborah's Gems

12DOC 5 - photo by Deborah Frings - Deborah's Gems

12DOC 6 - photo by Deborah Frings - Deborah's Gems

12DOC 7 - photo by Deborah Frings - Deborah's Gems

12DOC 8 - photo by Deborah Frings - Deborah's Gems

12DOC 9 - photo by Deborah Frings - Deborah's Gems

12DOC 10 - photo by Deborah Frings - Deborah's Gems

12DOC 11 - photo by Deborah Frings - Deborah's Gems

12DOC 12 - photo by Deborah Frings - Deborah's Gems

Stamps: Hampton Art Graphic 45 - 12 Days of Christmas; Waltzingmouse - Frame It, Alpine Christmas
Inks: Versamark; Versafine - Onyx Black
Dies: Spellbinders - Squares Lg (S4-126) #6, Squares Sm (S4-128) #7; Lil' Inkers - Stitched Squares #5
Accessories: White Lustre Card; Anita's DP - Classic Black Christmas, Classic Red Christmas; My Mind's Eye DP - Kiss & Tell; Embossing Powder - Clear, Black Tinsel, Red Tinsel, Green Tinsel, Gold and Silver; Various metallic/glitter card; Ribbons


I started by stamping all the frames and sentiments, embossing them with clear powder and die cutting them all.  I went through my stash for a selection of metallic/glitter card and cut the mat layers.  After die cutting the square with the stamped frame I stamped and embossed all the images - I used my stamp-a-ma-jig to make sure that the images were centred.  I decided to make three sets of four - square, portrait and landscape - changing up how I decorated the cards.  The square cards all have an extra mat layer cut using the stitched square and the inside of each features a backing mat of the matching paper and a simple sentiment.  For the portrait cards I added a ribbon beneath the square image, which was adhered with dimensional tape.  As before the inside has a mat layer of coordinating paper and a Christmas verse.  For the landscape cards I was going to make them all with a bow, but that is a bit bulky to post, so I added ribbons which had been wrapped around metallic card.  Here are the insides for each of the three sets.

12DOC inside landscape - photo by Deborah Frings - Deborah's Gems

12DOC inside square - photo by Deborah Frings - Deborah's Gems

12DOC inside portrait - photo by Deborah Frings - Deborah's Gems

As always, you can find more inspiration by checking the cards produced by our Design Team and by our Guest Designer, Pat.

Before I go, a little bit about the carol The Twelve Days of Christmas.  It was first published in England in 1780 without music as is likely French in origin.  The melody that is now associated with the song was written by Fredric Austin.  It is a cumulative song and since 1984 the cumulative cost of all the items in the song have been used a fun economic indicator.  Here are the lyrics:

On the first day of Christmas
my true love sent to me:
A Partridge in a Pear Tree

On the second day of Christmas
my true love sent to me:
2 Turtle Doves
and a Partridge in a Pear Tree

On the third day of Christmas
my true love sent to me:
3 French Hens
2 Turtle Doves
and a Partridge in a Pear Tree

On the fourth day of Christmas
my true love sent to me:
4 Calling Birds
3 French Hens
2 Turtle Doves
and a Partridge in a Pear Tree

On the fifth day of Christmas
my true love sent to me:
5 Golden Rings
4 Calling Birds
3 French Hens
2 Turtle Doves
and a Partridge in a Pear Tree

On the sixth day of Christmas
my true love sent to me:
6 Geese a Laying
5 Golden Rings
4 Calling Birds
3 French Hens
2 Turtle Doves
and a Partridge in a Pear Tree

On the seventh day of Christmas
my true love sent to me:
7 Swans a Swimming
6 Geese a Laying
5 Golden Rings
4 Calling Birds
3 French Hens
2 Turtle Doves
and a Partridge in a Pear Tree

On the eighth day of Christmas
my true love sent to me:
8 Maids a Milking
7 Swans a Swimming
6 Geese a Laying
5 Golden Rings
4 Calling Birds
3 French Hens
2 Turtle Doves
and a Partridge in a Pear Tree

On the ninth day of Christmas
my true love sent to me:
9 Ladies Dancing
8 Maids a Milking
7 Swans a Swimming
6 Geese a Laying
5 Golden Rings
4 Calling Birds
3 French Hens
2 Turtle Doves
and a Partridge in a Pear Tree

On the tenth day of Christmas
my true love sent to me:
10 Lords a Leaping
9 Ladies Dancing
8 Maids a Milking
7 Swans a Swimming
6 Geese a Laying
5 Golden Rings
4 Calling Birds
3 French Hens
2 Turtle Doves
and a Partridge in a Pear Tree

On the eleventh day of Christmas
my true love sent to me:
11 Pipers Piping
10 Lords a Leaping
9 Ladies Dancing
8 Maids a Milking
7 Swans a Swimming
6 Geese a Laying
5 Golden Rings
4 Calling Birds
3 French Hens
2 Turtle Doves
and a Partridge in a Pear Tree

On the first day of Christmas
my true love sent to me:
12 Drummers Drumming
11 Pipers Piping
10 Lords a Leaping
9 Ladies Dancing
8 Maids a Milking
7 Swans a Swimming
6 Geese a Laying
5 Golden Rings
4 Calling Birds
3 French Hens
2 Turtle Doves
and a Partridge in a Pear Tree

That's all - congratulations if you've got to the end of this post!  I'm really looking forward to seeing your creations based on the song.  See you soon.

signature
Related Posts Plugin for WordPress, Blogger...