Showing posts with label US - Reach for the Stars. Show all posts

Friday, 11 May 2018

Uniko - Explosion! Collection Dies ....

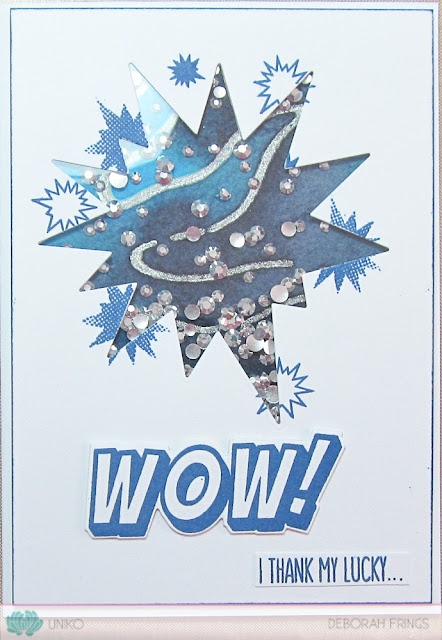
... Morning! We've reached the last day of introductions for the new Uniko release! I do hope you've all enjoyed what you've seen so far. Today I'm introducing a new collection of dies - they coordinate with the Explosion! collections and they're great. I made a clean, simple and fun card:

Wow! - photo by Deborah Frings - Deborah's Gems

Stamps: Uniko - Explosion! Additions, Reach for the Stars
Inks: Gina K - Blue Denim, Black Onyx
Dies: Uniko - Explosion! Collection Dies
Accessories: White Lustre Card; Gina K Card - Blue Denim; Acetate; Studio Katia - Silver Foil Crystals; Blue Mulberry Paper


I don't often make window cards, but after seeing Bev's lovely card yesterday, I decided to make one using the large explosion die.

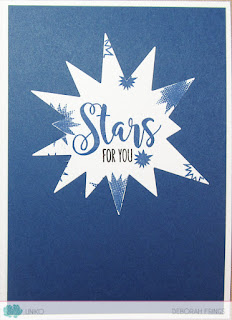
I used the largest die to cut the exploding star slightly off centre. I kept the die cut panel in place and randomly stamped a number of the smaller explosion stamps around the edge; I removed the die cut star and put it safely aside. I adhered a sheet of clear acetate behind the white pane. I die cut a piece of white foam with the largest star, which I attached to the acetate. In my stash, I found a very old sheet of blue mulberry paper which reminded me of a galaxy. After adding some silver foil crystals to the star opening, I closed the panel by adhering the mulberry paper. I edged the whole panel with some blue ink and attached it to the card base. I stamped the word 'wow' on white card, cut it out with the matching die and used dimensional pads to attach it to the card. I finished the front by stamping the little sentiment on card and glued it flat to the front. I added a few dots to show that the sentiment continues inside. On the inside, I cut a panel of blue card onto which I glued the die cut star/explosion. I finished the sentiment by adding the words' Stars for you'. I'm submitting this card to CASology - CAS#299 where the cue word is Marine which suggested shades of blue to me! I'm posting this card to my son.

Wow inside - photo by Deborah Frings - Deborah's GemsWow sq - photo by Deborah Frings - Deborah's Gems

Check out the Uniko blog to see more inspiring projects from the rest of the Design Team. It's been fun introducing all these lovely new stamp sets, stencils and dies. Tomorrow is Release Day! So please come back again and join in our traditional Design Team Blog Hop & Giveaway! There'll be so much to see and prizes too - details on Bev's blog. See you then!!

signature

Wednesday, 14 March 2018

TMR - Theme ....

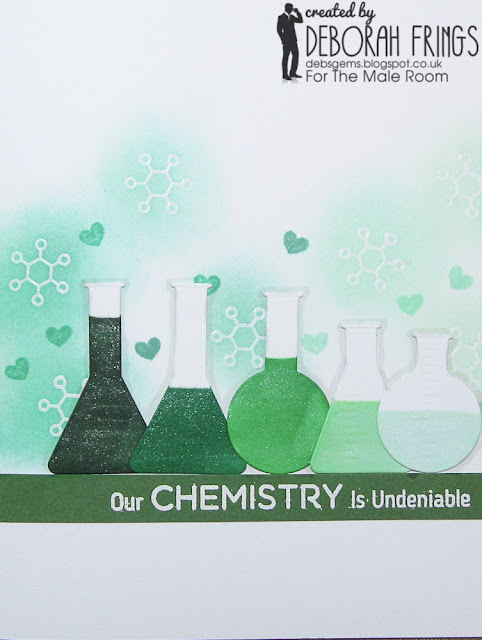
... Hello! I can't quite believe that it's been two weeks since I posted anything!! Time is going by so fast. Anyway, it's time for our new challenge at The Male Room - TMR#81. We have a fun theme, we want to see Space/Science inspired masculine projects. I actually ended up making two cards, here's the first with a science theme:

Our Chemistry - photo by Deborah Frings - Deborah's Gems

Stamps: My Favourite Things - LLD Undeniable Chemistry
Inks: Distress - Cracked Pistachio, Evergreen Bough, Lucky Clover; Versamark
Dies: Die-namics - Chemistry Set
Accessories: White Lustre Card; SU Card - Garden Green; Copic Markers; Spectrum Noir - Clear Sparkle Brush; White and Clear Embossing Powder


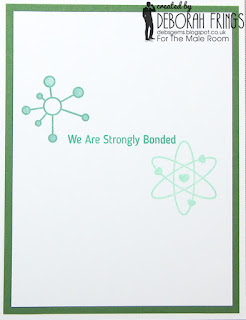
I'm submitting this card to AAA Cards - AAA#110 where they have an Ombre theme, to The Card Concept - CC#88 where they want shades of green, and to CAS(E) this Sketch! - CTS#262. I die cut several different flasks from white card and coloured them with shades of green - moving from the most concentrated to the least. I stamped some 'molecules' in Versamark on to the card base, heat embossed them with clear powder and then inked over with soft shades of green. I also stamped some little hearts in the same shades of green. I stamped a sentiment on green card in Versamark and heat embossed with white powder. I added lots of sparkle to the 'chemicals' in the flasks and adhered them to the card. On the inside, I cut a mat layer of dark green card and added a fun sentiment on the white panel with more 'chemical' symbols!!

Our Chemistry inside - photo by Deborah Frings - Deborah's GemsOur Chemistry sq - photo by Deborah Frings - Deborah's Gems

I was on a bit of a roll, so I made a second card, this time with a space theme:

Shoot for the Moon - photo by Deborah Frings - Deborah's Gems

Stamps: Altenew - To The Moon, Happy Dreams; Uniko - Reach for the Stars
Inks: Versamark; Delicata - Silvery Shimmer; Gina K - Moonlit Fog, Dark Sage
Dies: Die-namics - Circles Set 2 #5
Accessories: White Lustre Card; Stampin' Up! Card - Basic Black; Shimmer Spritz - Frost; White Embossing Powder


I made the card base from Stampin' Up! black card. I used the multi-step moon image from To The Moon to create the focal image, stamping in silver, pale grey and dark grey, and cut it out with a circle die. I spritzed the card with frost shimmer spray to give the impression of a galaxy of stars. I stamped the sentiment in Versamark and heat embossed with white powder. I finished the front by added a few larger stars in silver. On the inside, I cut a panel of white card on which I stamped another moon and added a greeting. I'm submitting this card to Less Is More - LIM#366 where they want a monochromatic card.

Shoot for the Moon inside- photo by Deborah Frings - Deborah's GemsShoot for the Moon sq - photo by Deborah Frings - Deborah's Gems

That's all from me for today. But do visit The Male Room blog to see lots more inspiration from the rest of the Design Team and also from our Guest Designer Lynda from Lynda's Crafty Hall. You've got lots of time to play along with this challenge, submission deadline is midnight BST on Tuesday 27th March, that's 7.00pm EDT in the States. Have fun!!

signature

Monday, 26 February 2018

Uniko - Life Is A Song, Background Blocks Equaliser, and Equaliser Stencil ...

... Hi! We're on day four of our Uniko Introductions. Today we have two more stamps sets and a stencil; they have a distinctly musical theme! I've made two cards; here's the first:

Rock Star - photo by Deborah Frings - Deborah's Gems

Stamps: Uniko - Background Blocks Equaliser, Reach for the Stars, Life is a Song
Inks: Gina K - Charcoal Brown, Wild Wisteria, Lovely Lavender, Kraft; Distress Oxide - Antique Linen
Dies: Die-namics - Double Stitched Circle Stax #4
Accessories: White Lustre Card; Stampin' Up! Card - Early Espresso; Clear Embossing Powder


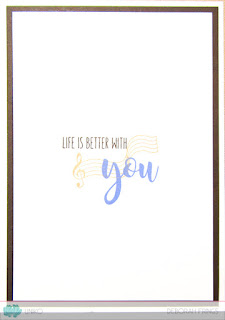
I've used the sketch from MFT Wednesday Sketch Club - MFTWSC#373 for the layout of my card, and the colours are from Colour Throwdown - CTD#481. I started by stamping the equaliser image on white card and heat embossing with clear powder. I added colour to the image using a water brush and squishing the ink on an acrylic block. Once finished I used a stitched edge die to cut out the circle. I cut a panel of brown card and attached it to the front of the card. I stamped some of the musical notation stamps on a strip of brown card and adhered that over the top of the circle. I finished the front by stamping a greeting. On the inside, I cut a mat layer of brown card and created a fun greeting in the middle of the white panel.

Rock Star inside - photo by Deborah Frings - Deborah's GemsRock Star sq - photo by Deborah Frings - Deborah's Gems

Next, is a one layer card - it is very quick and easy to make:

Music - photo by Deborah Frings - Deborah's Gems

This was such fun to make! I taped the stencil to a square card, making sure to mask any areas that I didn't want inking. Then I spritzed on some of my new Dylusions Shimmer sprays - you can't see the shimmer in the photo above, but I've taken a detail shot which shows it nicely! I've based the colours on this week's CAS Colours & Sketches challenge - CASC&S#260, although I think it might not be CAS enough!! Once the inks dried, I stamped the greeting in bold black. On the inside, I cut a mat layer of deep pink card and on the white panel added a greeting and musical notation. I'm submitting this to Simon Says Wednesday challenge - SSWC#2102, where they want us to make our own background.


Stamps: Uniko -All Occasion Sentiments #1, Life Is A Song
Inks: Gina K - Peach Bellini, Blue Raspberry; Versafine - Onyx Black; Stampin' Up! - Raspberry Ripple
Accessories: White Lustre Card; Stampin' Up! Card - Raspberry Ripple; Dylusions Shimmer Sprays - London Blue, Tangerine Dream, Bubblegum Pink


Music detail - photo by Deborah Frings - Deborah's GemsMusic inside - photo by Deborah Frings - Deborah's Gems

Thanks so much for stopping by to see my cards. Don't forget to visit the Uniko blog to see much more from the rest of the Design Team. The release schedule is:

Introductions: 23rd - 27th February

RELEASE DAY: Wednesday 28th February, 9.00am GMT. Join us for our traditional Design Team Blog Hop and Giveaway!

See you again tomorrow!

signature

Sunday, 25 February 2018

Uniko - Seeing Stars and Chrysanthemum Stencils ....

Hello! I hope you've been enjoying our introductions; today is the midpoint of Uniko February Introductions and we're showcasing two new stencils - one if a huge flower and the other lots of stars. Here's my card made with the Chrysanthemum stencil:

Thank You - photo by Deborah Frings - Deborah's Gems

Stamps: Uniko - All Occasion Sentiments #3, Pure Florals Chrysanthemum
Inks: Distress - Spun Sugar, Worn Lipstick, Picked Raspberry; Distress Oxide - Worn Lipstick; Memento - Grey Flannel
Accessories: White Lustre Card; Stampin' Up! Card - Strawberry Slush


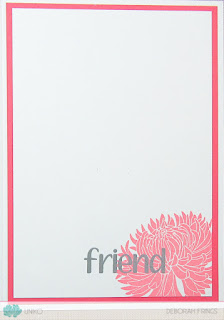
I kept this card super simple as I wanted to showcase the beauty of the chrysanthemum. I taped the stencil to a large card and inked up the image with three shades of pink distress ink. I added a very simple sentiment across the centre of the flower in a coordinating pink distress oxide ink. On the inside, I cut a mat layer of pink card and on the white panel added the small solid flower from Pure Florals Chrysanthemum and the word 'friend'. I used the colours from this month's House of Cards challenge - HOC#02.

Thank You inside  - photo by Deborah Frings - Deborah's GemsThank You sq - photo by Deborah Frings - Deborah's Gems

I went for another clean, simple card to showcase the Seeing Stars stencil:

Reach for the Stars - photo by Deborah Frings - Deborah's Gems

Stamps: Uniko - Reach for the Stars. Simply Said
Inks: Distress - Salty Ocean, Blueprint Sketch, Chipped Sapphire, Black Soot; Versamark; Versafine - Onyx Black
Accessories: White Lustre Card; Stampin' Up! Card - Pacific Point; Kaleidoscope Embossing Powder

I masked off a one-inch border all the way around the card, taped on the Seeing Stars stencil, and inked through the stencil with Versamark. After removing the stencil, I applied iridescent embossing powder, heat set it and then applied several shades of blue to create a starry sky. I removed the masking tape and added a greeting. Ont he inside, I cut a mat layer of blue card and on the white panel added a simple greeting and some more stars.

Reach for the Stars inside - photo by Deborah Frings - Deborah's GemsReach for the Stars sq - photo by Deborah Frings - Deborah's Gems

That's all from me for today - do visit the Uniko blog to see lots more inspiration projects from the rest of the Design Team. Here's a quick reminder of the release schedule:

Introductions: 24th - 27th February

RELEASE DAY: Wednesday 28th February, 9.00am GMT (that's 4.00am EDT). Join us for our Design Team Blog Hop and Giveaway!

See you soon!

signature

Tuesday, 12 December 2017

Uniko - Spring Botanicals ....

... Hi! It's time to start the introductions for Uniko's December release. We have two sets today - Scattered Polka Dots Large Background and Spring Botanicals Snowdrop. Sadly, my parcel still hasn't arrived, so I'm going to let the rest of the team showcase the large background stamp, and I'm going to concentrate on the lovely snowdrop stamp. I made two cards, here's the first:

Happy Birthday - photo by Deborah Frings - Deborah's Gems

Stamps: Uniko - Spring Botanicals Snowdrop (digi), Reach for the Stars, Simply Said Blocks, Simply Said
Inks: Versafine - Onyx Black; Stampin' Up! - Lemon Lime Twist; Gina K - Black Onyx
Dies: Die-namics - Cross Stitch Rectangle Stax #5, A2 Rectangles Set 2 #9
Accessories: White Lustre Card; SU Card - Lemon Lime Twist; Copics; Nuvo Aqua Shimmer Glitter Brush; Clear Embossing Powder


I printed the snowdrop image on white card, heat set it and die cut a panel with the cross stitch rectangle. I used Copics to colour the image and added lots of sparkle to the flowers with a clear glitter brush - you can see the sparkle in the photo below. I layered the panel on bright lime green card and adhered it to the centre of the card. I stamped the sentiment in Versafine on green card, heat embossed it with clear powder, cut it out and adhered it to the card with dimensional pads. On the inside, I cut a mat layer of lime green card and added a simple, but fun, birthday greeting to the white card.

Happy Birthday inside - photo by Deborah Frings - Deborah's GemsHappy Birthday sq - photo by Deborah Frings - Deborah's Gems

Here's the close-up photo showing the sparkle - I had to make the image quite dark in order to show the sparkle!!


I'm submitting this card to AAA Cards - AAA#105 where they want to see sparkle - hopefully!!!

My second card features the snowdrops left as an outline image, but printed in colour:

Happy Birthday - photo by Deborah Frings - Deborah's Gems

Stamps: Uniko - Spring Botanicals Snowdrop (digi), Simply Said Birthday, Happy Succulents
Inks: Versafine - Onyx Black; Gina K - Black Onyx, Blue Raspberry
Dies: Die-namics - A2 Stitched Rectangles Set 1 #9, Oval Stax
Accessories: White Lustre Card; Gina K Card - Blue Raspberry; Nuvo Aqua Shimmer Glitter Brush; Clear Embossing Powder; US Stencil - Scattered Polka Dots; Vellum

I printed the image in colour and carefully cut it out. I used blue cardstock to make the base and on the white oval, I lightly stencilled some polka dots to create a bokeh effect. I die cut a panel of vellum on which I stamped and embossed a birthday sentiment. I ran the vellum through my Xyron and adhered it directly to the card. I used a strong adhesive to attach the snowdrops over the vellum. On the inside, I added a white panel with a simple greeting.

Happy Birthday inside - photo by Deborah Frings - Deborah's GemsHappy Birthday sq - photo by Deborah Frings - Deborah's Gems

I added sparkle to the snowdrop flowers with a clear glitter brush, but you can barely see it in the photo above. It really does sparkle!!

Now that you've seen what I've made with the snowdrop, do visit Uniko to see more inspiration projects from the rest of the Design Team. A quick reminder of the release schedule:

Introductions: 12th - 15th December

RELEASE DAY: Saturday 16th December 9.00am GMT. The whole release will be available to purchase in the Uniko shop. As always, we will have a DT Blog Hop and Giveaway - enjoy!!

See you again soon.

signature

Friday, 8 December 2017

Uniko Challenge Reminder - Christmas ....

..... Hello and good morning! According to the United States Postal Service the last posting date for Christmas first class to Europe and the UK was yesterday - 7th December!!!  Good thing I made this card a while ago and it's in the post then :) I'm here this morning with a reminder card for our current challenge at Uniko - US#44 - we want to see Christmas cards.

Rejoice - photo by Deborah Frings - Deborah's Gems

Stamps: Uniko - Peace on Earth, Most Wonderful, Festive Sentiments, Reach for the Stars
Inks: Versafine - Onyx Black; Gina K - Black Onyx, Christmas Pine; Delicata -Silvery Shimmer
Dies: Die-namics - Pierced Ovals #3, Cross Stitched Oval Stax #4
Accessories: White Lustre Card; Stampin' Up! Card -Smoky Slate; Copics; Wink of Stella - Clear; Clear Embossing Powder


I kept this card really simple to focus on the pretty dove. I die cut white card to create the oval frame and adhered it flat to the card base. I added lots of sparkles all over it with a clear Wink of Stella brush. I stamped the dove on white card with a pale grey ink, coloured it with Copics, put it back in the MISTI and restamped in Versafine and heat embossed with clear powder. I carefully cut out the dove. I stamped the leaf on the white oval and adhered the dove on top, I used some dimensional pads on the wings to give the bird some real dimension. I adhered the oval to the card with dimensional tape. On the inside, I cut a mat layer of pale grey card and added a greeting and some stars to the white panel.

Rejoice inside - photo by Deborah Frings - Deborah's GemsRejoice sq - photo by Deborah Frings - Deborah's Gems

I based the layout of this card on a sketch from Christmas Card Throwdown - CCT#21.

Don't forget to visit the Uniko blog to see more inspiration projects from the rest of the design team. That's all from me for now. Bye!

signature
Related Posts Plugin for WordPress, Blogger...