Saturday, 15 February 2020

C24C - Most wonderful time ...

... Morning! Being a part of a Christmas challenge design team is such fun - I just love making Christmas cards.  Thanks to all who took part in our last challenge at Christmas 24 Challenge.  This time, at Christmas 24 Challenge, we want to see

A CHRISTMAS SCENE

How you interpret a Christmas scene is up to you.  Here's my take:


Stamps: Concord & 9th - Christmas Cottage
Inks: Gina K - Black Onyx, Christmas Pine, Fresh Asparagus, Jelly Bean Green, Sandy Beach, Kraft
Dies: Concord & 9th - Christmas Cottage, Birthday Stacks
Accessories: White Lustre Card; SU Card - Basic Grey, Crushed Curry, Early Espresso; Copic Marker; Glitter

I've had this lovely stamp set for ages, but this is the first time I've actually used it to make a card. I love the way it's so easy to make a 3D card - and one that folds flat to fit a standard envelope.  Here's a link to Concord & 9th showing just how easy it is.  I'm submitting this card to The Holly & Ivy Christmas Challenge - H&ICC#65, where it's anything goes.


I started by cutting the panels to size and cutting the various panels with the dies.  I used my MISTI to stamp the images. I added some scraps of yellow card behind the windows to make it look like the lights are on. I coloured the front door with a red copic marker and stamped on the little wreath image. I finished the house by adding the die cut roof. I stamped some stags in the background, added some tiny footprints leading to the front door and finished by adding glitter.  I used grey card for the main background onto which I stamped a greeting. There is space on the back of the card for my message.  It was so much fun making this card. I took a photo looking down on the card so that you can see the dimension:


Now, have fun with the theme and I look forward to seeing what you make.  See you soon.

signature

Monday, 10 February 2020

Happy Birthday ....

... I had a fun time at our craft group this morning, but when I left it was snowing!!!  Fortunately, it's not hung around, but it's very cold and grey.  So, after lunch I came up to my craft room and I've made a birthday card:


Stamps: Uniko - Happy Succulents, Birthday Wishes
Inks: Versafine - Onyx Black; Gina K - Black Onyx, Dusty Rose
Accessories: White Lustre Card; SU Card - Night of Navy; Clear Embossing Powder; Copic Markers

I'm playing along with The Colour Throwdown Challenge - CTD#579, such pretty colours, The Flower Challenge - TFC#41 to add leaves, and with Uniko Studio Birthday Linky Party - US8BDLP.


I stamped the succulents on white card, coloured them with Copic markers, put the image back in the MISTI and restamped in Versafine and then heat embossed the image.  I finished the front of the panel by adding a simple birthday greeting.  I layered the panel on some navy card and attached the whole lot to the front of the top folded card.  On the inside I cut another mat of navy card and on the white panel added a lovely birthday wish along with a tiny flower.


I'm so pleased that I've been able to join in with Uniko's 8th Birthday Linky Party.  I had the great privilege of being on Bev's design team for 4 years.  Sadly I had to step down at the end of 2018 as I just didn't have the time to create.  So it's wonderful getting out my Uniko stamps and making this simple birthday card.

That's it for now - see you again soon.

signature

Sweet Birthday Wishes ....

.... Morning!  I hope everyone got through Storm Ciara safely.  We were quite lucky to only have heavy rain and strong winds yesterday morning; the afternoon and evening were much kinder to us.  Anyway, I got to play again in the evening and with some new stamps that I got yesterday from Seven Hills Crafts.  Here's my card - very clean and simple:


Stamps: The Stamping Village - Happy Birthday; Lil' Inkers - Rainbow & Clouds Sentiments; Waltzingmouse Stamps - Pinstripe Background
Inks: Gina K - Dusty Rose; Versafine - Onyx Black
Dies: Die-namics - Stitched Tag-Corner Rectangles #4
Accessories: White Lustre Card; SU Card - Poppy Parade; Sakura Stardust Pen; Clear Embossing Powder; Copic Marker

I'm submitting this card to MFT Wednesday Sketch Club - MFTWSC#475, Seize the Birthday - STB#182, The Paper Players - PP#477, and Just Us Girls - JUGS#522.


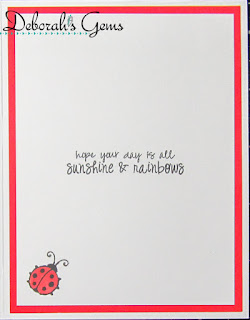
I used two of my oldest stamps and one of my newest stamps on this card.  The pinstripe background is from WMS and the sentiment inside from Lil' Inkers, both now sadly closed.  I stamped the background on a large panel and cut a piece for the bottom of this card (you'll see the other piece later this week). The image is from the Happy Birthday stamp set from The Stamping Village - love this cute bug! I stamped it in Versafine, clear heat embossed and then coloured the image with a glitter pen. I cut it out with a stitched edge die and adhered it to the card with dimensional tape.  On the inside I cut a mat layer of bright red card and on the white panel added a sentiment and another little ladybug.


Today I'm off to my local craft group - first time for a couple of weeks.  I'm taking the little scrapbook that I've been working on - hopefully, I'll get it finished this week and share photos later.  Have a good day and see you soon.

signature

Sunday, 9 February 2020

Mixed Media Dylusions Fun .....

...  Good afternoon!!  I say good, but it's awful here today.  Those weather boffins were absolutely right - pouring rain, grey skies and so much wind.  We've moved all the garden ornaments into the shed.  And we're not going out at all - so I've been playing.  I started this yesterday afternoon and have just finished.  I had such fun:


Stamps: Dylusions - Crown of Roses, Clockwork, Sunshine Girl, Around the Edge, Graphic Backgrounds, Say It How It Is, Just Breathe, Doodle Parts, Toadstool Town
Inks: Archival - Jet Black; Dylusions - Postbox Red
Accessories: Dylusions Square Journal; Dylusions Inks - Tangerine Dream, Squeezed Orange, Pure Sunshine, Postbox Red Bubblegum Pink; Dylusions Stencils - Holes, Heart Border, Diamonds, Starstruck, Old School Numbers; Copic Markers; Glitter Pens

I'm submitting this spread to Love to Craft Challenge Blog - LTCCB#43 (anything goes), and some new mixed media challenges - More Mixed Media Challenge - MMMC#02 (anything goes/option red) and Creative Artiste Mixed Media Challenge - CAMMC#57 (anything goes). I've also put this into the Dylusions Facebook Challenge - February to use Orange, Stencil and Doodle.


I have several of Dyan's journals and many pre-inked/painted backgrounds ready to make into spreads.  This spread must have been done while I was in the States as I've not done any inking since I've been back home.  I added some more stenciling to the pages, rummaged through my cut out images and worked out the spread.  I had so much fun putting the page together.  You can't see it in the picture above, but there's shimmer on the page too - I used glitter pens to colour the flowers .  Here are larger photos of each page.


That's all for today - I'm off to cook lunch and then chill with the family and a movie.  See you soon.

signature

Saturday, 8 February 2020

Best Move Ever ...

.... Hello! It is absolutely gorgeous here today - the sun's shining, blue skies and no wind to speak of.  However, according to the weather boffins, it's all change tomorrow. And where am I? Playing in my favourite room!! I've a clean, simple Valentine card for my wonderful hubby, Jonathan.  I'm perfectly safe sharing it here today, as he's not going to see it before Friday. Here's the card:


Stamps: Lil' Inkers - It's Today, Right?, Sassy Pants; Sugar Pea Designs - Caring Hearts
Inks: Stampin' Up! - Poppy Parade; Delicata - Silvery Shimmer
Dies: Poppy Stamps - Heart Stack
Accessories: White Lustre Card; SU Card - Poppy Parade, Flirty Flamingo; Silver Holographic Heart Mirri Card

I'm submitting this card to CAS Colours & Sketches - CASC&S#356 (those colours are just fab), CAS on Friday - CASOF#173 (where the theme is LOVE), and Allsorts Challenge - ASC#558 (where we need to add at least one heart).


I shared another card with this die yesterday, it's such a lovely die and I've had fun playing with it. This time I used the inlaid die technique, so I've still got some bits spare 😊 I cut the die out in white, red, peachy pink and silver.  Then I put some tape behind the open space and started putting back the die cut pieces.  I used silver for the frame and filled in with the other colours.  I finished the front by added a simple sentiment in bold red and layered the panel on some silver heart holographic card (I've had this in my stash for years).  On the inside I cut another mat of the silver holographic card and on the white panel added a fun sentiment from Lil' Inkers - I think Jonathan will appreciate it!


I'm sure that you're aware that Lil' Inkers is closing its doors soon.  I have several of the coffee theme sets and dies, as well as several of the sassy sentiments sets and some wonderful die sets.  I'd like to thank Laura for her wonderful designs and wish her every success for the future. 

That's all for today - I think I'm going to try and take advantage of this wonderful weather and go for a walk.  See you soon.

signature

C24C - Happy Christmas ....

... Morning! I had planned to share some cards with you this week, but instead I've been finishing off a mini scrapbook that Kat started before we moved to the States! I'll share photos of that later.  However, this morning I've made another Christmas card - it's based on our theme of DRY AND/OR HEAT EMBOSSING over at Christmas 24 Challenge.  Here's my card:


Stamps: Magenta - Poinsettia; MFT - Grand Holiday Greetings
Inks: Versafine - Onyx Black; Memento - Rhubarb Stalk; Gina K - Black Onyx
Accessories: White Lustre Card; Cordinations - Black Magic Potion #9; Spectrum Noir Shimmer Brushes; EF - Embossalicious - Poinsettia; Clear Embossing Powder

I'm submitting this card to some, new to me, Christmas challenges - The Holly and Ivy Challenge - H&I#64 where it's Anything Goes, and to Christmas at Sweet Stampin' Christmas - SSC#01 - where they want us to Add Sparkle.


I found some Coredination card in my stash and embossed a poinsettia background, and then lightly rubbed off some of the black to reveal the green core. On white card I stamped this bold poinsettia in Versafine black ink and heat embossed with clear powder.  I used Spectrum Noir shimmer brushes to colour the image and sentiment. You can't see the shimmer above, but I have a closeup photo below that really shows the sparkle.  On the inside I cut a mat layer of green card and on the white panel added a bold greeting and another image of the poinsettia.


You have another six days to join in with our DRY AND/OR HEAT EMBOSSING challenge at Christmas 24 Challenge - I look forward to seeing what you create.  That's all for now.

signature

Friday, 7 February 2020

Magic of kindness ...

... Hi!  Just popping in with a quick one.  I've made a very clean, simple and sparkly card for my stash:


Stamps: Sugar Pea Designs - Caring Hearts
Inks: Stampin' Up! - Poppy Parade
Dies: Poppy Stamps - Heart Stack
Accessories: White Lustre Card; SU Card - Poppy Parade; Aquashimmer Brush - Clear

I'm submitting this card to CASology - CAS#361, Time Out Challenge - TOC#154, and to Creative with Stamps - CWS#47.


This is super easy to make.  I die cut the stacked hearts from red card, adhered them to the front of the card and then coloured inside the hearts with a clear aquashimmer brush.  I finished the front by stamping a simple sentiment and a couple of tiny hearts above the die cut.  I've let the inside blank for my own message.  I've taken a closeup to show the gorgeous shimmer - deliberately darken down.


This was fun to make - I've got a few more die cuts left, so you might see some more of this die soon.  That's all for now.

signature

Monday, 3 February 2020

Merry Christmas ...

... Hello again! I'm on a bit of a roll - after doing some tax admin this morning, I got to play this afternoon and made a very clean, simple Christmas card.  I really am determined to have enough made this year.  Here's my card:


Stamps: Uniko - Stunning Snowflakes, Simply Said Christmas
Inks: Versamark; SU - Cherry Cobbler
Dies: Poppystamps - Celestial Star Border
Accessories: White Lustre Card; SU Card - Cherry Cobbler, Silver Glitter; Silver Embossing Powder

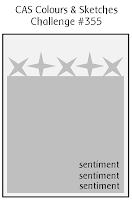
I'm submitting this one to CAS Colours & Sketches - CASC&S#355 and to Addicted to Stamps and More - ATSM#374.


As soon as I saw the sketch at CASC&S I knew what I wanted to do.  I cut a panel of deep red card to 4¼", put the die on the top and then carefully die cut about two-thirds the way down the die.  I then embossed the whole die.  I also die cut the same border in silver glitter card and adhered that to the top of the panel.  I finished the front panel by cutting it to size and stamping a repeated Christmas message and embossed in silver.  On the inside I cut a mat layer of red card and on the white panel I stamped a simple greeting and some silver snowflakes.


I took a close-up photo of the lovely silver stars so that you can really see the sparkle.


It's a really lovely day today - not too cold, relatively light winds and sunshine - which is really good as we have a team of guys working in the garden.  Now that mum is living with us, we decided to have the garden made to work for her - so it's undergoing huge changes.  I'll post pictures once it's completed.  That's all for now. 

signature
Related Posts Plugin for WordPress, Blogger...