Showing posts with label Flower Challenge. Show all posts

Saturday, 23 January 2021

A Twofer Flowers ....

... Good evening! It's been a bit of a day here in Northop Hall. I woke early to see falling snow - not too much, but we're really not geared up to handle snow in the UK. I did a quick trip to Tesco for the weekly groceries, and I've spent the rest of the day working in my craft room. I've made a couple of cards for the current Twofer Card Challenge - TCC#34 where Darnell wants to see us use Flowers:


Stamps: Dare 2B Artzy - Flowers for Mom, Blissful Blossom; MFT - Whimsical Greeting
Inks: Hero Arts - Unicorn; Versafine Claire - Nocturne; Versafine - Onyx Black
Dies: Dare 2B Artzy - Joyful Flowers D42; Lil Inkers - Dual Dotted Rectangles #5
Accessories: White & Black Card; Dare 2B Artzy DP - Fields of Joy; Copic Markers; Sakura Stardust Pens; Clear Embossing Powder

I'm so pleased to play along with the Twofer challenge, I always have good intentions, but run out of time. I've had the D2BA design paper, matching stamps and dies for quite some time and it's the first time I've used them, so I'm going to submit them to Never-Before-Used-Schtuff - NBUS#22. I'm also submitting the cards to Dare 2B Artzy - D2BA#01 where the January challenge is Anything Goes.

I started by making the Mother's Day card. I used the D2BA die to cut out the flower from the design paper. I cut out several flowers. I used a large dotty rectangle die to cut some design paper to cover the card. I cut a couple of plain white rectangles, rounded the corners and on one I stamped the greeting and some outline flowers, on the other I adhered the die cut flower. I adhered them both to the front of the card. On the inside, I cut another piece of the design paper for the mat layer. On the white panel I stamped a lovely greeting and added another of the die cut flowers to the corner. I'm submitting this card to Just Add Ink - JAI#538 as I used their sketch for the layout of the card.


My next card is a clean, simple birthday card. This time I stamped the flower image on white card, coloured it with Copic markers, restamped with Versafine black ink, heat embossed with clear powder and cut it out with the matching die. I added some sparkle to the flower with Sakura Stardust pens. I cut a strip of black card onto which I stamped a birthday greeting in white ink and embossed this with clear powder. On the inside, I kept it simple with a greeting in black and added one of the die cut design paper flowers. I'm submitting this card to CAS Colours & Sketches - CASC&S#402 - I used their colours, and to The Flower Challenge - TFC#52 where they want us to use Embossing (heat or dry).


I had lots of fun making these cards - same materials, but looking so different. Here are large versions of each card.


Before I go, here are all the challenge graphics:


It stopped snowing earlier this afternoon and the sun came out, so some has melted, but it's going to be cold tonight, so I expect it's going to freeze!! Ugh! Oh well, it means I'll play again tomorrow. Bye for now.

signature photo Signature.png

Sunday, 22 March 2020

Happy Mother's Day ....

.... Morning! I know that for many parts of the world Mother's Day isn't until May, but here in the UK we have Mothering Sunday which falls on the fourth Sunday in Lent, so it's exactly three weeks before Easter. With all the issues surrounding the coronavirus pandemic local pubs, restaurants, etc have been ordered to close, so my plan to take my Mum out for lunch has been cancelled. However, I am still celebrating with her today - only we're doing it at home.  This is the card I made for Mum:


Stamps: Altenew - Wavy Roses; Stampin' Up! - Sweet Laughter
Inks: Gina K - Whisper Amalgam; Versafine Clair - Charming Pink; Versafine - Onyx Black
Accessories: White Card; SU Card - Melon Mambo; Copic Markers; Nuvo - Clear Aquashimmer Brush; Clear Embossing Powder

I'm submitting this card to Addicted to Stamps and More - ATSM#381 - Anything Goes, The Flower Challenge - TFC#42 - Anything Goes, and to Cardz for Glaz - C4Glz#117 - Spring Flowers.


I based this card on one of the suggested layouts in the cards that come with Wavy Roses. I used a soft neutral ink to create a pretty border around the card. I stamped the main image on white card, coloured with Copic markers, restamped in Versafine and heat embossed with clear powder. I don't have the matching die so I simply fussy cut out the flower. I used a tip from Jennifer McGuire and stamped 3 of the images of scrap card, cut them out slightly smaller than my main image and adhered them together to make a dimensional embellishment. I stamped the sentiment in bright pink to match the rose.


I finished the front by adding sparkle to the rose with a clear aquashimmer brush. I took a photo using my phone torch to make the sparkle visible - it's so pretty!


Wherever you are, keep safe and enjoy time with your family. See you soon. xx

signature photo Signature.png

Wednesday, 11 March 2020

SHC - You're Amazing ....

.... Good morning! I've been bursting to share a secret - I am now a member of Tara's design team at Seven Hills Crafts - I'm delighted to be joining such a talented team.  Do visit the SHC blog to see my first post. I've made a card for my mum:


Stamps: Concord & 9th - Flower Patch Turnabout
Inks: Gina K - Innocent Pink, Dusty Rose, Lipstick, Cherry Red, Black Onyx
Dies: Concord & 9th - Flower Patch Dies; Die-namics - A2 Stitched Rectangles Set 1 #8, A2 Stitched Rectangles Set 2 #9
Accessories: White Card; SU! Card - Black; Vellum from stash

I'm submitting this card to The Flower Challenge - TFC#42 where it's Anything Goes.


I picked red for this card as it's my mum's favourite colour, and she's look wonderful in red. I used my MISTI to stamp the images starting with the palest and finishing with the darkest red. I used stitch edged dies to cut the mat panel and main background panel, and adhered them to the front of the card. I used the matching flower die to cut a white panel for the words - "to my beautiful" is a separate stamp and you can use other words such as sister or friend to complete the greeting. Obviously, as this is for my mum, mother was appropriate. I found some lovely vellum in my stash and cut another couple of flowers as well as some green leaves. On the inside, I cut a mat of black card and added a simple greeting. I also used some of the smaller stamps from the set to add some more red flowers.


This is not a mother's day card, although it could be. I made this for mum, just because. We have been having the back garden redesigned to make it better for mum. It is designed to be a sensory garden with colour, sound and fragrance, to help mum as her vision is not good. So I thought this would be my way of saying thank you to her. I get the benefit of the garden too.

That's all for now. See you soon.

signature photo Signature.png

Monday, 10 February 2020

Happy Birthday ....

... I had a fun time at our craft group this morning, but when I left it was snowing!!!  Fortunately, it's not hung around, but it's very cold and grey.  So, after lunch I came up to my craft room and I've made a birthday card:


Stamps: Uniko - Happy Succulents, Birthday Wishes
Inks: Versafine - Onyx Black; Gina K - Black Onyx, Dusty Rose
Accessories: White Lustre Card; SU Card - Night of Navy; Clear Embossing Powder; Copic Markers

I'm playing along with The Colour Throwdown Challenge - CTD#579, such pretty colours, The Flower Challenge - TFC#41 to add leaves, and with Uniko Studio Birthday Linky Party - US8BDLP.


I stamped the succulents on white card, coloured them with Copic markers, put the image back in the MISTI and restamped in Versafine and then heat embossed the image.  I finished the front of the panel by adding a simple birthday greeting.  I layered the panel on some navy card and attached the whole lot to the front of the top folded card.  On the inside I cut another mat of navy card and on the white panel added a lovely birthday wish along with a tiny flower.


I'm so pleased that I've been able to join in with Uniko's 8th Birthday Linky Party.  I had the great privilege of being on Bev's design team for 4 years.  Sadly I had to step down at the end of 2018 as I just didn't have the time to create.  So it's wonderful getting out my Uniko stamps and making this simple birthday card.

That's it for now - see you again soon.

signature

Tuesday, 8 May 2018

Uniko - Stencils: Party Confetti and Stylised Floral ....

... Hello! We've reached the midpoint of our Uniko Introductions. Today I'm introducing a couple of new stencils and they're fab! I do hope you've enjoyed what you've seen so far, and thanks for your lovely comments. I'm going to start with an elegant thank you card showcasing the Stylised Floral stencil (and a sneak of tomorrow's intro too):

Thank You - photo by Deborah Frings - Deborah's Gems

Stamps: Uniko - Simply Said Blocks II, Flower Power #8
Inks: Distress - Shaded Lilac, Wilted Violet; Gina K - Wild Lilac; Versamark
Accessories: White Lustre Card; Gold & Silver Vellum; Gold Embossing Powder; Gems


I got the colour scheme from the current Inkspirational - INK#160 challenge where they want us to use Shades of Purple and Gold, and as I've used vellum on the card, I'm going to submit it to The Flower Challenge - TFC#20 where they want us to use vellum/acetate.

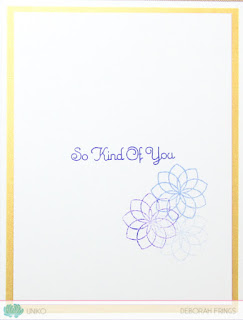
I started by cutting the gold vellum mat and a white panel slightly smaller. I put the stencil over the card, taped it in placed and inked all over with pale lilac, I added some darker purple around the centres of each flower, but you can't really see it in the photo - it's better in real life!! I stamped the little flower in Versamark on silver vellum, heat set it with gold powder and fussy cut them all out. I attached them to the card and added a variety of different colour and shaped purple gems to the centre of each flower. I finished the front of the card by adding a simple block sentiment. On the inside, I cut another gold vellum mat and on the white panel, I stamped a greeting and a few of the outline flower in shades of purple.

Thank You inside - photo by Deborah Frings - Deborah's GemsThank you sq - photo by Deborah Frings - Deborah's Gems

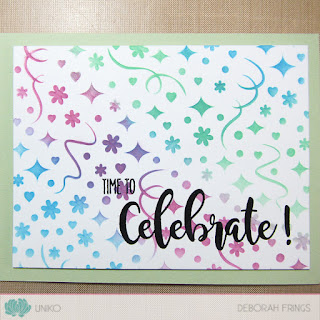
I wasn't sure what to make with the next stencil, and then I saw the MUSE challenge - MUSE#265 and it was so easy:

Time to Celebrate - photo by Deborah Frings - Deborah's Gems

Stamps: Uniko - Birthday Sentiments
Inks: Distress Oxides - Lucky Clover, Salty Ocean, Seedless Preserves; Versafine - Onyx Black; Gina K - Black Onyx
Accessories: White Lustre Card; SU Card - Pistachio Pudding; Clear Embossing Powder


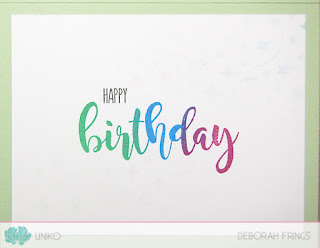
I made the base from pale green card. I cut a panel of white card smaller and put the stencil on top, taping it into position. I used the same three colours as the party banners on the Muse card and inked the stencil to match the pattern. I finished the front by embossing a bold sentiment in black. On the inside, I cut a panel of white card and stamped a birthday greeting using the three shade of ink and adding a very subtle hint of colour with the stencil.

Time to Celebrate inside - photo by Deborah Frings - Deborah's GemsTime to Celebrate Sq - photo by Deborah Frings - Deborah's Gems


That's all from me today, but it for more inspiration projects, do visit Bev's blog to check out more from the rest of the Design Team. The release schedule is:

Introductions: 5th - 11th May

RELEASE DAY: Saturday 12th May, 9.00am BST. Join in our Design Team Blog Hop & Giveaway! You will also be able to buy the whole release at the Uniko online store. For prize details see Bev's blog.  See you again tomorrow!

signature

Saturday, 24 March 2018

Uniko - Blog Hop and Revisit ...

... Hello! Thanks so much for stopping by. It's time for our Uniko Blog Hop & Revisit. On months when there is no new release, we revisit a previously released stamp set. This month Bev has picked Fun Flowers and the newly released Fun Flowers Stencil. I had fun with both the stamp set and the stencil and ended up making two cards. Here's the first:

Make a Wish - photo by Deborah Frings - Deborah's Gems

Stamps: Uniko - Birthday Sentiments, Fun Flowers
Inks: Gina K - Lovely Lavender, Wild Lilac; Versafine - Onyx Black; Versamark
Dies: Spellbinders - Classic Scallop Border (E8-001)
Accessories: White Lustre Card; SU Card - Elegant Eggplant; Vellum; Clear Embossing Powder; Cosmic Shimmer EP: Mallow Flame Aurora, Pink Violet Blaze, Tropic Violet Lustre, Tropic Bilberry Blaze


I started by taping the stencil to white card and tapping a Versmark pad all over the panel. I removed the stencil and added several different embossing powders and heat set the powders. You can't see it in the photo, but the embossed images have a lovely lustre to them. I cut a strip of shimmer vellum on which I stamped and embossed the sentiment. I used some Spellbinder dies to cut the scallop border. I attached the sentiment strip and then layered the panel on dark purple card and adhered it to the card base. On the inside, I cut a mat layer of dark purple card and added a simple birthday greeting and some more fun flowers in lilac. I'm submitting this card to The Flower Challenge - TFC#18 where it's Anything Goes.

Make a Wish inside - photo by Deborah Frings - Deborah's GemsMake a Wish sq - photo by Deborah Frings - Deborah's Gems

My second card is smaller, being a 4-bar card:

Happy Birthday - photo by Deborah Frings - Deborah's Gems

Stamps: Uniko - Fun Flowers, Simply Said
Inks: Gina K - Blue Lagoon, Jelly Bean Green; Versafine - Onyx Black; Distress - Spun Sugar, Festive Berries
Accessories: White Lustre Card; Copic Markers; Dylusions Paint Pen; Uniko Stencil - Fun Flowers; Nuvo - Aqua Shimmer Brush; Gem

I put the stencil on the card and lightly brushed on some pale pink and red inks, concentrating the colour towards the bottom right. I stamped a flower and some leaves, cut them out with my Scan'N'Cut and added colour with Copic markers and a red Dylusion paint pen. I covered them all with a light layer of clear shimmer. I added the flower and leaves with dimensional dots. I finished the card by added a sentiment and a little gem to the centre of the flower. I was going to submit this to Less is More as they want us to use stencils, but I forgot that they also want it to be one layer!!! Oops! I've not done the inside of this card as yet.

Don't forget to visit the Uniko Blog and the rest of the Design Team, comment along the way for your chance to win a £15 eGift Certificate.


You have until midnight (BST) Saturday 7th April to comment. That's all for now - see you again soon.

signature
Related Posts Plugin for WordPress, Blogger...