Showing posts with label US - Simply Said Blocks II. Show all posts

Friday, 17 August 2018

Uniko - Beautiful and BB Happy Hexagons ...

... Morning! Welcome back, today we're introducing two more new sets from the upcoming Uniko release.  I'm going to start with the latest addition to the Background Builders series - Happy Hexagons. I really like these stamps and I made two cards:


Stamps: Uniko - Background Builders Happy Hexagons, Originally Organic Additions, Bee Happy, Simply Said Blocks II
Inks: Gina K - Dusty Rose, Red Hot, Tangerine Twist, Wild Dandelion, Jelly Bean Green, Blue Raspberry, Wild Lilac, Lovely Lavender, Black Onyx, Sweet Corn, Sweet Mango
Accessories: White Lustre Card; SU Card - Basic Black; Gems; Gina K Wreath Builder Stencil


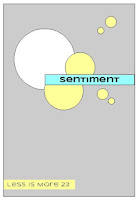
I started with the one-layer get well card. I used the sketch from CAS Colours & Sketches - CASC&S#285, the colours are from The Paper Players - PP#405, and the theme comes from Cardz for Guyz - C4G#201. I used my MISTI to work out where to stamp each image, took a photo and then had fun stamping. I think this is a bright, cheery card and perfect when feeling rough. I've left the inside blank.

Next is the square card. This one is totally different; I used the pretty large outline hexagon image to create a rainbow wreath or flower! I used my Gina K wreath builder stencil to position the card and stamp the flower. Once finished, I added a bold sentiment in the centre. I layered the finished panel on black card and attached it to a square card base. On the inside, I cut a mat layer of black card and on the white panel stamped the hexagon at the corners. I'm submitting this card to AAA Cards - AAA#121 where the theme is friendship.


I'm submitting both cards to Darnell's Twofer Card Challenge - TCC#08 where the theme is Geometric. I've been wanting to play along with this challenge for ages, but this is the first time I've actually managed to get my act together and make some cards!!


The second stamp set that we're introducing today is simply called Beautiful - and it is!! Here's my very clean and simple card:


Stamps: Uniko - Beautiful
Inks: Distress - Squeezed Lemonade, Spiced Marmalade, Picked Raspberry; Gina K - Black Onyx
Accessories: White Lustre Card; Uniko Stencil - Lattice; Nuvo - Clear Shimmer Brush


I used masking tape to create a strip towards the bottom of the card. I stamped the flowers to the left and used masks to create a group of three flowers. Leaving the masks in place I put a stencil over the card and inked the background. Removing the masks makes it look like the stencilled pattern goes behind the flowers. I finished the front by adding a simple sentiment and lots of shimmer to the flowers. I've left in the inside blank for my own message. I'm submitting this card to The Flower Challenge - TFC#23 where they want one-layer cards. I've taken a photo to show all the lovely sparkle on the flowers:


That's all from me today - don't forget to visit Uniko and join in with the blog hop and leave some comments as you go! See you again tomorrow for the last of our introductions.

signature

Saturday, 12 May 2018

Uniko - May Release, Design Team Blog Hop & Giveaway ...

.... Hi! We made it. It's Release Day for the new Uniko stamps, stencils and dies. Thank you so much for being with me over the past week. I've got a few new cards to share with you today. I'm going to start with the last card I made - I finished it at 1.00am EDT (that's 6.00am UK time):

Get Well Soon - photo by Deborah Frings - Deborah's Gems

Stamps: Uniko - Just Because, Large Background French Script, Simply Said Blocks II
Inks: Distress Oxides - Twisted Citron, Lucky Clover, Blueprint Sketch; Versafine - Onyx Black; Gina K - Moonlit Fog
Accessories: Gina K Card - Black Onyx; Tim Holtz Watercolour Card; Sheer Shimmer - Sparkle; Clear Embossing Powder; White Lustre Card


The reason I'm so late working on this post is that I spent most of yesterday at Mega Meet in Novi. It's a big stamping/scrapbook show. I was watching Tim Holtz play with his inks, sprays, stamps and stuff, and that's where I got the idea for this card. I cut a panel of watercolour card slightly smaller than the card base and created the background using Tim's Distress Oxides. I really like the way the colours layer. I added another layer to the background by inking up the large French script background in a dark grey and randomly stamped it over the card. I put the panel into the MISTI, dusted it off with an anti-static bag, and stamped the greeting and flower in Versafine black ink. I had to stamp the images a couple of times to fill all the texture on the watercolour card. I used clear powder to heat emboss the images. On the inside of the card, I cut a panel of white card onto which I stamped the floral silhouette in two shades of green and added a greeting. I'm submitting this card to Your Next Stamp - YNS#89 where I've used their colours.

Get Well Soon inside - photo by Deborah Frings - Deborah's GemsGet Well Soon sq - photo by Deborah Frings - Deborah's Gems

Next up is a card for Kat - just because:

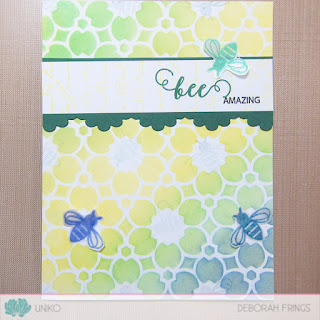
Bee Amazing - photo by Deborah Frings - Deborah's Gems

Stamps: Uniko - Bee Happy, Originally Organic Additions; Large Background French Script
Inks: Distress - Squeezed Lemonade, Mustard Seed, Shabby Shutters, Lucky Clover, Tumbled Glass, Blueprint Sketch; Gina K - Christmas Pine, Black Onyx; Memento - London Fog
Dies: Spellbinders Edgeabilities - Classic Triple Scallop (E8-003)
Accessories: White Lustre Card; Gina K Card - Christmas Pine; Vellum; Clear Embossing Powder; Uniko Stencil - Stylised Floral


I think this is my favourite stencil of this release and it works so well with the little bees from Bee Happy. I used distress inks to create an ombre pattern diagonally across the stencil. I attached the panel to the front of a card. I used an edge die to cut the pattern on dark green card. On the white panel, I stamped the French script vertically just for some subtle pattern and then stamped the greeting. I stamped three bees on vellum, heat embossed with clear powder, and fussy cut them out. I adhered the bees to the card and then stamped some more bees at the centre of each flower, they were stamped very lightly. On the inside, I cut a mat layer of dark green card and on the white panel, I stamped the heart and lots of little encouragement words and another little bee. I'm submitting this card to Fab Friday - FABF#137 where I've used their sketch for the layout of this card.

Bee Amazing inside - photo by Deborah Frings - Deborah's GemsBee Amazing sq - photo by Deborah Frings - Deborah's Gems

My last card is a birthday card for our nephew - it'll be in the post today:

Make a Wish - photo by Deborah Frings - Deborah's Gems

Stamps: Uniko - Simply Said Blocks II, Birthday Sentiments, Background Blocks Party Confetti
Inks: Distress - Twisted Citron, Lucky Clover, Blueprint Sketch, Mermaid Lagoon; Gina K - Black Onyx; Versafine - Onyx Black
Dies: Uniko - Explosion! Collection Dies
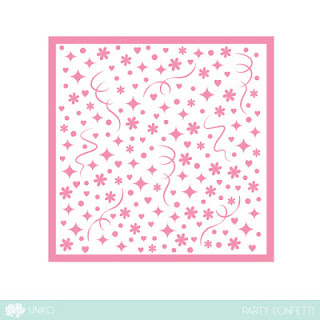
Accessories: White Lustre Card; SU Card - Basic Black; Sheer Shimmer - Frost; Clear Embossing Powder; Uniko Stencil - Party Confetti


I used the party confetti stencil and distress inks to colour several pieces of card and then used the Explosion! dies to cut out several shapes. I cut out a number of plain white pieces in order to layer the die cuts and make them thicker. I spritzed the background with frost Sheer Shimmer, attached the explosions bursts and a simple sentiment. On the inside, I cut a panel of white card onto which I stamped the party confetti background block using several shades of distress ink. I finished by adding a bold birthday greeting. I'm submitting this card to CAS-ual Fridays Challenge - CFC#199 where I used their sketch for the layout, and also to Seize the Birthday - STB#1005 for their Anything Goes Birthday. As you can see I've used the same shades of blues and greens as in both my previous cards.

Make a Wish inside - photo by Deborah Frings - Deborah's GemsMake a Wish sq - photo by Deborah Frings - Deborah's Gems

Well, that's all the cards I was able to make this time - I really should leave it so late. Please do join our traditional Design Team Blog Hop and Giveaway (prize details can be found on Bev's blog). Here are the links:


Before I go, here a final look at all the new products available today. I've had such fun playing with them.


Bee Happy


Flower Power #8


Just Because


Large Background French Script


Simply Said Blocks II


Honeycomb Pattern Stencil


Natures Treasures II Stencil


Party Confetti Stencil


Stylised Floral Stencil


Explosion! Collection Dies


Originally Organic Additions Dies

Wow! That was a long post but I think you'll agree that it was worth it. These stamps, dies and stencils are just fabulous. You can purchase them at the Uniko on-line store.

That's all for now - enjoy the Blog Hop! See you again soon.

signature

Thursday, 10 May 2018

Uniko - Originally Organic Addition Dies ....

..... Oops! I'm rather late with this post. I added my card to Bev's blog, but totally forgot to write my post!! Silly me. So, I'm here, a bit late, with my introduction card for the new dies to go with Originally Organic Additions - so nice to have the dies. Here's my card:

Congratulations - photo by Deborah Frings - Deborah's Gems

Stamps: Uniko - Originally Organic Additions, Simply Said Blocks II, Organic Wishes
Inks: Gina K - Passionate Pink, Jelly Bean Green; SU - Pool Party
Dies: Uniko - Originally Organic Additions Dies
Accessories: Gina K Card - Black Onyx; White Lustre Card; Shimmer Spritz - Frost; Circle Punches


I used the sketch from the current Less is More - LIM#370 for the layout and the colours are from Global Design Project - GDP#137. I started by spraying some white card with frost shimmer spritz. Once dry, I stamped the images and used the matching dies to cut out the vine frame and flowers, I used punches for the circles. I made the base from black card so that the stamped and die cut images really pop. I attached the vine frame and circles flat to the card and used dimensional pads to add the little flowers and the sentiment. Ont he inside, I simply cut a panel of white card on to which I stamped a greeting and another flower.

Congratulations inside - photo by Deborah Frings - Deborah's GemsCongratulations sq - photo by Deborah Frings - Deborah's Gems

For more inspiration from the rest of the Design Team, and our Guest Designer, Anna, do visit Bev's blog.

Sorry, this is so late - I was so convinced that I'd written this post! Hey ho! See you again tomorrow for the last of our introduction posts. Bye for now!!

signature

Tuesday, 8 May 2018

Uniko - Stencils: Party Confetti and Stylised Floral ....

... Hello! We've reached the midpoint of our Uniko Introductions. Today I'm introducing a couple of new stencils and they're fab! I do hope you've enjoyed what you've seen so far, and thanks for your lovely comments. I'm going to start with an elegant thank you card showcasing the Stylised Floral stencil (and a sneak of tomorrow's intro too):

Thank You - photo by Deborah Frings - Deborah's Gems

Stamps: Uniko - Simply Said Blocks II, Flower Power #8
Inks: Distress - Shaded Lilac, Wilted Violet; Gina K - Wild Lilac; Versamark
Accessories: White Lustre Card; Gold & Silver Vellum; Gold Embossing Powder; Gems


I got the colour scheme from the current Inkspirational - INK#160 challenge where they want us to use Shades of Purple and Gold, and as I've used vellum on the card, I'm going to submit it to The Flower Challenge - TFC#20 where they want us to use vellum/acetate.

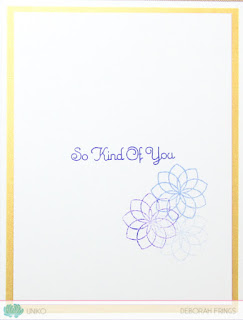
I started by cutting the gold vellum mat and a white panel slightly smaller. I put the stencil over the card, taped it in placed and inked all over with pale lilac, I added some darker purple around the centres of each flower, but you can't really see it in the photo - it's better in real life!! I stamped the little flower in Versamark on silver vellum, heat set it with gold powder and fussy cut them all out. I attached them to the card and added a variety of different colour and shaped purple gems to the centre of each flower. I finished the front of the card by adding a simple block sentiment. On the inside, I cut another gold vellum mat and on the white panel, I stamped a greeting and a few of the outline flower in shades of purple.

Thank You inside - photo by Deborah Frings - Deborah's GemsThank you sq - photo by Deborah Frings - Deborah's Gems

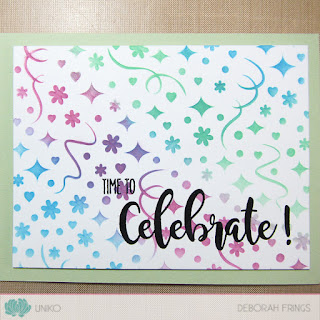
I wasn't sure what to make with the next stencil, and then I saw the MUSE challenge - MUSE#265 and it was so easy:

Time to Celebrate - photo by Deborah Frings - Deborah's Gems

Stamps: Uniko - Birthday Sentiments
Inks: Distress Oxides - Lucky Clover, Salty Ocean, Seedless Preserves; Versafine - Onyx Black; Gina K - Black Onyx
Accessories: White Lustre Card; SU Card - Pistachio Pudding; Clear Embossing Powder


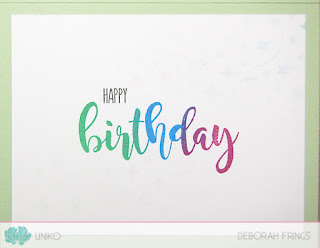
I made the base from pale green card. I cut a panel of white card smaller and put the stencil on top, taping it into position. I used the same three colours as the party banners on the Muse card and inked the stencil to match the pattern. I finished the front by embossing a bold sentiment in black. On the inside, I cut a panel of white card and stamped a birthday greeting using the three shade of ink and adding a very subtle hint of colour with the stencil.

Time to Celebrate inside - photo by Deborah Frings - Deborah's GemsTime to Celebrate Sq - photo by Deborah Frings - Deborah's Gems


That's all from me today, but it for more inspiration projects, do visit Bev's blog to check out more from the rest of the Design Team. The release schedule is:

Introductions: 5th - 11th May

RELEASE DAY: Saturday 12th May, 9.00am BST. Join in our Design Team Blog Hop & Giveaway! You will also be able to buy the whole release at the Uniko online store. For prize details see Bev's blog.  See you again tomorrow!

signature
Related Posts Plugin for WordPress, Blogger...