Showing posts with label Global Design. Show all posts

Sunday, 11 August 2019

Relaxing ....

.... Hi! Yesterday was so weird! It poured with rain, the wind blew a gale and the sun came out - it felt more like autumn than summer. The positive was that I spent the afternoon in my craft room catching up with challenges. I made a fun card:


Stamps: Impression Obsession - Have a Seat
Inks: Gina K - Black Onyx
Dies: Die-namics - Fishtail Flags Layers Stax #1
Accessories: White Lustre Card; K-ology DP - Addison; Copic Markers

The theme at Time Out Challenges - TOC#141 is Relaxation. I think there is nothing more relaxing than sitting in a comfy armchair with a good book in front of a roaring fire. Well, there's no fire here at the moment, but I plan on that comfy chair and book later today. The layout is loosely based on last week's CAS(E) this Sketch - CTS#333 and the colours are from Global Design Project - GDP#201.


I had a rummage through my stamps and found this old set from Impression Obsession. I stamped the armchair on some old design paper and fussy cut it out. I used my Misti to stamp the large sentiment, coloured the letters with Copic markers and restamped it with bold black ink. I die cut two fishtail banners and added a couple of sentiments. On the inside I cut a white panel and added a border of the design paper to the edge. I finished with a simple word - Relax!!


It's been a quiet weekend - Kat went over to her friend's house yesterday for a movie session - all night! I have to pick her up later today. Mum has been watching her favourite animal/garden TV programmes and I've just been playing. Feels so good to be back.

signature

Thursday, 10 May 2018

Uniko - Originally Organic Addition Dies ....

..... Oops! I'm rather late with this post. I added my card to Bev's blog, but totally forgot to write my post!! Silly me. So, I'm here, a bit late, with my introduction card for the new dies to go with Originally Organic Additions - so nice to have the dies. Here's my card:

Congratulations - photo by Deborah Frings - Deborah's Gems

Stamps: Uniko - Originally Organic Additions, Simply Said Blocks II, Organic Wishes
Inks: Gina K - Passionate Pink, Jelly Bean Green; SU - Pool Party
Dies: Uniko - Originally Organic Additions Dies
Accessories: Gina K Card - Black Onyx; White Lustre Card; Shimmer Spritz - Frost; Circle Punches


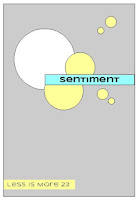
I used the sketch from the current Less is More - LIM#370 for the layout and the colours are from Global Design Project - GDP#137. I started by spraying some white card with frost shimmer spritz. Once dry, I stamped the images and used the matching dies to cut out the vine frame and flowers, I used punches for the circles. I made the base from black card so that the stamped and die cut images really pop. I attached the vine frame and circles flat to the card and used dimensional pads to add the little flowers and the sentiment. Ont he inside, I simply cut a panel of white card on to which I stamped a greeting and another flower.

Congratulations inside - photo by Deborah Frings - Deborah's GemsCongratulations sq - photo by Deborah Frings - Deborah's Gems

For more inspiration from the rest of the Design Team, and our Guest Designer, Anna, do visit Bev's blog.

Sorry, this is so late - I was so convinced that I'd written this post! Hey ho! See you again tomorrow for the last of our introduction posts. Bye for now!!

signature

Wednesday, 9 May 2018

Uniko - Flower Power #8 ....

... Morning! Have you started to make a list yet? Today is the last of the new stamps sets that form part of the upcoming Uniko release. I've made a very simple card in bold, bright colours:

Kind People - photo by Deborah Frings - Deborah's Gems

Stamps: Uniko - Flower Power #8
Inks: Gina K - Passionate Pink; Stampin' Up! - Lemon Lime Twist, Pool Party; Memento - Grey Flannel
Dies: Hexagons - free with Craft Beautiful
Accessories: White Lustre Card; Uniko Stencil - Lattice; Gems; Copic Markers


There are lots of little stamps in this set that can be used to create a flower with stem and leaves, but I decided to focus on the bold, solid flower. I stamped it three times in bright pink and cut out the flowers with a hexagon die, I used Copic markers to edge each panel. I used the lattice stencil to create a subtle background and then adhered the hexagon panels in a line down the side. I added a tiny gem to the centre of each flower and finished the front with this lovely sentiment from the stamp set. I kept the inside very simple and only stamped another flower with some leaves.

Kind People inside - photo by Deborah Frings - Deborah's GemsKind People sq - photo by Deborah Frings - Deborah's Gems

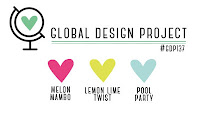
I'm submitting this card to CAS Colours & Sketches - CASC&S#271, I used their sketch, and the colours are from this week's Global Design Project - GDP#137. Don't forget to visit Bev's blog to see more inspiration projects from the rest of the Design Team.  See you again tomorrow!

signature

Friday, 15 December 2017

Uniko - Pure Florals Rose .....

....  Hello! I can't quite believe how quickly this week has gone by. Today is the last of the Uniko Introductions. We are showcasing Pure Florals Rose - a wonderful addition to the series. I've made a couple of cards for today, here's the first:

Happy Birthday - photo by Deborah Frings - Deborah's Gems

Stamps: Uniko - Pure Florals Rose, Simply Said, Fontiments
Inks: Gina K - Kraft, Black Onyx, Red Velvet, Jelly Bean Green; Versafine - Onyx Black
Dies: Die-namics - A2 Stitched Rectangles Set 2 #9
Accessories: White Lustre Card; SU Card - Crumb Cake; Clear Embossing Powder; Zig Clean Colour Brushes; Nuvo Aqua Shimmer - Clear; Uniko Stencil - Lattice; Tim Holtz Watercolour Card

So glad my parcel arrived on Wednesday, I was able to use the Lattice stencil to make this lovely background. I taped the stencil to the white panel and lightly sponged on some kraft ink, keeping it darker in the corner and fading out towards the top of the card. I adhered the panel to a kraft card base. I stamped the small rose and leaves on watercolour card with Versafine ink and heat embossed with clear powder, this gives a line which makes it so easy to colour. I used my zig clean colour brushes to lay down some colour which I blended out with a clear glitter brush - sadly you can't see the sparkle in the picture above!! I stamped the little birthday sentiment on the white panel and then used dimensional pads to adhered the rose and leaves. On the inside, I cut a white panel on to which I stamped a simple sentiment and the outline images.

Happy Birthday inside - photo by Deborah Frings - Deborah's GemsHappy Birthday sq - photo by Deborah Frings - Deborah's Gems

I used the colours from this week's challenge at Global Design Project - GDP#117.

My next card is relatively CAS - well I think it is!!

With heartfelt sympathy - photo by Deborah Frings - Deborah's Gems

Stamps: Uniko - Pure Florals Rose, Pure Florals Lily
Inks: Gina K - Black Onyx; Stampin' Up! - Smoky Slate; Distress - Hickory Smoke; Delicata - Silvery Shimmer
Accessories: White Lustre Card; SU Card - Smoky Slate; Uniko Stencil - Broken Lines


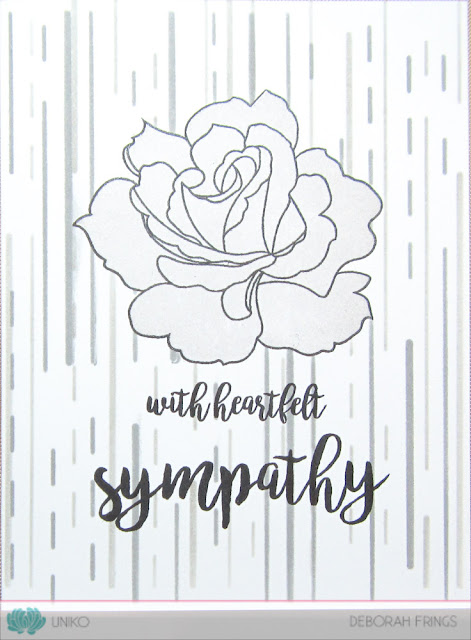
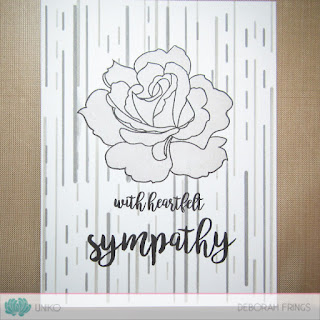
This is a one-layer card. I used my MISTI to stamp the outline rose towards the top centre of the card and masked the rose. I taped the stencil to the card and sponged on dark grey ink, then I shifted the card slightly to the left and sponged on light grey ink. I removed the mask and put the card back into the MISTI. Then I stamped the solid rose in silver ink. I finished the front with a sentiment. I picked sympathy because Kat said that the grey rose made a lovely sympathy card! I agree. On the inside, I cut a mat layer of pale grey card and added a sentiment and another rose to the white panel.

With heartfelt sympathyinside  - photo by Deborah Frings - Deborah's GemsWith heartfelt sympathy sq - photo by Deborah Frings - Deborah's Gems

I'm submitting this to CASology - CAS#279 where they want to see GREY and this is much more CAS than the other one!

Don't forget to visit the Uniko blog to see more inspiration projects from the rest of the Design Team. And come back tomorrow - it's RELEASE DAY!!!

Yesterday was a snow day for Kat - she had a much-needed lie-in and spent the day working on a physics project. I was in my craft room making cards, but I did take the opportunity to get out my camera and take a photo of all the snow and the bright blue skies we had. I've hung large baubles from one of the trees in my front garden and it looks so pretty:


If you look closely at the ornament you can see my reflection!!!  That's all for now - see you soon.

signature

Tuesday, 16 May 2017

CASC&S - Colours .....

.... Morning! I'm continuing my stay as Guest Designer at CAS Colours & Sketches and this week we have some lovely colours - CASC&S#223 to play with - Rich Razzleberry, Sahara Sand and Sweet Sugarplum. I decided to make a sweet cup birthday card:

Birthday Wishes - photo by Deborah Frings - Deborah's Gems

Stamps: Gina K - Sweet Thing
Inks: Versamark; Versafine - Onyx Black; Memento - Tuxedo Black
Accessories: White Lustre Card; Stampin' Up! DP - Rich Razzleberry, Sahara Sand; SU Card - Sweet Sugarplum; Copics; Spectrum Noir Sparkle - Clear; Glossy Accents


I used the sketch from this week's CAS(E) this Sketch - CTS#211 for the layout and the theme comes from Global Design Project - GDP#087. I recently got some new stamps from Gina K designed by my favourite designer - Claire Brennan and decided to give them a some love. I think the colours for this week's challenge are just perfect for a nice cherry cupcake (and calorie free at that!). I adhered the design paper to the card and on the small piece of pink card stamped the birthday greeting. I stamped the cupcake holder on design paper, heat embossed it and then carefully cut it out. I adhered it to the cake and then added the frosting on top. I used Copic markers to colour the image and added some sparkle to the cherry with clear Spectrum Noir brush. I also added some shine with Glossy Accents. Before attaching the finished cupcake, I stamped some stars for the background. I finished off by adding the little flag banner. On the inside I cut a piece of sand design paper for the mat layer and on the white panel added another greeting and cupcake.

Birthday Wishes inside - photo by Deborah Frings - Deborah's GemsBirthday Wishes sq - photo by Deborah Frings - Deborah's Gems

This card will be in the post shortly!! Don't forget to visit the CAS Colours & Sketches blog to see more inspiration from the Design Team.

signature
Related Posts Plugin for WordPress, Blogger...