Showing posts with label US - Pure Florals Gerbera. Show all posts

Friday, 18 May 2018

Uniko Challenge - Photo Inspiration ...

.... Good morning! Time is flying by this month, we're already half-way through May. It does mean that it's time for our new challenge at Uniko - USC#47. For the next few weeks, we have a photo inspiration challenge for you, with the option of making your card a birthday card. I decided to skip the option and just use the photo for inspiration, here's my card:

Coffee & Friends - photo by Deborah Frings - Deborah's Gems

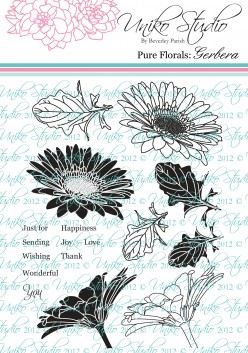
Stamps: Uniko - Pure Florals Gerbera, I Love Coffee, Originally Organic Additions
Inks: Distress - Shabby Shutters, Crushed Olive, Mowed Lawn, Twisted Citron, Worn Lipstick, Ripe Persimmon; Distress Oxides - Bundled Sage, Twisted Citron; Versmark; Versafine - Onyx Black
Dies: Uniko - Gerbera Collection; Honey Bee - Coffee Cup Card
Accessories: Tim Holtz Watercolour Card; SU Card - Crumb Cake; White Lustre Card; White & Clear Embossing Powder; Copics


I really like this photo - it's so fresh and bright. I decided to focus on the leaf pattern on the suitcase and the pretty jug of flowers. I used my large coffee cup die to cut the card base (the finished card is 5 3/4" high x 3 3/4" wide) from watercolour card. I randomly stamped the outline leaf in Versamark and heat embossed with white powder. I used several shades of green distress ink directly on the card and spritzed with water to allow the inks to blend. I set the card aside to dry naturally. On a smaller piece of watercolour card, I stamped the large outline gerbera daisy, embossed it with white powder and inked it with a couple of shades of pink and orange. Once it was dry, I used the matching die to cut it out. I die cut the cup band from some kraft card, stamped on the sentiment and heat embossed it with clear powder. I added some more leaves to the band with the solid leaf image and used distress oxide inks which work perfectly on the coloured card. I cut the coffee lid from white card and attached the gerbera daisy to the lid. I used the coffee cup die to cut out a white card panel for the inside. I stamped the gerbera daisy in the corner, coloured it with Copic markers, returned it to my MISTI and restamped in black ink to give a crisp outline. I finished the inside by adding a simple sentiment.


In the photo above you can see the front of the card without the coffee cup band. I'm submitting this card to House of Cards - HOC#05 where they want us to make a shaped card, and also to Happy Little Stampers Anything Goes with Dies - HLSAGD#05. I hope you can see how my card relates to the inspiration photo.

For more inspiration with our new challenge to visit the Uniko blog to see cards from the rest of the Design Team and also from our guest designer, Sue.

That's all from me for now - see you again soon.

signature

Wednesday, 6 September 2017

Uniko - Polka Dots and Word Blocks ....

... Good morning! You've seen the sneak peeks, and now it's time to introduce the new stamps from Uniko. Today we are introducing two new sets. The first is an addition to the Background Blocks series and it features POLKA DOTS - just love them!! The second set is an addition to the Simply Said series - this time the words are in blocks. I've combined them both on this card:

Inspire Me - photo by Deborah Frings - Deborah's Gems

Stamps: Uniko - Background Blocks Polka Dots, Pure Florals Gerbera, Simply Said Blocks, All Occasion Sentiments #3
Inks: Gina K - Onyx Black; Delicata - Silvery Shimmer
Accessories: White Lustre Card; Stampin' Up! - Basic Black; Copics; Wink of Stella - Clear; Silver Shimmer Washi Tape


When I made this card, I hadn't received the actual stamps - Bev kindly sent me the digital images and I was able to print them off to size. I used the sketch from Sunday Stamps Challenge - SSC#160 for the layout. I cut the polka dot panel to size and layered it on some black card and attached it to the card base. I forgot to add some silver string, so used a strip of silver shimmer washi and and thin strip of the polka dot panel to make my own. I stamped the gerbera image on white card and used Copics to create a rainbow coloured flower, cut it out and added some sparkle all over with a clear Wink of Stella brush. I attached the flower with some dimensional tape on the side that over hangs the dotty panel. I finished the front with a simple sentiment - I think there are some super words in this set. On the inside I cut a mat layer of black card. On the white panel I stamped the polka dots in silver shimmer ink and added a bold word in the centre, I finished the panel by adding a couple of rainbow gerbera daisies. I wish you could get daisies like this for real!!!

Inspire Me inside - photo by Deborah Frings - Deborah's GemsInspire Me sq - photo by Deborah Frings - Deborah's Gems

You've seen the peeks, and you've used seen how I've used the stamps. Do visit the Uniko blog to see how the rest of the team have used these sets - they're fabulous!!! Before I go, here's a quick reminder of the release schedule:

Introductions: 6th - 8th August - your chance to see how these stamps are in action

RELEASE DAY: Saturday 9th August, 9.00am BST. You get to see the whole release and see how the Design Team have used them on their projects. As is traditional, there will be a DT Blog Hop - do leave comments as you go along as there's a GIVEAWAY too! You can get the stamps at the Uniko Shop.

That's all from me today - do come back tomorrow to see more introduction cards! Bye for now.

signature

Friday, 21 October 2016

Uniko - colours .....

.... Hello! It's time for our new challenge at Uniko. We've got a colour challenge for you this month and it's a fun one - we want to see RAINBOW colours on your cards. I've made a one layer birthday card for my Mum. It was her birthday on 18th October, so hopefully she'll have received the card by now. But I'm still safe sharing it here, even if she hasn't got it. Mum is not tech savvy!!! Here's the card I made for her:

Best Wishes - photo by Deborah Frings - Deborah's Gems

Stamps: Uniko - Pure Florals Gerbera, Simply Said Birthday
Inks: Versafine - Onyx Black; Memento - London Fog; Kaleidacolor - Pastel
Accessories: White Lustre Card; Stampin' Up! DP - Real Red; Staedtler - Aquarell Pencils; Clear Embossing Powder


I was watching one of Jennifer MacGuire's videos the other day and decided to have a go at the technique she showed - sentiment backgrounds. I stamped the large gerbera daisy in the centre of the card and heat embossed the iamge with clear powder. I decided to colour the image with water colour pencils for a slightly softer look. I started with red in the centre and then went out either side with the colours of the rainbow. I used a water brush to pull out the colours. I stamped the main birthday greeting in black and then repeated the words "on your birthday" using a soft grey ink. Having a MISTI stamper made the process of repeat stamping so quick. On the inside I cut a mat layer of bright red design paper. Red is Mum's favourite colour. On the white panel I stamped the solid gerbera daisy using pastel rainbow inks and finished with a simple greeting.

Best Wishes inside - photo by Deborah Frings - Deborah's GemsBest Wishes sq - photo by Deborah Frings - Deborah's Gems

I took a close-up photo of the gerbera daisy - it's so pretty. I wish they came like this in real life!!

Best Wishes detail - photo by Deborah Frings - Deborah's Gems

I'm submitting this card to AAA Cards - AAA#75 where they have a photo inspiration. Love the rainbow coloured pinwheel - obviously my inspiration are the rainbow colours. For more rainbow inspiration cards do visit our blog to see more from the Design Team. We have a Guest Designer with us this month - Hannelie - who is someone I've admired for a long while, and she's a whizz with CAS cards.

That's all for now!

signature

Friday, 25 September 2015

UC - Autumn/Fall ....

... Hi!  Last week was really busy over at Uniko with the launch of some fabulous new stamps sets from Bev.  We actually introduced one of the sets at the start of this challenge, so my reminder card has gone back to an old, but much loved, set.  The theme for our challenge is Autumn/Fall with an optional twist of 'Thanks'.  Here's my card:

Just for You - photo by Deborah Frings - Deborah's Gems

Stamps: Uniko - Pure Florals Gerbera
Inks: Stampin' Up! - Lost Lagoon, Tangelo Twist, So Saffron; Memento - Tuxedo Black
Dies: Uniko - Gerbera
Accessories: White Lustre Card; SU Card - Lost Lagoon; Copic Markers


I've kept this card fairly simple.  I cut a mat layer of dark aqua card and adhered it to the card.  The white panel is slightly smaller to show a narrow border of colour.  I stamped the sentiment directly on the white panel along with some background leaves.  I stamped the gerbera daisy on some scrap white card, coloured it with Copic markers and cut it out with the matching die.  On the inside I cut another mat layer of dark aqua card and stamped the daisy again in pale yellow.  I used the colours from last week's Paper Players challenge - PP#262.

Just for You inside - photo by Deborah Frings - Deborah's Gems

Don't forget to visit our blog to see what the rest of the Design Team have created to inspire you.

signature

Thursday, 11 June 2015

Uniko Studio - Revisit ....

....  Morning!!  Today the Uniko Design Team are revisiting one of Beverley's earlier stamp sets (and one of my favourites) - Pure Florals: Gerbera.  Gerbera daisies are so pretty and come in a huge variety of colours, so you can really play with this set.  Here's my card:

Just for You - photo by Deborah Frings - Deborah's Gems

Stamps: Uniko Studio - Pure Florals: Gerbera
Inks: Versafine - Onyx Black; Stampin' Up! - Watermelon Wonder
Accessories: White Lustre Card; SU Card - Watermelon Wonder


I used the sketch from this week's CAS(E) this Sketch! - CTS#126 challenge.  I think it's just perfect to showcase that fabulous flower.  I cut a panel of white card smaller than the card base, used temporary adhesive to hold it in place and stamped the outline image in black and the solid image in red.  I layered the smaller panel on card and adhered the lot to the card, using the coloured card hides the small gap where the image doesn't quite stamp.  I finished the front with a simple sentiment.  I stamped them on some scraps of card and adhered them with dimensional tape.  On the inside I kept it really simple with a mat layer of red card and stamped the outline image on the white panel.

Just for You inside - photo by Deborah Frings - Deborah's GemsJust for You sq - photo by Deborah Frings - Deborah's Gems

We have a new member joining the Design Team this month - please welcome Jane to the team.  So why not follow the Blog Hop to check out what the team have created with this super set:

Deborah - That's me!

We have a prize too!  If you visit all the blogs along the hop and leave a comment you will be entered into a draw and the randomly selected winner will win the Gerbera stamp set, or if you already have that set, a gift certificate to the same value. 


You have a week to leave a comment and Beverley will announce the winner on her blog on Friday 19th June.  That's all for now, thanks so much for stopping by and leaving a comment, I really appreciate it.  Have a fabulous day.

signature

Friday, 13 February 2015

Fabulous Friend ....

....  Good morning everyone!  It's Friday 13th today - I'm not superstitious, so it doesn't worry me at all!!  Earlier this week, Kathryn asked me to make a card for her.  She wanted a card to give one of her best friends, something to mark a special friendship.  It also happens that they met on 14th February!!!  So I've made a really clean, simple and pretty card - I'm safe posting it here today as neither of the girls will see it.

Fabulous Friend - photo by Deborah Frings - Deborah's Gems

Stamps: Uniko Studio - Pure Florals Gerbera, Beautiful Blooms II, All Occasion Sentiments #3
Inks: Stampin' Up! - Cherry Cobbler, Pink Pirouette; Memento - London Fog; Encore - Silver
Accessories: White Lustre Card


I've used a few challenges to make this card.  I've used the layout from this week's CAS(E) this Sketch - CTS#110, the colours are from Colour Me Card Challenge - CMCC#58 and this week's CASology - CAS#133 has the cue word Love and I think the girls' friendship fits.

This card came together really quickly.  I stamped the outline image in grey and then stamped the solid image in pink.  These stamps are so easy to line up.  I finished by added a simple sentiment, stamping the words in different colours.  Don't you love the font on "fabulous"?  I kept the inside really simple - just a tiny flower (those gorgeous Beautiful Blooms).  There's lots of space for Kathryn to write a message.

Fabulous Friend Sq - photo by Deborah Frings - Deborah's GemFabulous Friend inside - photo by Deborah Frings - Deborah's Gem

I really must get on with some housework stuff - it's been a busy week in my craft room and my ironing pile is calling me.  It's always a good excuse to catch up with some TV programmes :)  That's all for now.  Do drop by tomorrow for our new challenge at 52 {Christmas} Card Throwdown.  See you!!

signature
Related Posts Plugin for WordPress, Blogger...