Showing posts with label Chocolate Baroque. Show all posts

Saturday, 18 January 2014

52CCT - A recipe ...

...  Good morning everyone!  Welcome to 52 {Christmas} Card Throwdown,  Mynnette has provided us with a recipe to follow this week:

Monochromatic, CAS, ribbon and a rhinestone

Merry Christmas - photo by Deborah Frings - Deborah's Gems

Stamps: Chocolate Baroque - Christmas Flourish; Waltzingmouse - Festive Foliage; Stampin' Up! - Sassy Salutations, More Merry Messages
Inks: Kaleidacolor - Fresh Greens; Versafine - Onyx Black
Dies: WMS - Holly Die; Die-namics - Fishtail Flags Layers Stax #3
Accessories: Green Hammered Card; White Lustre Card; Vellum; Clear Embossing Powder; Ribbons; Gems


I love monochromatic cards, it's fun to pick a colour and play; I've gone for greens on my card.  For the layout I used this week's Freshly Made Sketches - FMS#119 challenge.  I made the base from some dark green hammered card stock that I've had in my stash forever for a while!  The background holly flourish and holly spring were stamped in Kaleidacolor Fresh Greens.  I cut a strip of vellum for the sentiment as I didn't want to hide the pretty background stamp.  I stamped the sentiment in Versafine and then heat embossed with clear powder.  To adhere the vellum I used Invisi Dots over most of the length, but left the end unstuck.  I found some ribbons in my stash, cut fishtails in each, attached to the card and then used dimensional gel to adhere the holly spring.  I cheated a bit with the rhinestones, Mynnette's recipe is for a single stone, but it would have looked strange to have a single stone, so I went with three green gems.  For the inside I cut a panel of white card and used the flourish stamp to create a border all the way round the card, finishing with a Christmas greeting in the middle.

Merry Christmas inside - photo by Deborah Frings - Deborah's Gems

Do you remember that we had a Design Team call last year, well from this week we are being joined by our new teamies.  Do make them welcome!  I must also give a shout out to Mynnette - you might notice that some of us have swanky new 52CCT logos for our cards - all designed by Mynnette!

I have to say that I'm really getting fed up with winter, we've got even more snow here today.  I know that we don't have as much as some, but I'm over it.  I'm so glad that our new snow blower arrived last week.  I assembled it on Thursday and it's already cleared the drive a couple of times.  So much quicker than doing it manually!  Well, that's all for now - I'm really looking forward to seeing your creations with the recipe!

signature

Tuesday, 11 December 2012

Metallic Christmas ....

..... Morning all - I've a card for this week' Do You Stack Up? - DYSU101 challenge - where we have to include Gold and Silver.  The challenge deadline is today, so I'm quite late submitting my card.


Stamps: Chocolate Baroque - Holly Leaves
Inks: Versamark; Distress - Evergreen Bough
Dies: Spellbinders - Labels 17 (S5-025) #6
Accessories:  Gold and silver embossing powder; Black card from stash; Craft Work label sentiment


This is a really quick and easy card to make and I really like the effect you get combining different embossing powders.  I started by stamping the image in Versamark and adding the gold and silver powder, heating and then cutting it out with the beautifully ornate Labels 17 die.  I sponged on some colour around the edge of the card base and then, using the same colour, stamped the image directly onto the card base.  I finished off with the sentiment label which I coloured to match the background.  This looks very dramatic but is quick and easy enough to mass produce.

Before I go I'd like to welcome Anne-Elise - thanks for joining me.  That's all for now - I'm off to the hairdresser to get my hair cut - ready for Christmas and the New Year.  It's only two weeks to go!!!  Take care, see you soon.

Sunday, 22 July 2012

CR84FN59 - Happy Birthday ....

.... Wow - there goes another week - time is flying past so quickly!  The positive is that it's time for our new challenge at CR84FN.  Our CR84FN59 colours are just so warm and pretty - coral, brown and tan.  Here's the graphic for this week's colours - the pictures are courtesy of Style me Pretty.  Don't you love the ruffle cake?


The card I've made this week is for my design team buddy - Heather Jensen!  Heather is celebrating her birthday next Tuesday and, for a change, I even managed to post my card early so she should have received it by now.  Have a great day Heather.


Stamps: Chocolate Baroque - Baubles; Personal Impressions - Mixed Sentiments
Inks: Stampin' Up! - Chocolate Chip, Calypso Coral; Distress - Antique Linen
Accessories:  Card from stash; Stampin' Up! - Everyday Enhancement Designer Papers; Papermania - Exquisite Papers

I used the sketch from this week's Mojo Monday - MOJO250 for the layout.  I used brown card to make the card base and layered that with some scripty tan designer paper.  The pretty coral floral layer is from Stampin' Up!  It's so pretty.  I added some texture by paper pricking the border.  The flower circles are stamped, clear embossed and painted.  The were stamped on white card, so to make them blend with our colours, I added some distress ink.  On the large circle I fussy cut the flower to give some depth.  I finished off with a sweet birthday sentiment stamped in Calypso Coral.  I also decorated the inside of the card - see picture at the end of the post.


The rest of the design team and our Guest Designer Monika Davis (M.A.D. Stamper) have some lovely inspiration cards to share with you this week - click on the links below or go directly to the CR84FN blog.

Monika Davis - Guest Designer

Here is the graphic from Mojo Monday and also the inside of the card:


That's all for now - so looking forward to seeing your creations.  Have a super Sunday and see you tomorrow.

Wednesday, 1 February 2012

Less is more, banner and bling ...

..... I've managed to play in my craft room today - yea!!  And I've made a card for three challenges - I think this is the only way I'm going to be able to keep playing in my favourite challenges!!  And the challenges for this card are:

  • Less Is More - LIM52 - a sketch from Chrissie and Mandi, but with a few instructions - (a) the card must be landscape, (b) it must be rectangular and (c) the band must remain in the vertical position
  • Jingle Belles - JB12-03 - a banner holiday, where we must use the blog's banner as inspiration for our card
  • 52 {Christmas} Card Throwdown - 52CCT-5 - the theme for this week is to use embellishments, specifically rhinestones!!


I really like this sketch from Chrissie and Mandi - so many possibilities, and will go into my notebook for use again.  I took my colour inspiration from the Jingle Belles banner - bright red, soft grey, soft green and some shimmer too - perfect Christmas colours, and it was easy to add some bling!  I masked off the vertical band and sponged on distress ink, then I flicked on water to give a subtle impression of falling snow.  While masked I stamped the holly leaves in the same colour.  To define the edges of the band, and to echo the grey and shimmer in the Jingle Belles banner, I added holographic silver border peel offs.  I stamped the Christmas tree in London Fog and coloured the image with Promarkers, cut it out and attached it to the card with dimensional tape.  I added lots of red gems to the tree.  I finished off with a simple sentiment stamped in bright red with a tiny gem on the dot of the i!


Stamps:  Chocolate Baroque - Christmas Flourish; Waltzingmouse - Nutcracker Sweet
Inks:  Distress - Evergreen Bough; Stampin' Up! - Poppy Parade; Memento - London Fog
Promarkers:  Green, Mint Green, Terracotta, Cinnamon
Accessories:  Silver holographic peel offs; Red gems and card from stash

I had a really busy day yesterday.  Now that things are progressing with going to the States, I spent most of the day compiling a list of what we're taking and doing a valuation for insurance purposes.  Scary!!  I  had a phone call from my Aunt - her friend has asked me to make a 21st birthday card.  I got a few details, emailed a couple of sketches, and will be making that card later today.

I had a lovely time in town this morning - did a bit of shopping at the local market and enjoyed the bright winter sunshine.  It might be cold, but it's so beautiful.  That's all for now - must get back to my craft room and get started on the 21st card!  See you soon.

Saturday, 7 January 2012

Christmas is in the box ....

... a lovely lie in this morning - that's what I'd planned, but I was still up in time to check out some of my favourite challenge blogs this morning!!!  Still, it meant that we had plenty of time to pack away Christmas.  Mum, Kathryn and I spent the morning putting away the tinsel, baubles, lights and taking the Christmas tree down and putting it all into the Christmas box!  The house seems rather bare now.

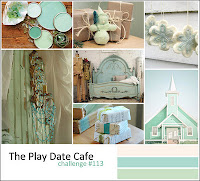
This afternoon I've been in my craft room making a birthday card (which will be from Mum) for my niece, Anne.  For Anne's card I've used the layout from Mojo Monday - MOJO222, the gorgeous pastel colours from The Play Date Cafe - PDCC113 and the theme from DYSU#53 - Let it Snow.


I knew exactly what effect I wanted to achieve with this card and I'm really pleased that the finished card is almost exactly as I imagined it.  I thought the Let it Snow theme from DYSU was perfect for a winter birthday, and the PDCC113 colours are just right.  The hardest part of the card was getting the proportions for the different elements right - I've got a lot of scrap paper on my desk now!  The backing paper is from Artylicious Season's Greetings CD - lots of pretty snowflakes shading from mint green to juniper!  I stamped a pretty doily in pearlescent ice blue onto vellum (inspiration from Charmaine) and cut it out with my nesties.  I used a Cuttlebug die to cut out the pretty snowflake.  Finally, I attached a simple birthday sentiment.


Actually, I think the hardest thing about this card has been getting a decent photo!  It's dark here now and the daylight bulb in my craft room drained the colour, the desk light at my computer gave a yellow cast, so I tried a flash - which is about as good as I can get at the moment.  It does show the pretty doily very well!  I'll try again tomorrow for a better picture.

Stamps:  Waltzingmouse - Dainty Doilies 2 Small, Flourishes - Scallops & Dots; Personal Impressions - Wording Stamps (PIC5066)
Inks: Brilliance - Pearlescent Ice Blue; Distress - Bundled Sage
Spellbinders: Labels Eighteen (S4-310) # 2, Big Scalloped Circles Lg (S4-249) #7
Accessories: Cuttlebug - Ice Crystals die; Stampin' Up! - Filigree brad, gems, Very Vanilla card; Chocolate Baroque - Season's Greetings CD

That's all for today.  I'm off to make supper for us all now.  I'll be back tomorrow with another card using our CR84FN45 colours - I love these colours.  To be fair, I might be a bit biased as I picked them ;)  See you tomorrow!

Friday, 6 January 2012

No time like the presents ....

... the challenge over at Jingle Belles - JB12-01 is to make a card:


Make a holiday card that incorporates GIFT WRAP:
as a background, as an accent, or using motifs cut from your favourite wrapping paper
OR
Make a holiday card with an image of present(s) on it!

And conveniently this also happens to fit in with our St Luke's Charity Card Challenge - where we would like you to make a card and give something that was destined for the bin a new lease of life.  So my card is for both challenges.


I started to take down my Christmas cards last night, and one of the card featured a large pile of Christmas presents - perfect for my "new" card.  I cut out the presents, removing a couple of the parcels to make the pile the right size for my card.  Using one of the Winter edition distress inks, I sponged some colour onto the card base and then stamped, in the same colour, a lovely holly flourish.  To complete the card I attached the parcels - done!  The tag on the parcel says "Just to say", the message is completed on the inside of the card.


Stamps:  Chocolate Baroque - Christmas Flourish
Inks:  Distress - Evergreen Bough (Winter Limited Edition)
Accessories:  Parcels recycled from a Christmas card, card from stash

Kathryn and her school are off to see the Panto in Rhyl today - it's always a really fun event and the children have a great time.  And while Kathryn's out having fun, Mum and I will be in town - some girly time together.  See you soon!

Friday, 11 November 2011

Tag, you're it ...

... this week's challenge at CAS-ual Fridays - CFC28 is to make a CAS tag or a design featuring a tag.


I've made a tag - the first of many that I'm going to need for December!  I started off with a pre-made blank tag and added some colour with my new Winter Limited edition Distress inks - they're wonderful!!!  I spritzed on some water and the colours blended beautifully.  Next I used the same colours to stamp a spray of holly and a simple greeting.  Finally I added a Christmas tree - which was stamped one shade of green and then coloured with more of the new winter green.  I added a bit of sparkle to the star and hearts!  Quick and simple to make.  Ladies, I do hope this is okay for the challenge!


Stamps:  Chocolate Baroque - Christmas Flourish, Sentiment (Elusive Images); Waltzingmouse - Nutcracker Sweet
Inks:  Distress - Iced Spruce, Evergreen Bough; Stampin' Up! - Garden Green
Accessories:  Sakura pens and card from stash

Today has been a truly dull and miserable day - we've had the lights on all day!  It's one of those days that I really don't like - just damp, dull and grey.  I'm hoping that the weekend will be a bit better as my brother-in-law, Bert, will be coming over to see us for the day.  He's bringing my great-nephew, Callum, with him.  It'll be nice to spend some time with them and hopefully get some pictures in the garden - so keep your fingers crossed for sunshine!  That's all for now.  See you tomorrow.

Tuesday, 25 October 2011

Dots - take two ....

... I'm rather enjoying the challenges from this week's Less is More - LIM38 - polka dots and the lovely layout from Waltzingmouse Sketch Challenge - WMSC70.


So I had another go  - I've taken a few liberties with the sketch this time.  I stamped some doily images off the edge of the card at the top left and bottom right and then used some of the flowers I had left over from yesterday's card.  Finally, I added a simple sentiment to say thanks.  I think you can still see the general layout of the sketch.


Stamps: Waltzingmouse - Dainty Doilies 2 Small,  Dainty Doilies Large; Chocolate Baroque - Big Flowers
Inks:  Stampin' Up! - Wisteria Wonder (another of the new in-colours)
Promarkers:  Orchid, Honeycomb, Cocktail Pink
Accessories: Polka Dot Parade - Papertrey (download); Glass gem and card from stash

We had a fun time at Camera Club last night.  I finally selected my two images to submit for judging and eventually settled on titles - now I've got to wait two weeks to hear what the judge thinks!  It was Jonathan's last night at the Club - he flies to America next Monday - so people kept stopping by to wish us luck.  I had to explain that I'm not going - yet!  Anyway, that's all for now.  We have a busy(ish) day lined up, but should still have time to play.  See you soon!

Monday, 24 October 2011

Dots before my eyes ....

... I do try to have interesting titles, but sometimes they're just silly!!!  Anyway, if you've seen this week's Less is More - LIM38 challenge you already know where this post is going.  The Ladies Chrissie and Mandi have a recipe for us this week, our card needs to be clean and simple (of course), but must feature

POLKA DOTS

I decided that this challenge would be perfect for my Swiss Dots folder (and I'm sure many of the LIMettes have thought the same) but it is just perfect.  But I wanted more polka dots - and I was surprised to find that I don't actually have much paper with polka dots.  So I surfed the net and found that you can "try before you buy" on Papertrey - so I had a hunt through their papers and found the lovely Polka Dot Parade so I printed off a sheet of the swatches.  For the card layout, I used the lovely sketch from Waltzingmouse Sketch Challenge - WMSC70 - designed by Kelly Schirmer, it's basic with so many possibilities.


I have gone for a very literal interpretation of the sketch - well, it works for me so well.  I layered some white card which I'd embossed with Swiss Dots, onto turquoise card.  I stamped a pretty flower onto a polka dot swatch and then cut it out.  I used Promakers to add some colour to the stamp details and finished off with a large gem to match.  For the sentiment label I stamped a pretty doily and then the greeting.  Clean and simple, and I'm really pleased with this.


Stamps:  Waltzingmouse - Afternoon Tea Sentiments, Dainty Doilies 2 Small; Chocolate Baroque - Big Flowers
Inks:  Memento - Tuxedo Black; Stampin' Up! - Pool Party (one of the new in-colours)
Promarkers:  Moss, Soft Green
Accessories:  Polka Dot Parade - Papertrey (download); Cuttlebug Swiss Dots folder, gem and card from stash

We had a very lazy day yesterday - Ben and Kathryn played on the X-box, I got into my craft room (yippee) and Jonathan went out for a photo shoot - it was lovely and relaxing.  And today I'm taking Kathryn to craft class for the morning and Ben plans to go out with his friends.  And I've got another skip being delivered today - smaller than the last one - but we still have a bit of sorting out to do - and I'm taking it a bit slower than the last couple of weeks.  No decorators today - just me slowly putting the house back together.  That's all for now.  I'm off to get read for class - see you later!

Monday, 17 October 2011

OLW68 - Get triangular ....

... this week's One Layer Wednesday - OLW68 is being hosted by Susan at Simplicity.  Susan has set us the task of using triangles in our cards.  They can be actual triangles or simply implied! 

I decided to use this as an opportunity to make another Christmas card for my 2011 Collection and have used a "triangular" Christmas tree for the focal image. 


I stamped the image in Tuxedo Black and coloured with three shades of red Promarkers.  And, as it's a Christmas card, I've added lots of sparkle too.  Simple, pretty - I really like this one!

Stamps:  Holly Ivy Mix - Chocolate Baroque; Stampin' Up! - Contempo Christmas
Inks:  Memento - Tuxedo Black
Promarkers:  Poppy, Lipstick Red, Cocktail Pink, Chestnut, Terracotta, Warm Grey 1
Accessories:  Card and glitter from stash

I'm so pleased to be indoors at the moment - it's blowing a gale outside!  It's not raining - although I don't think it'll be long before it starts - but the wind is howling around the house - I'm sure my decorators are pleased they completed the outside yesterday when it was reasonably warm, dry and wind free!  That's all for now - I'm off to get dinner sorted out and then this evening I plan to play in my craft room for a while.

Wednesday, 28 September 2011

Let it snow ....

... you've probably guessed from the title that this is a Christmas card - and you wouldn't be wrong.  I've made this one for the current Jingle Belles - JB39 - challenge entitled "Here comes Suzy Snowflake".  The Jinglettes would like us to make a card based on the song "Suzy Snowflake" - an oldie sung by Rosemary Clooney - I've just listened to it and it has a real old Christmas feel!  I put the lyrics at the bottom of the post if you want to read them.  For my card - I've focused on the verse about making a snowman - with lots of snowflakes around!

Both the snowman image and the backing paper are from Chocolate Baroque (Elusive Images that was).  I printed the snowflake paper in various shades, but settled on the blue for this card - I have sheet of pink and green snowflakes to play with soon.  The snowman was coloured with Promarkers.


Stamps: Chocolate Baroque (Elusive Images) - Snow is Falling; Waltzingmouse - Compliments of the Season
Inks:  Versafine - Onyx Black; Memento - Tuxedo Black
Paper:  Chocolate Baroque (Elusive Images) - Season's Greetings CD
Spellbinders: Labels Four (S4-190) #6, Labels Four Sm (S4-309) #6
Accessories:  Kanban - Snowflakes stickers; Mirri card, glitter, Promarkers from stash

It's mad here - the sun is shining, the sky is bright blue and it's so warm - it feels like summer!  And I've just made a cool blue Christmas card - as I said mad!!!!  Below are the lyrics from Suzy Snowflake - enjoy!
Here comes Suzy Snowflake
Dressed in a snow-white gown
Tap, tap, tappin' at your windowpane
To tell you she's in town.
Here comes Suzy Snowflake
Soon you will hear her say
Come out ev'ryone and play with me
I haven't long to stay.
If you want to make a snowman
I'll help you make it, one, two, three.
If you want to take a sleigh ride
Whee! The ride's on me.
Here comes Suzy Snowflake
Look at her tumblin' down
Bringing joy to ev'ry girl and boy
Suzy's come to town.
If you want to make a snowman
I'll help you make it, one, two, three
If you want to take a sleigh ride
Whee! The ride's on me.
Here comes Suzy Snowflake
Look at her tumblin' down
Bringing joy to ev'ry girl and boy
Suzy's come to town.

After my early morning post I did manage to get some sleep - and bizarrely actually feel more awake now than usual.  I suspect I may pay for it later.  Still, while the sun is shining and the day is lovely - I'm going to get the washing finished.  Joy!!  See you soon.

Wednesday, 25 May 2011

Less is More 16 & CAS-ual Fridays .....

.... the challenges from Less is More to use a butterfly or butterflies on your card is a perfect partner to the request to "Bring the Bling" for this week's CAS-ual Fridays challenge.  A marriage made in heaven!!


Butterflies are such a popular image and they feature frequently on the cards that I see when browsing the Internet.  And there are so many gorgeous stamps available - I have quite a few in my stash, but for this card I decided to use a stamp that I got free with this issue of Craft Stamper magazine.  I inked up the butterfly with a lovely pale pink and added a darker rose colour to the wing edges and stamped directly onto a small 3" × 3" card.  I used one of my new ultra fine Sharpie pens (super set) to add some butterfly trails and finally a simple sentiment.  But I wasn't happy with the card - it was certainly clean and simple - but didn't look finished.

So I made my small card into a topper by cutting off the front of the card and trimming down the size.  I used the red ink pad to ink the card edges - just a fine line.  Then I attached the image to a mat of pale pink textured mirri card and mounted the whole lot onto a larger square card.  Finally I added some bling to the little swirls - and now I'm happy with the way the card has turned out.


Stamps:  Chocolate Baroque - Butterfly (FOC from Craft Stamper);  Waltzingmouse - Say It With Style
Inks:  Stampin' Up! - Pretty in Pink, Rose Red
Accessories:  Card, mirri card, gems from stash

I'd like to say thank you to my fellow LIMettes for all your wonderful comments on my LIM15 cards - I've read them all and really appreciate you taking the time to leave some love!!  I have discovered that I am able to leave comments on some cards - it does appear to be a bit hit and miss at the moment.  Blogger says that the problem is not affecting everyone and that they are working on a fix - so hopefully I'll be able to leave some love.

I've got a day of playing in my craft room lined up.  See you all later.

Related Posts Plugin for WordPress, Blogger...