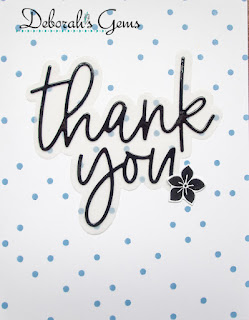
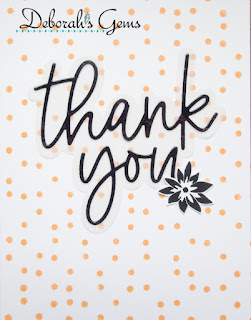
Showing posts with label C&9 - Polka Dot Turnabout. Show all posts

Wednesday, 9 February 2022

SHC - Box of Thanks

.... Morning! I'm here with my Seven Hills Craft blog post. This week I have something a bit different. I made a gift box containing eight thank you cards. This is a gift for my mum who is having a mastectomy tomorrow. I know that she'll have lots of flowers and cards, and I thought it would be nice for her to have some thank you cards ready to use. 


Stamps: Altenew - Illusion Diamond; C&9 - Big on You, So Happy for You, Polka Dot Turnabout, Petals & Pallets, All the Thanks
Inks: Gina K - Lipstick, Passionate Pink, Sweet Mango, Wild Dandelion, Lucky Clover, Powder Blue, Blue Lagoon, Wild Lilac, Soft Stone; Versafine - Onyx Black; Versafine Clair - Nocturne
Dies: The Greetery - Stationery Box; C&9 - Say Thanks
Accessories: White Card; Clear Embossing Powder; Basic Grey - Magnetic Disk Closures

I'm submitting this project to Love to Craft Challenge Blog - LTCCB#66 where it is always Anything Goes. I'm also playing along with Happy Little Stampers Anything Goes with Dies - HLSAGD#02. The box was made with dies and there is a die cut thanks greeting on two of the cards too.


The box is so easy to make - full details are on the Seven Hills Craft blog - I think my finished box is very pretty and very elegant.


I had so much fun making this box - I can see me using the dies a lot more - such a nice way to give a gift of cards.

That's all from me today - I'll be back soon. Take care and keep safe.

signature photo Signature.png

Tuesday, 5 October 2021

SHC - Sweet Gingko ...

.... Hi, it's time for my weekly post for Seven Hills Craft blog. I've got a couple of cards to share today - they focus on the lovely Altenew Sweet Gingko stamp, die and stencil sets.


Stamps: Altenew - Sweet Gingko; MFT - Hugs & Kisses; C&9 - Big On You
Inks: Gina K - Green Grass, Key Lime, Blue Lagoon, Sweet Mango, Tangerine Twist, Coral Reef; Versafine Clair - Nocturne
Dies: Altenew - Sweet Gingko; Gina K - Master Layout 2
Accessories: SU Card - Pear Pizzazz; White & Black Card

I'm submitting this card to Color Hues - CH#27 where they want us to use green and orange - done! I'm also playing along with Never-Before-Used-Schtuff - NBUS#31 - and this is the first time I've used Sweet Gingko.


Before I started on this card I die cut lots of gingko leaf sprigs and created a negative space template for use in my MISTI - to make stamping easy. 

I made the A2 (US size) note card from green card in my stash. I stamped the lined leaf image in green ink around the edge of the note card. I used the co-ordinating stencil to add colour to the gingko leaves. I started with lime green ink and then added a touch of teal at the base of the leaves. I used dies to cut out a white stitched edge panel and a black mat layer. I blended three shades of orange ink over the white panel to create an ombre effect. I stamped a simple greeting in black ink at the bottom of the panel. I adhered the panel to the centre of the card. I used the largest gingko stamp to create the focal image. I stamped the lines in black ink and used the solid leaf stamp to add lime green ink to the leaves. I layered the inked pieces to three white die cuts and adhered it all to the card. Inside the card, I cut a mat layer of black card. On the white panel, I stamped a large, bold sentiment in pale orange and added one of the co-ordinating smaller sentiments in green ink. I finished the panel by adding another gingko leaf.


Next is an autumn greetings card:


Stamps: Altenew - Sweet Gingko; Lawn Fawn - Scripty Autumn Sentiments; MFT - Whimsical Greetings; C&9 - Polka Dot Turnabout
Inks: Gina K - Warm Cocoa, Kraft, Prickly Pear, Tangerine Twist, Blue Lagoon; Delicata - Golden Glitz
Dies: Altenew - Sweet Gingko
Accessories: SU Card - Mango Melody; White Card

I'm submitting this card to Addicted to CAS - ATCAS#207 where the cue word is Autumn. I'm also playing along with Addicted to Stamps and More - ATSM#415 where they want us to use stencils and/or dies - I've used both.


I started by stamping a simple polka dot background in gold ink on an A2 notecard. I created the sentiment by combining stamps from Lawn Fawn's Scripty Autumn Sentiments - I like that the set includes the word autumn. I used the lines gingko stamp with two shades of brown on several of the die cut gingko leaves. I added colour by using the solid leaf stamps along with the stencil to add a touch of teal at the base of the leaves. I adhered the orange leaves flat to the card and used dimensional pads to add the rest of the leaves. Inside the card, I cut a mat layer of orange card. On the white panel, I stamped a greeting and added another die cut gingko leaf.


I had planned to make more cards, but ran out of time!! We had a James Bond film fest this weekend in preparation for going to see the new movie yesterday! So, as a result I have lots of finished gingko leaves left over - here a photo:


I'll be making more cards with them soon. That's all from me for today. See you again soon.

signature photo Signature.png

Wednesday, 19 May 2021

SHC - Floral Birthdays ....

..... Good morning! I'm here with my weekly Seven Hills Craft blog post. I've got a couple of floral birthday cards to share with you today. Here's the first:


Stamps: Concord & 9th - Buds & Blossoms, Yay for Birthdays; Altenew - Birthday Builder
Inks: Gina K - Peach Bellini, Sweet Corn, Sea Glass, Ocean Mist, Jelly Bean Green, Passionate Pink, Innocent Pink, Tangerine Twist, Sweet Mango, Slate
Dies: Concord & 9th - Buds & Blossoms
Accessories: White Card; Stickles

I'm submitting this card to Sunday Stamps Challenge - SSC#257 where they have these gorgeous colours, and to Seize the Birthday - STB#214 and I've used the optional twist to make a bouquet of flowers.


Mum asked me to make her a card for one of her friends - so I thought a floral card would be just right. I die cut several flowers and leaves using the Buds & Blossoms dies from white card. I kept the negative space card and put that in my MISTI, positioned the matching solid images in the space, picked them up with the MISTI door and then put the white diecuts in the space and stamped. Once I'd done the solid images I stamped the outline images.  I worked out where I wanted the flowers and leaves to be on the card, and then stamped the birthday greeting. I adhered the outer flowers and leaves flat to the card and used dimensional pads for the yellow, peach and pink flowers. I finished the front by adding some Stickles glitter to the flowers. Inside the card, I cut a piece of white card slightly smaller than the card. I stamped a couple more flowers on the corners and finished by adding a fun birthday greeting. I edged the panel with an aqua marker.


I had a couple of die cut flowers and some leaves leftover, so I made another card:


Stamps: Concord & 9th - Polka Dot Turnabout Stamp, Buds & Blossoms; Altenew - Birthday Builder
Inks: Memento - Lady Bug; Gina K - Slate
Dies: Altenew - Geo Frames; Concord & 9th - Buds & Blossoms
Accessories: White & Black Card

I'm submitting this card to The Paper Players - PP#541 where they want to see Polka Dots, and to AAA Cards - AAA#190 where they're celebrating their 7th Birthday.


I started by stamping the polka dot background directly on the card. I used the Polka Dot turnabout stamp and only stamped it once in bright red to match the flower. I used a hexagon die to cut the white panel, to get the black mat layer I simply placed the die on black card, drew round it and cut it out. Makes the perfect size mat. I stamped a simple birthday greeting on the hexagon. I finished by adding the multi-headed flower - this has been layered onto three other die cuts to give dimension and stability. Inside the card, I cut a piece of white card onto which I stamped a greeting and added the last of my left over flowers and leaves.


That's all from me today - see you soon.

signature photo Signature.png

Wednesday, 11 November 2020

SHC - Ornament Banner Christmas ...

... Hello! Time is marching on - it's almost the middle of November and that means there are only six weeks until Christmas. So, my Seven Hills Crafts post features Christmas cards. All feature ornament banners - I made banners in pinks, blues, gold, rainbow, and red & green. Here's the first card using the pink ornament banner:


Stamps: My Favorite Things - Ornament Builder Banner; Concord & 9th - Star Turnabout, Very Merry Sentiments, Christmas Cottage
Inks: Gina K - Innocent Pink, Passionate Pink, Red Hot, Cherry Red, Jet Black Amalgam; Delicata - Silvery Shimmer
Dies: Die-namics - Ornament Builder Banner
Accessories: White & Black Card

I used the Star Turnabout alternating pink and silver inks to create the background. I cut the pink ornament banner into two, adhered them to the card front and finished by stamping the sentiment in the middle. On the inside, I stamped and added some decoration in pink to match the front of the card.


My next card uses the blue banner:


Stamps: My Favorite Things - Ornament Builder Banner; Concord & 9th - Star Turnabout, Joy, Christmas Cottage
Inks: Gina K - Powder Blue, Blue Denim, Jet Black Amalgam; Delicata - Silvery Shimmer
Dies: Die-namics - Ornament Builder Banner
Accessories: White & Black Card

I used the same star stamp for the background, but this time only stamped it twice, once in blue and once in silver.

Next is the rainbow ornament banner card:


Stamps: My Favorite Things - Ornament Builder Banner; Concord & 9th - Star Turnabout, Christmas Cottage, Warm Wishes
Inks: Versafine Clair - Tulip Red, Summertime, Cheerful, Verdant, Paradise, Charming Pink, Purple Delight; Gina K- Jet Black Amalgam; Delicata - Golden Glitz
Dies: Die-namics - Ornament Builder Banner
Accessories: White & Black Card

For this card I only stamped the stars once in shimmery gold ink as I wanted the rainbow ornaments to stand out. I stamped a greeting on the front and inside, I used the same words as the previous two cards, but this time the decoration is stamped in gold to match the stars.


The next card features the gold ornament banner:


Stamps: My Favorite Things - Ornament Builder Banner; Concord & 9th - Polka Dot Turnabout, Very Merry Sentiments
Inks: Delicata - Golden Glitz; Versafine - Onyx Black
Dies: Die-namics - Ornament Builder Banner
Accessories: White, Cream, & Black Card; Clear Embossing Powder

I changed the background to polka dots for this card and stamped the turnabout image twice in gold. I adhered the ornament banner across one corner of the card and stamped a bold greeting in black in the opposite corner which I embossed with clear powder. On the inside, I stamped the verse from Very Merry Sentiments.


My last card uses the red & green ornament banner and this time I opted for a portrait look:


Stamps: My Favorite Things - Ornament Builder Banner; Concord & 9th - Polka Dot Turnabout, Very Merry Sentiments
Inks: Kaleidacolor - Fruit Cake; Versafine - Onyx Black
Dies: Die-namics - Ornament Builder Banner
Accessories: White & Black Card; Clear Embossing Powder

I really like this Kaleidacolor ink pad, I think it's perfect for Christmas cards. I stamped the polk dot background twice. I cut the banner into two pieces, adhered them across the corners of the card and added the centre ornament with a dimensional pad. I finished by stamped the sentiment directly on the card and heat embossing with clear powder. The inside has the same verse as the cream card - but the photo was blurred!! 

These cards are flat and will be easy to mail. That's all from me today. Hope you're all keeping safe and well. Bye for now.

signature photo Signature.png

Thursday, 4 June 2020

C4Glz - Stay Up ....

... Hello! I hope everyone is okay and enjoying the cooler weather!! It's time for our new challenge at Cardz 4 Galz - C4Glz#123. For the next couple of weeks we want your cards to feature more than one fold - you can go as mad as you like, but I've simply added one extra fold to create a Z-fold card:


Stamps: Concord & 9th - Polka Dot Turnabout, Cozy Up
Inks: Gina K - Kraft, Sea Glass, Dark Chocolate; Stampin' Up! - Pear Pizzazz
Dies: Concord & 9th - Cozy Up
Accessories: Cream Lustre Card; Copic Markers

Here's a side view of the card where you can easily see the Z-fold effect. I have to thank Jennifer McGuire for the inspiration for this card.


I'm submitting this card to CAS Colours & Sketches - CASC&S#373 - just love the colours they've picked for this week.


I penciled a line down the centre of the card front and positioned the heart die and did a partial die cut (see Jennifer's video). I rubbed out the pencil line and then scored above and below the die cut heart and folded back to create the z-fold. I put the card into my MISTI and stamped the log heart, which I then covered with a heart mask. I used the polka dot turnabout stamp to create the background on the inside of the card and on the front. I removed the mask and stamped the greeting using a dark brown ink. I die cut a cream heart which I put on the inside of the card to add my greeting. I finished the front of the card by adding a couple of coffee mugs, coloured to match.


Don't forget to visit our blog to see more inspiration cards from the rest of the team. I look forward to visiting you soon to see what you create. Have fun and bye for now.

signature photo Signature.png
Related Posts Plugin for WordPress, Blogger...