Friday, 19 September 2014

Double the Joy ....

....  Good morning!  I can't quite believe it's already Friday!  Earlier this week I saw that Time Out Challenge DT were running a special challenge as a surprise for Bev (owner of Uniko Studios), who had twin boys on 2nd September.  You can see her post here - such cute boys!!  The theme of the challenge is "Double the Joy" - you need to use two of something on your card.  Here's my card:

Congratulations - photo by Deborah Frings - Deborah's Gems

Stamps: Uniko Studio - All Occasion Sentiments #1; Stampin' Up! - Something for Baby
Inks: Archival - Jet Black; SU - Bashful Blue, Pacific Point, Lucky Limeade, Smoky Slate
Dies: SU/Sizzix - Baby's First Framelits
Accessories: Papermania Tall Card Blank; SU Card - Smoky Slate; White Lustre Card

Congratulation to Karl and Bev on your gorgeous boys - Josh and Ben.  Take lots of photos and enjoy!  They will grow so fast!!  I reckon it could be "double the trouble" with twin boys!!


I used the colours from last week's Colour Throwdown - CTD#309 as they were perfect.  I stamped the cute booties in dark blue and green on the card base.  I cut a panel of light grey card on which I layered a white panel - covered with light grey nappy (diaper) pins.  I stamped two onesies in pale blue and added a tie on each - one in green and one in dark blue.  I finished the front with a simple, bold congratulations sentiment - naturally I used Bev's own stamp!! This card is on its way to Bev and Karl.

I've got to do some house stuff today - hoovering, dusting, tidying and even some ironing!  So that's all for today.  Do drop by tomorrow for the new 52CCT and Waltzingmouse challenges.  See you soon.

signature

Thursday, 18 September 2014

She's a teenager ....

... Hi!  Yesterday was Kathryn's 13th birthday - it only seems like yesterday that she was a tiny baby.  Kathryn's grown into a lovely young woman.  She's a teenager now, but has been acting like one for a little while now :)  Kathryn has very definite likes and dislikes - she's not a "girly" girl.  Kathryn likes very specific bands, she likes zombie stuff and Mexican style painted skulls, she enjoys Manga books and comics, she loves the TV show Pretty Little Liars and she dresses almost exclusively in black!  So I had a bit of a hard time working out what to make for her card.  This is what I made:

Kathryn's birthday - photo by Deborah Frings - Deborah's Gems


Stamps: Rick St Dennis Digi - Sugar Skulls; Sweet Stamp Shop - Dia De Los Muertos (now discontinued)
Inks: Memento - Tuxedo Black; Archival - Jet Black; Distress - Mowed Lawn, Salty Ocean, Picked Raspberry
Dies: Lil Inkers - Stitched Squares #6
Accessories: White Lustre Card; SU Card - Basic Black; Copic Markers; Luminarte - Radiant Rain Shimmer; Crafters Companion - Spray & Sparkle Multicolour;  Shimmer Sprays - Various

This is a large card (well, I had to make something special) at 8" × 8".  I started by adding spatters of colour to the card base and then sprayed over the top with Radiant Rain, which caused the spatters to bleed - love the effect!  I printed the Sugar Skulls digi on white card and then coloured with Copic markers.  I die cut the image and added some shimmer and sparkle with the Crafter's Companion spray - it really does sparkle!  I layered the finished image on black card.  I stamped the roses and feathers on vellum, coloured the reverse, cut them out and adhered them to the card.  I finished the front with an extra sugar skull and her age.  The numbers are from my stash - no idea who made them!

On the inside I cut a mat layer in black.  I found the logo of Kathryn's favourite band - Black Veil Brides - on the Internet.  I printed it on white card (having made it a bit lighter) and added a birthday verse, written by Susan Tither and found on Craftsuprint.  

KBC inside - photo by Deborah Frings - Deborah's Gems

Below is a close up of the Sugar Skulls image - I had such a good time colouring it in!  

KBC2 - photo by Deborah Frings - Deborah's Gems

I decorated the envelope too.  I did another sugar skull and flourish on the front and on the back I added another BVB logo.

KBC3 - photo by Deborah Frings - Deborah's GemsKBC4 - photo by Deborah Frings - Deborah's Gems

We took Kathryn out to dinner last night - we told her she could pick anywhere she wanted.  She picked the Cheesecake Factory!  So still a bit of a kid :)  It was lots of fun!  Before I go, I have to share a photo of the birthday girl - mind these are increasingly difficult to get - Kathryn doesn't like having her photo taken anymore!!!

Kathryn - photo by Deborah Frings - Deborah's Gems

This one was taken last Saturday when we were in Muskegon.  I was taking a photo of a bicycle rack in front of her and I tried to get one without her noticing!  But I failed - just look at that face!  Love her so much!!

signature

Wednesday, 17 September 2014

TMR - Metal ....

...  Good morning everyone!!  It's time for our new challenge at The Male Room - we'd like you to use METAL on your project.  Here's what I made:

Dude - photo by Deborah Frings - Deborah's Gems

Stamps: Waltzingmouse - Half Pint Heroes, Free Spirit Sentiments; Winnie & Walter - Bubble Talk
Inks: Memento - Tuxedo Black; Stampin' Up! - Blackberry Bliss
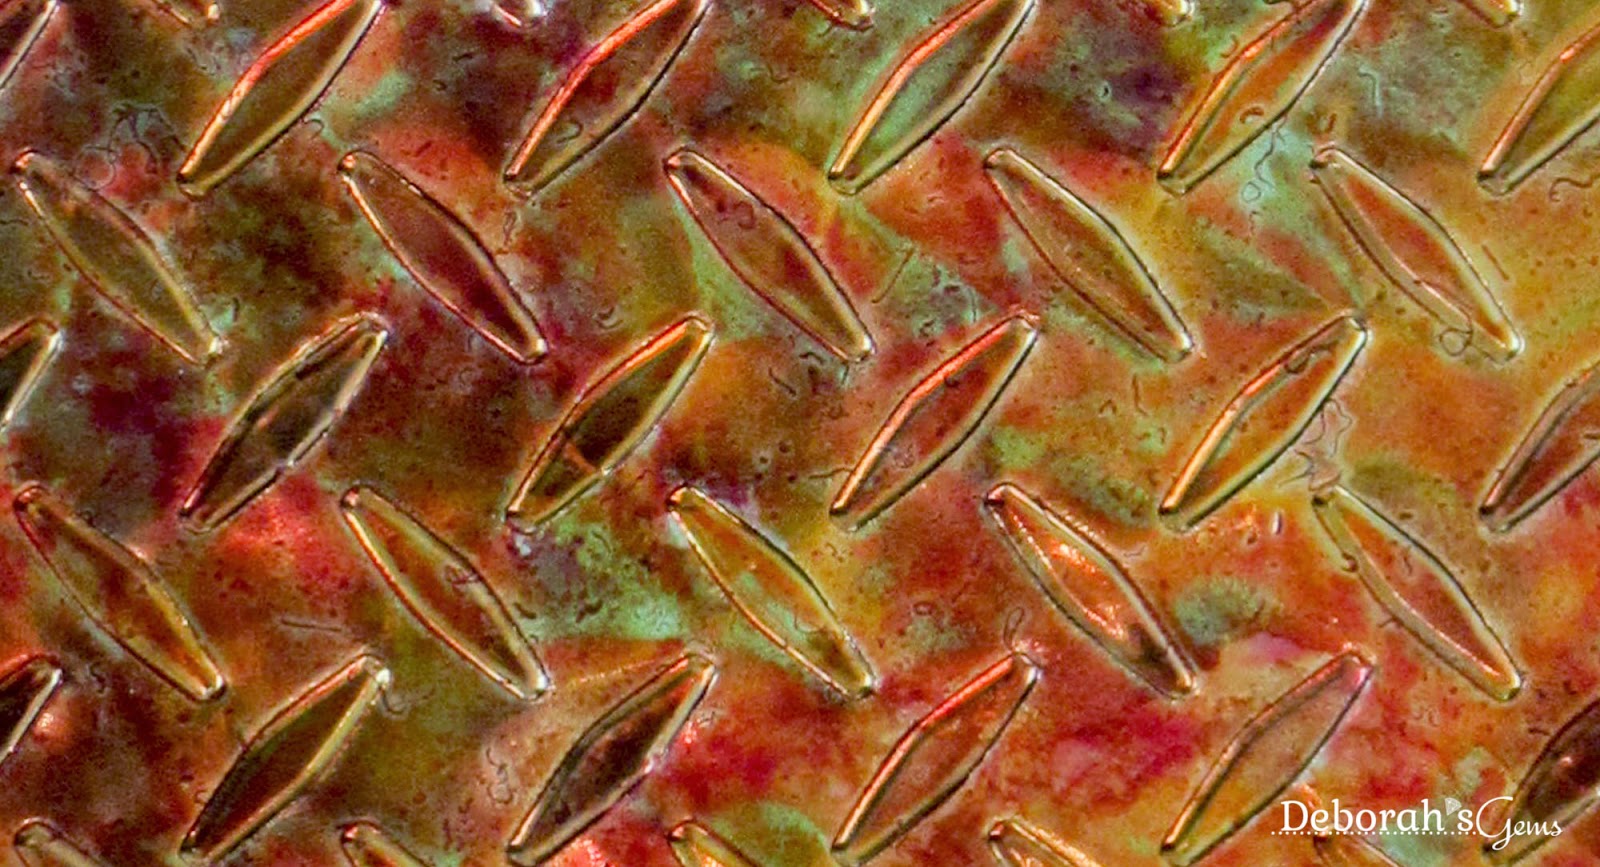
Accessories: White Lustre Card; SU Card - Always Artichoke; Self Adhesive Metal Sheet; Cuttlebug EF - Diamond Plate; Copic Markers; SU Marker; Adirondack Alcohol Inks - Ginger, Butterscotch, Cranberry, Lime


I used a couple of challenges to make this card.  I used the sketch from the current Fusion challenge - FUSION#18 and the colours are from this week's Paper Players - PP#213.  I turned the sketch to make a landscape style card, I also used the idea of a car, but made it masculine.  I made the central panel from a self-adhesive metal sheet.  I embossed the metal and then added colour with alcohol inks (matching them as closely as possible to the Paper Players challenge colours).  I layered the panel onto a piece of green card.  I stamped the little car on white card and coloured it with Copic and Stampin' Up! markers.  I made the sentiment banner from white card, stamped the sentiment and attached it to the card with dimensional tape.  I glued the car directly to the sentiment panel.  On the inside I cut a mat layer of green card and on the white panel stamped a simple sentiment and another car.  I've also included a detail shot of the metal panel where you can really see the colours!

Dude inside - photo by Deborah Frings - Deborah's Gems

Dude detail - photo by Deborah Frings - Deborah's Gems

For more inspiration using metal on your masculine projects - check out The Male Room blog and see what my team mates have made!  Before I go, I'd like to thank everyone for the fabulous submission for our last challenge - so many wonderful projects!!  That's all for now!

Edited:  Just realised that this is my 1,500 post!!! Blimey!

signature

Monday, 15 September 2014

WMS PJP - last card ....

....  Good afternoon!  I'm back with another card for the Waltzingmouse Pajama Party!  Yes, I know I said that yesterday's card was the last one, but I got chance to play in my craft room this morning and have just one more for you:

Believe - photo by Deborah Frings - Deborah's Gems

Stamps: Waltzingmouse - Vintage Ornaments, Twas the Night Before Christmas, Tis the Season
Inks: Versamark; Stampin' Up! - Strawberry Slush; Versafine - Onyx Black
Dies: Spellbinders - 2010 Heirloom Ornaments (S4-283) #4, Ovals Sm (S4-112) #3
Accessories:  White Lustre Card; SU Card - Strawberry Slush, Basic Black; White Embossing Powder; Ribbon; SU Marker Pens - Real Red, Black; Signo White Gel Pen


I combined a couple of Claire's challenges - No 1 Doodle Do and No 3 Old Pajamas - this actually means doodling on a stamped image and using an older set of Waltzingmouse Christmas stamps.  I decided to use the solid image from Vintage Ornaments.  I stamped it in Strawberry Slush and cut it out with the co-ordinating Spellbinder die.  Then I added some doodles to the panels using marker pens.  I die cut a panel of white cut, stamped the oval ray pattern using the 3rd generation image and then stamped the sentiment and attached it to the ornament with dimensional tape.  I made the background panel by stamping the oval ray patten in Versamark and heat embossed with white powder.  I layered the background onto pink card and adhered it to the card base.  I finished the front with a simple ribbon.  On the inside I cut a panel of black card for the mat and on the white panel stamped a bold, simple sentiment in Strawberry Slush.

Believe - photo by Deborah Frings - Deborah's Gems

Now - that really is my last card for the PJ Party!  I'm going to make a cup of coffee and sit down to check out all the submissions.   But before I go, I told you that we'd were away for the weekend in Holland, Michigan.  Below are some (of the many) photos that I took on Saturday when we were in Grand Haven and Muskegon.

Grand Haven & Muskegon 1 - photo by Deborah Frings - Deborah's Gems

Kathryn - she was messing around on this rock and I managed to get a photo of her.  Kathryn used to love having her photo taken, but over the last year she's become less keen!!!  So I was pleased to get this one.  Taken in Grand Haven.

Grand Haven & Muskegon 2 - photo by Deborah Frings - Deborah's Gems

The lighthouse in Grand Haven.  Love the bold red colour.  It was a lovely afternoon.  Jonathan and I both walked to the red house at the end of the pier.

Grand Haven & Muskegon 3 - photo by Deborah Frings - Deborah's Gems

It was a bit windy at the end of the pier, so I decided to try and catch the waves crashing against the walk.  And I did!!!!  Fortunately I didn't get wet.

Grand Haven & Muskegon 4 - photo by Deborah Frings - Deborah's Gems

On our drive to Muskegon we came across a Veteran's Memorial Park in the middle of the road!  It was so beautiful that we decided to stop and look around.  I found this cross as we walked around.  It was really peaceful.

Grand Haven & Muskegon 5 - photo by Deborah Frings - Deborah's Gems

Finally a photo taken at the Farmers' Market in Grand Haven.  It was a fabulous market full of fresh produce and flowers.  Love chillies and tomatoes - I bought some to make salsa!! That's it - see you soon.

signature

WMS PJ Party - take three ....

... okay, I realise that you might have seen enough, but I've one more cute Halloween card, for the Waltzingmouse PJ Party,  to share with you today. 

Witch Way - photo by Deborah Frings - Deborah's Gems

Stamps: WMS - Boo and Friends, Peek a Boo Sentiments
Inks: Memento - Tuxedo Black; Archival - Jet Black; Distress - Stormy Sky, Weathered Wood
Dies: WMS - Witch Die
Accessories: White Lustre Card; SU/Sizzix EF - Cloudy Day; Copic Markers


I think this little spook witch is absolutely adorable!  Stamped onto white card, cut with the matching die and coloured with Copic markers.  I made a cloudy sky for the background by embossing white card, shading to suggest a night sky and attached it to the card base.  I stamped the sentiment on scrap card and fussy cut it out.  Both the image and sentiment were adhered using dimensional tape.  The inside is blank for my own message.

That really is all for today.  It's been a fun weekend.

signature

WMS PJ Party ....

.... Good evening!  I'm back with another card for the Waltzingmouse PJ Party.  This one is for No 2 - Cute Halloween.

Fangtastic - photo by Deborah Frings - Deborah's Gems

Stamps: WMS - Boo and Friends, Peek a Boo Sentiments
Inks: Memento - Tuxedo Black; Archival - Jet Black; Distress - Evergreen Bough
Dies: WMS - Vamp Die
Accessories: White Lustre Card; Stampin' Up! Card - Real Red; Copic Markers; Cuttlebug EF - Skeleton Skull; Gem


I adore these cute little spooks that Claire released last month - they are fun, sweet and so easy to colour.  I stamped the little vampire onto white card, cut him out with the matching die and then used Copic markers to colour him.  I added a tiny red gem.  I embossed some white card with this design, shaded the edges to highlight the skulls and adhered it to a panel of red card.  I stamped the pun sentiment in the centre.  On re-reading Claire's explanation, I realise that she might have been expecting actual sweets and candies!!!  Oh well, never mind, this is still rather sweet :))

That's all for now!

signature

Sunday, 14 September 2014

Swell birthday ....

....  Good evening!  I hope you're all enjoying your weekend.  We're on a weekend break on the west coast of Michigan in a town called Holland!  Jonathan came over for a photo shoot by Lake Michigan but sadly the chill weather meant that it was cancelled.  But that's okay as there's plenty to do over here.  We'll still be taking photos!!!  Before heading over here I was busy in my craft room making some cards for the Waltzingmouse Pajama Party!!!!!  Yea!  It's been a while since Claire hosted a PJ Party, so it's nice to sit back with a cuppa and check out what everyone has made.

Edited:  Oops!  I've posted a day early - hey ho!  I'll still be linking up when the PJ Party starts tomorrow!!!!

There are four categories:
  1.  Doodle Do - make a project that include some hand doodling.
  2. Too cute to Spook - make a Halloween project that includes cuteness! To quote Claire "sweet treats and dinky delectables".
  3. Old Pajamas - use an older Waltzingmouse Christmas set on your project.
  4. Bedtime Story Sketch challenge - a sketch from Claire for us to play with.
I actually made a few cards.  The first one that I'm sharing is for No 4 the Bedtime Story Sketch challenge.  I made a birthday card - I took inspiration from Lynn's beautiful card which she posted in our Waltzingmouse Fanatics Challenge on the theme Birthday/Anniversary (there's still time to join in).

Swell Birthday - photo by Deborah Frings - Deborah's Gems

Stamps: WMS - Art Deco Backgrounds, Putting on the Ritz; Rick St Dennis Digi - Shady Ladies "Tosca"
Inks: Versamark; Distress - Evergreen Bough, Tumbled Glass, Broken China, Iced Spruce; Stampin' Up! - Tempting Turquoise, Coastal Cabana
Dies: Spellbinders - Floral Ovals (S4-356) #3, Fancy Framed Tags Two (S5-128)
Accessories: SU Card: Bermuda Bay, Smoky Slate; White Lustre Card; Copic Markers; Wink of Stella Brush - Clear & Silver; Martha Stewart punch; Clear Embossing Powder

I've had this stunning digi image, Tosca Shady Lady, for a while (I coloured her during the summer break) and I couldn't work out how to show her off to best advantage.  The image was coloured with Copic markers and I added sparkle with Wink of Stella brushes on the gems and knife.  When I saw Lynn's card with the fab Art Deco background I realised that it was the perfect background for this elegant lady.

I stamped the background with Versamark, heat embossed with clear powder, and then added colour to match the image - I used a mixture of Evergreen Bough, Tumbled Glass, Broken China and Iced Spruce.  I adhered the background to a card base made from Bermuda Bay card.  I punched the horizontal border from grey card (I didn't want to hide too much of the background) and die cut an ornate oval frame for the image.  I used dimensional tape to attach the oval and image.  I stamped the birthday sentiment on white card, cut it out with one of the layer dies from the Fancy Tags set and adhered it with dimensional tape.  I added a couple of Art Deco decorations either side of the sentiment.  On the inside I cut a panel of white card, added some decoration in the corners and stamped a birthday greeting.

Swell Birthday inside - photo by Deborah Frings - Deborah's Gems

The image is called Shady Lady "Tosca" and she hold a dagger in her hand, which might not be what you'd expect on a birthday card - but she really is very beautiful and so elegant!!  I had to use her.  I'm submitting this card to the RSD Progressive Challenge Sept - Anything Goes.


I'll be back later with a couple more cards.  See you soon.

signature

Saturday, 13 September 2014

52CCT - Colours ...

....  Hello everyone!  I'm back with our new challenge at 52 {Christmas} Card Throwdown.  This week is our colour challenge and Asha would like you to use:

Red OR Blue + Black AND White + Silver OR Gold

Here's my card:

Merry Christmas - photo by Deborah Frings - Deborah's Gems

Stamps: Deedee's Digis - Dashing Through; Reverse Confetti - Bring on the Merry
Inks: Archival - Jet Black
Dies: Spellbinders - Wonky Rectangles (S4-306) # 5 & 6
Accessories: White Lustre Card; Silver Mirri Card; Copic Markers; Martha Stewart Tinsel Glitter; White Flock Powder; Craftwork Cards Sentiment Label


Our sponsor this month is Deedee's Digis and I've used her cute Dashing Through image on my card.  I've used the theme from this week's Merry Monday - MM#125 challenge - Transportation - a sled, albeit a penguin sled!!!  I printed the image onto white card, coloured with Copic Markers and used dies to cut it out.  I like the fun shape which goes with the fun image.  I used white flock powder for the Santa hat.  I added some sparkle to the finished image with tinsel glitter.  I layered the image onto a panel of silver mirri card.  I added a bit of definition to both panels by going round the edge of the silver mirri crd with a black marker and the edge of the white panel with a red marker.  I finished the front with a sentiment label from my stash which I edged in red and adhered with dimensional gel.  On the inside I cut a mat layer of silver mirri card, cut a panel of white card which I edged in red and a bold sentiment to go with the greeting on the front. 


Merry Christmas inside - photo by Deborah Frings - Deborah's Gems

Please excuse the photos - it's very hard to photograph mirri card - you can see my reflection in the main image above!!!  The mirri card also looks a bit gold, but it is silver, which you can see in the bottom photo.

Including this challenge we have 13 challenges before Christmas - so if you've not played along yet, you still have the opportunity to get at least 13 cards made before it's time to post them out!  For more inspiration cards using these fabulous colours, do check our blog to see the cards from the rest of the Design Team.  Have a super weekend, see you soon.

signature

Friday, 12 September 2014

Pick of the Week nominee ....

... Good morning all!   Yesterday I shared a Halloween card made with a fun, but slightly scary, Rick St Dennis image - Strange Doll.  I really I like this image, it's a bit creepy, but not so much that it'll have you running in the opposite direction.  I posted it to RSD Facebook page as well as a couple of challenges.  I was surprised and delighted to find this on the post from Rick


Then I got an email enclosing a link to this little badge - I'm thrilled to be Rick's first Pick of the Week nominee!


This is a fun idea - Rick and his team pick the nominees and then we get to vote on the winner.  Rick will be posting details of this week's nominees on Monday 15th September!

signature

Thursday, 11 September 2014

Halloween wishes ....

....  Good afternoon from a rather grey Northville!  It's beginning to look like autumn really has arrived.  We had more storms and high winds yesterday and today, it's dull and much cooler than lately!  Still, that's a good excuse to play in my craft room and I've been busy, but can't share them just yet!!!

I had fun making a Halloween card this morning.  I found a new challenge blog last week - A Step in the Dark - ASID#10 Anything Goes.  It is a bit different from other challenges; they are appealing to our darker side - emo, punk, goth, steampunk and just plain creepy, but I rather like it!  Here's my card:

Halloween Wishes - photo by Deborah Frings - Deborah's Gems

Stamps: Rick St Dennis Digi - Strange Doll; Waltzingmouse - Hocus Pocus, Halloween Party, Ciecly at Halloween
Inks: Archival - Jet Black; Distress - Antique Linen
Accessories: Cream Lustre Card; Graphic 45 DP - Steampunk Spells; EK Success - Cobweb Punch; Copic Markers; Ribbon


I love this digi by Rick St Dennis - not too creepy, but definitely not cute!!  I printed her onto white card, coloured with Copic marker and then cut her out.  It doesn't show very well in the photo, but I soften the white by shading with Antique Linen.  I used the sketch from Clean & Simple Stamping - FTL#306, but I turned the sentiment panel so that the sentiment is at the top.  I covered the card with the texty paper, cut a panel of cream card and punched a cobweb edge.  I cut a smaller piece of patterned paper to go on top.  I edged the paper before adhering it to the punched panel.  I stamped the sentiment in black and finished the panel with some black ribbon.  I attached Strange Doll with dimensional tape.  On the inside I cut another panel of design paper.  I added a touch of colour to the cream panel, stamped the verse and added a few bats!

Halloween Wishes inside - photo by Deborah Frings - Deborah's Gems

That's all for now.  See you soon.

signature
Related Posts Plugin for WordPress, Blogger...