Showing posts with label RSD Progressive Challenge. Show all posts

Tuesday, 15 December 2015

RSD - Progressive Challenge Team B ....

....  Hello! It's time for Team B to share our inspiration projects for Part II of the RSD Progressive Challenge.  In Part II of the challenge, you need to create a project using an image provided free by Rick St Dennis; if you want to play along but missed part I, then you can find the image at Rick's Zibbet shop.

We're at day 8 of this year's 12 Days of Creepmas, sponsored by Smeared Ink.  Rick has created a fabulous image - Take Yer Pick - he's really not sure whether it's Halloween or Christmas, and that's the whole point of Creepmas - it's a fun mix of the two!  Here's my card:

Take Yer Pick - photo by Deborah Frings - Deborah's Gems

Stamps: Rick St Dennis Digi - Take Yer Pick; Stampin' Up - Wacky Wishes, Wonderland
Inks: Versafine - Onyx Black; SU - Soft Sky
Dies: Die-namics - Zig-Zag Stitched Rectangle Stax #5; SU/Sizzix - Word Bubble Framelits
Accessories: White Lustre Card; Kaisercraft DP - Christmas Carol; Graphic45 DP - Rare Oddities Frightfully Sweet; Copic Markers; Glossy Accents; Wink of Stella - Clear

I had lots of fun with this image.  I love the parcel monster - he looks so confused, bless!!  I coloured him with Copic markers, cut him out with a fancy edge die and added snowflakes to the background and then finished the image with Glossy Accents to the eyes.  I used Christmas and Halloween design papers to cover the card base and added the image directly on top.  I finished with a sentiment that I produced on the computer and cut out with a die.  On the inside I cut a mat layer of Christmas design paper and added a fun Christmas greeting.

Take Yer Pick inside - photo by Deborah Frings - Deborah's Gems

Here's the full list of those taking part in the 12 Days of Creepmas Blog Hop:


Fiona
Black Dragon
Susan R
Jessica
Suzi
Airless Chambers
Deborah
Susan S
Val
Sarah
Kat
Leigh
Lady Brayton
Sue

It's been a crazy weekend weather wise here in Michigan.  Saturday and Sunday both set new record high temperatures for December, with 63°F (17°C) on Saturday and 61°F (16°C) on Sunday, both so much higher than average.  Some places were even warmer.  In fact the whole month of December has been warmer than average so far - it's a wonderful start to winter :))))  There's been no snow at all so far - see me smiling!!!  Anyhow, that's all for now!  See you soon.

signature

Monday, 16 November 2015

RSD - Progressive Challenge Team B ....

....  Morning all!  This post is really and I do have to apologise to my team mates.  It's time for Team B to share our inspiration projects for the RSD Progressive Challenge.  The challenge has two parts - the first part is where you can use any Rick St Dennis image on your project with an ANYTHING GOES theme.  This is my card:

Merry Christmas - photo by Deborah Frings - Deborah's Gems

Stamps: Rick St Dennis Digi - Jingles the Elf (available I Brake for Stamps); Uniko - Simply Said Christmas
Inks: Versafine - Onyx Black
Dies: Memory Box - Postage Rectangles #4
Accessories: White Lustre Card; Stampin' Up! Card - Real Red; Copic Markers; Wink of Stella - Clear; Sakura - Stardust Pen Gold; Glitter

I've made a really clean, simple, layered Christmas card.  I made the base from red card.  I printed the image on white card, coloured it with Copic markers, used a gold Sakura Stardust pen for the trims on hat, collar, cuffs and shoes, and added a touch of sparkle to the little bells with my clear Wink of Stella brush.  I cut the whole image out with a fun postage stamp style die.  I finished the image by adding glitter to the background and a clean, simple Christmas greeting.  I've not done the inside yet - but will share a photo when it's done.

I've finally completed the inside of the card - I've kept it very simple:


If you want to play along with the challenge, remember ANYTHING GOES, so long as you use a Rick St Dennis digi - you can find lots of wonderful images at Rick's Zibbet shop.  That's all for now, and once again, many apologies to my teamies for the lateness of this post!!

signature

Thursday, 15 October 2015

RSD - Progressive Challenge Part 2 - Team B ...

.....  Morning!  Welcome to Part 2 of the Progressive Challenge at Sparkle and Glitter.  For this part of the challenge you have to use the image provided by Rick St Dennis.  If you took part in the first part of the challenge you can get the image by contacting Mo (click here).  The image that we're using this month was originally going to be in one of Rick's fabulous colouring books, but it was substituted, so this version of Alice is now available at Rick's Zibbet shop.  Team A have already shared their projects here.  This is my take:

Who am I? - photo by Deborah Frings - Deborah's Gems

Stamps: Rick St Dennis Digi - Alice; Stampin' Up! - Morning Cup; Dylusions - Clearly Borders
Inks: Dylusions Paints - Lemon Zest, Squeezed Orange, Postbox Red, Black Marble; Archival - Monarch Orange, Forget-me-Not, Jet Black
Dies: Die-namics - Zig-Zag Stitched Rectangle Stax #5
Accessories: White Lustre Card; Dylusions Sm Journal 5" × 8"; Copic Markers; Wink of Stella - Clear; Signo White Pen; Sharpie Fine Black Pen; Dylusions Stencils - Blocks Lg, Hearts Lg, Keyholes Sm, Blocks Sm

I attended some Dylusion classes with Dyan Reaveley last weekend.  On Sunday we did a full day class focusing on Dyan's wonderful paints.  We worked on the small journal and spent the day learning various techniques.  The background on this page was made using baby wipes and I've detailed the paints and stencils above.  It is the perfect background for my image of Alice.

I printed the image on white card, coloured her with Copic markers and cut her out with a die which has a faux stitched edge.  I have added sparkle to her eyeshadow, lips, hairband and initial.  I stamped some images based around the theme of tea onto the background using archival ink.  I finished the spread by adding a quote from Alice in Wonderland by Lewis Carroll:

"Who in the world am I?  Ah, that's the great puzzle."
Lewis Carroll

I've been pointed in the direction of some new challenges by my team mate, Vicky, so I'm submitting this art journal spread to the following challenges:


Do visit Sparkle and Glitter to see what the rest of Rick's Elite team have made using their images of Alice.


This is the cover of Rick's colouring book Alice 150th Birthday - just one of Rick's colouring books available at Zibbet or on Amazon.  Bye for now!

signature

Tuesday, 15 September 2015

RSD - Progressive Challenge Team B ....

.....  Hello and Good Morning!  This is the first of three posts today - it's a busy time here at Chez Frings!!!!  It's time for our new Progressive Challenge over at Sparkle and Glitter and, as normal, the first month has the theme "ANYTHING GOES", but you MUST use one of Rick St Dennis's images.  Here's my card:

Without You - photo by Deborah Frings - Deborah's Gems

Stamps: Rick St Dennis Digi - Marsailles; CAS-ual Friday Stamps - Love Notes, Big Treble
Inks: Archival - Jet Black; Memento - London Fog; Stampin' Up! - Real Red
Dies: Die-namics - Fishtail Flags Layers Stax #7
Accessories: White Lustre Card; SU DP - Whisper White, Brides Specialty (discontinued); Kasiercraft Doily - Secret Admirer; Copic Markers; Wink of Stella - Clear; Sakura Stardust - Silver


I think you all know that I just love Rick's gorgeous Hat Ladies and this image is brand new this year - she's tres elegant!  I printed her on white card and coloured her with Copic markers, cut her out and added sparkle to her blouse and feathers.  I kept the colours really simple - black, red and white!  I used the sketch from Retro Sketches - RS#181 for the layout.  The musical inspiration comes from CAS-ual Chic - CASCC#03 and the photo over at Cupcake Inspirations Challenge - CIC#327 gave me the idea for the doily and soft creams/greys.  The die cut banner uses some very old and treasured design paper from Stampin' Up!  On the inside I cut a mat layer of design paper and added a greeting to the white panel.  This is for a friend in the UK.

Without You inside - photo by Deborah Frings - Deborah's GemsWithout You sq - photo by Deborah Frings - Deborah's Gems

I've taken a close up of Marsailles Chapeaux so that you can see the shimmer on her blouse and feathers.

Without You detail - photo by Deborah Frings - Deborah's Gems

Do visit our blog to see what the rest Rick's Elite DT have created for you.  Do play along, Rick has a huge selection of images available at his Zibbet shop, or you can shop at Esty.  Team A posted their projects earlier this month - click here to see what they made.  See you later!

signature

Saturday, 15 August 2015

RSD - Progressive Challenge Team B ....

...  Hello!  It's time for Part Two of our Progressive Challenge.  If you played along with Part One of the challenge, then you will be able to get your free image (which must be used for this part of the challenge) from Monique.  If you didn't play along with Part One, then you'll be able to find the cute August Mouse at Rick's Zibbet shop.  Team A have already shown off their creations with this sweet mouse and here's my card:

Fun in the Sun - photo by Deborah Frings - Deborah's Gems

Stamps: Rick St Dennis Digi - Helen's August Mouse; Inkadinkado - Coastal, Down by the Seaside
Inks: Versafine - Onyx Black; Stampin' Up! - Crumb Cake
Accessories: White Lustre Card; Kaisercraft DP - Tropicana; SU DP - Crumb Cake; Copic Markers; Wink of Stella - Clear

I printed the mouse on white card, coloured her with Copic markers, cut her out with a scalpel and then edged the image with a black marker.  With her pretty tropical blouse and gorgeous flower in her hat, Miss Mouse had to be setting out for her holiday on a tropical island.  Fortunately I found the perfect background in my stash of design paper.  On the inside I cut a mat layer of kraft design paper and added a simple image to the white panel.  Once again, I'm rather late with my card - technical issues last night (in other words I managed to destroy my first coloured image and had to start again!!)

Fun in the Sun inside - photo by Deborah Frings - Deborah's Gems

Do visit Sparkle and Glitter to check out what the rest of the team have made using Helen's August Mouse.  Why not check out Rick's Zibbet shop - there are over 1,200 images from cute to dark, from fun to scary - they're all fab!!  Rick has created an Adult Colouring Book called Day of the Dead - and a Limited Edition of 100 signed by Rick and numbered is available at the Zibbet shop, but you can get an unsigned version from your local Amazon store too.  I'm waiting for my copy to arrive and can't wait to colour!!!

That's all for now.  Whatever your plans are for the weekend, have a great time.  We're going to be very busy - off to see a cruise - details later!!!

signature

Wednesday, 15 July 2015

RSD - Progressive Challenge Team B ....

.... Morning!  I'm back in the States and it's so nice to be home, I've really missed playing in my craft room.  I'm back this morning with a card for our Rick St Dennis Progressive Challenge, and it's time for some mid-month inspiration from Team B.  This month has an "ANYTHING GOES" theme, but you must use one of Rick's images on your project.  There's a huge selection over at Rick's Zibbet shop - do check it out.

My card is a clean and layered with a fun image:


Live Laugh Love - photo by Deborah Frings - Deborah's Gems

Stamps: Rick St Dennis Digi - Emma Hemlock (I Brake for Stamps); Kaisercraft - Secret Garden
Inks: Versafine - Onyx Black; Stampin' Up! - Pistachio Pudding
Dies: Memory Box - Cross Stitched Frame Borders #5 and #6
Accessories: White Lustre Card; SU Card - Rich Razzleberry; Copic Markers; Wink of Stella - Clear, Pink, Silver and Green


I printed the image on white card, cut it out with the lovely cross stitched frame die and then coloured her with Copic markers.  I know that the image is for Halloween, but I think she's lovely.  The colour inspiration started from this week's Colour Q - cQc#299, but then slightly wandered off!  I did use some of the colours, but could get the image to work with yellow, so opted for lime green instead.  I think Emma's a fun loving girl, so I added green to her hair (wish I was brave enough to do that) and added lots of sparkle to her feathers, the ribbon, her make-up and the background too.  I layered the finished image on a piece of razzleberry card and adhered the whole panel to the card.  I finished the front with a simple, but heartfelt, sentiment.  On the inside I cut a mat layer of razzleberry card and on the white panel stamped a pretty doily in green (to match her ribbon) and added a bold sentiment.

Live Laugh Love inside - photo by Deborah Frings - Deborah's Gems

Do visit our Sparkle and Glitter blog to see the inspiration projects from the rest of Team B - they're fabulous!!!  And why not play along with us this month - Mr Linky is here - find your favourite image from Rick's shop and go wild!!  That's all for now - see you soon.

signature

Monday, 15 June 2015

RSD - Progressive Challenge Team B ....

.... Morning!  It's time for Part Two of our Progressive Challenge.  Those of you who played along with Part One will be able to get your free image, which MUST be used for this part of the challenge, from Monique.  Please click on the link and email her for your copy of the image - it's fab!!!  Team A have already shared their projects and today it's Team B's turn, here's my card:

Kettle's On! - photo by Deborah Frings - Deborah's Gems

Stamps: Rick St Dennis Digi - Mr TeA; Waltzingmouse - Afternoon Tea, Afternoon Tea Sentiments
Inks: Memento - London Fog; Stampin' Up! - Soft Sky
Dies: Spellbinders - Superellipse (S5-188) #2; Lawn Fawn - A Birdie Told Me
Accessories: White Lustre Card; SU Card - Soft Sky; Copic Markers; Wink of Stella - Clear

Don't you just love Mr TeA?  He comes with a sentiment and without, I used the one without.  If you didn't play along with Part 1 of the challenge and you want to play along, you can find Mr TeA  at Rick's Zibbet shop here.  Why not browse Zibbet while you're there - Rick has so many fabulous images available.

As soon as I saw this image I knew what I wanted to do.  I created the background using the outline kettle from Afternoon Tea and added little tea cups to echo the teacups in Rick's image.  I printed Mr TeA on white card and coloured him with Copic markers, cut him out and added some sparkle to the big yellow teacup.  I love the crazy expression on his face.  I stamped the sentiment on white card, cut it out with a die and while still in the die added some colour.  On the inside of the card I cut a mat layer of pale blue card and stamped a tiny kettle in the corner.

Kettle's On inside - photo by Deborah Frings - Deborah's Gems

Do pop along to Sparkle and Glitter to see what the rest of Team B have made to inspire you.  And please do play along - we'd love to see your creations.  You can link up by clicking here and adding your project to Mr Linky.  That's all for now - have fun!

signature

Friday, 15 May 2015

RSD - Progressive Challenge Team B ....

...  Good morning!  I have to apologise to my team mates, once again, I'm running late with this post.  It's time for Team B to share the projects we've made for the Rick St Dennis Progressive Challenge.   The theme for this part of the challenge is ANYTHING GOES with a RICK ST DENNIS image.  Here's my card:

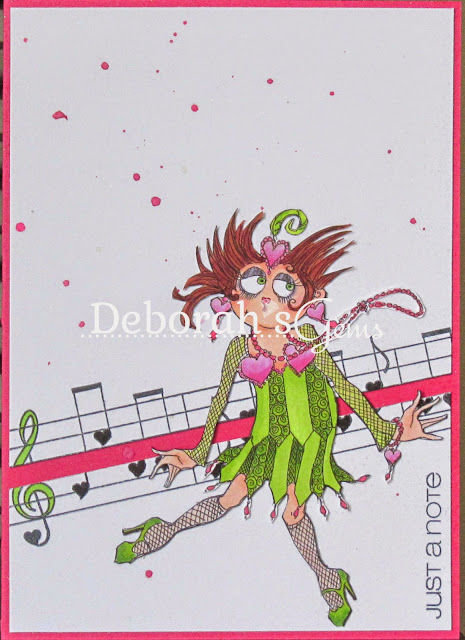
Just a Note - photo by Deborah Frings - Deborah's Gems

Stamps: Rick St Dennis Digi - Jocasta Jazz Valentine Girl; CAS-ual Friday Stamps - Love Notes, Big Treble
Inks: Memento - Tuxedo Black; Stampin' Up! - Melon Mambo
Accessories: White Lustre Card; SU Card - Melon Mambo; Kaisercraft DP - Say Aloha; Crafter's Companion - Spray 'n' Sparkle Iridescent; Cosmic Shimmer Mist - Candy Pink; Copic Markers; Wink of Stella - Clear; SU Marker - Basic Black


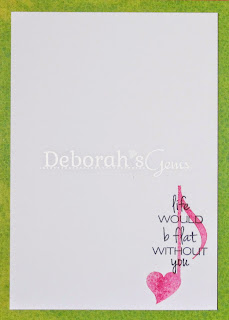
I used a few challenges in the making of this card.  The colours are from Colour Me Card Challenge - CMCC#71 and the layout is based on this week's sketch at Freshly Made Sketches - FMS#186.  The image is called Jocasta Jazz Valentine Girl and she's just wonderful.  I'm on a bit of a roll with music theme cards - I made one yesterday too.  I printed her on white card, coloured with Copic markers and then very carefully used my scalpel to cut her out.  I ran a black marker round the cut edge to define the image and added some WOS sparkle to her feather, jewellery, makeup and shoes.  I used bright pink card for the base.  I stamped the music diagonally across the card and added a simple sentiment to the side.  I cut the card along the middle diagonal to allow the pink to show through.  Before attaching Joscasta, I used iridescent spray and some Cosmic Shimmer to add some detail to the white panel.  On the inside, I covered the card with green design paper and added a simply sentiment to the white panel.

Just a Note inside - photo by Deborah Frings - Deborah's GemsJust a Note sq - photo by Deborah Frings - Deborah's Gems

The rest of Team B have some fabulous projects over at Sparkle and Glitter - do pop by and check out their work.  If you want to play along with us, you need to use a Rick St Dennis image on your project - 3D art, scrapbook page, art journal or cards - the choice is yours.  Rick has over a 1,000 images available at his Zibbet store, to suit all tastes from sweet, cute, fun, funky to downright scary too.  Have fun!!

signature

Wednesday, 15 April 2015

RSD - Progressive Challenge Team B ...

.....  Good afternoon.  I'm very late with this post for the Rick St Dennis Progressive Challenge (I should have had this card up early this morning).  This month you must use the gorgeous Aloha Nui image (which you will have received if you played along with the first part of the challenge).  However, if you missed that you can buy the image at Rick's Zibbet shop.  Here's my card:

Aloha - photo by Deborah Frings - Deborah's Gems

Stamps: Rick St Dennis Digi - Aloha Nui; Waltzingmouse - My Island
Inks: Stampin' Up! - Crumb Cake, Strawberry Slush
Accessories: White Lustre Card; Fancy Pants DP - Beach Babe; SU Card - Pistachio Pudding; Copic Markers; Wink of Stella - Clear


I used a couple of challenges in the making of this card.  I used the colours from The Paper Players - PP#240 and the layout is based on the sketch at Freshly Made Sketches - FMS#182.  I printed this sweet lady on white card, coloured her with Copic markers, cut her out and added some sparkle to her flowers and hair with a clear Wink of Stella brush.  I found this fab piece of design paper in my stash - it wasn't quite the right colour, so I went over it with Copic markers and layered it on some pale green card.  I adhered the image with dimensional gel.  On the inside I cut a mat layer of green card and on the white panel added a little island and a sentiment.

Aloha inside - photo by Deborah Frings - Deborah's GemsAloha sq - photo by Deborah Frings - Deborah's Gems

The rest of Team B have made some fabulous projects with Aloha Nui - do drop by and leave a comment or two.  That's all for now.  See you soon.

signature

Sunday, 15 March 2015

RSD - Progressive Challenge Team B ....

......  Hello!!!  It's time for Team B to share with you our projects for our new Progressive Challenge.  This time, as well as using a Rick St Dennis image, we have a theme for you to create a SPRING/EASTER project.  I've made a clean, simple and pretty Easter card:

Happy Easter - photo by Deborah Frings - Deborah's Gems

Stamps: Rick St Dennis Digi - Easter Turtle; Uniko Studio - Flower Power #4
Inks: Stampin' Up! - Wisteria Wonder, Daffodil Delight, Calypso Coral, Strawberry Slush, Costal Cabana, Certainly Celery; Memento - Tuxedo Black
Accessories: White Lustre Card; SU DP - Calypso Coral; Copic Markers; Wink of Stella - Clear


I've used another of Rick's wonderful turtles - this one, Easter Turtle, is a real cutie and she's such fun to colour.   I used the layout from this week's CAS Colours & Sketches - CASC&S#115 but I have flipped it to work with my image.  The colours are from ShowCASE Your Style - SYSC#10.  I printed the turtle on white card, colour her with Copic markers and then cut her out.  I added some sparkle to her hat, her shell, her nails and the Easter eggs.  I stamped a couple of tall flowers in the background and created the horizontal strip by stamping little petals in lots of colours.  I finished the front with a simple Easter greeting.  On the inside I cut a mat layer of coral design paper and on the white panel stamped a greeting and added lots of pastel flowers.

Happy Easter inside - photo by Deborah Frings - Deborah's GemsHappy Easter sq - photo by Deborah Frings - Deborah's Gems

There are lots of wonderful spring and Easter images in Rick's Zibbet and Esty shops - so pop along and find something to play along with our Progressive Challenge.  We look forward to seeing what you create, add your links to our special Progressive Challenge page here.  Have fun!

signature

Sunday, 15 February 2015

RSD - Progressive Challenge Team B ....

....  Hello!  I'm running a bit late with this post!  It's time for Team B to share the projects we've made for the Progressive Challenge.  We've used Rick's lovely digital image - String of Hearts Fairy which you will have received if you playing along with the first part of the challenge.  If you missed the first part and you want to play along you can get the image at Rick's Zibbet.  Here's my card:

Fly High - photo by Deborah Frings - Deborah's Gems

Stamps: Rick St Dennis Digi - String of Hearts Fairy; Stampin' Up! - Butterfly Basics
Inks: SU - Pear Pizzazz, Strawberry Slush, Pool Party
Accessories: White Lustre Card; Kaisercraft DP - Kaleidoscope; Copic Markers; Wink of Stella - Clear; SU Punch - ¾" circle

I printed the fairy on white card and coloured her with Copic markers and added lots of sparkle to her wings and several of the hearts using my clear Wink of Stella Brush.  I then spent some time fussy cutting her out - it's worth the effort.  I found the perfect design paper in my stash - read the sentiment!  I adhered the paper to the card base and then added some stamped images to the paper.  I stamped the little postmark onto a bit of scrap, punched it out and adhered it to the card.  I attached the fairy with dimensional tape.  On the inside I cut a mat layer of design paper, cut a panel of white card smaller and stamped a sentiment and a bit of collage.

Fly High inside - photo by Deborah Frings - Deborah's Gems

Here's a close up of the sentiment on the design paper - it's perfect with the image.  And also a close up of the sparkle on her wings!

Fly High Detail - photo by Deborah Frings - Deborah's GemsFly High Detail 2 - photo by Deborah Frings - Deborah's Gems

Today is the perfect day to stay in and play - why?  Well, it's blooming cold outside.  North America is under the influence of a huge arctic blast.  The temperature here as I type is -21°C, but feels like -27°C because of the wind (that's -4°F and -14°F for my American friends - I still use Celsius).  The upside is that the sky is blue and the sun is shining.  We've got friends who live in Boston and they're digging out after another 14inches of snow!!!  I think I am officially over winter - roll on spring!!  That's all for now.

signature
Related Posts Plugin for WordPress, Blogger...