Monday, 8 March 2021

Happy Birthday ....

.... Good afternoon. I've made a birthday card today:


Stamps: Unity Stamps - Tess Girl; Happy Little Stampers - Fun Birthday Sentiments
Inks: Versafine - Onyx Black
Accessories: White Card; Kaisercraft DP - Bombay Sunset; Clear Embossing Powder; Copic Markers

I'm submitting it to AAABirthday - AAA#23 where they want us to use patterned paper, and also to Never-Before-Used-Schtuff - NBUS#24. I have a huge stash of patterned paper and don't often use it, so thanks to the AAAB team for making me get some out! My NBUS is this lovely image from Unity Stamps and the verse inside.


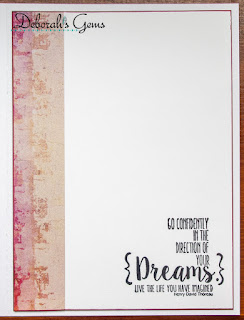
I found this lovely paper in my stash cut it to fit the front of the card, edged it with a dark pink marker and glued it to the card. I stamped the girl on white card, coloured her with Copic markers, reinked with black Versafine and heat embossed with clear powder. I then fussy cut her out, edged her with a black marker and glued her to the front of the card. I finished by adding a simply birthday greeting. On the inside, I cut a piece of white card onto which I glued a strip of the same design paper to one side. I stamped the sentiment in the bottom corner of the card. It is such an encouraging sentiment - perfect for a young woman setting out on her journey in life.


Today is International Women's Day and the theme they have is Choose to Challenge. I think the sentiment goes well with the theme. I'm also submitting this to Women.Beyoutifully.you where there theme is empowerment. I think she's very confident in herself and the sentiment works perfectly.


And that's all from me today. See you soon.

signature photo Signature.png

Wednesday, 3 March 2021

SHC - Easter Bunnies ....

.... Morning! We've had a super weekend here in Northop Hall - it was sunny with bright blue skies, and warm over the weekend. A bit cooler since then. Mum has been in the garden putting in plants and I've been playing in my craft room - we've both been in our happy place!! Anyway, I'm here with my regular weekly post for Seven Hills Crafts. I've been trying to push myself out of my comfort zone and this first card is way out there:


Stamps: Lawn Fawn - Easter Before 'n' Afters, Celebration Scripty Sentiments, Blue Skies
Inks: Gina K - Key Lime, Jelly Bean Green, Grass Green; Distress - Tumbled Glass, Broken China; Versafine - Onyx Black; Kaleidacolor - Spectrum
Dies: Lawn Fawn - Easter Before 'n' Afters; Concord & 9th - Confetti Card Dies
Accessories: White Card; Copic Markers; Lawn Fawn Stencil - Grassy Hillsides; Clear Embossing Powder; Nuvo - Clear Aquashimmer Brush

I'm submitting this card to Never-Before-Used-Schtuff - NBUS#24 - all new to me!!


I started with a top folding A2 white card and created the background using the grassy hillside stencils. I used several shades of green for the grass and two shades of blue for the sky. I then stamped various images on white card, coloured them with Copics, restamped with Versafine black ink and heat embossed with clear powder. I stamped the greeting in on of the large white clouds. I used matching dies to cut out the bunnies, basket and eggs, I fussy cut the clouds. Next, I adhered two of the clouds to the right hand side of the card and used the large scalloped edged rectangle die from Confetti cards to cut out my card. I then adhered the elements to the front of the card. I used dimensional pads for the Easter basket and the red egg. On the inside, I cut a piece of white card and stamped a greeting and added a few more of the Easter elements.


My next card is more my usual style - tending towards clean and simple:


Stamps: Lawn Fawn - Easter Before 'n' Afters, Celebration Scripty Sentiments, Simply Celebrate Spring
Inks: Gina K - Soft Stone; Versafine - Onyx Black
Dies: Lawn Fawn - Simply Celebrate Spring
Accessories: White Card; Copic Markers; Clear Embossing Powder; Nuvo - Clear Aquashimmer Brush

I'm submitting this card to Fusion - FUSION#0421 where I've taken the rainbow dress as my inspiration.


I stamped the row of eggs on white card, coloured them with Copic markers, restamped with black Versafine, heat embossed with clear powder and cut them out with the matching die. I worked out where I wanted the coloured eggs to be on the card and then stamped lots of eggs in soft grey ink all over the front. I used dimensional pads to add the coloured eggs. I added lots of sparkle to the eggs with a clear aquashimmer brush. I finished the front by adding a bold scripty Easter greeting. On the inside I've kept things really simple with no message, but I did add a cute bunny.


I had a few bunnies left over from my first card, so I made a final Easter card - this one is very clean and simple:


Stamps: Lawn Fawn - Easter Before 'n' Afters, Celebration Scripty Sentiments, Simply Celebrate
Inks: Gina K - Sweet Mango; Versafine - Onyx Black; Versmark
Dies: Lawn Fawn - Easter Before 'n' Afters
Accessories: White Card; Copic Markers; Clear and White Embossing Powder; Gina K Card - Sweet Mango; Nuvo - Clear Aquashimmer Brush

I cut a strip of black card an inch wide and stamped the scripty Easter greeting in Versamark and heat embossed it with white powder. I layered this piece on peach card and adhered the panel to the front of a top folding A2 card. I finished the front with the cute bunny holding the peach Easter egg - I've added sparkle, but you can't see it in the photo above. On the inside, I cut a mat layer of peach card and on the white card I stamped a greeting and added the Easter basket.


I had lots of fun making the first card - it is very much out of my comfort zone, but I did a few like that this weekend. I might not do it again for a while. That's all from me for today. See you soon.

signature photo Signature.png

Monday, 1 March 2021

C24C - Tic Tac Toe ....

... Morning! It's the first of the month and that means we have a new challenge for you at Christmas 24 Challenge - C24C#29. For the next two weeks we have a Tic-Tac-Toe grid for you to pick a line and use on your Christmas card. I picked the left hand line down - Die Cuts, Design Paper and Pearls. Here's my card:


Stamps: Uniko - Peace on Earth
Inks: Gina K - Soft Stone; Memento - Grape Jelly
Dies: MFT - Very Merry and Bright
Accessories: White Card; Kaisercraft DP - Christmas Jewel; Pearls

I'm submitting this card to Fab 'n' Funky Challenges - FNF#512 where the theme is Christmas.


This is a quite clean and simple. I found a piece of Christmas design paper which is bold and has lovely foiled snowflakes and used the large word die to cut the greeting. I used the negative space piece to help position the words, removed the paper and left the words bold on a white card. In my stash I found a strip of tiny black pearls exactly the right length and placed them below the word bright. A nice clean, simple card. On the inside, I cut a piece of design paper for the mat layer and on the white panel I stamped a couple of doves in soft grey and added a sentiment in purple.


Using this large die made it very easy to make a second card. I used the negative space left in the design paper on a black card:


Stamps: Uniko - Peace on Earth
Inks: Gina K - Soft Stone; Memento - Grape Jelly
Dies: MFT - Very Merry and Bright
Accessories: White Card; Kaisercraft DP - Christmas Jewel; Pearls; Glitter Paper

I used a piece of pale lilac glitter paper to go behind the design paper as the black card didn't give enough definition to the letters. I trimmed the paper to be slightly smaller than an A2 card. I added lots of tiny dark grey pearls to the centres of the snowflakes. The pearls in the letters are where the snowflake centres would be. On the inside, I used the glitter paper for the mat layer and stamped the same doves and words on the white panel.


This was fun. Using the large word die made it easy to make two cards at once. I really enjoyed seeing all the lovely cute animals cards for our last challenge. I can't wait to see what you make using the Tic-
Tac-Toe grid. Don't forget to visit our Christmas 24 Challenge blog to see more inspiration cards from the rest of the design team.

Before I go, I'd like to wish all my family and friends living in Wales

Dydd Gŵyl Dewi Hapus!

The national flower of Wales is a daffodil and there are some flowering in my garden - spring is on the way. Bye for now - see you again soon.

signature photo Signature.png

Sunday, 28 February 2021

O Christmas Tree ....

.... Hello again! I've ended February with an almost full week of cards - go me!! Today I'm sharing a Christmas card. It's never to early to start on your stash for this year - it makes thing so much less frantic in November!! This card is a bit out of my comfort zone.


Stamps: Visible Image - O Christmas Tree, Sentimental Christmas
Inks: Distress - Black Soot, Chipped Sapphire, Shaded Lilac, Tumbled Glass, Shabby Shutters, Twisted Citron; Versafine - Onyx Black; Memento - Lulu Lavender
Accessories: White Card; Clear Embossing Powder; Imagine Crafts - Frost Sheer Shimmer Spritz; Tim Holtz Stencil - Stars THS115; Viva - Iridescent Glitter Paste

I'm submitting this card to Just Us Girls - JUGS#573 - that inspiration photo is just gorgeous and inspired my ink blended background. I'm also playing along with 52Christmas Card Throwdown - 52CCT08-21 where they want Mixed Media on your card - done!! Finally, I'm joining in with Merry Little Christmas Challenge Blog - MLCCB#31 where it's Anything Christmas Goes.


I used a top-folding A2 card for the base. I used several shades of Distress ink to blend the background. I used Tim's water drop method to add some subtle dot texture on the background and then I spritzed the whole thing with frost shimmer spray - it's absolutely beautiful in sunshine!! Once the background was dry, I stamped the Christmas tree in black Versafine ink and heat embossed with clear powder. To give better definition of the tree, I repeated this step (one of the great things about using a MISTI). I finished the front by applying a layer of iridescent glitter paste through a Tim Holtz star stencil. On the inside, I stamped a Christmas greeting in black and added a tiny lilac start.


I took a photo of the card in direct sunlight - you can really see all the shimmer and sparkle - so pleased with it.


Isn't it wonderful how much better everything feels when the sun shines? And getting decent photos is a real plus too! I'm very pleased how this turned out. I don't usually go full mixed media on a card, but this was fun. That's all for today. Hope to see you again soon.

signature photo Signature.png

Saturday, 27 February 2021

Coffee Time ...

... Hello again! I've had a super afternoon, playing with stamps and ink - something I've not done for a while. I've got a couple of cards with coffee theme to share. My first card also celebrates the 9th birthday of one of my favourite stamp companies - Uniko. I've been a fan of Bev's designs since she started the company and I've also been lucky enough to be on her design team too. This card is for Bev:


Stamps: Uniko - I Love Coffee, Originally Organic
Inks: Versamark; Gina K - Stormy Sky
Dies: Honey Bee - Coffee Cup Card
Accessories: White Card; SU Card - Crumb Cake; Vellum; Copic Markers; Silver Embossing Powder

I'm submitting this card to Bev's Uniko 9th Birthday Bash - US9BD.


I used Honey Bee's large coffee mug die to cut out the card. I used some kraft card for the cup lid and stamped lots of little coffee beans over it in Versamark. On the main mug I stamped the beautiful Originally Organic flower - this is a favourite of mine. I coloured it with Copic markers paying homage to Uniko's house colours. I embossed the finished image with silver powder. I cut the cup holder in vellum as I didn't want to hide the pretty image when it is put over the mug. On the inside, I stamped a simple and heartfelt sentiment in grey.


My next card kind of sums up how I feel at the moment. This third lockdown has really gotten to me, as it has to many, and this just made me feel better:


Stamps: CAS-ual Friday Stamps - Cup of Coffee, Hot Coffee, Peace, Love & Coffee; Stampendous - Coffee Background
Inks: Gina K - Warm Cocoa; Memento - Rhubarb Stalk
Dies: CFS - Coffee Cup
Accessories: White Card

I'm submitting this card to Caffeine Fueled Paper Play - CFPP#02 (a challenge I've been meaning to play along with for ages), and to Never-Before-Used-Schtuff - NBUS#23.


I've not used any of the coffee themed stamp sets that I have from CAS-ual Friday, so it's been fun to give them an outing! I stamped the background image using soft brown ink - it has lots of wonderful coffee quotes. I stamped the coffee mug on white card and added this brilliantly snarky sentiment. Absolutely perfect for how I'm feeling! I used the matching die to cut out the mug and adhered it to the front of the card. On the inside, I simply stamped another sentiment and added a tiny coffee mug.


I really do think that's it from me today. The sun is just starting to go down behind the houses over the road. It's been a beautiful bright day and I've played inside - my idea of fun. See you tomorrow!

signature photo Signature.png

Perfect Moment ...

.... Good afternoon! Yes, I'm posting again! I've been having fun just playing along with various challenges. So, today I have a rather quirky card to share:


Stamps: Stamp Mania - Mexican Pottery Set; Visible Image - Take the Moment, The Ripple Effect
Inks: Versafine - Onyx Black; Stampin' Up! - Mint Macaron, Mossy Meadow; Verafine Claire - Nocturne
Accessories: White Card; Copic Markers; Sakura Stardust Pens; Nuvo Clear Aquashimmer Brush; Clear Embossing Powder

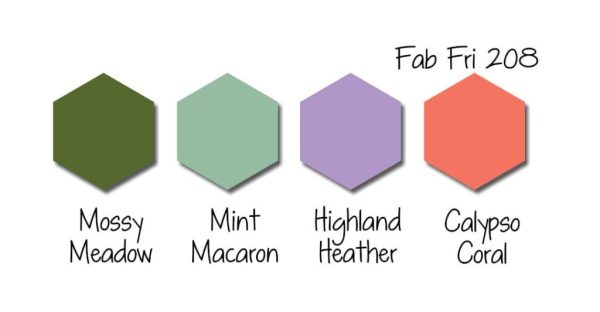
I'm submitting this card to Fab Friday - FABF#208 - where they have these lovely colours, and to Addicted to CAS - ATCAS#192 where the cue word is Animal. 


I love this lizard image and I think he's perfect for the animal element of my card. I used my MISTI to stamp him on white card. I removed the image and coloured it with Copic markers. I then returned the image to the MISTI and restamped in black Versafine ink and heat embossed with clear powder. This technique is one of my favourites because it gives such a lovely crisp, clean image. I then very carefully fussy cut him out. I used a top-folding A2 white card and stamped a subtle background directly onto the card. I adhered the lizard, onto which I have added some shimmer, and then added a sentiment. On the inside, I finished the message in bold black and stamped the lizard again in dark green ink.


I really like this inspirational message. For the moment, the card is going into my stash but I think I know where its eventual home will be. 

I've got a couple more cards in progress, so I'm going to make the most of a nice quiet Saturday afternoon and work on them. See you again soon.

signature photo Signature.png
Related Posts Plugin for WordPress, Blogger...